
This blog uses affiliate links. If you’d like to purchase a recommended product, please use the link to support this blog. It doesn’t cost you anything extra, it simply allows me to continue creating these posts. Thank you so much for your love and support!

6 Great Hiking Trails with Beautiful Views in Maui, Hawaii (Maps included)
Check out our 6 favorite hikes in Maui - Maps and directions included! There are various levels of hikes for families, from easy to experienced hiker status! Try a coastal walk, hike to a waterfall or walk along a volcanic crater! Most of these hikes are free unless you are in a national park.

Haleakala Crater - Halemau’u Trail views
Where to Hike and find Gorgeous Views in Maui, Hawaii
We’ve spent a lot of time on Maui at sea level, deep under the sea (see scuba), and at high elevations! Let’s be clear, I’m not the most outdoorsy experienced hiker, but I do love a nice hike and killer views! Try a coastal walk, hike to a waterfall or walk along a volcanic crater! Most of these hikes are free unless you are in a national park. Here are some hike suggestions for novice, intermediate, and experienced hikers!
See our shopping list (with some great budget-friendly dresses and tons of Hawaiian outfit ideas) straight from Amazon: Hawaii Packing Essentials
This guide is part of our Ultimate Maui Travel Guide, which covers everything from family travel to honeymoons and first-time visits.

Haleakala Crater - Halemau’u Trail
1. Haleakala Crater - Halemau’u Trail
Address: Halemau'u Trailhead, Halemauu Trail, Kula, HI 96790
Follow Haleakala Highway east for 7.8 miles and turn left on 377 to continue on Haleakala Highway, which will travel south another 6 miles to a junction with Crater Road (378). Turn right and follow Crater Road 20.7 miles to the Haleakala Visitor Center.
The Hike: Haleakala offers a few hikes at various elevations. We opted for the Halemau’u Trail.
Haleakala National Park charges a fee to enter. Fees are $30 per vehicle or $25 per motorcycle. If you are entering on foot or bike the fee is $15 per person. You can also purchase a park-specific annual pass for $55. You need a reservation if you want to start before 7am because of the sunrise crowd.
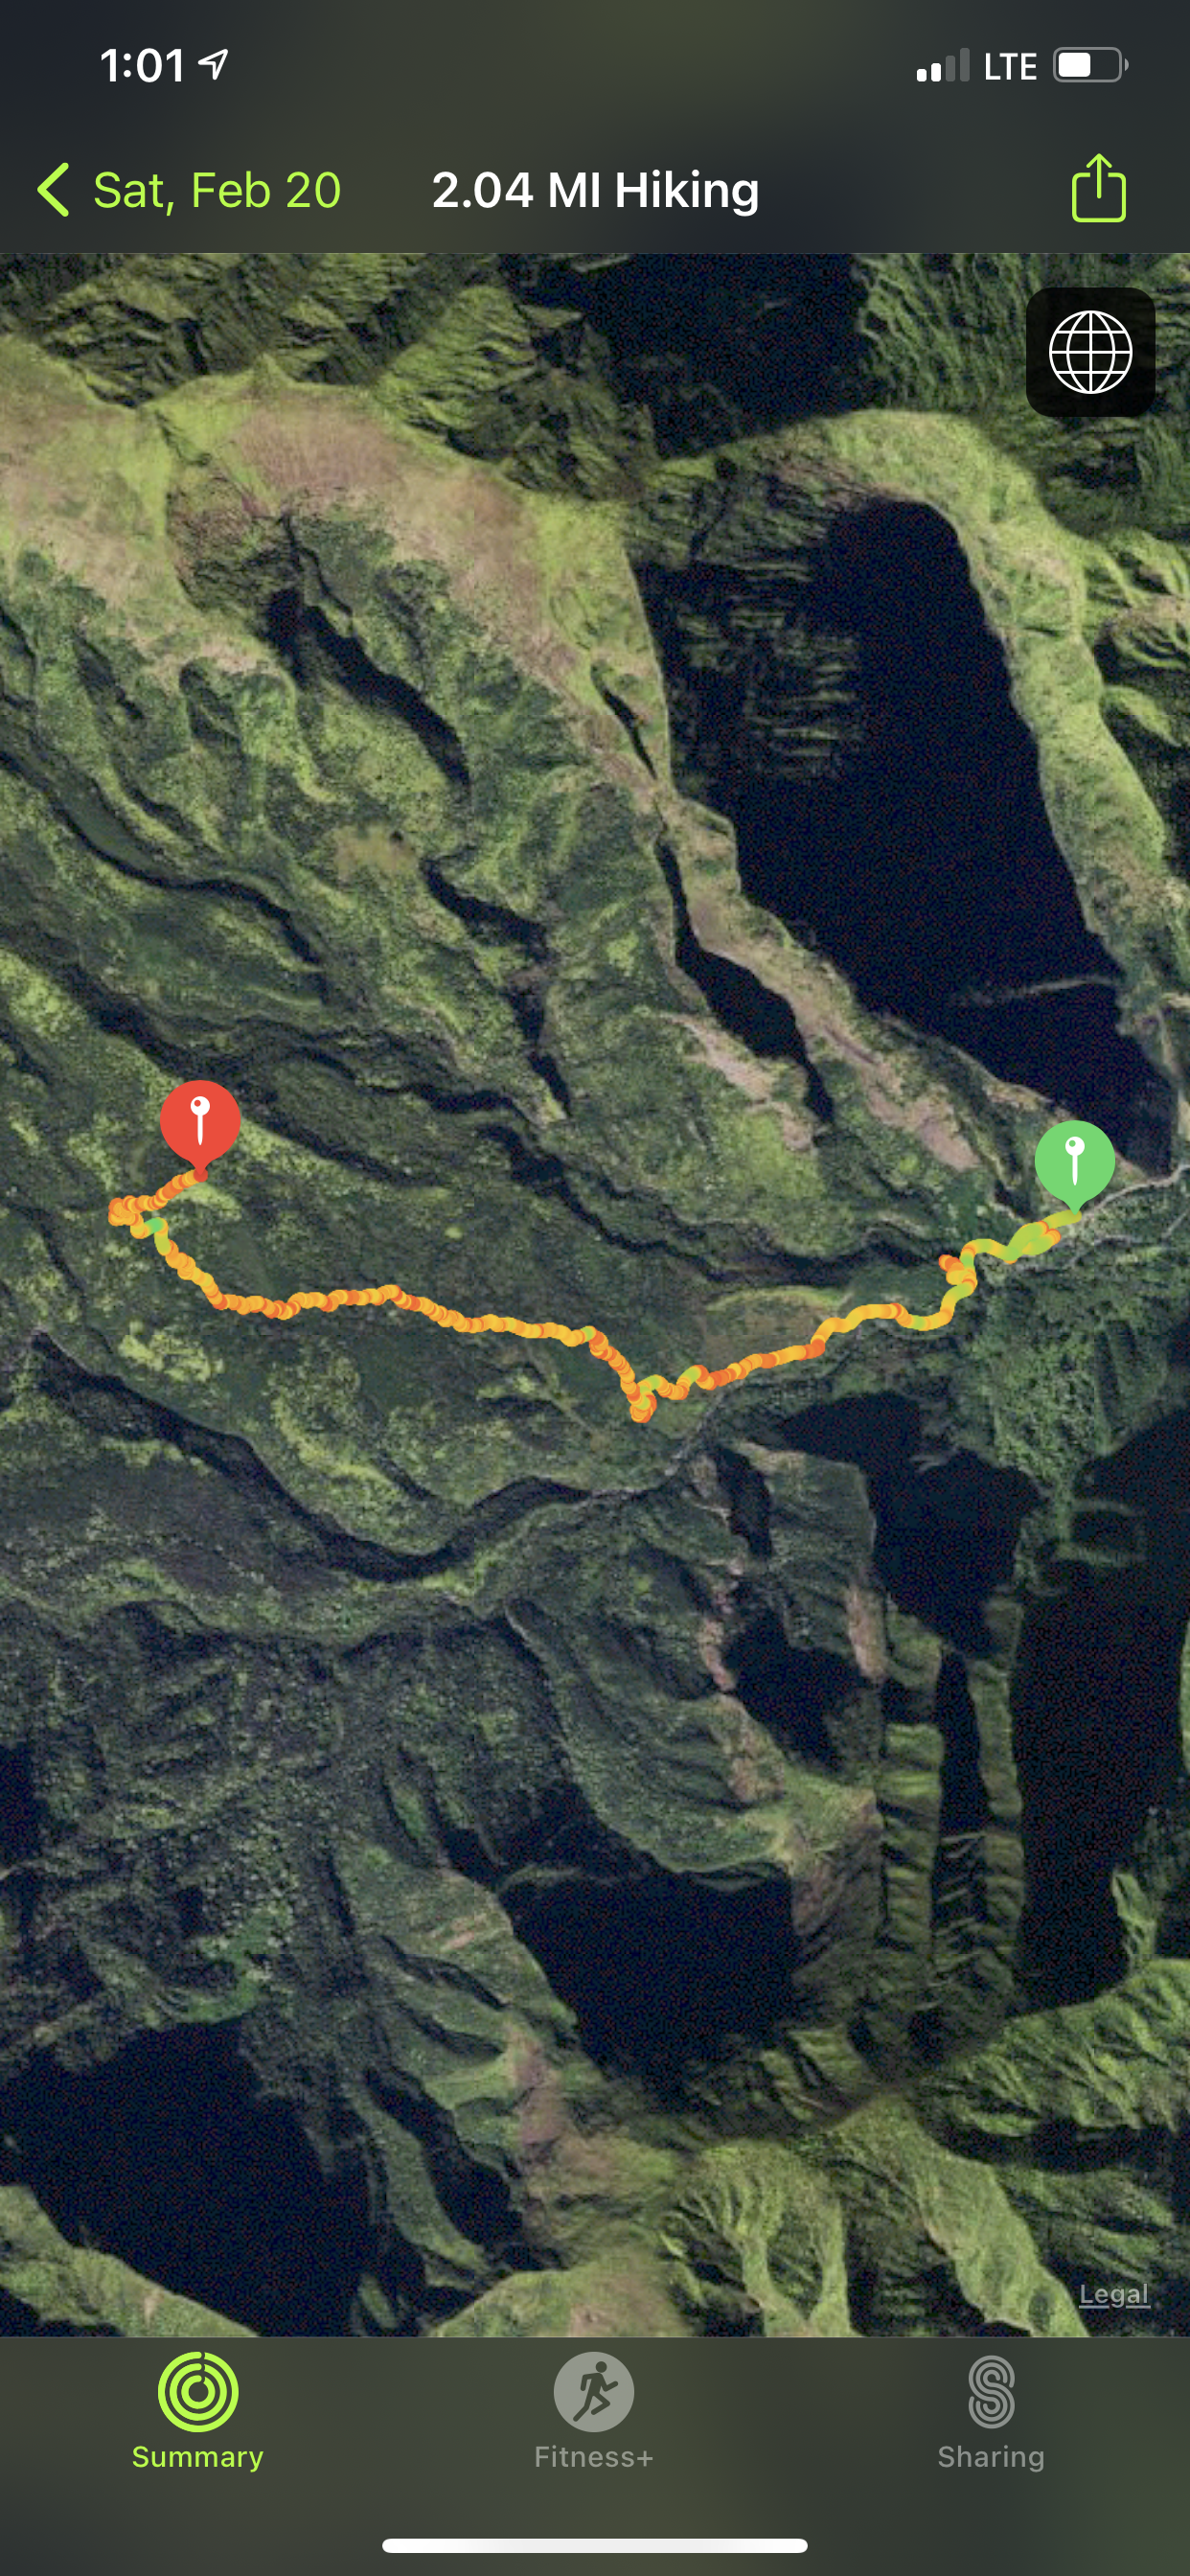
Duration: The Halemau’u Trail is a 7+ mile hike at 3000 ft along the rim overlooking the summit basin. From the rim you can extend your hike taking the trail switchbacks down a thousand feet to wilderness grassland, then crosses a volcanic landscape of cinder cones and lava fields. I was 6 weeks pregnant and we did a shorter 2 mile hike along the rim that took us almost 2 hours.
What to pack: water, sunscreen, hat, sunglasses, rain gear (the weather can change very fast)
Pro tip: Plan the hike about 2 hours before sunset, so you can hike and then head up to the top of the summit to watch the sunset. Pack some sandwiches for dinner and then stargaze! You can see the Milky Way most nights!

Haleakala Crater - Halemau’u Trail Hike map

Waimoku Falls at the end of Pipiwai Trail
2. Road to Hana - Pipiwai Trail (Bamboo Forest)
Address: Kīpahulu Visitor Center, Hana, HI 96713 (Parking lot)
Haleakala National Park charges a fee to enter. Fees are $30 per vehicle or $25 per motorcycle. If you are entering on foot or bike the fee is $15 per person. You can also purchase a park-specific annual pass for $55.
The Hike: We’ve done this hike quite a few times and it never disappoints! You’ll find this near the end of the Road to Hana in Haleakala park. First you’ll hike on a trail through the trees (around the big banyan tree), then through a bamboo forest, and you’ll end up at Waimouku Falls!
Difficulty: Fairly easy - Pipiwai Trail is great for families and kids. It can get muddy in spots so wear proper shoes and watch where you step!
Duration: It’s about 4 miles round trip and takes at least 2 hours. The elevation is about 650 ft and the trail is moderately easy.
What to pack: water, sunscreen, hat, sunglasses, snacks, towel and swimsuit if you want to dip in the waterfall or ‘Ohe’o Gulch
Check out what else you can do on the Road to Hana

Pipiwai Trail - Bamboo Forest - Road to Hana - Maui
3. Wailea Trail - Hoapili Trail
Address: 8650 Must Hold Block Boundary, Kihei, HI 96753
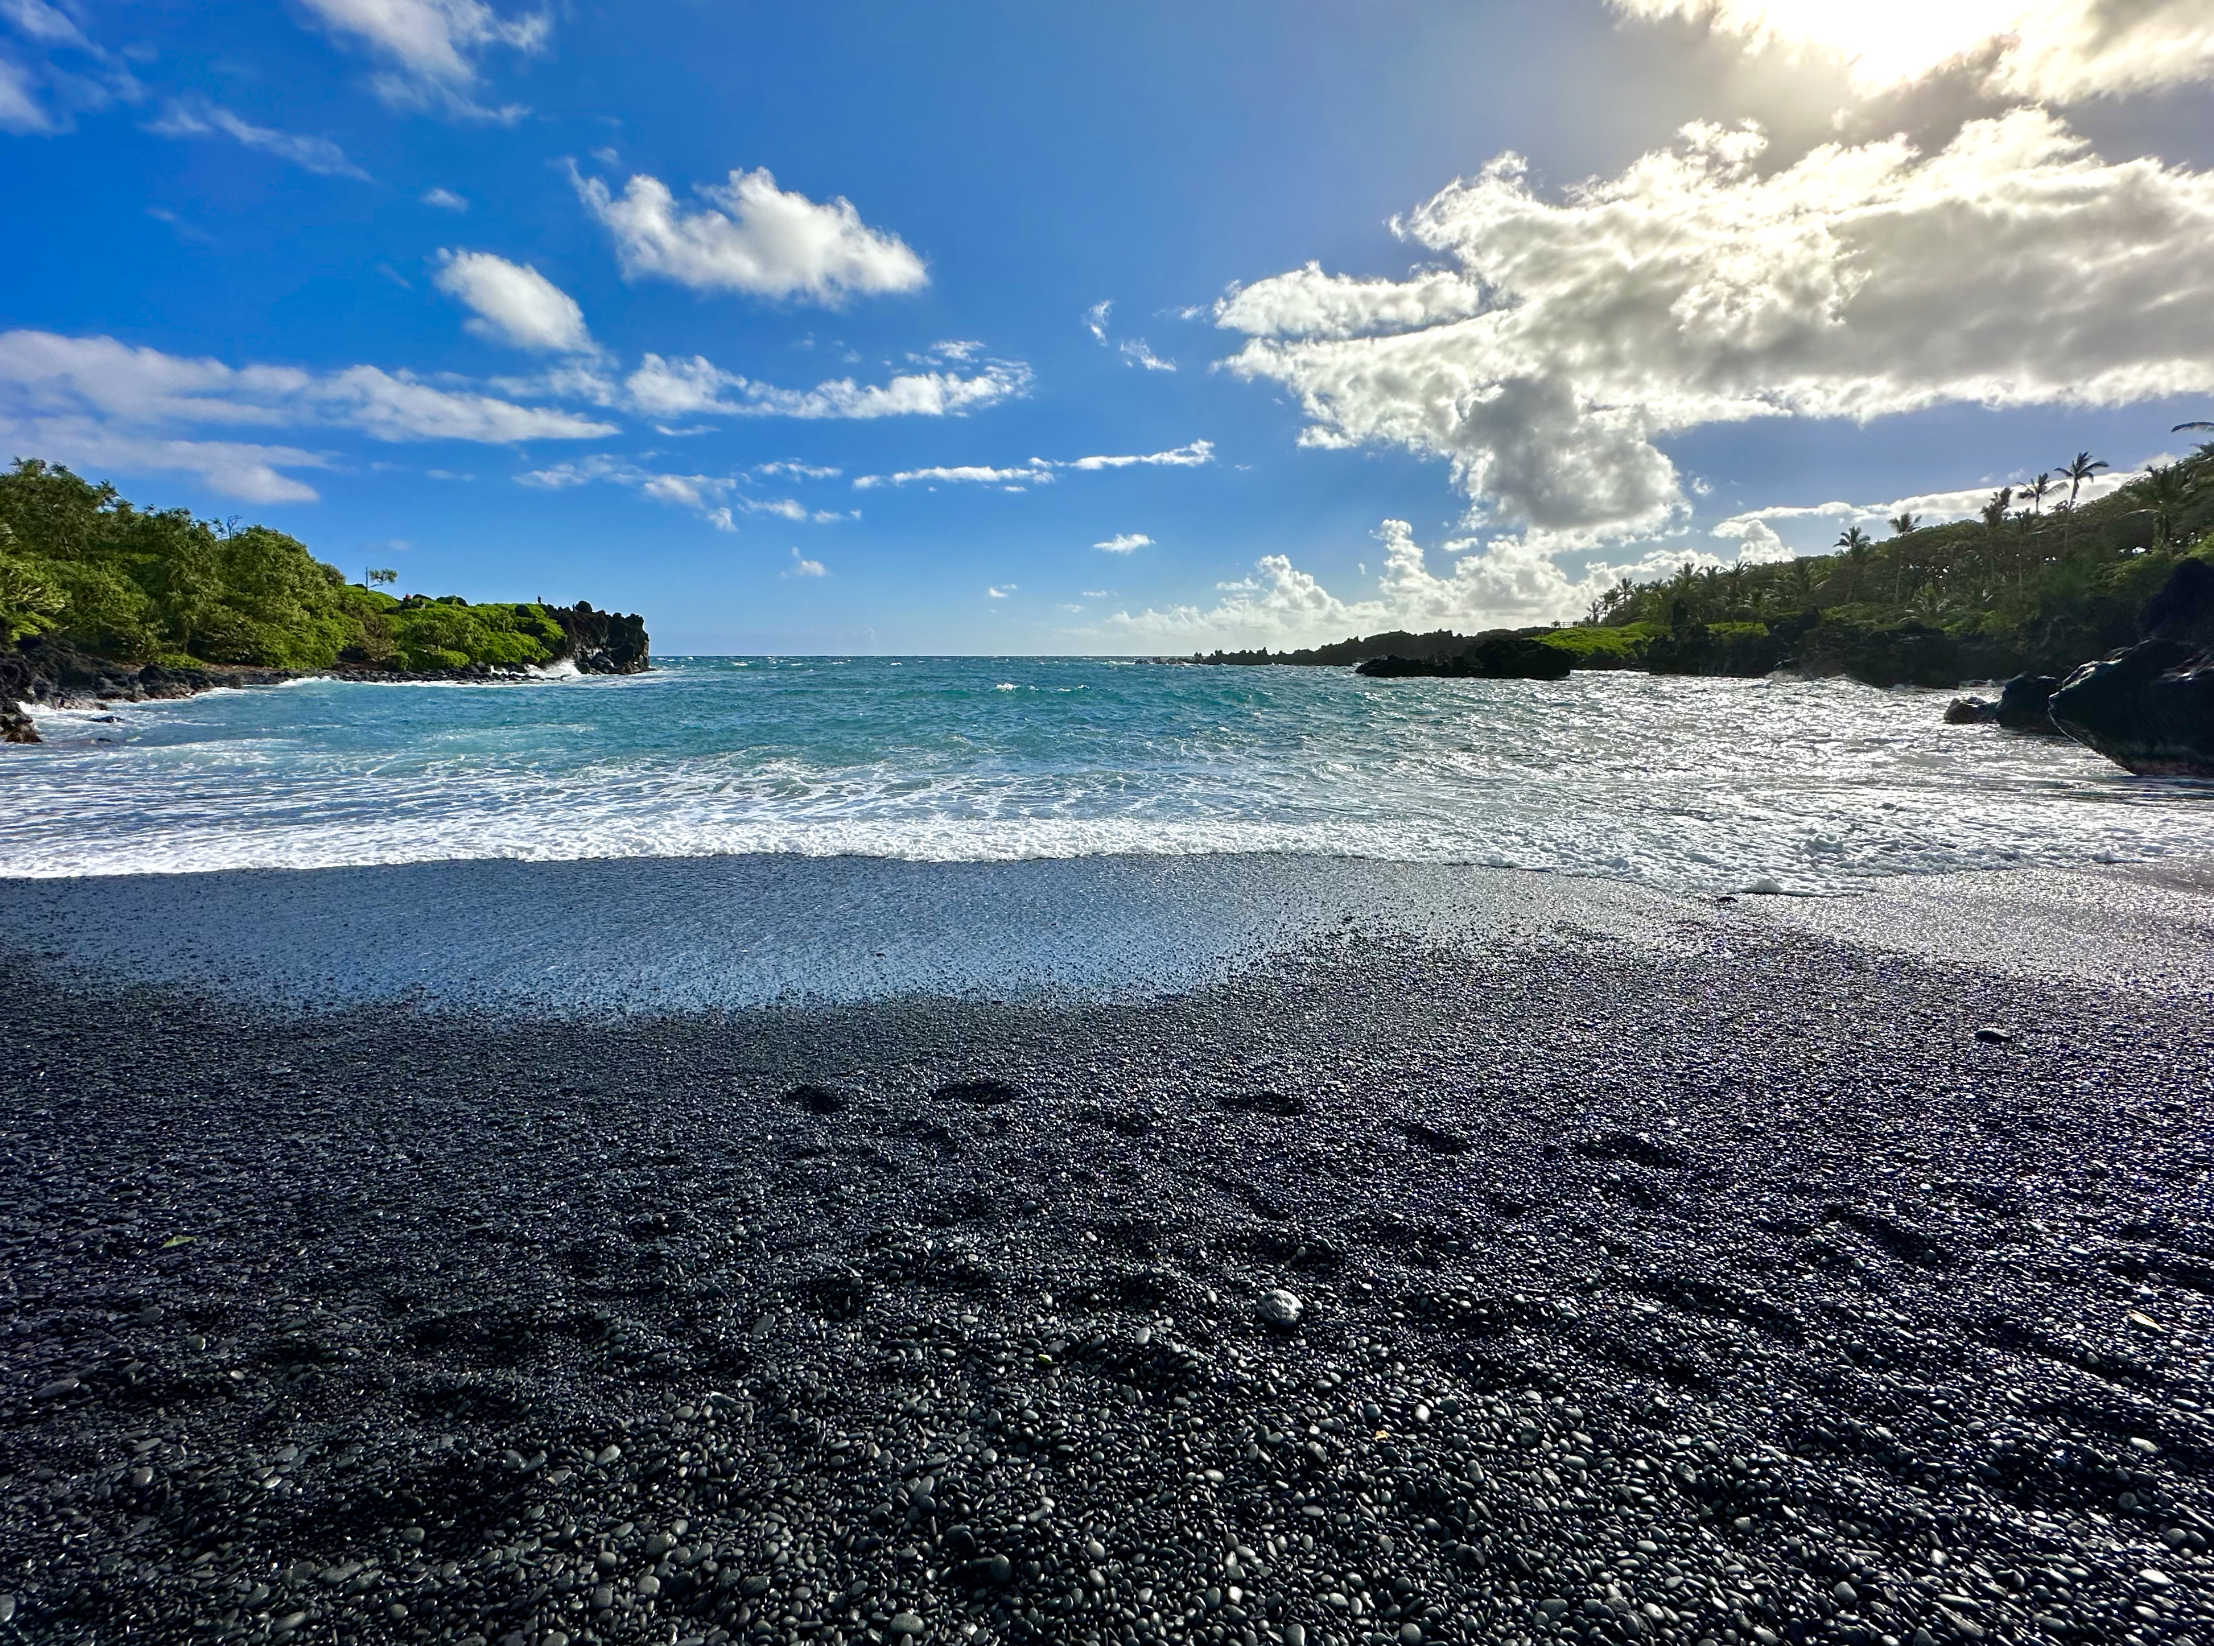
The Hike: After you pass the fancy resorts in Wailea, if you continue down Makena road, it dead ends with a nice hiking trail along the water. Sometimes you can see dolphins early in the morning - look at the wakes of the boats! We were lucky enough to find a Hawaiian Monk Seal that had just given birth days prior and was on the shore with her pup. This hike begins at La Pérouse Bay. We took the Hoapili Trail to the Hanomanioa Light House where at the end of the trail is one of those natural pools that you often see influencers float in on Instagram. If you’re lucky, you’ll come across some black mountain goats along the way! There are also great little spots along the beach to stop and have a small private beach area all to yourself!
Difficulty: Moderate - the first mile is easy and shaded along the beach. The lava field can be a little slippery with loose lava gravel and is in full sun. Hoapili Trail is good for families, I wouldn’t take toddlers on the lava field unless you are carrying them in a carrier. It gets hot - bring WATER!
Duration: To get to the lighthouse and natural pool it’s about 3 miles.
What to Pack: water, sunscreen, hat, sunglasses (the trail is shaded at first, but the lava fields are in full sun), towel and swimsuit
See our shopping list (with some great budget-friendly dresses and tons of Hawaiian outfit ideas) straight from Amazon: Hawaii Packing Essentials

Wailea Natural Pool - Hoapili Trail

Kapalua Coastal Trail
4. Kapalua Coastal Walking Trail
Address: 99 Coconut Grove Ln, Lahaina, HI 96761
The Hike: Looking for an easy stroll along the beach with fantastic views? This is your trail! This path is pretty much paved the entire way and a great coastal walk if you’re not in the mood to walk in the sand. We parked near Merriman’s in the public parking lot. Get there early for a spot or park along the street.
Difficulty: Easy! Great for families, a lot of it is paved. Kids and toddlers can walk themselves!
Duration: Per my Apple Watch, we walked 37 mins for 1.57 miles from the parking lot to Oneloa Bay and back.
What to Pack: Flips flops or tennis shoes (shoes are better for your feet), water, sunscreen, hat, sunglasses
See our shopping list (with some great budget-friendly dresses and tons of Hawaiian outfit ideas) straight from Amazon: Hawaii Packing Essentials

Kapalua Coastal Trail Map

Iao Needle in Iao Valley
5. Iao Valley Hidden Trail
Address: 54 S High St, Wailuku, HI 96793
Hours: Daily, 7:00 AM - 6:00 PM
Parking Prices: Non-Commercial Vehicles
Residents = No Charge w/ID or DL
Non-Residents = $10
Entrance fee - $5 for non-residents
The Hike: This hike is fun through the jungle and shaded almost the entire way.
If you’re looking for a very short hike, there is a paved trail to the Iao Needle viewpoint. There is a lookout with a gazebo to hike to that has some benches with views of the needle. It was an easy hike, only .6 miles, 200 ft in elevation, and a quick 10-minute walk from the parking lot.
There is a trail behind the gazebo, but there are signs to not pass the barriers. This trail is dangerous and should be avoided. However, if you head down to the stream and hike up the mountains you’ll end up on the same trail just past the steep dangerous part. See the screenshot map below.
Difficulty: Fairly easy - it was nice and cool under the trees! There is a steep incline the last quarter mile but otherwise it was pretty smooth. There was some mud because there is often rain on this part of the island.
Duration: I did this hike at 6 weeks pregnant! We took it a little slower so it took us an hour and 45 mins to get to the top of the lookout which was about 2 miles and an elevation gain of 1061 feet. It was a little muddy at times so be careful! The trail doesn’t have any markers, but the path is pretty well-traveled so just stay on that which will take you to the top.
What to pack: Water, snacks, and a towel/swimsuit if you want to jump in the stream
See more in our post: Exploring Iao Valley
Iao Valley Secret Trail Map

Views from Waihee Ridge Hiking Trail
6. Waihee Ridge Hiking Trail
Address: Kahekili Hwy, Wailuku, HI 96793
Directions: Drive along the north shore to the trailhead. Parking is free but get there early for a good spot. There are Porta potties in the parking lot.
The Hike: The hike is in mainly in the sun along a mountain ridge. The view stays pretty much the same as you hike up, you are just higher in elevation.
Difficulty: Moderate - there is a pretty steep incline in some spots. We took a few breaks on our way up.
Duration: It was a nice sunny hike that took us about 2 hours round trip, over 2 miles, and almost 1500 ft in elevation per my Apple Watch.
What to pack: water, sunscreen, hat, sunglasses, snacks, towel
If you liked this post please share it on your favorite social media site using the Share button below because we’d love to get the word out! Feel free to pin this to your favorite Pinterest board:

Check out more Maui posts:


How to Spend 5 AMAZING Days in Sydney, Australia
How to spend 5 days in Sydney - Australia - Full itinerary! See all the things to do and where to stay in Sydney! See our tips in this great Travel Guide! This was our honeymoon and it was perfect!

Sydney Opera House
What to do for 5 Days in Sydney, Australia
While we were on our 3-week honeymoon, we spent a large chunk of it in Sydney! We had spent New Years in Sydney but left to let the crowds die down a bit and came back on the 3rd of January. Overall, we enjoyed our visit and would definitely go back. Making the long trek from California, we wanted to see all Sydney had to offer and spent about 5 days there.
Where to Stay in Sydney
We used our Hyatt reward nights, a perk from our Hyatt Credit Card, along with some points, and stayed at the beautiful 5-star Park Hyatt Sydney. It was the perfect location - across from the Opera House, near Circular Quay (where you can jump on a train or ferry and get anywhere in a matter of minutes), and under the Harbor Bridge.

Park Hyatt Sydney
Here was our 5-day itinerary for Sydney:
Day 1

Pancakes on the Rocks
MORNING
We started with breakfast at Pancakes on the Rocks. We love pancakes, figured it couldn't be bad with so many great Yelp reviews. The service was a little slow but the food made up for it. I had chocolate chips pancakes, of course, because everything is better with chocolate!
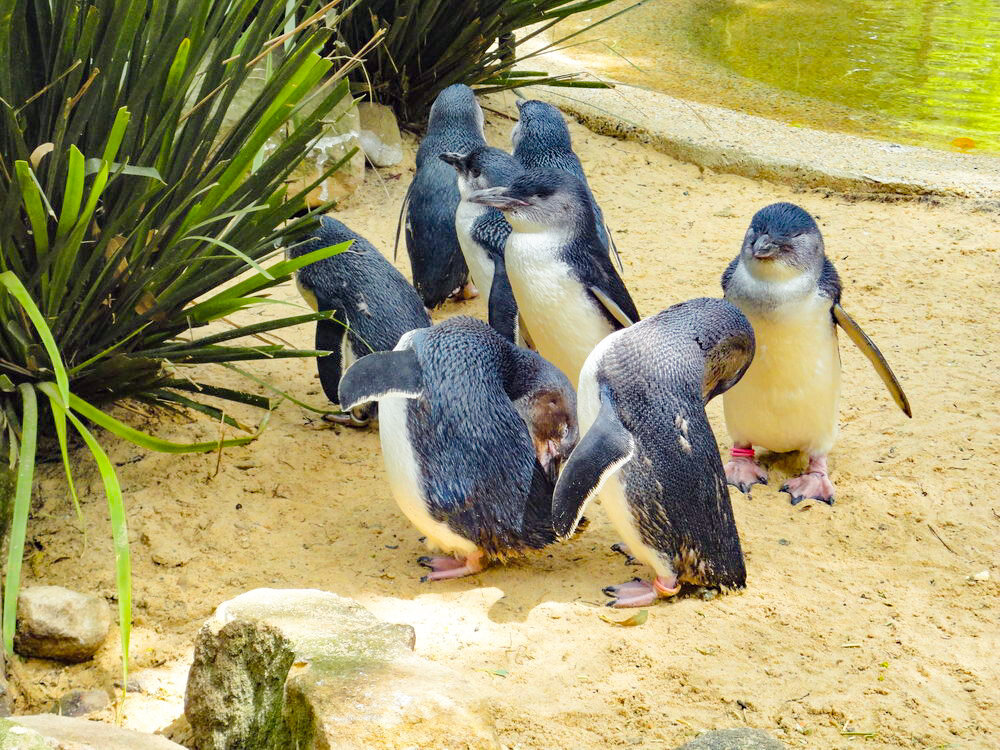
We went down to Circular Quay (pronounced "key") and took the ferry across the harbor to the Taronga Zoo.
There were Koalas, giraffes, kangaroos, everything that can kill you, and my favorite, the penguin exhibit that had Fairy Penguins!

Top of Taronga Zoo
The zoo is located on a hill with spectacular views of Sydney from all over, so we recommend you start at the top and work your way down.

Penguins in the Taronga Zoo
We took a few animal selfies too! We liked the zoo, but the Featherdale Wild Park was even better (see day 2 below).


AFTERNOON - Olympic Park
In the afternoon we took the ferry back to Circular Quay and boarded a train taking us out to the Sydney Olympic Park. Josh loves to visit Olympic Parks and this one had a lot to see and it was all outdoors!
The park was built to host the Summer Olympics in 2000. They had the torch, the Olympic Cauldron that looks like a spaceship which was where the flame was lit the duration of the games, markers that noted how high someone jumped, who won each sport, and name of everyone who participated.


Day 2
Morning - Blue Mountains
We booked a tour with Blue Diamond Tours, which conveniently picked us up from the hotel, and took us to the Blue Mountains National Park. The mountains look blue because the eucalyptus forest disperses droplets of Eucalypt oil into the atmosphere which combines with dust particles and water vapor, scattering refracted rays of light which are largely blue in color. #funfacts

The rock formation located in the Blue Mountains is known as the 3 Sisters, which aboriginals legend told, the 3 daughters from the Katoomba tribe fell in love with 3 brothers from a neighboring tribe, but they were forbidden to get married by tribal laws. The brothers didn't agree with this law and captured the 3 sisters, causing a war outbreak between the tribes and the sisters were turned into stone by a witch doctor to protect them. Unfortunately, the witch doctor died in the war and no one was able to turn them back.

From Scenic World’s Website
We took the Scenic World Skyway cable car suspended across the Jamison Valley to a park called Scenic World where they had attractions and the best views. You could look through the floor of the car and see the rain forest below.

looking through the floor of the skyway cable car
We also road the Scenic Railway, the world's steepest incline railway, which travels down a cliffside through tunnel and ancient rain forest at a gradient of 62 degrees. At the bottom, you can walk around the rainforest and check out the site of the old coal mine.


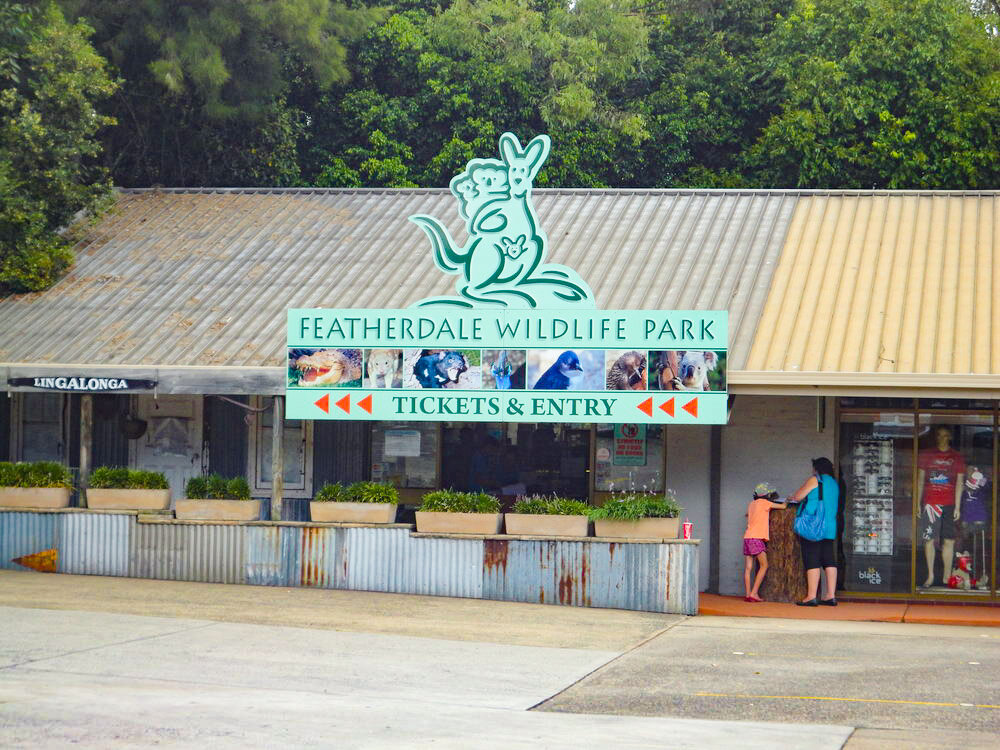
Afternoon - Featherdale Wildlife Park

ARCHER, THE KOALA, at Featherdale Wildlife Park
My favorite part of the day was when we went to see Australia's native animals at Featherdale Wildlife Park. I love animals and this was probably my favorite thing to do in Sydney.
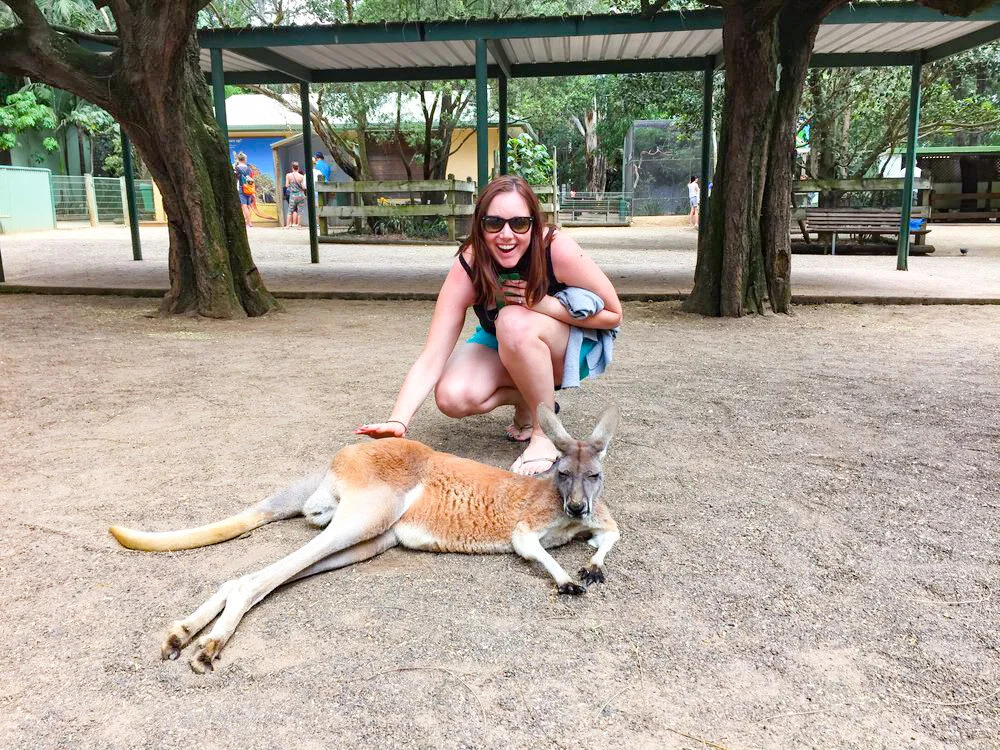
You can get up close and personal with the animals - touch them, hold them, feed them. The ever so adorable Archer, the koala, is best-loved as he is the popular koala. I even had my Mom paint him from a picture I took because I needed to see him every day.
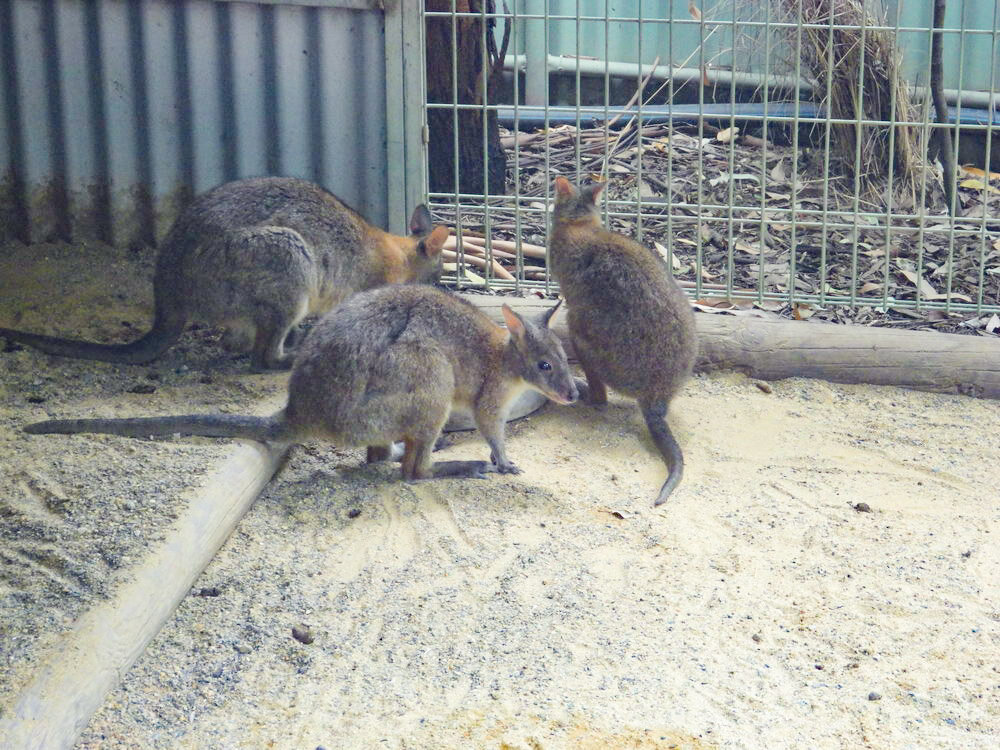
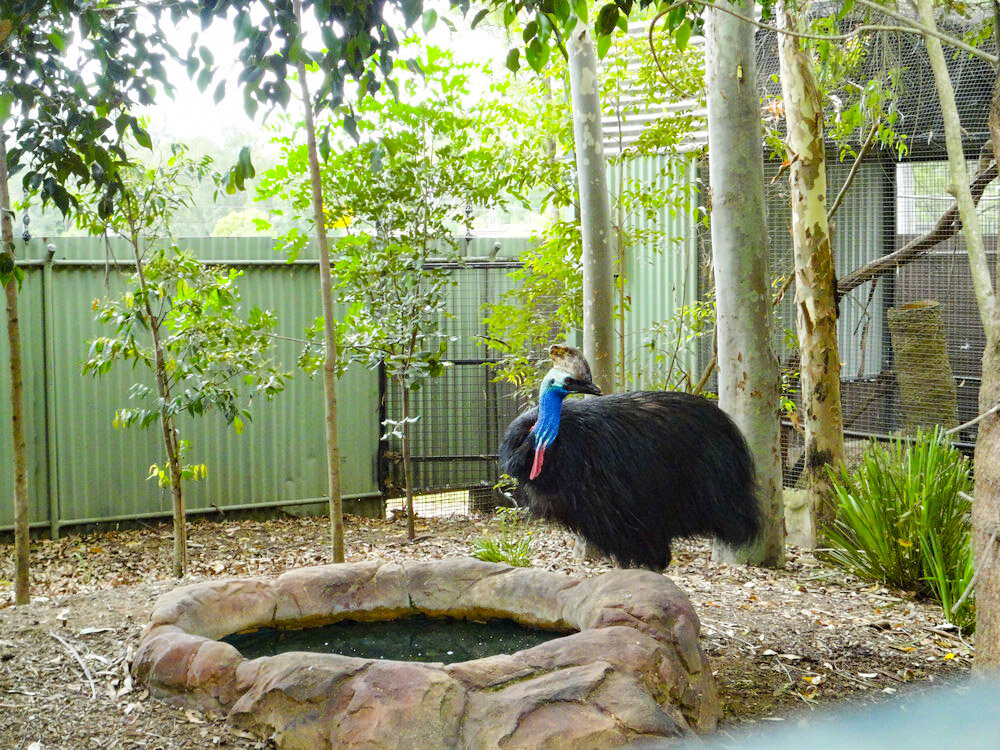
There are many other animals throughout the park such as kangaroos that are literally hanging out and let you pet them! We also saw more fairy penguins, wombats, wallabies, a Cassowary, and a Tasmanian Devil, OH MY!
Evening in Sydney
We came back to the hotel, freshened up and walked around the harbor over to the Opera Bar for dinner. The Opera Bar is located directly under the Opera House. They had a great food selection, we loved their burgers. The restaurant is set up with open seating and you order by the kitchen, get a number and they deliver to your table.

We also enjoyed their dessert (of course) having a crepe with chocolate sauce and vanilla ice cream. I was a perfect ending to our perfect day with a gorgeous pink sunset.
Day 3
Morning in Manly Beach
We started our day going to Manly Beach! For food, we found this spot called Hemingway's which looked like a library but served food and alcohol. It was early, so we had coffee and breakfast with a slight breeze and gorgeous view of the crystal blue ocean.
We walked around and did a little shopping, buying souvenirs and gifts for friends and family.

Afternoon - Sea life Sydney Aquarium

PLATYPUS at the Sea Life Sydney Aquarium
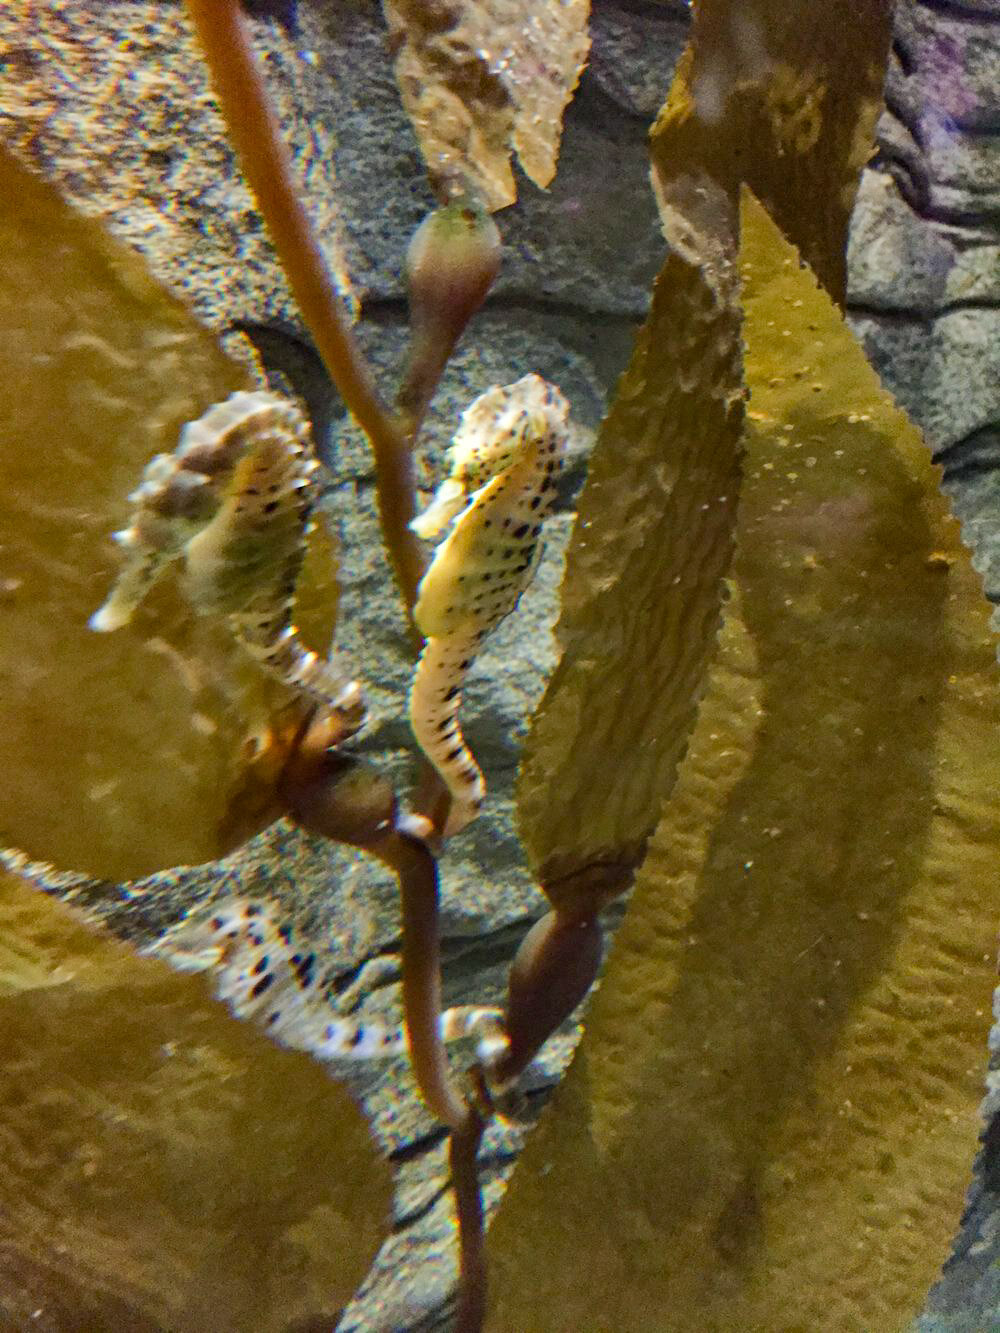
We took the bus back and decided it was time for more animals so we paid a visit to the Sea Life Sydney Aquarium and found Nemo, Dory, and lots of sharks.
We walked through the aquarium and after scuba diving the Great Barrier Reef, it felt like we had seen a lot of these fish before. However, they do have unique creatures that are hard to find in the deep blue and were glad to see them here (love the platypus). If you have kids (or act like a big kid like me) there are interactive pools where you can touch sea cucumbers and starfish.

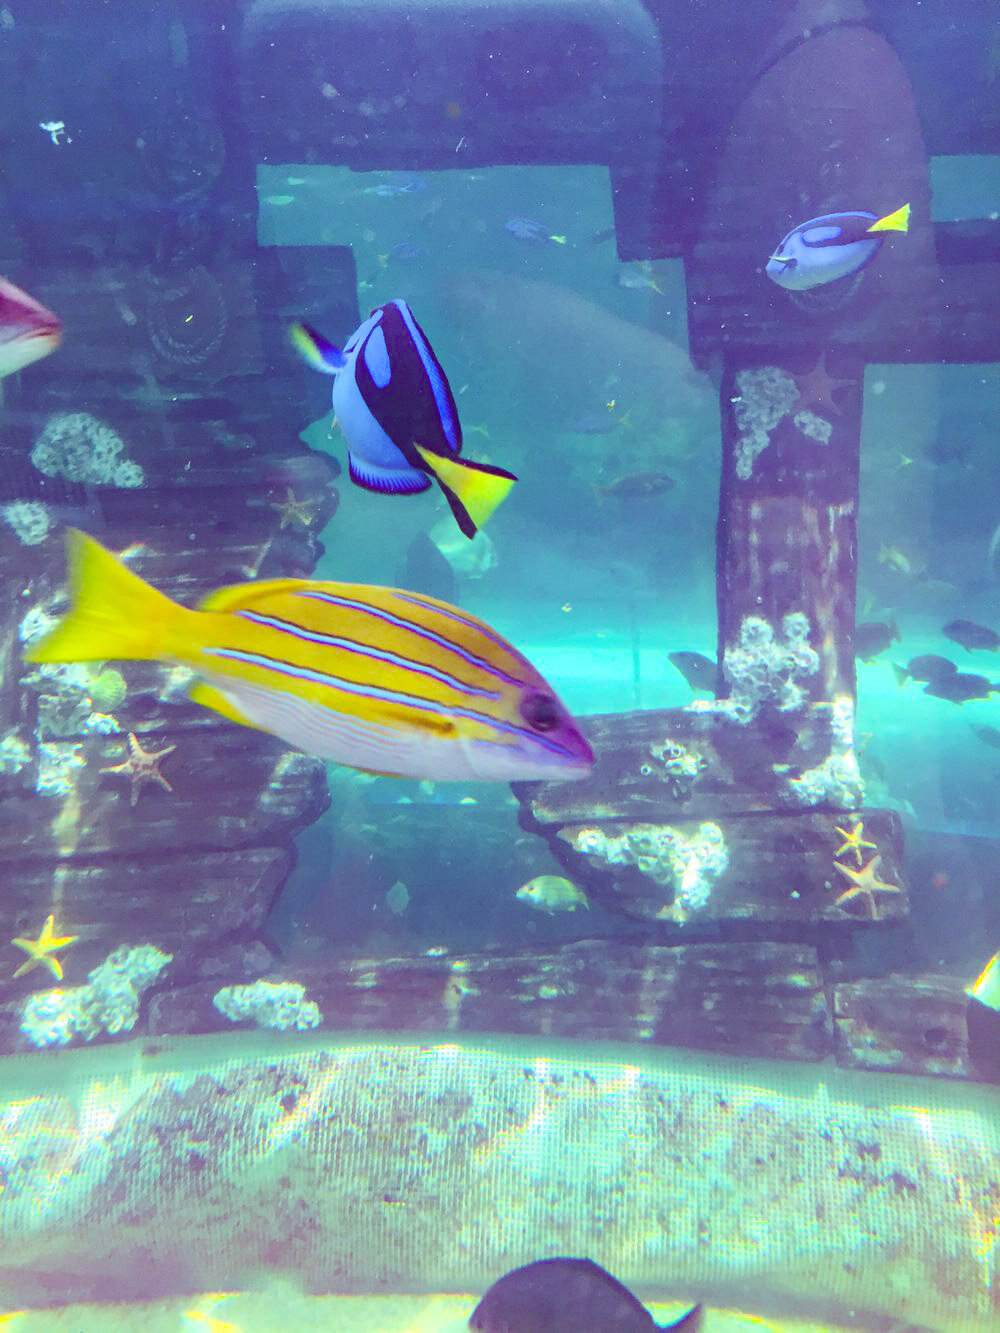
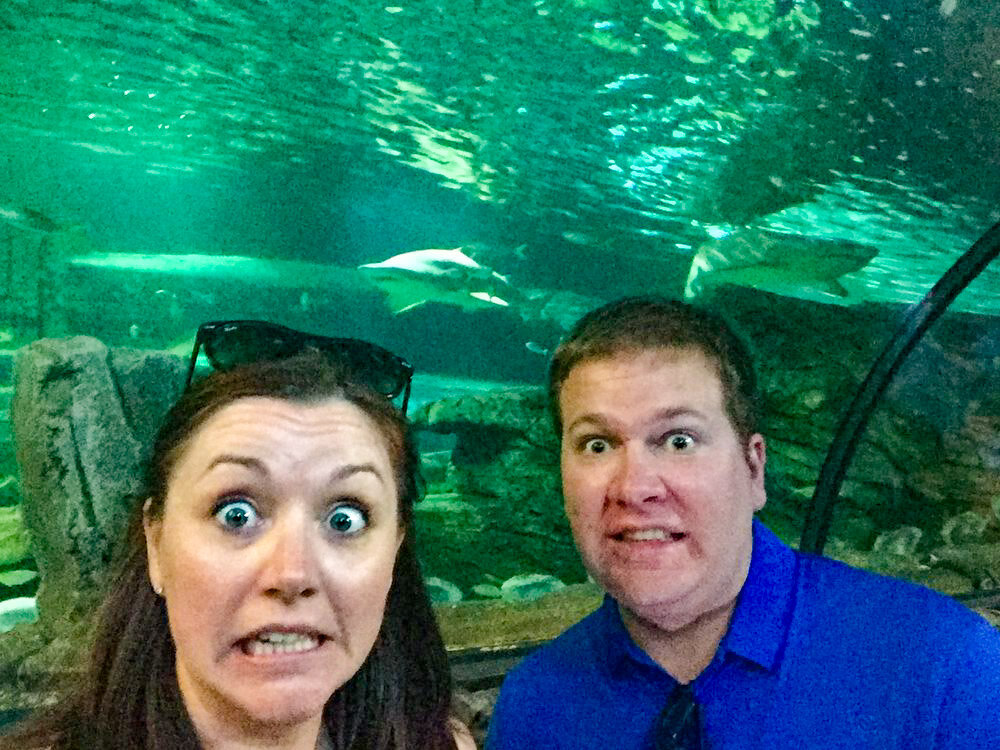
Also, the high point was the underground glass tunnels where fish and sharks swim around you on all sides and it feels like you're underwater with them.

Happy Hour in Sydney at a Secret Whiskey bar!
BAXTER INN - WHISKEY BAR
It was happy hour and we found a hidden gem! We went to a whiskey speak-easy called the Baxter Inn. It was a little challenging to find but worth it when we got there. You have to head down a nondescript alley on Clarence Street and walk through an unmarked door on your right, down a dark staircase to the basement level. The dim lighting and waiters outfits felt like we had walked into another dimension. They had 360 different whiskeys from around the globe and make their own apple juice for their fine crafted cocktail!

Baxter Inn Speakeasy Bar - Sydney
Afterward, we went to a casino in The Star hotel. Walking in, there was signage in front explaining the signs which show you might have a gambling problem because of Australia's gambling issue. It was kind of sad, but kind of funny. We played roulette and won! No gambling problem here.
Day 4
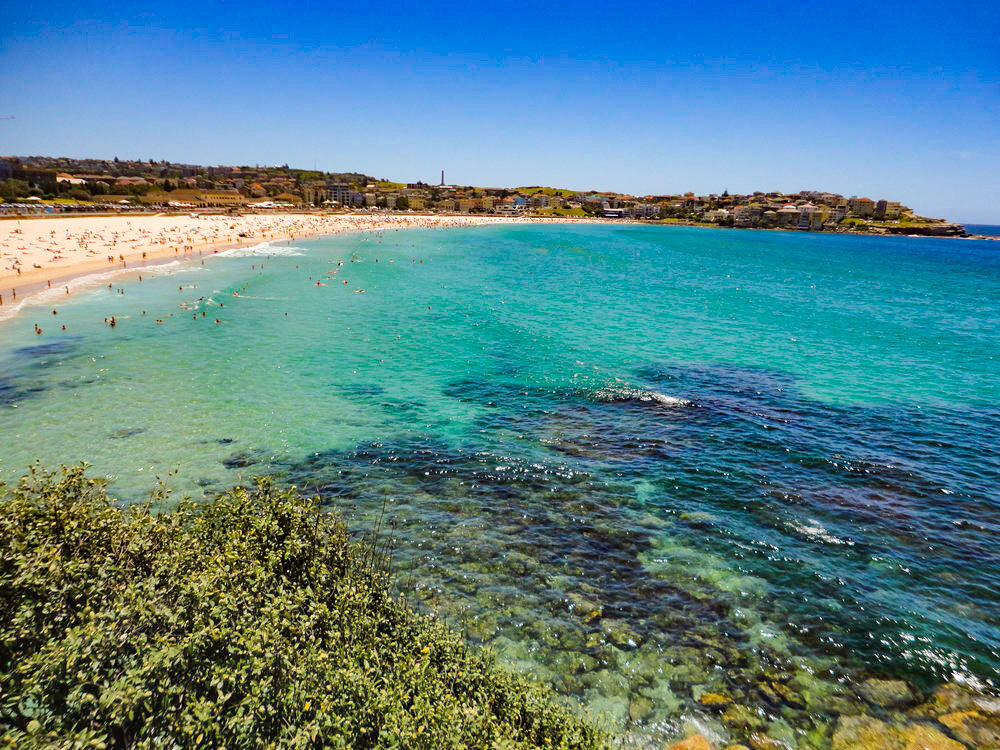
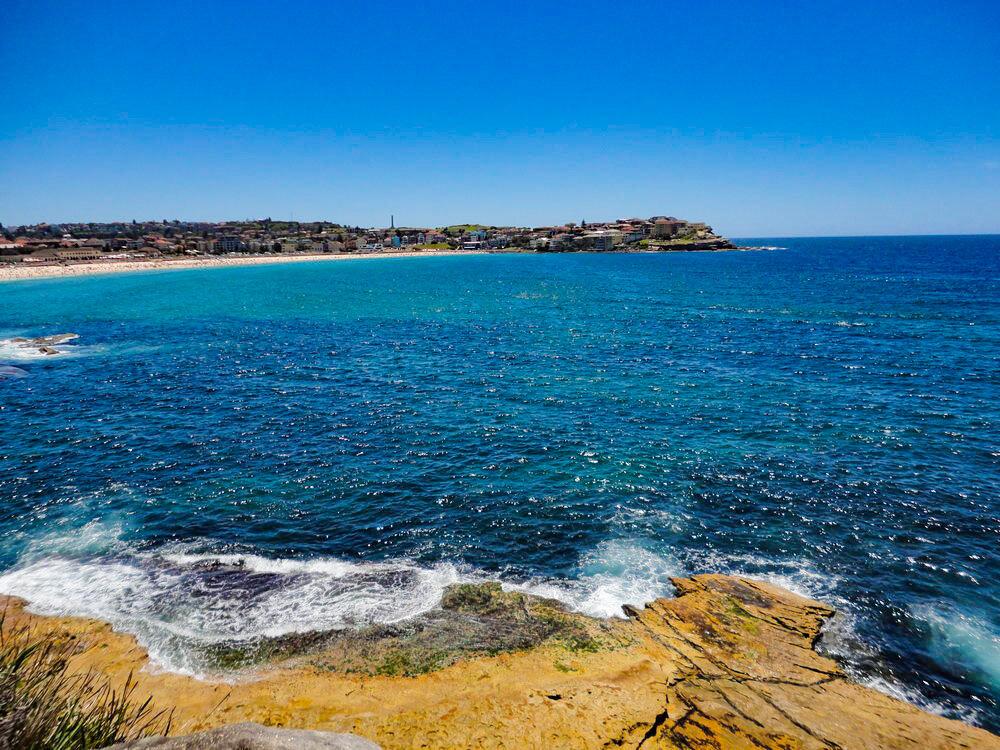
MORNING - Beach Walk

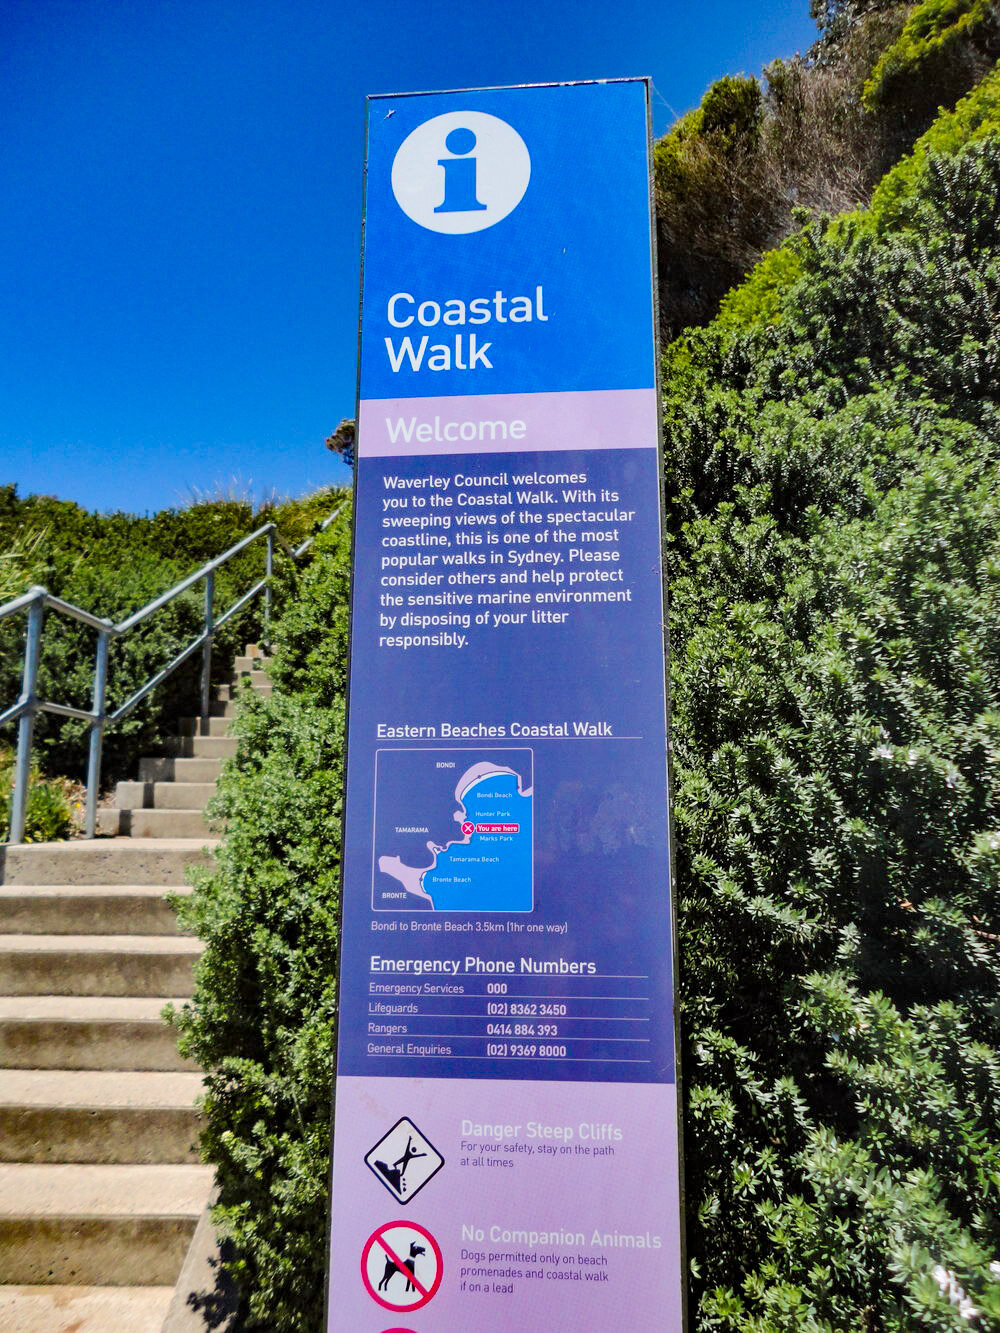
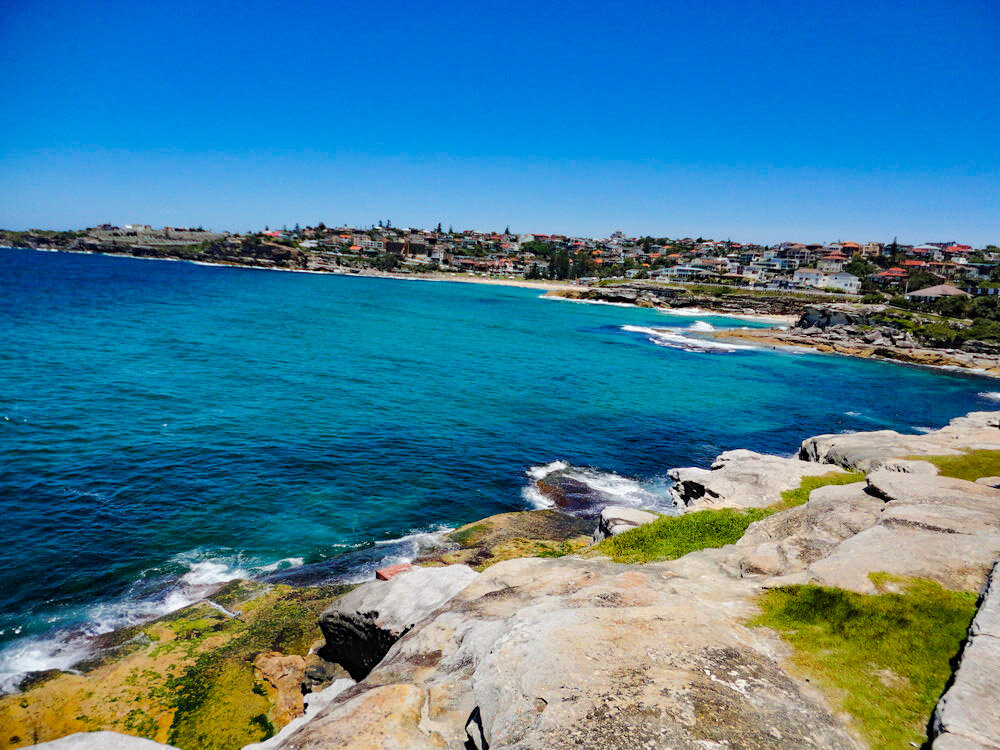
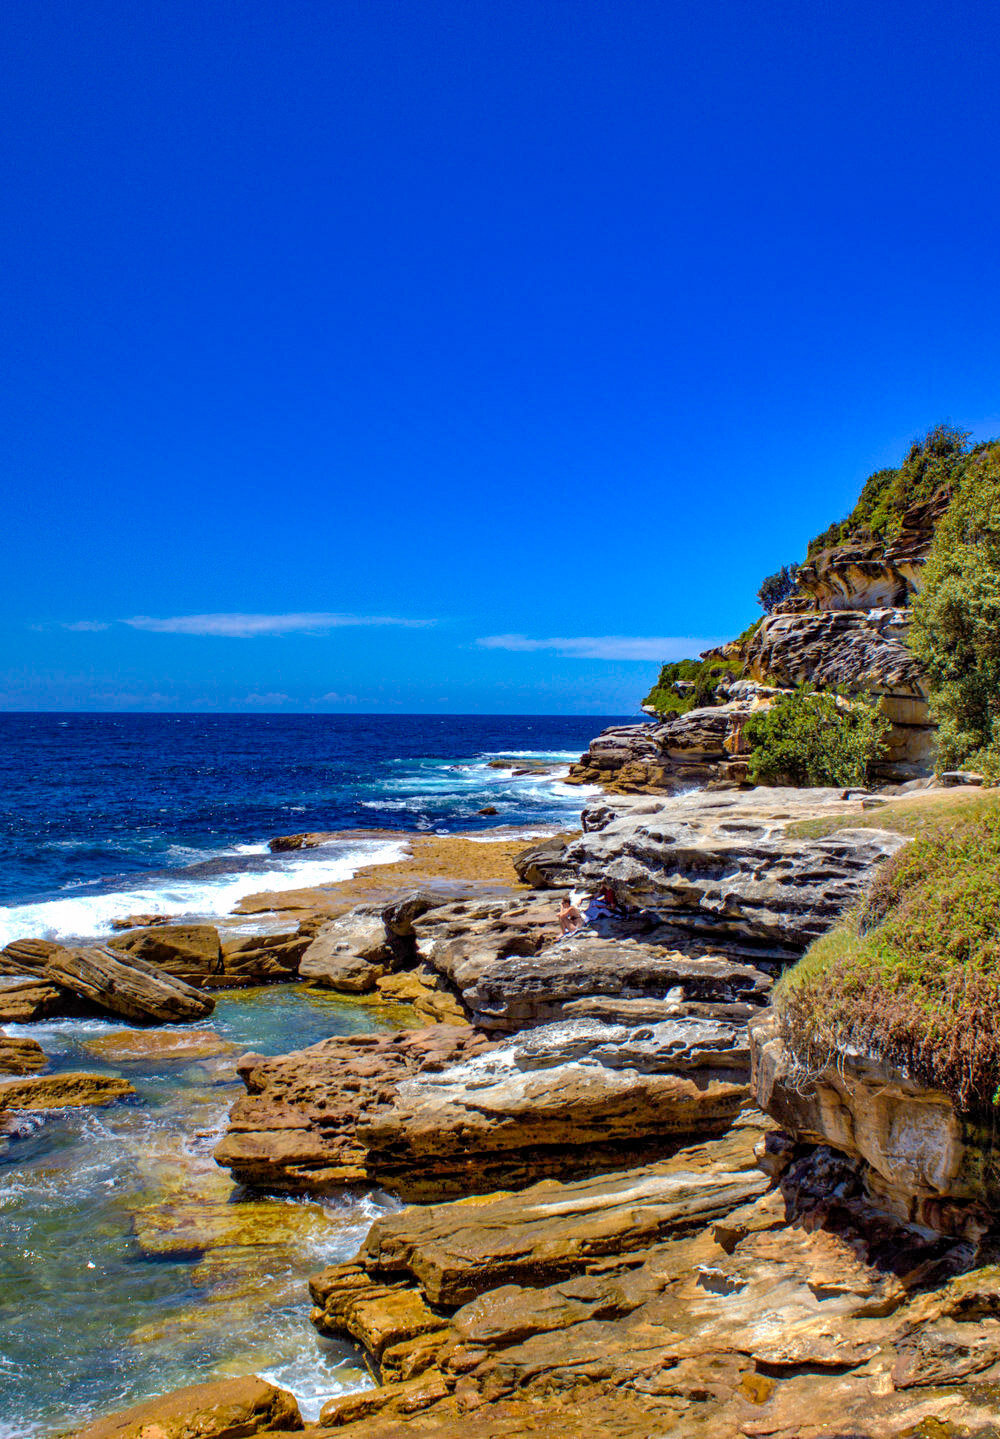
We took the bus over to Bondi Beach. We then did a 5 mile hike along the coast from Bondi Beach to Coogee Beach. Along the way, we walked through the Tamarama and Bronte beaches. This wasn't an easy hike, there were steep inclines, stairs and sun. Lots of sun. The sun was intense and even after re-applying sunscreen a few times, we burned. It hurt.
AFTERNOON - Luna Park

Luna Park Entrance
We came back cleaned up and took the ferry over to Luna Park, a carnival-like amusement park with a scary entrance. and did a couple of rides, but the highlight was playing on the slides in the funhouse. Josh and I raced for at least 30 minutes. This was definitely made for kids.

Luna Park Slides
EVENING
Afterward, we had dinner at an Italian restaurant right next to Luna Park, called Ripples Milsons Point. It was right on the water overlooking the harbor and I had the most amazing pumpkin ravioli.
We came back to the hotel and wanted to grab a few pictures on our last night:

Harbor Bridge at Night
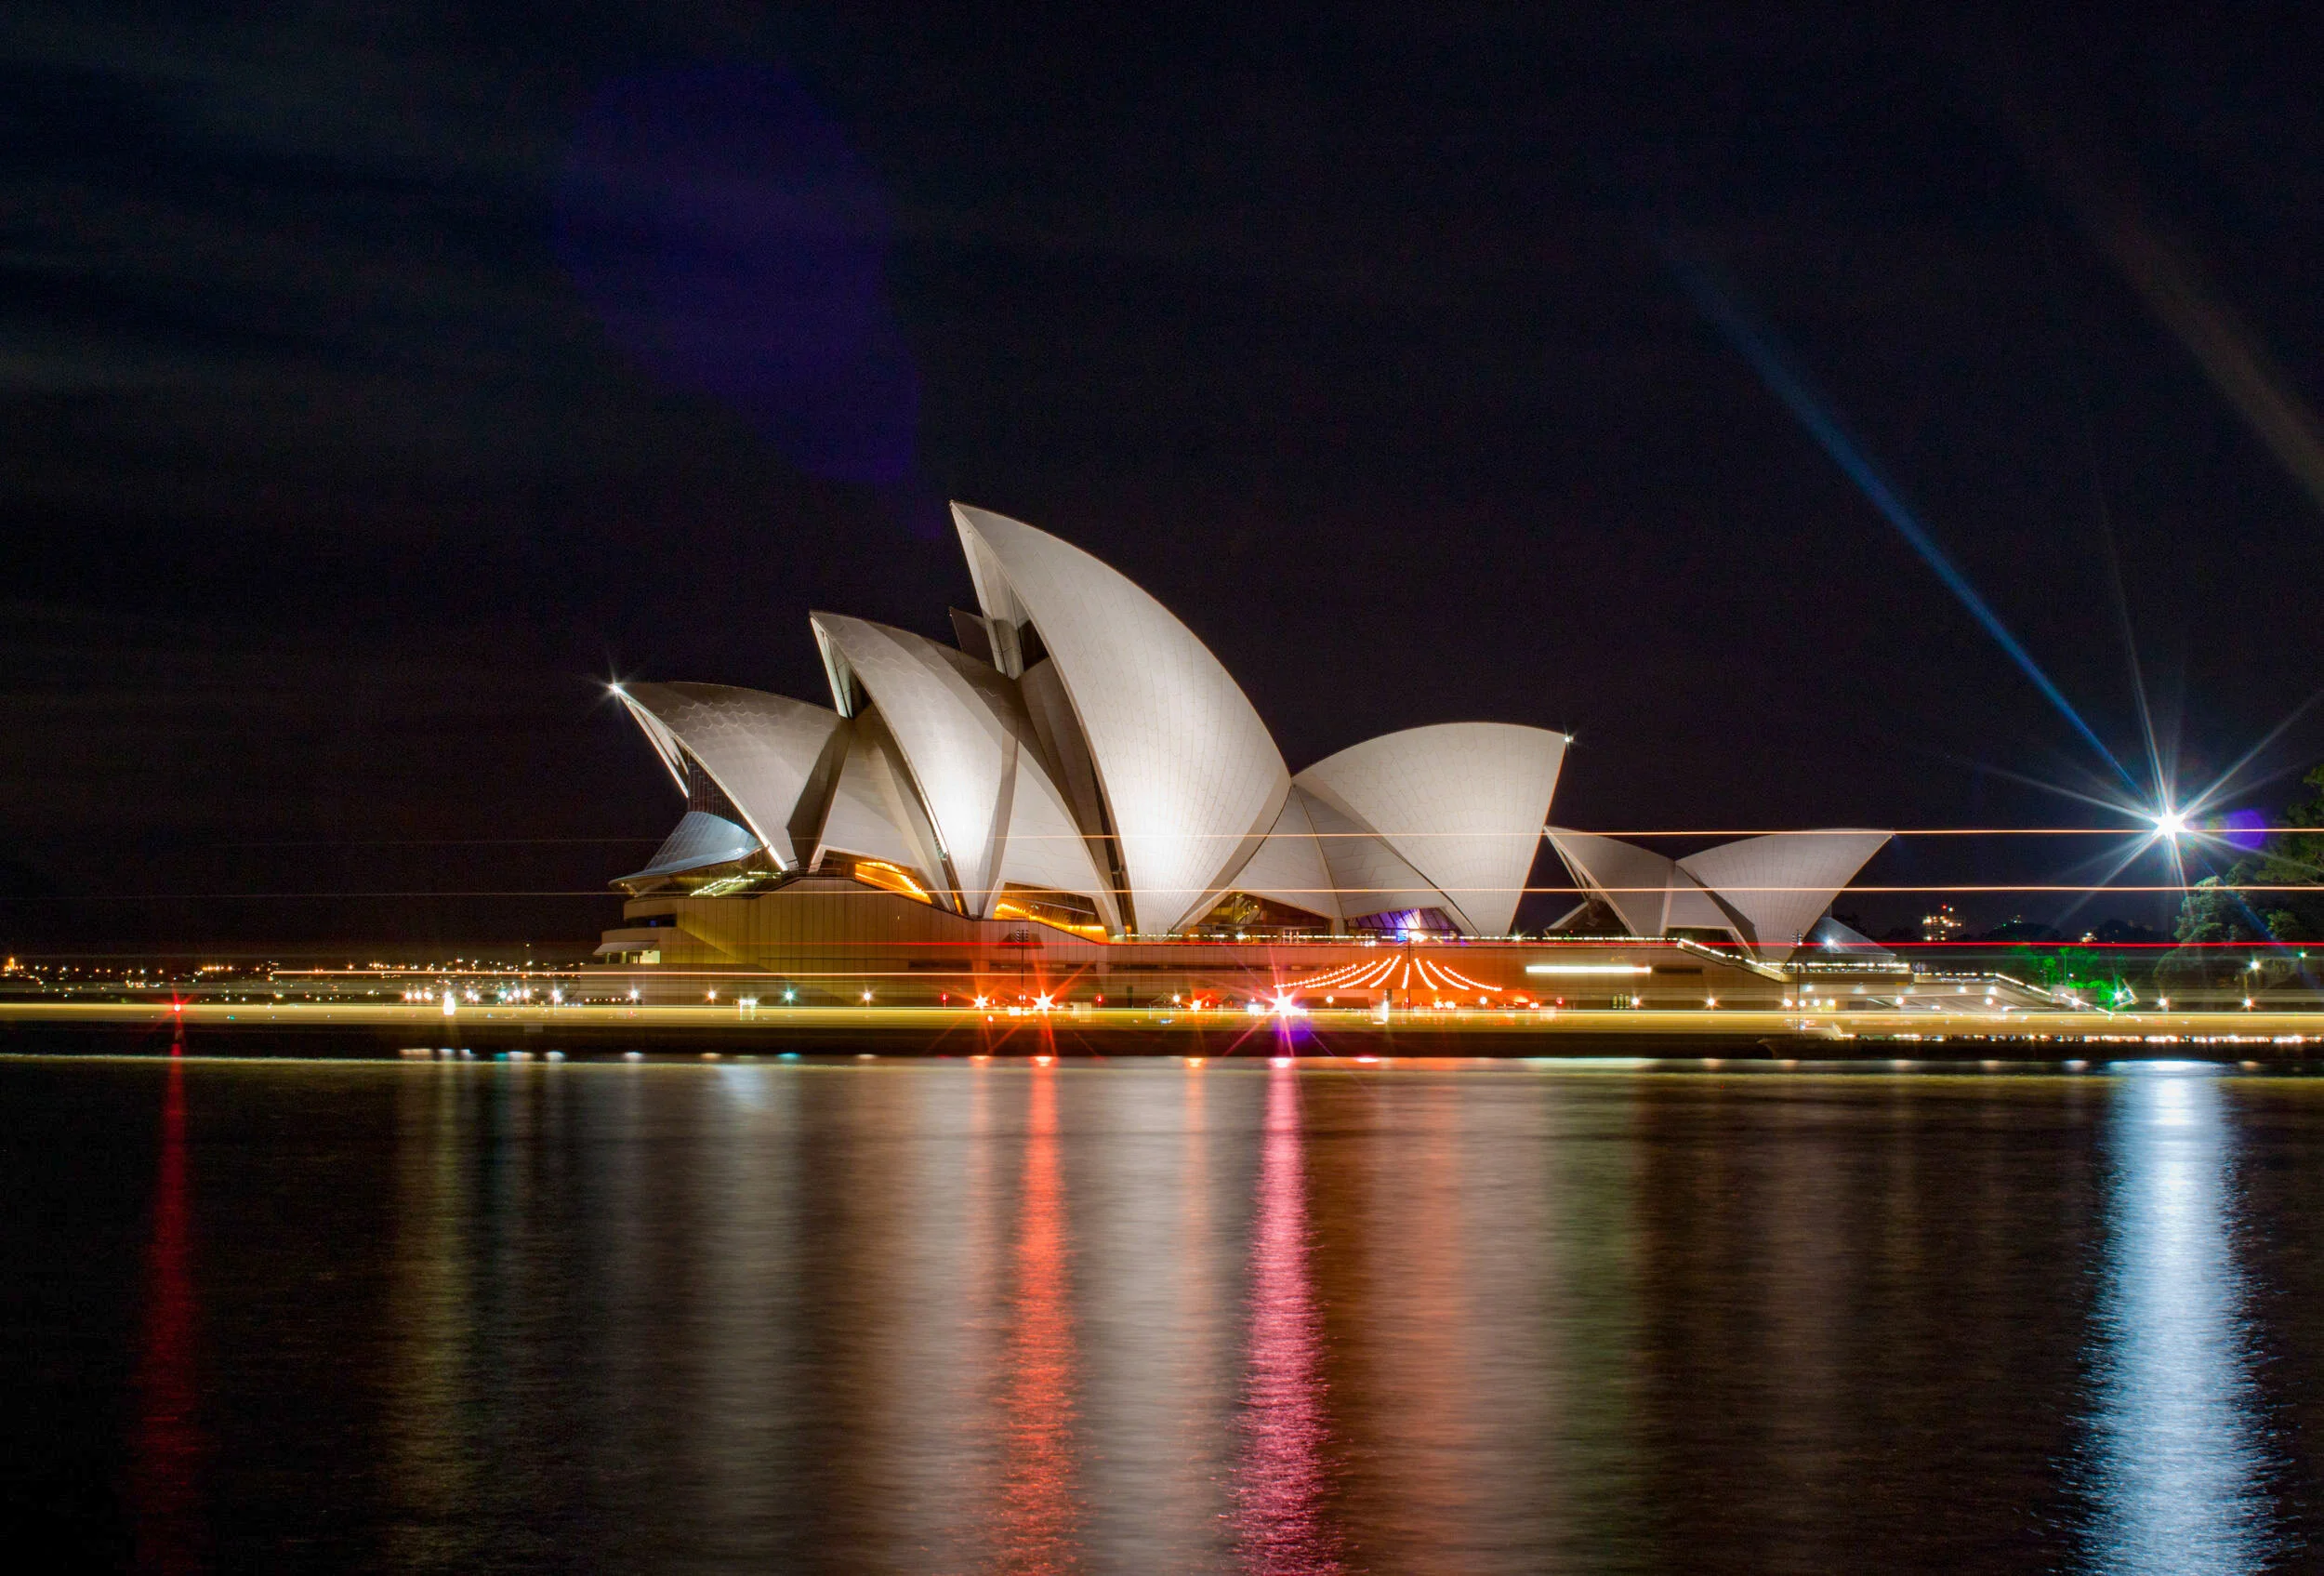
Opera House at Night
Day 5
MORNING - Opera House Tour
Our last day in Australia started with breakfast at the Park Hyatt Sydney. We overlooked the harbor directly at the Opera House and started to feel a little sad we were leaving.

Opera House Tiles Close-up - Chevron Design
We walked over and took a tour of the Opera House. As an iconic staple to the city, We were excited to see this gorgeous building and learn the history behind it. Up close you can see the shaped tiles that are shell-like making a chevron type pattern across the roof. The inside is just as stunning, as there are several venues within the house. The 2 largest concert hall is the largest and has the largest organ with over 10,000 pipes!

THIS IS KNOWN AS THE OPERA HOUSE CLEAVAGE
AFTERNOON
Since we were leaving that night, we had some time to kill but couldn't go too far. We decided to explore "The Rocks" which was the area right above our hotel. It's great for shopping and restaurants.
We went to Fortune of War (claims it is Sydney's oldest pub, which a lot of bars do) which wasn't anything special but nice to stop for a good cold brew.

Fortune of War - Sydney’s Oldest Pub
It was time to hop in a cab and head to the airport. We were sad to leave Sydney, but we weren't done with our Honeymoon yet, New Zealand and French Polynesia were next!
We would love to go back to Sydney and check off anything we missed! Let us know in the comments below if there is something you recommend!
If you liked this post please share it on your favorite social media site using the Share button below because we’d love to get the word out! Feel free to pin this to your favorite Pinterest board:

More great posts:


Best Lake Tahoe Hiking Trails for the Casual Hiker
Lake Tahoe is a great place for hiking, even for those who casually hike! Here are 2 hiking trails for the whole family to enjoy (dogs too)! Check out the Cascade Falls Trail and the Eagle Lake Trails near Emerald Bay in Lake Tahoe, California. Things to do in Lake Tahoe #Hike #California #LakeTahoe

Best Emerald Bay Lake Tahoe Trails
Updated April 10, 2026
There are endless options of hiking trails and waterfalls in Lake Tahoe. The best Lake Tahoe Hiking Trails are Eagle Lake and Cascade Falls for the occasional hiker.
I love to go hiking but I would not categorize myself as a “hiker.” I like trails with a mild incline, shade, pretty views, and something more strenuous than just a walk outside. Doesn’t everyone? We spent a weekend in Lake Tahoe and tried a different hike each morning. These trails, Eagle Lake & Cascade Falls, came pretty close to my description. Along the trails, we saw many families with small children and lots of people with dogs ranging from all sizes. Almost anyone can enjoy these moderate hikes!
Related Post: Guide to Lake Tahoe Summer Weekend Getaway - Everything you need to know about Tahoe!
EAGLE LAKE TRAILS
Distance: 1.8 miles (round trip)
Elevation Gain: 433 feet
Time: 2 hours if you want some time to explore around the lake or even jump in for a swim!
Parking: There is a very small parking lot off the trailhead but it fills up quickly! You’re better off parking along the road as soon as you see the sign. Try to get there before 10a for a good spot!

This moderate hike trails from the top road along Emerald Bay through the wilderness to a small lake nestled in the trees. Start at the trailhead and fill out a permit which is just filling out some contact info and holding onto a piece of paper.
Start heading Southwest up the stairs to the bridge and enjoy the waterfall.
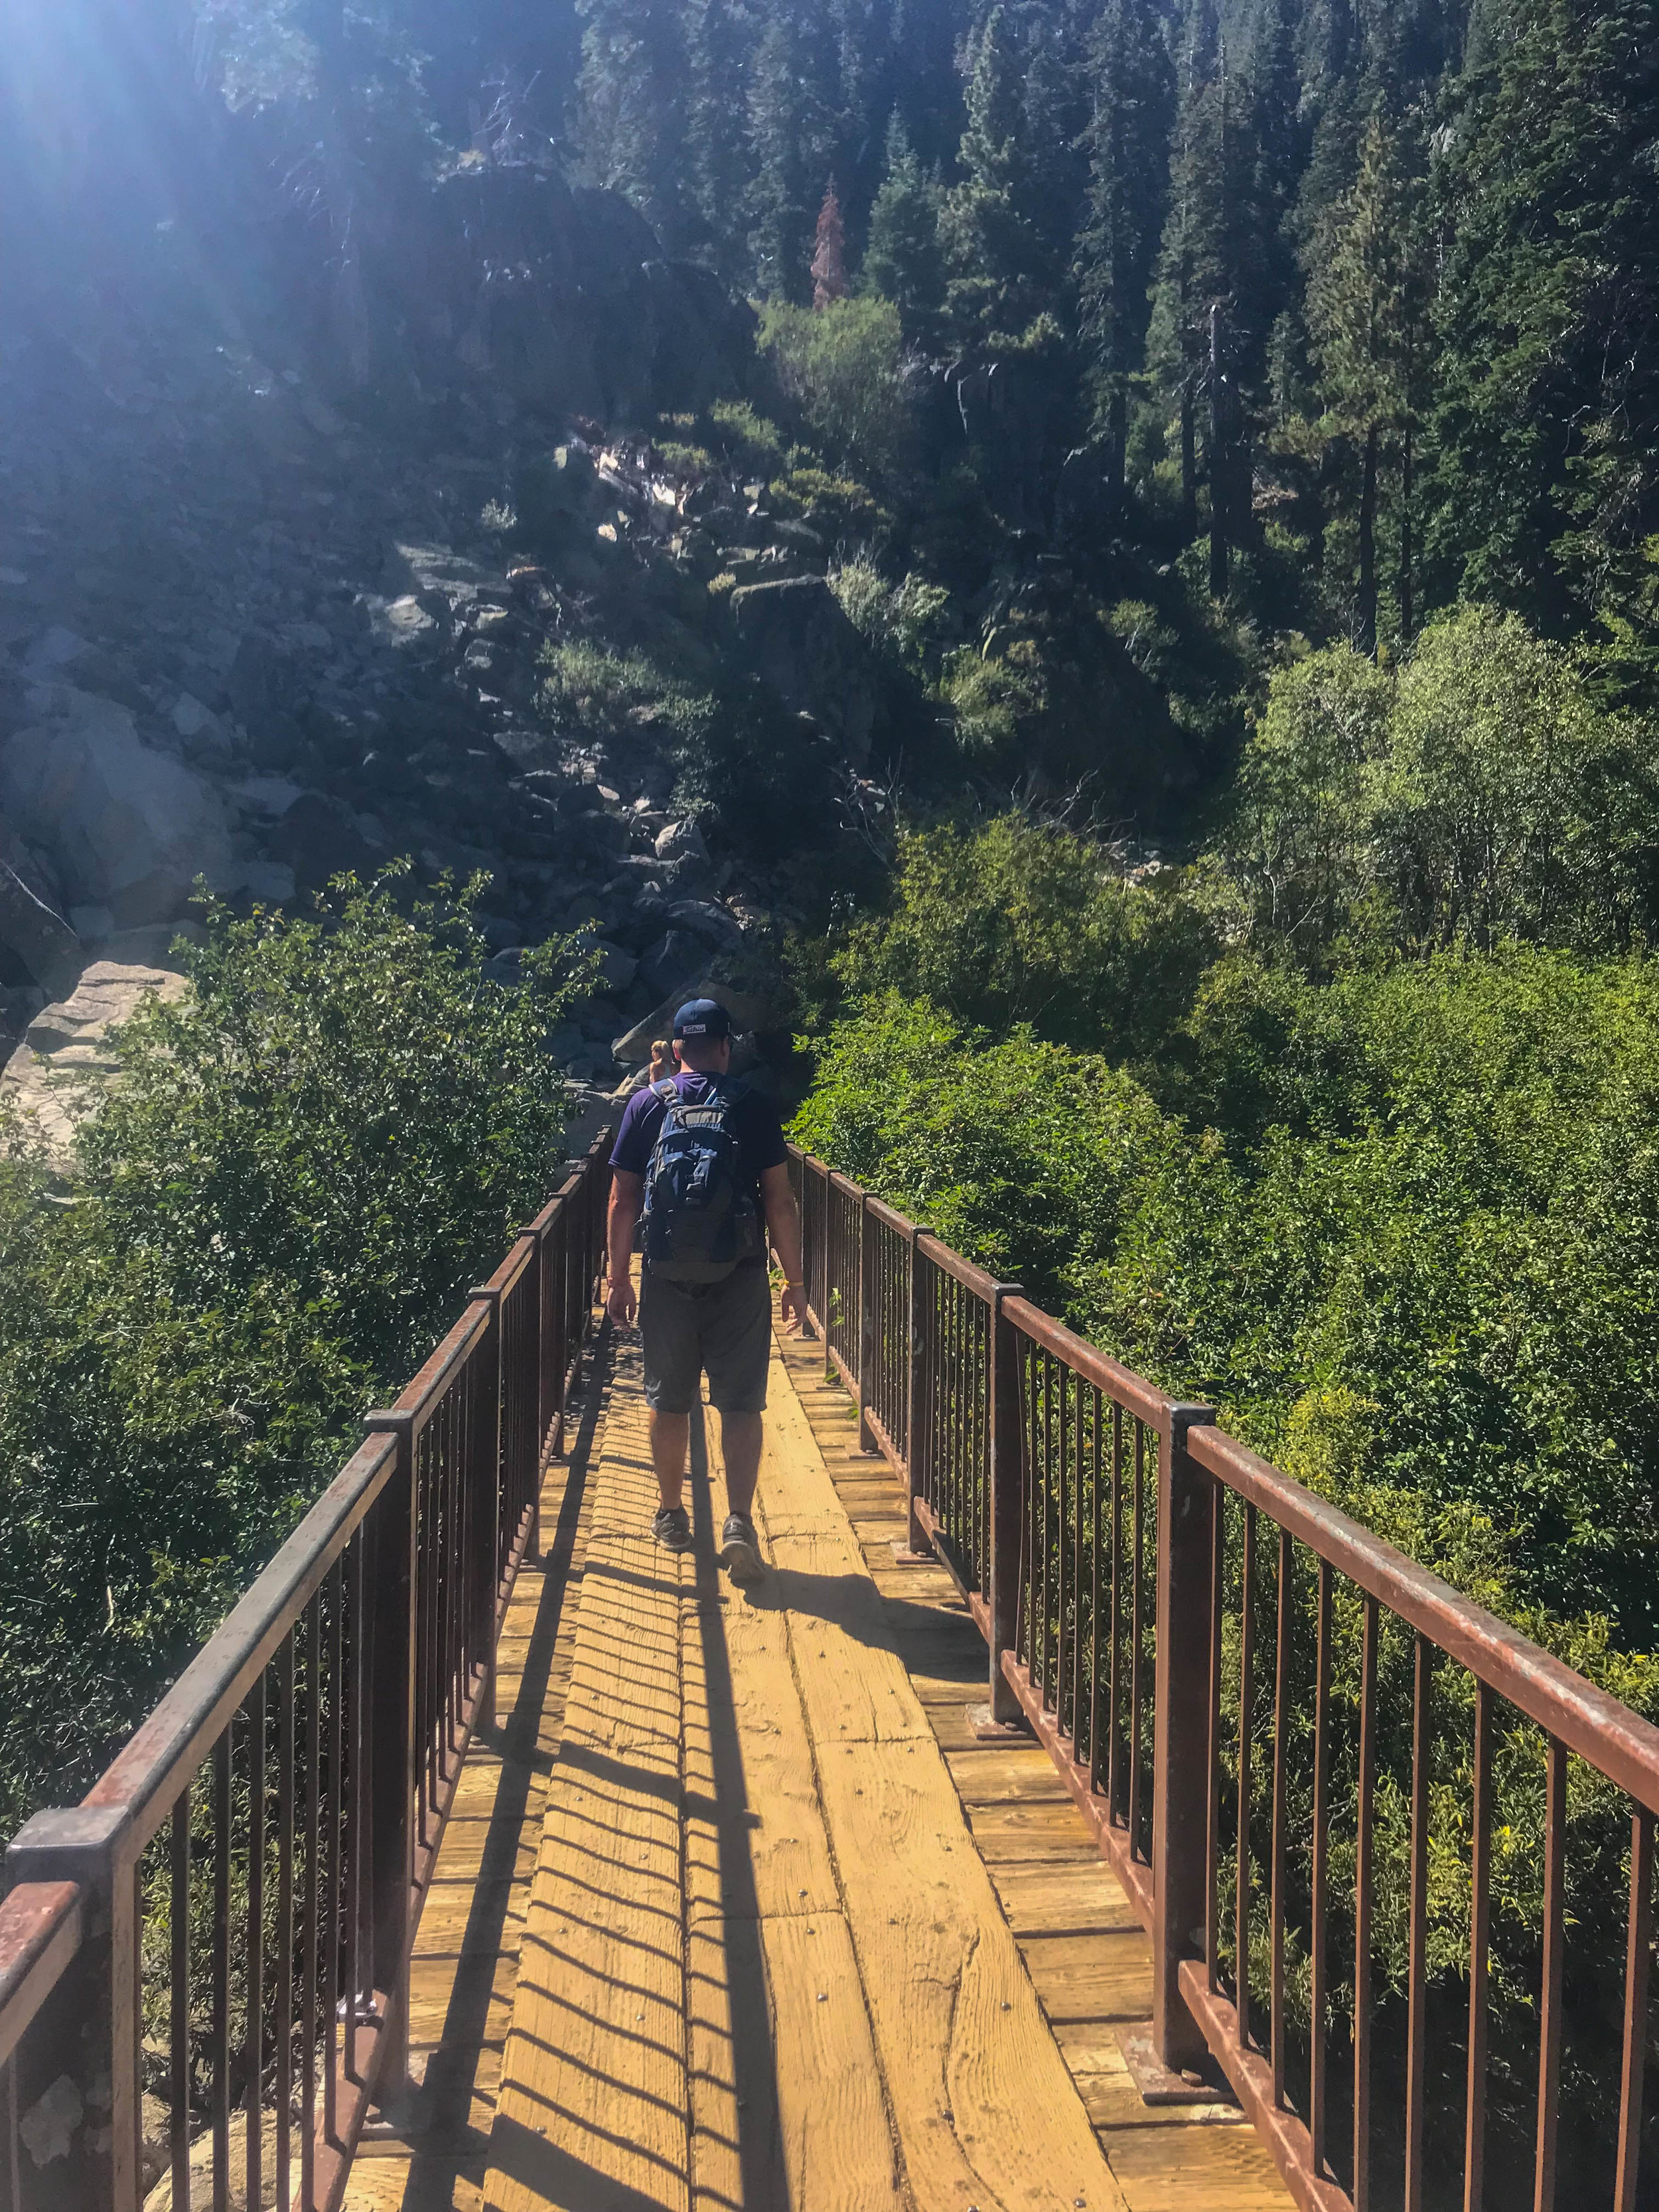
We hiked up to a ridge, hugged some trees, had some fun, and took a few pictures!

Emerald Bay view along Eagle Lake Trails

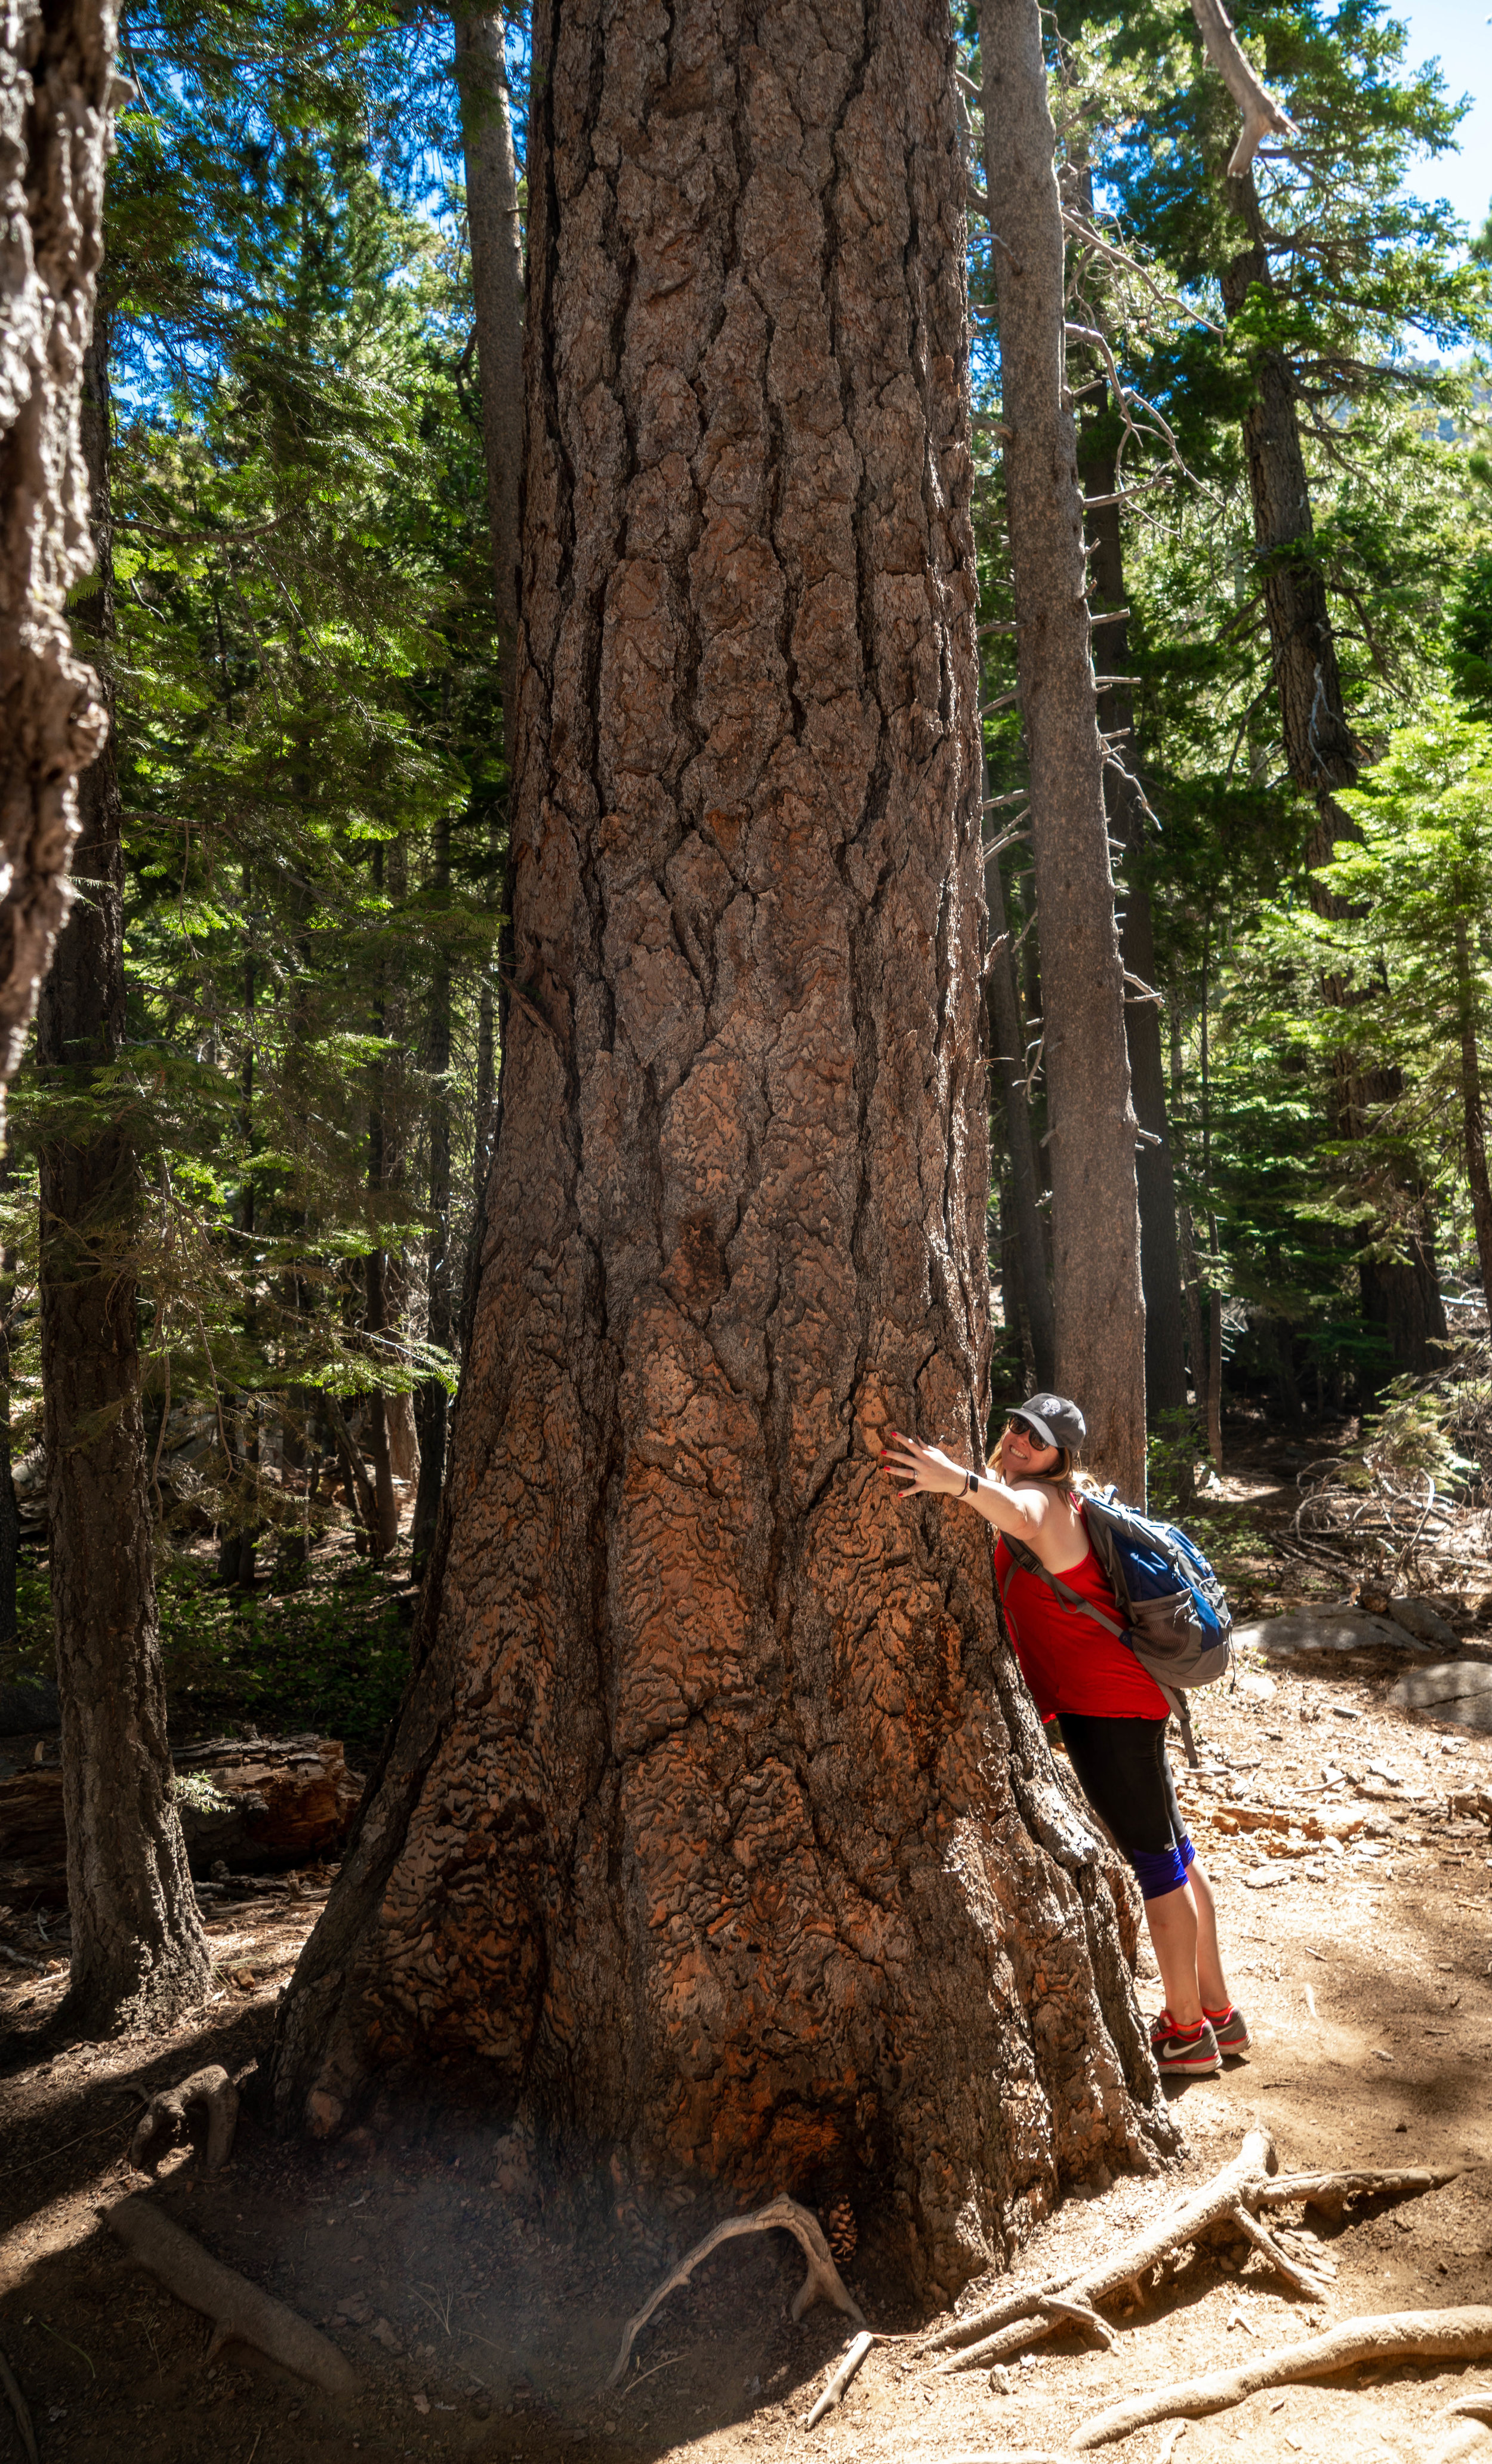

SISTER, STAND RIGHT HERE. JK, I LOVE MY SISTER!
From the ridge, we continued down the trail until we hit a fork in the road and the sign had fallen down. Take a right for the lake, it’s another 5 min downhill.

Eagle Lake Trails - Best Lake Tahoe trails for the casual hiker
As we arrived, a group was leaving saying they saw a bear on the opposite side of lake and he jumped in to cool off. They showed us the trail they took so we wandered around the lake and kept our eyes open for the bear across the lake. Unfortunately, we weren’t lucky enough to see the bear but we did have some nice views!

We made some friends too!

After about 15-20 mins sitting on a rock in the serene lake, we decided to head back.
More info:
https://www.alltrails.com/explore/trail/us/california/eagle-lake-trail
Related Post: Guide to Lake Tahoe Summer Weekend Getaway - Everything you need to know about Tahoe!
Cascade Falls Trail
Distance: 1.4 miles (round trip)
Elevation Gain: 236 Feet
Time: 1.5-2 hours leaving plenty of time to enjoy the falls and the view
Parking: There is a very small parking lot off the trailhead but it fills up quickly! You’re better off parking along the road as soon as you see the sign. Try to get there before 10a for a good spot! Unless you’re the Mystery Machine! ——>

The Mystery Machine spotted in Lake Tahoe
We parked fairly close to the spot we did the day before for the Eagle Lake Trail. There was a parking area through the campsite but there were limited spots available so we parked on the side of the road.

Cascade Falls Trail Views
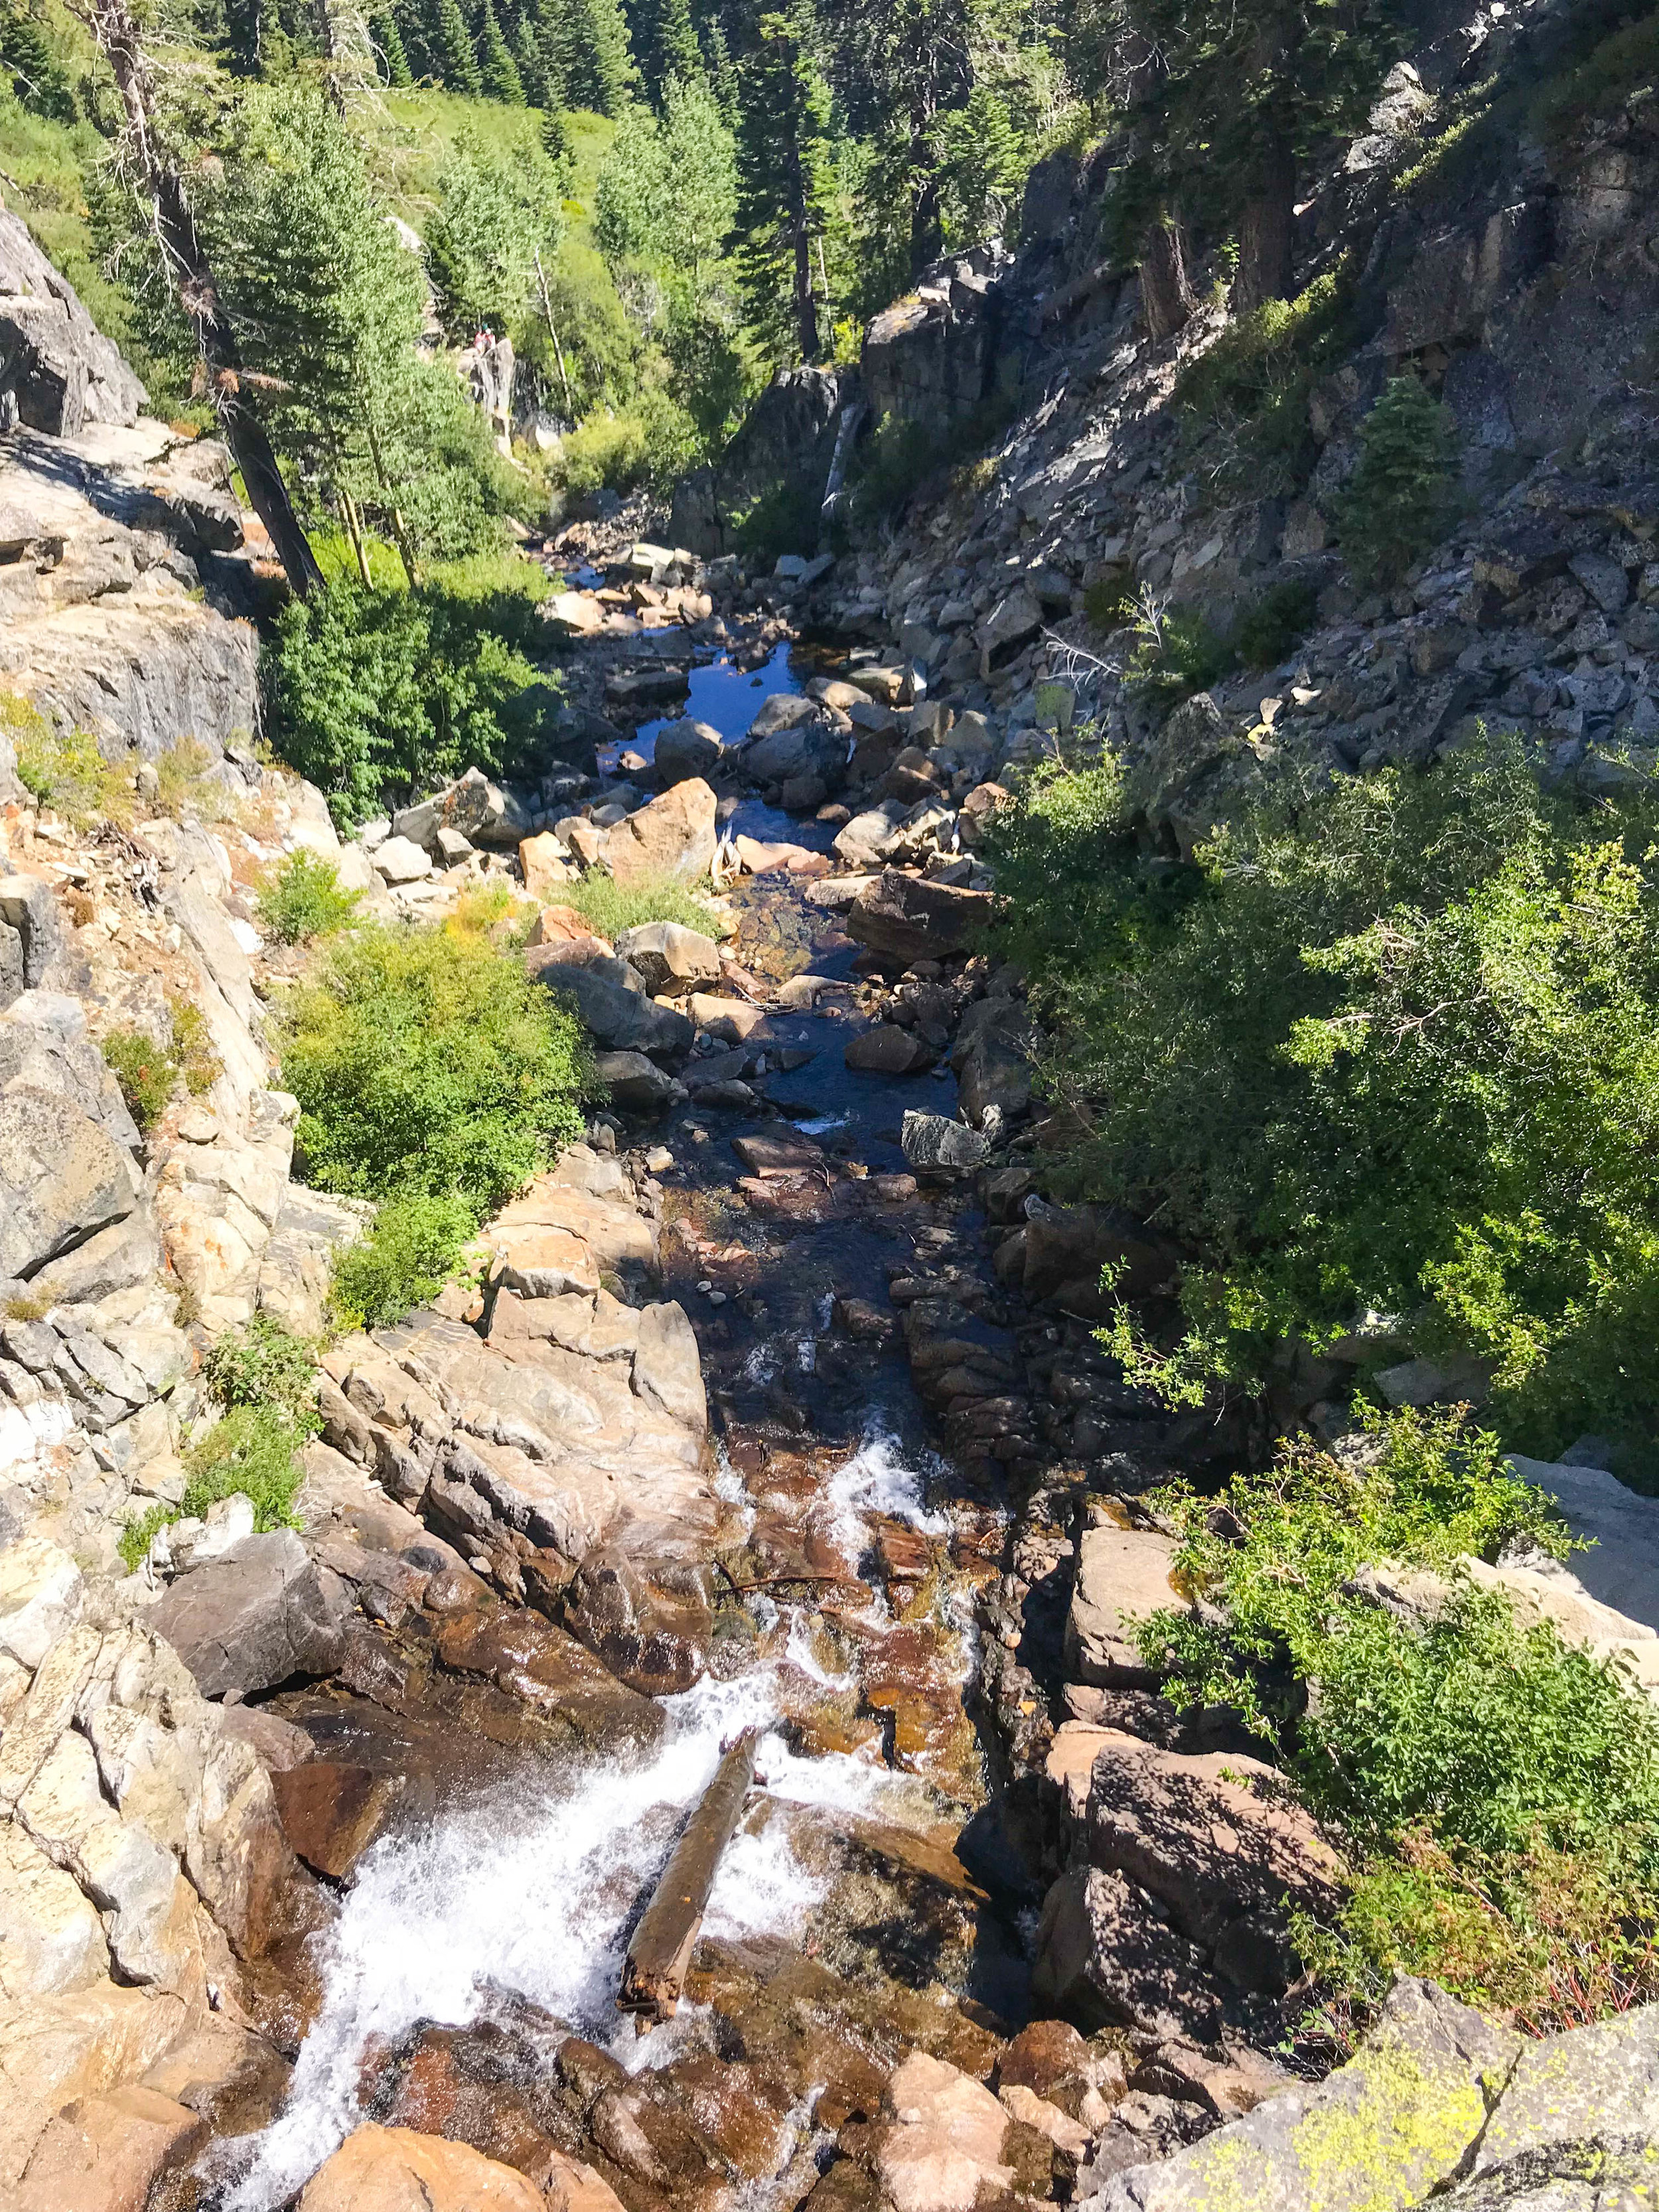
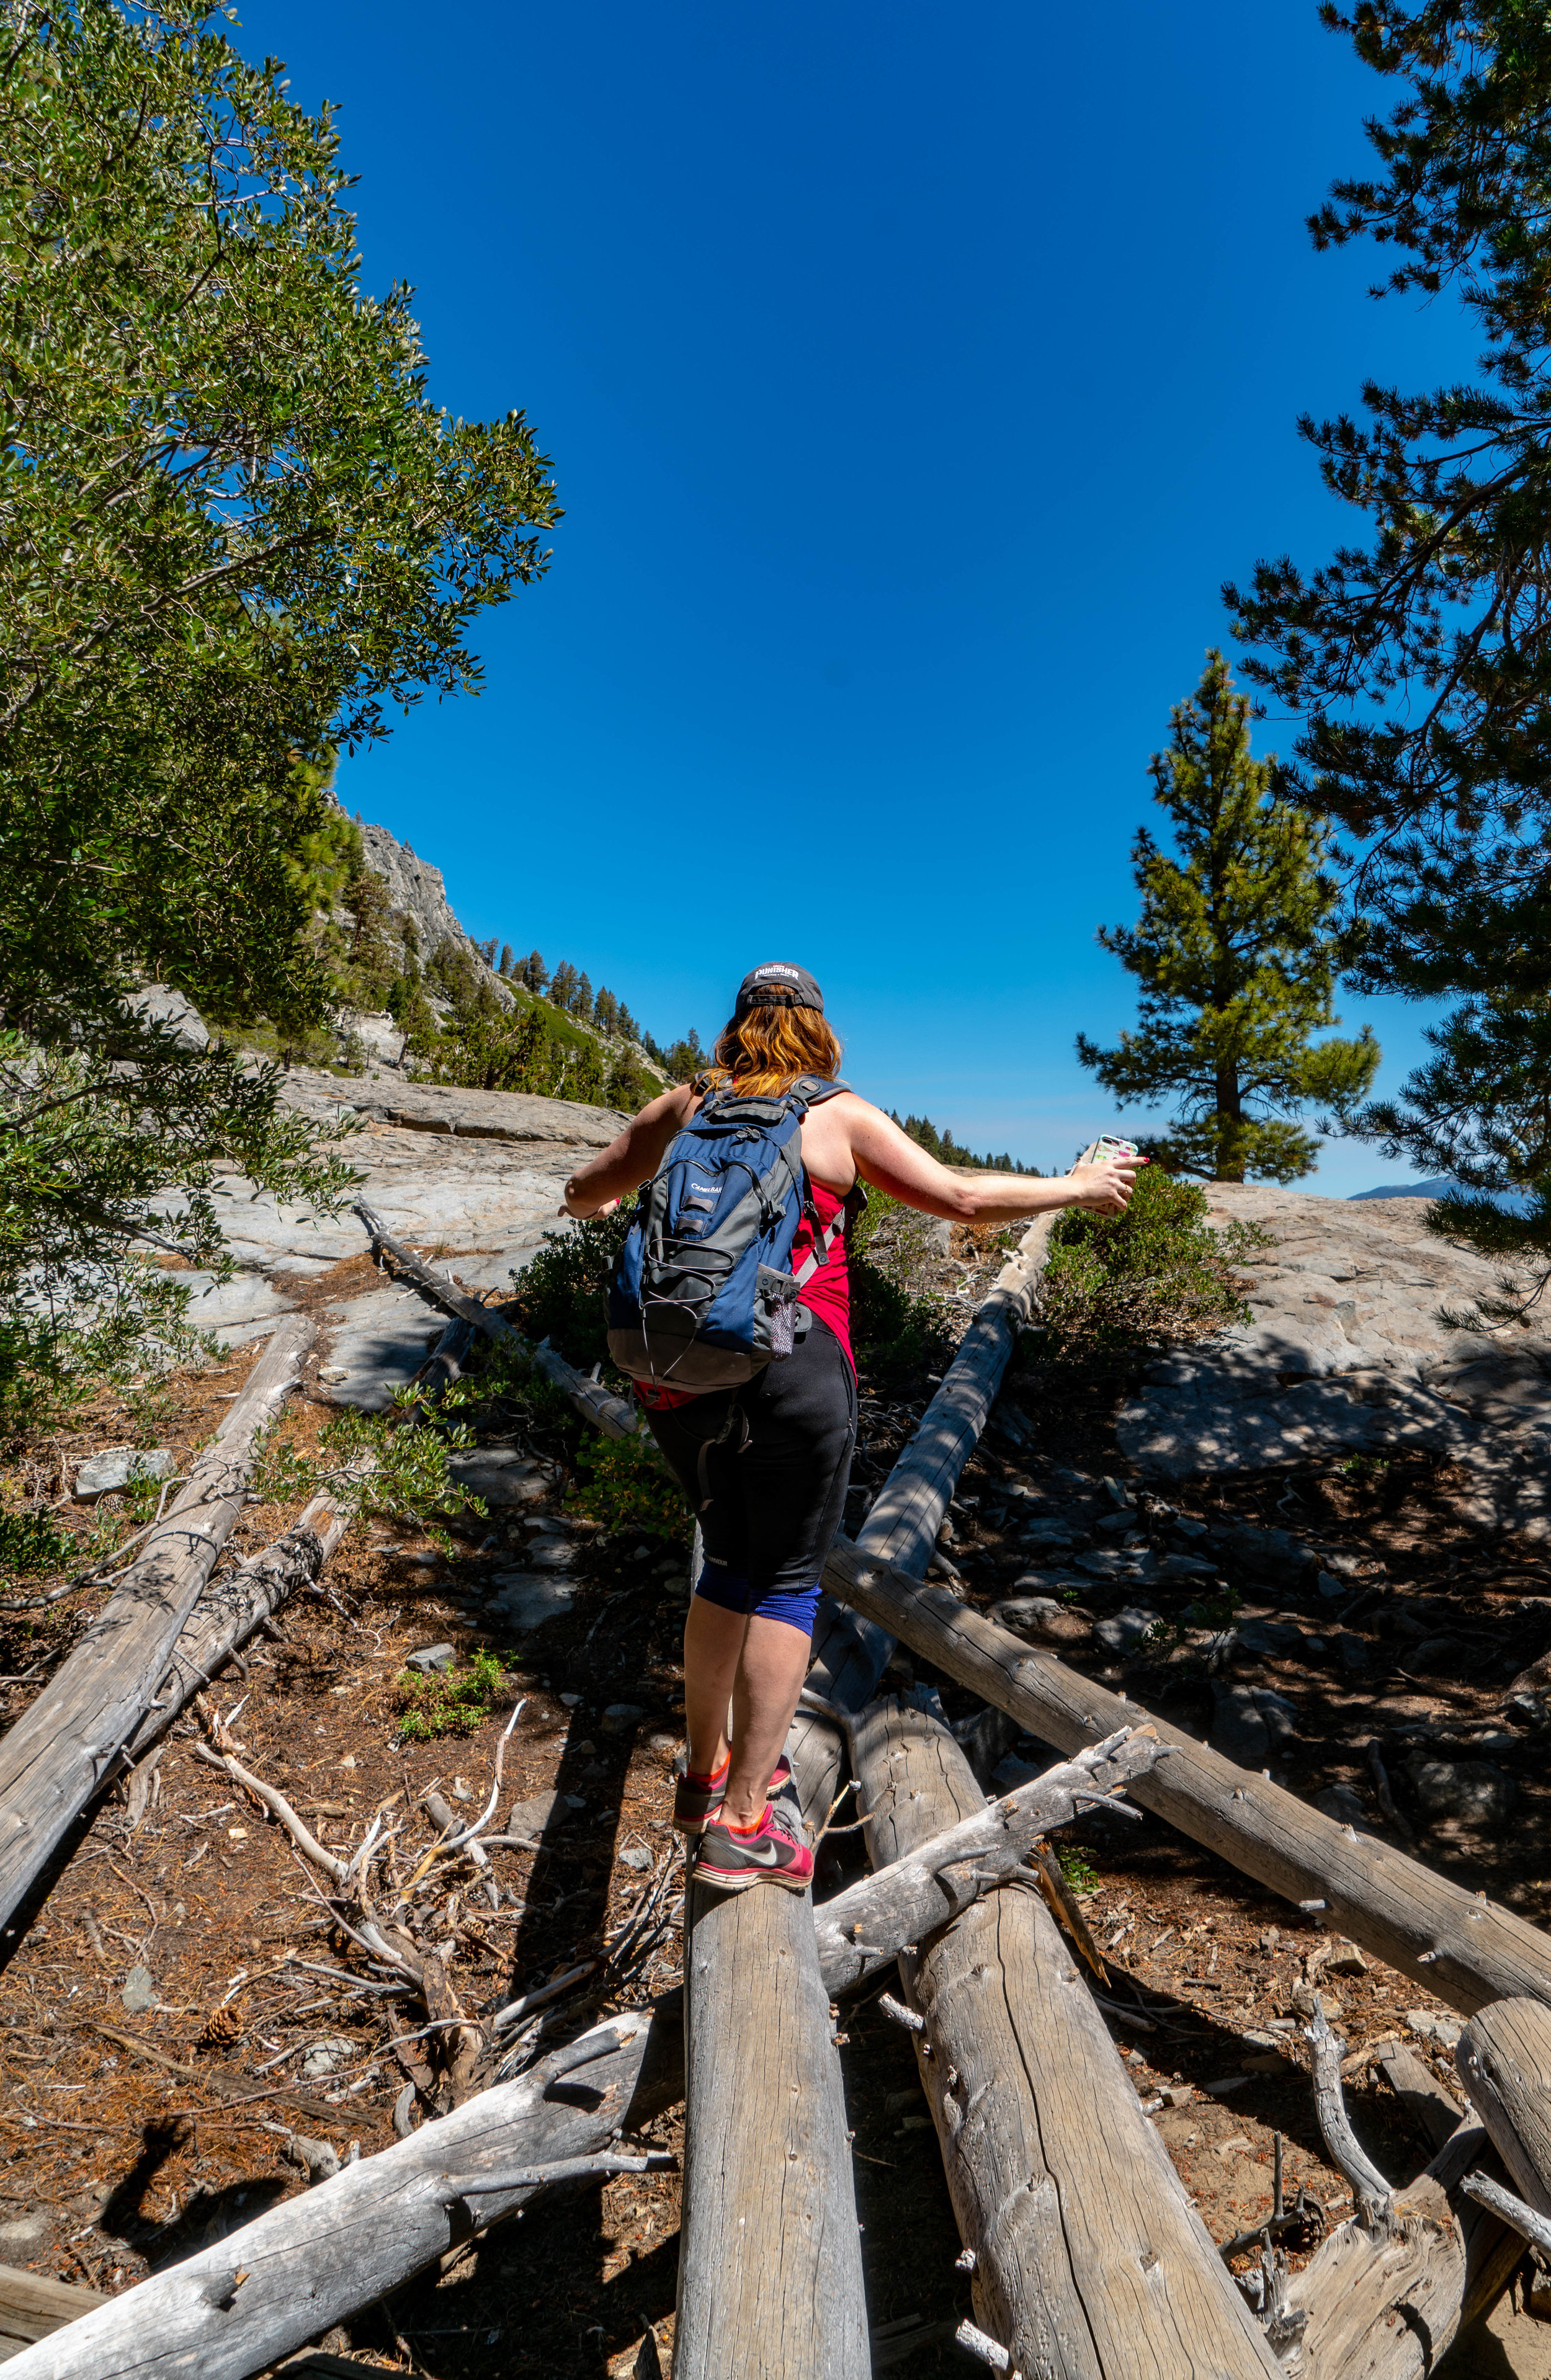
The trail starts fairly easy, walking among the trees on flat ground until you hit the trail along the mountain which is fairly rocky, make sure you watch your step!


Rocky trail along Cascade Falls Trail
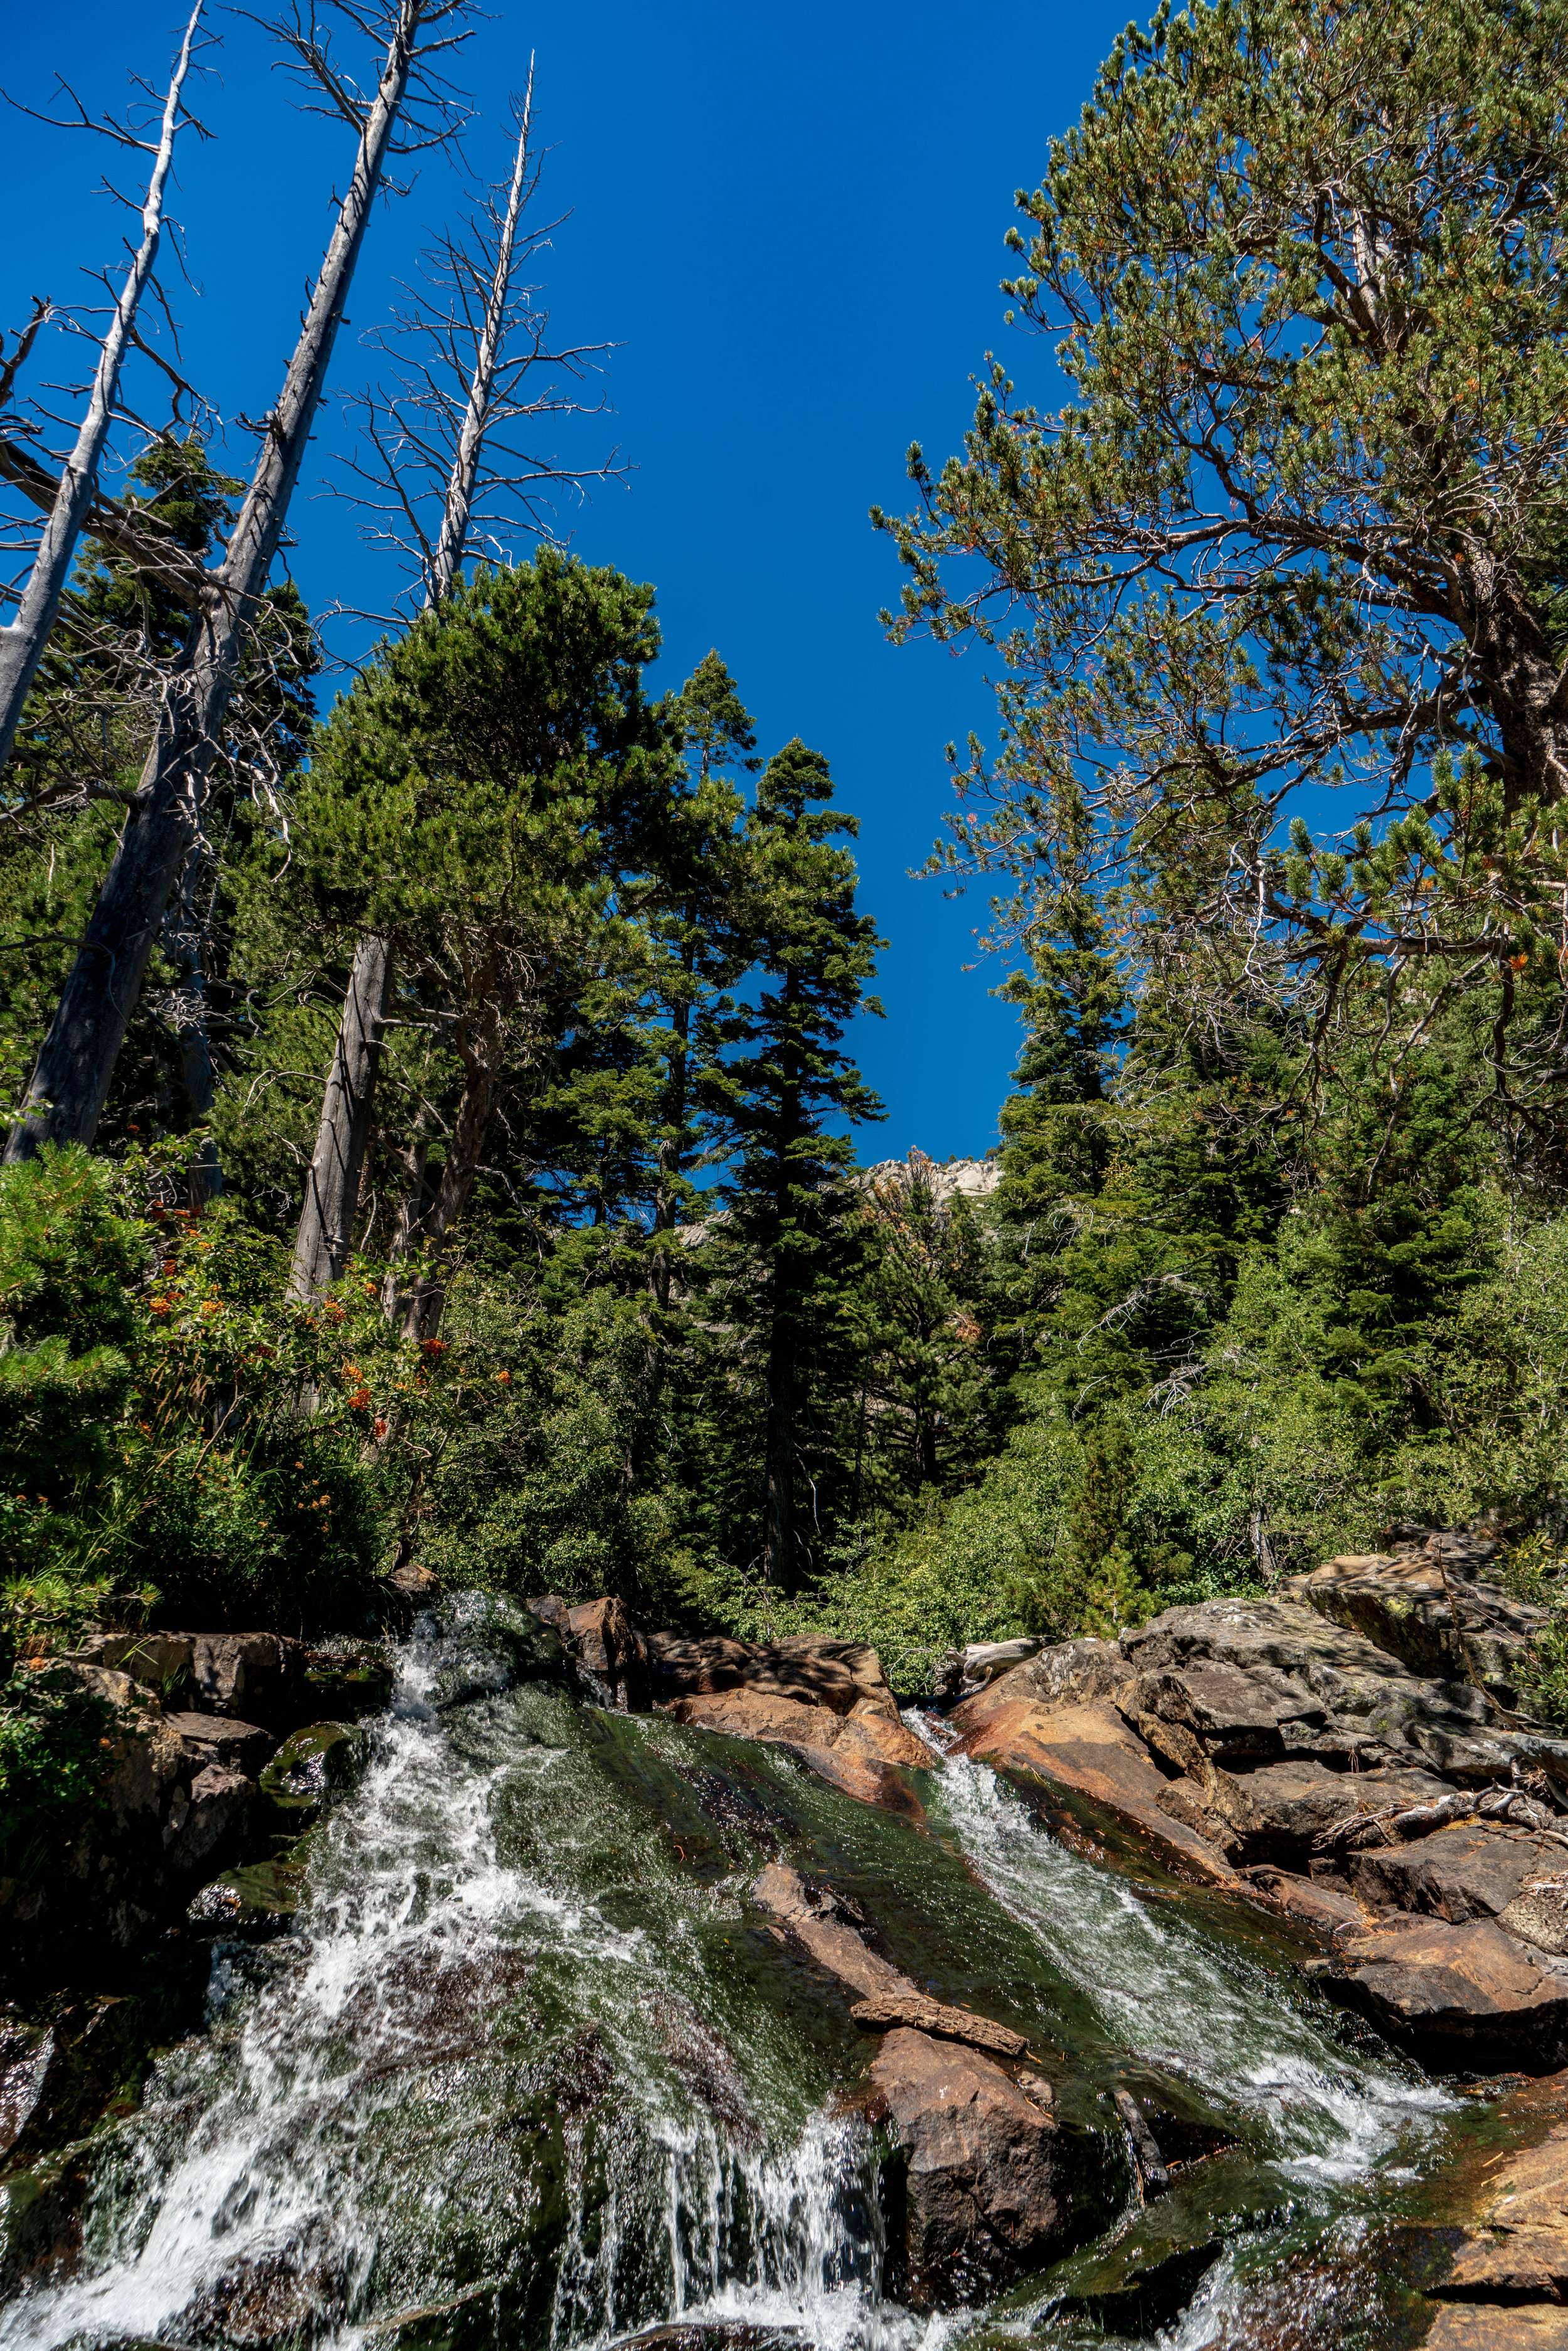
Once you make it through the trail, you’ll find the falls and beautiful views!

Cascade Falls Views

Cascade Falls
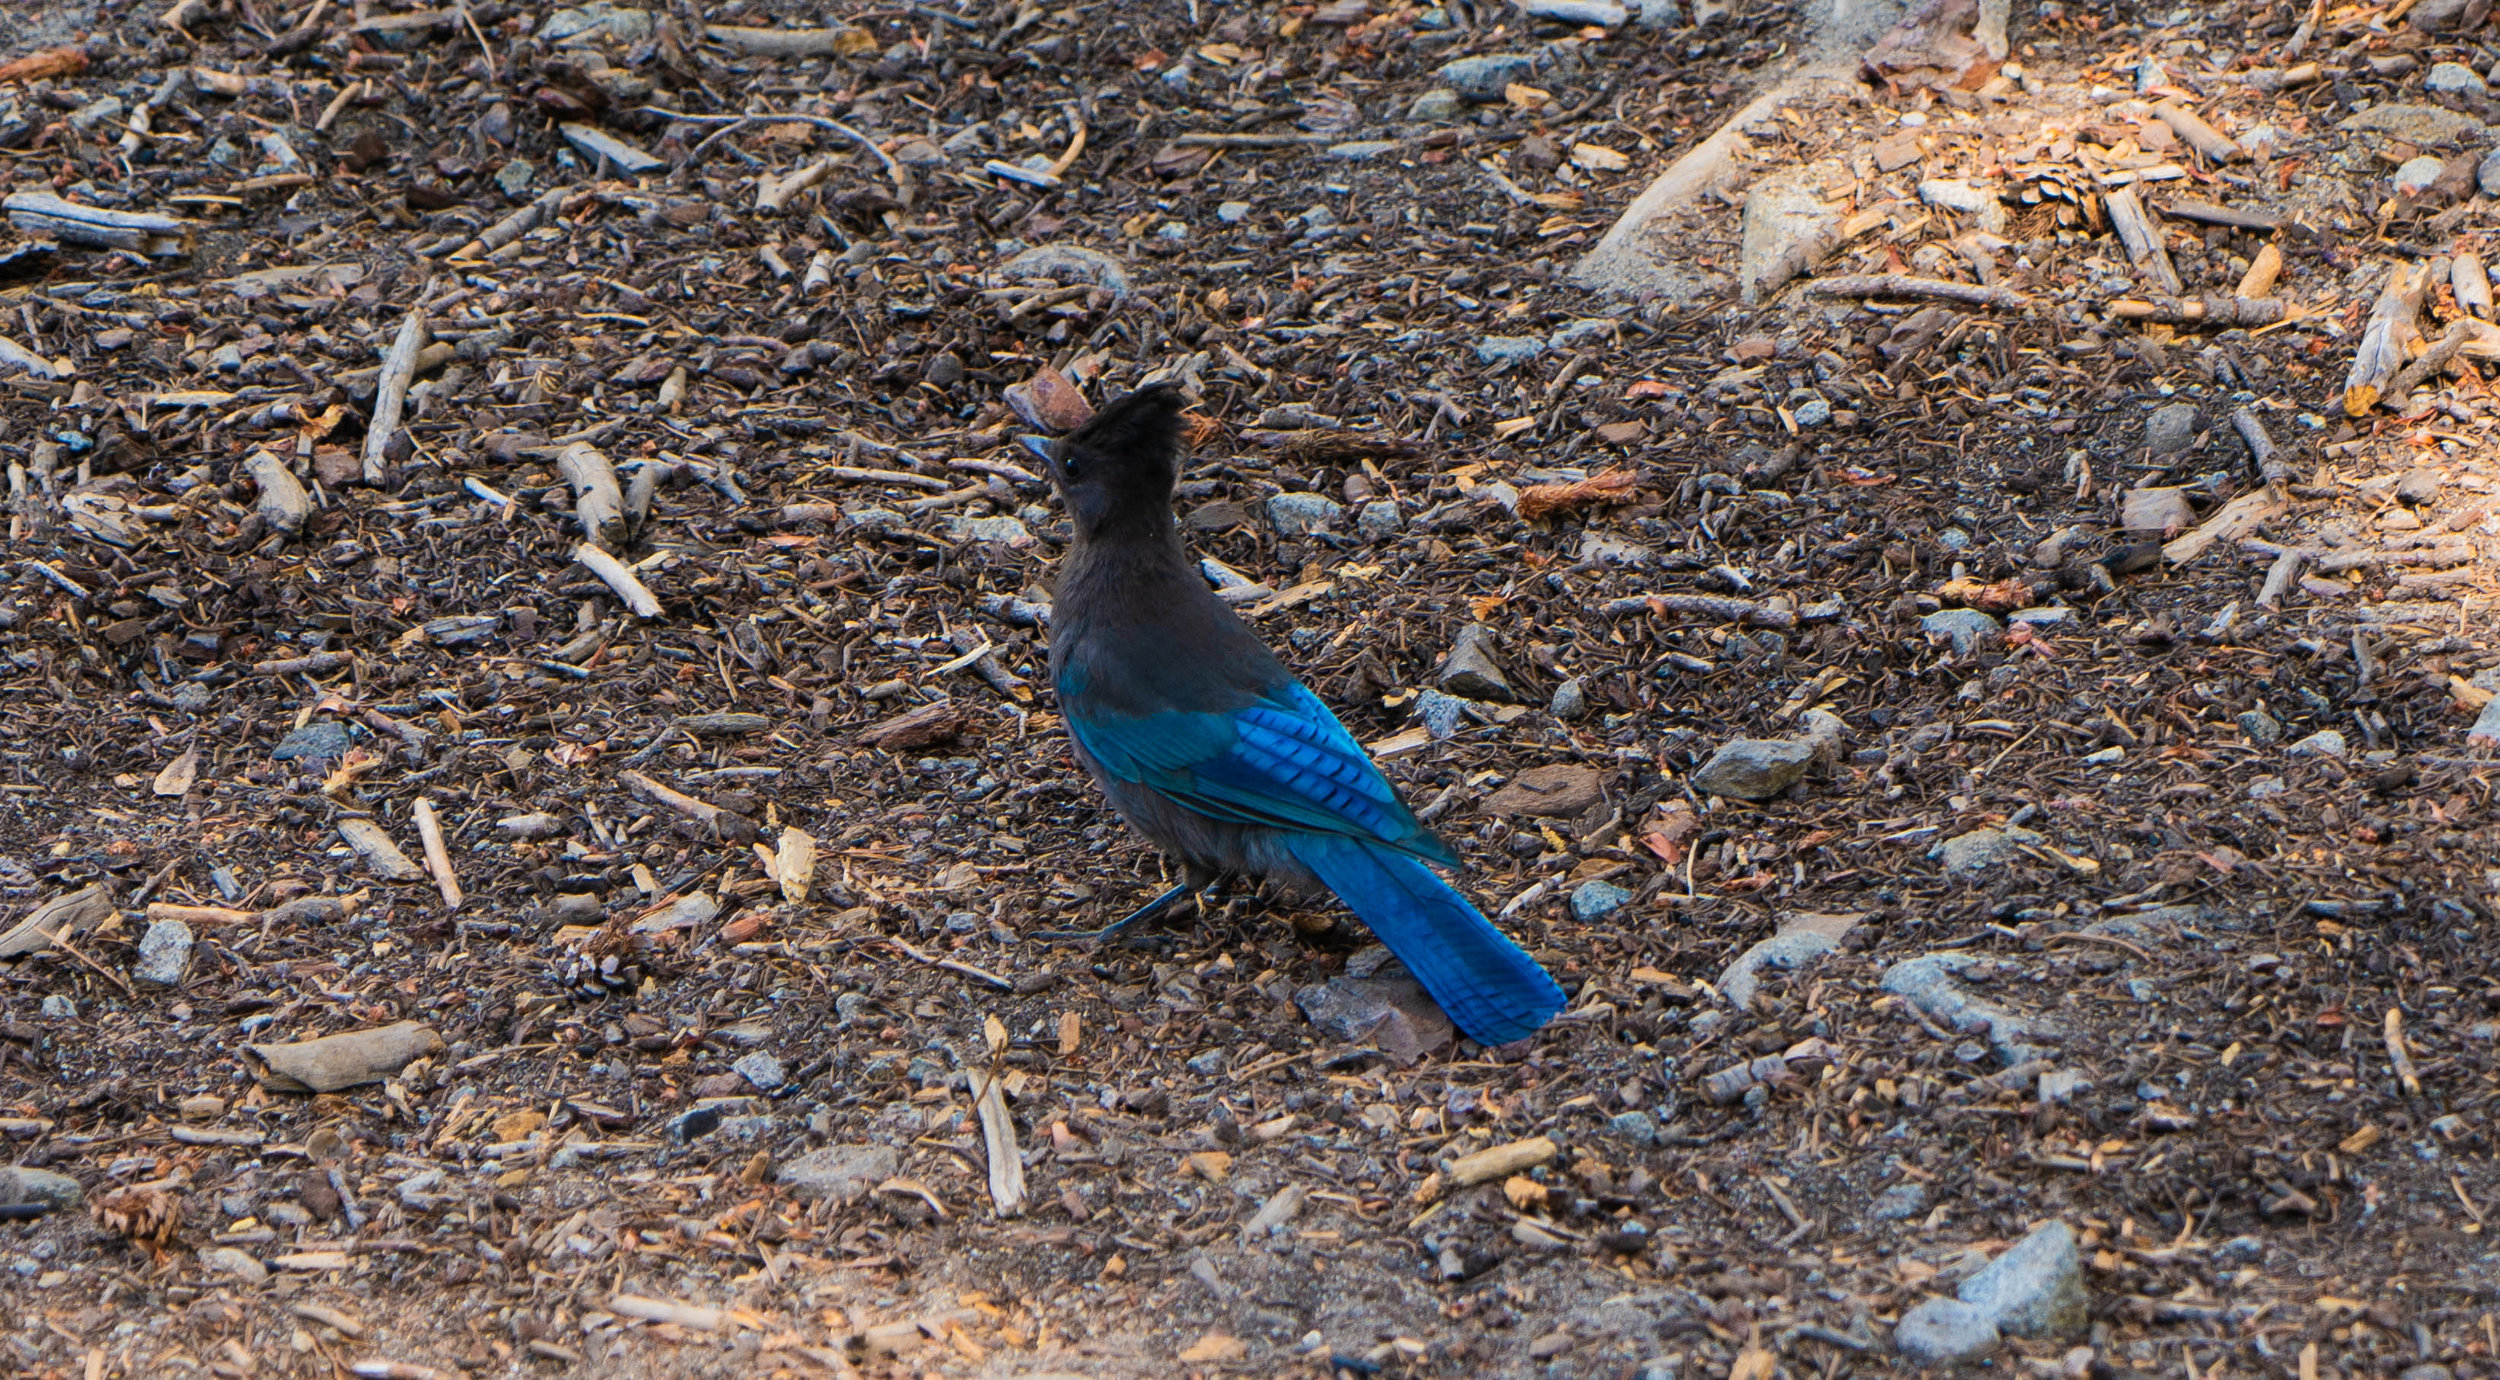
Of course we found more friends!

Chipmunks!

Do you see the lizard?
More information:
https://www.alltrails.com/explore/trail/us/california/cascade-falls
If you liked this post please share it on your favorite social media site using the Share button below because we’d love to get the word out! Feel free to pin this to your favorite Pinterest board:


See more of Sunny California:
Related Post: Guide to Lake Tahoe Summer Weekend Getaway - Everything you need to know about Tahoe!


Looking for the best restaurants and places to eat in Maui, Hawaii? Check out our favorite Restaurants in Maui from Lahaina to Wailea! | Where to go in Maui | Where to eat in Maui | Food in Maui