
This blog uses affiliate links. If you’d like to purchase a recommended product, please use the link to support this blog. It doesn’t cost you anything extra, it simply allows me to continue creating these posts. Thank you so much for your love and support!
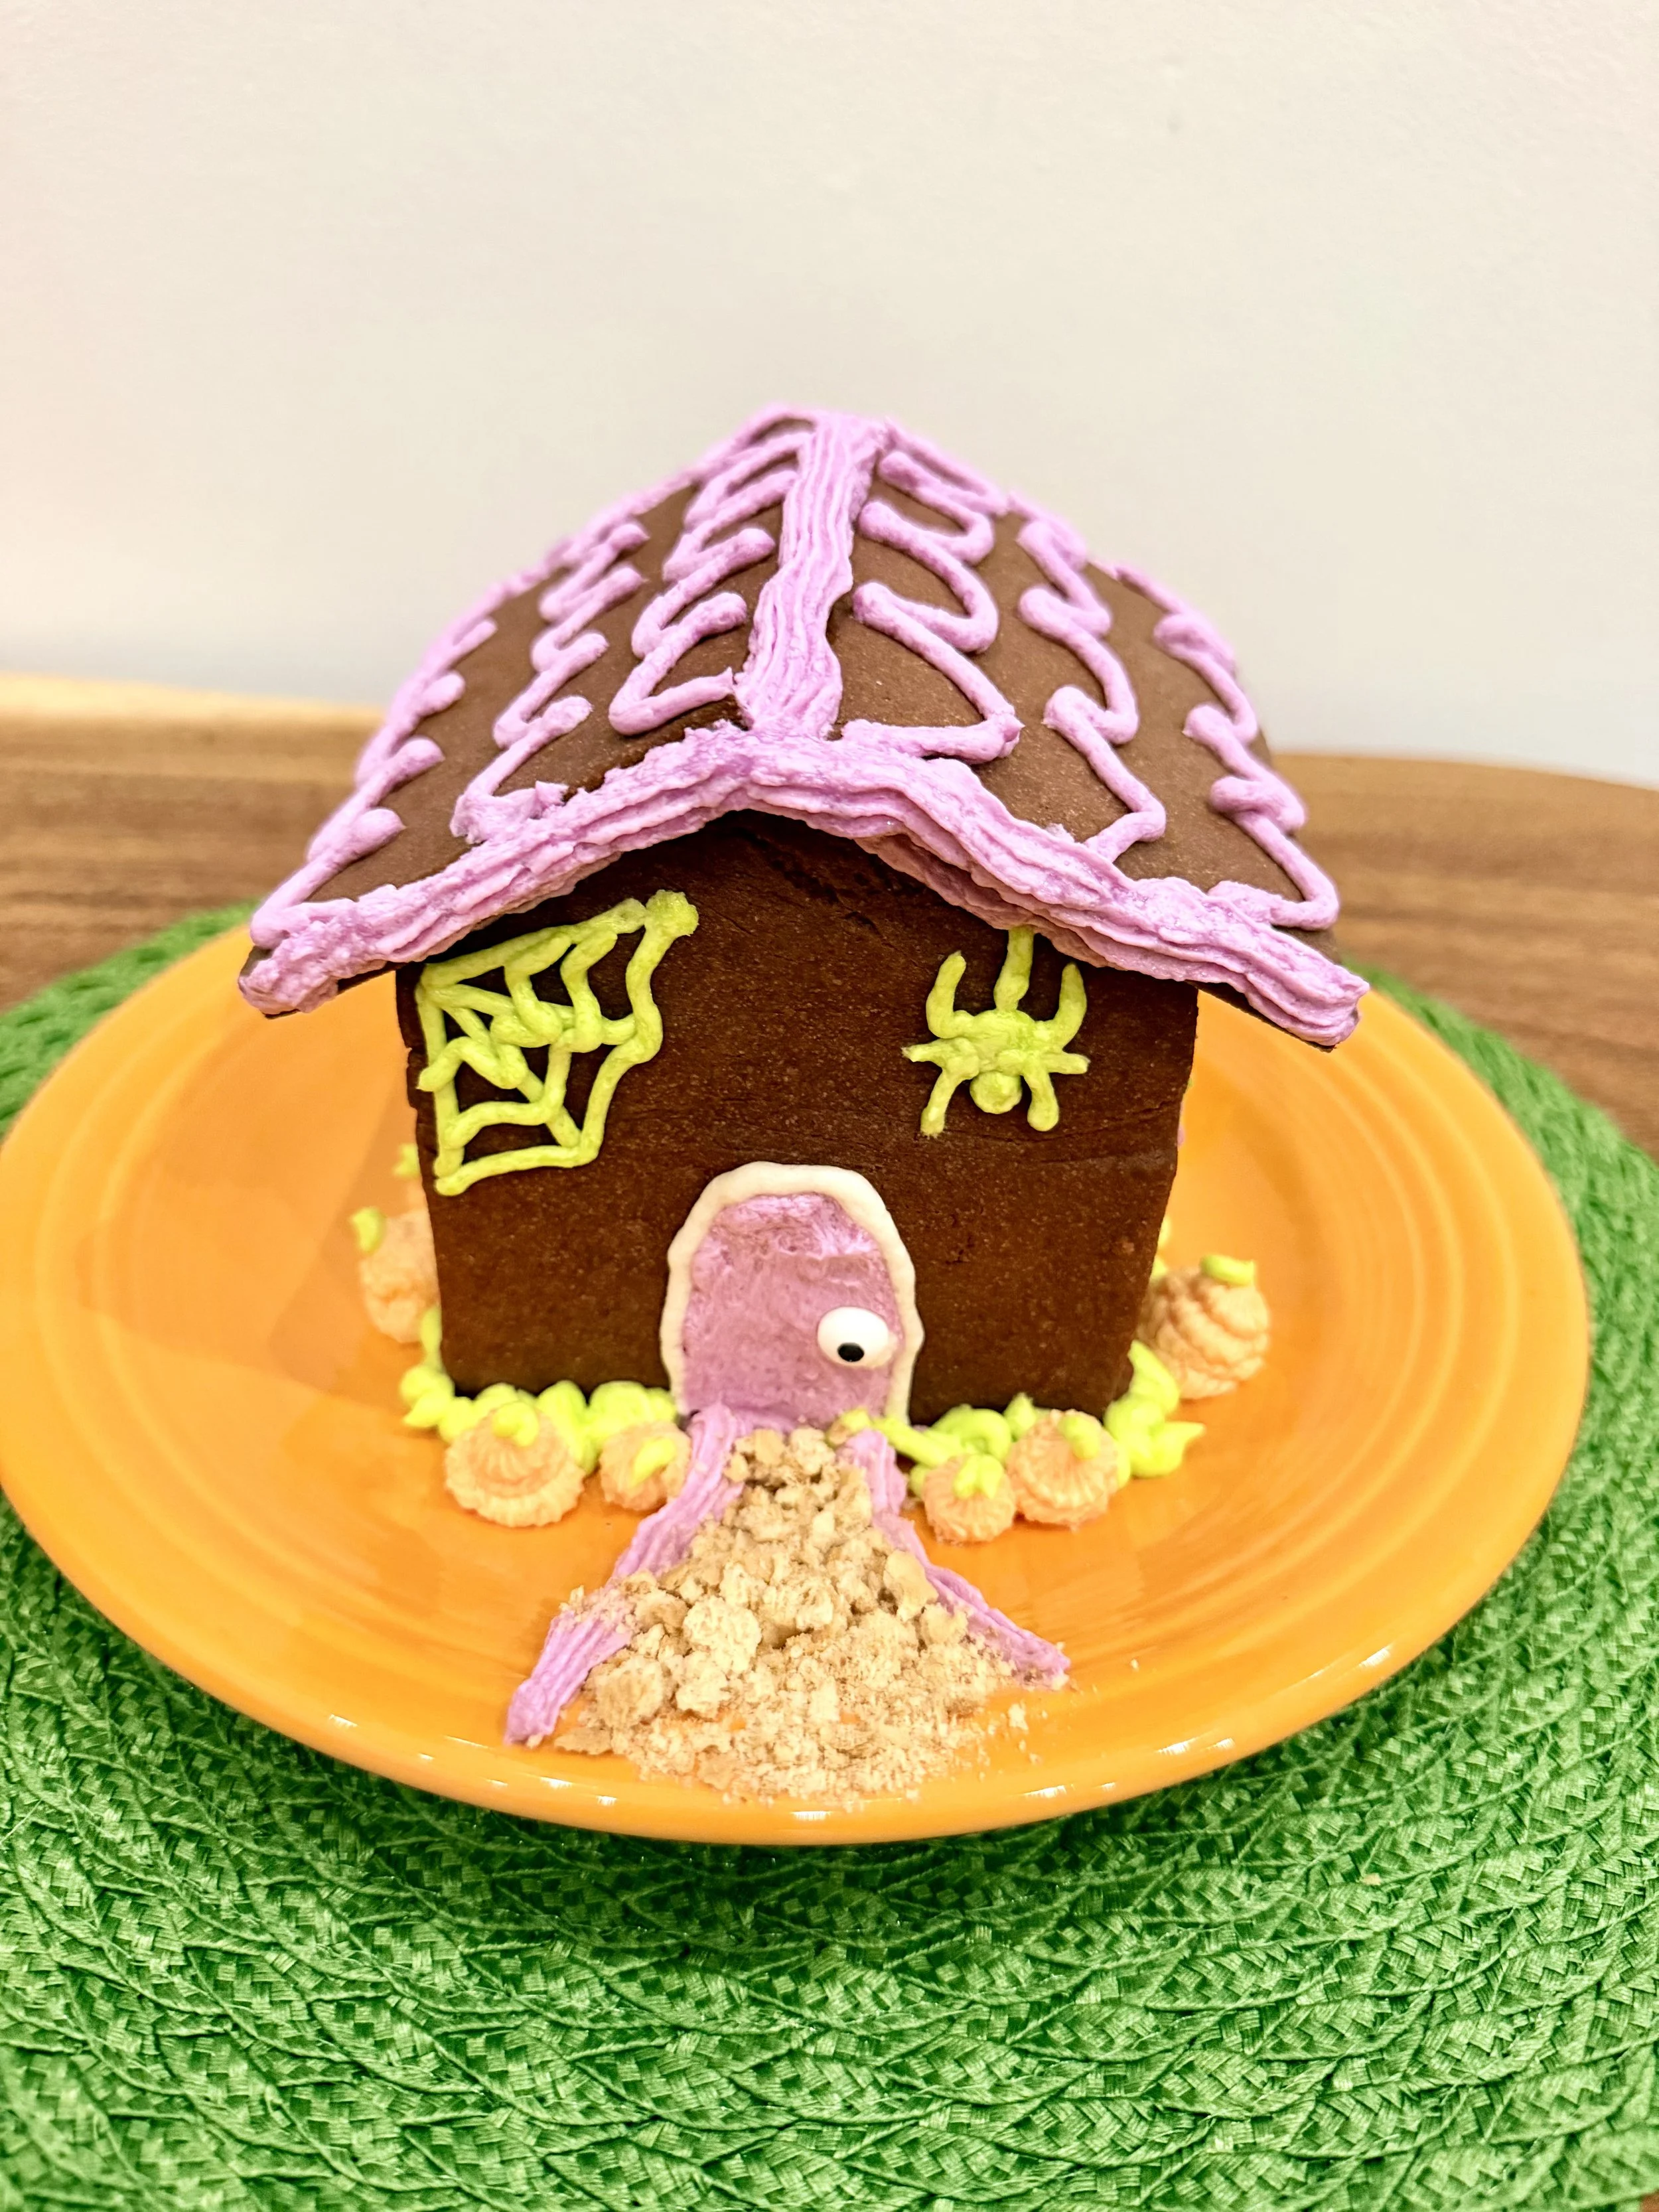
Chocolate Haunted Cookie House: How to Make a Cute Halloween Cookie House
Make a cute, not-too-spooky Halloween cookie house with chocolate cookie walls, colorful buttercream, 3-D frosting pumpkins and a friendly ghost! This kid-friendly haunted cookie house includes the full chocolate cookie recipe, decorating tips and step-by-step assembly instructions.
Halloween is one of our favorite holidays around here—besides Christmas, of course!
If you’ve been here before, you probably know that I have a thing for cookie houses. It all started because I don’t really like gingerbread, but I LOVE decorating gingerbread houses. So I made my own version using a sugar cookie house and buttercream frosting instead.
Since then, I’ve turned that same basic idea into houses for Valentine’s Day, St. Patrick’s Day, Easter and more.
So naturally, we needed a Halloween house!
Because I have little guys, though, I didn’t want our haunted house to be too haunted. I wanted something cute, colorful and just spooky enough to feel like Halloween without actually being scary.
And for the first time, I decided to make the house itself chocolate.
Chocolate Halloween Cookie House
If you’d like to see all of the different houses I’ve made, start with my Sugar Cookie House Guide, where I’ve collected my favorite ideas, tips and designs.
Why I Made a Chocolate Haunted Cookie House
I LOVE chocolate, but somehow I had never thought about making a chocolate cookie house before.
Which is funny, because the entire reason I started making sugar cookie houses in the first place is that I don’t like gingerbread!
When I started planning the Halloween version, I knew exactly what colors I wanted:
💜 Purple
🧡 Orange
💚 Green
I pictured those bright Halloween colors against a dark house.
At first, I thought I’d make my regular sugar cookie house and use black frosting.
But black frosting and I aren’t always friends.
I’m not a professional baker, and even when I use black gel food coloring, I’ve found that sometimes I get black…and sometimes I get a really dark gray.
I also LOVE buttercream frosting and knew I wanted to use it for this house. I didn’t want to add so much black food coloring that I was fighting with the frosting when the whole point of these houses is to make something that’s fun to decorate and tastes good enough to eat.
Then it hit me:
Why not make the HOUSE dark instead?
A chocolate cookie house would give me that dark Halloween backdrop while letting the purple, orange and green buttercream really pop.
Plus…chocolate.
Decision made.
A Cute Haunted House for Little Kids
Since I’m making this with my kids in mind, I wasn’t going for a creepy abandoned haunted mansion.
We’re going for cute haunted house.
Think bright frosting, colorful pumpkins, candy and a friendly ghost rather than anything genuinely frightening.
That’s generally how we like to do Halloween around here—festive and silly with just enough spooky thrown in.
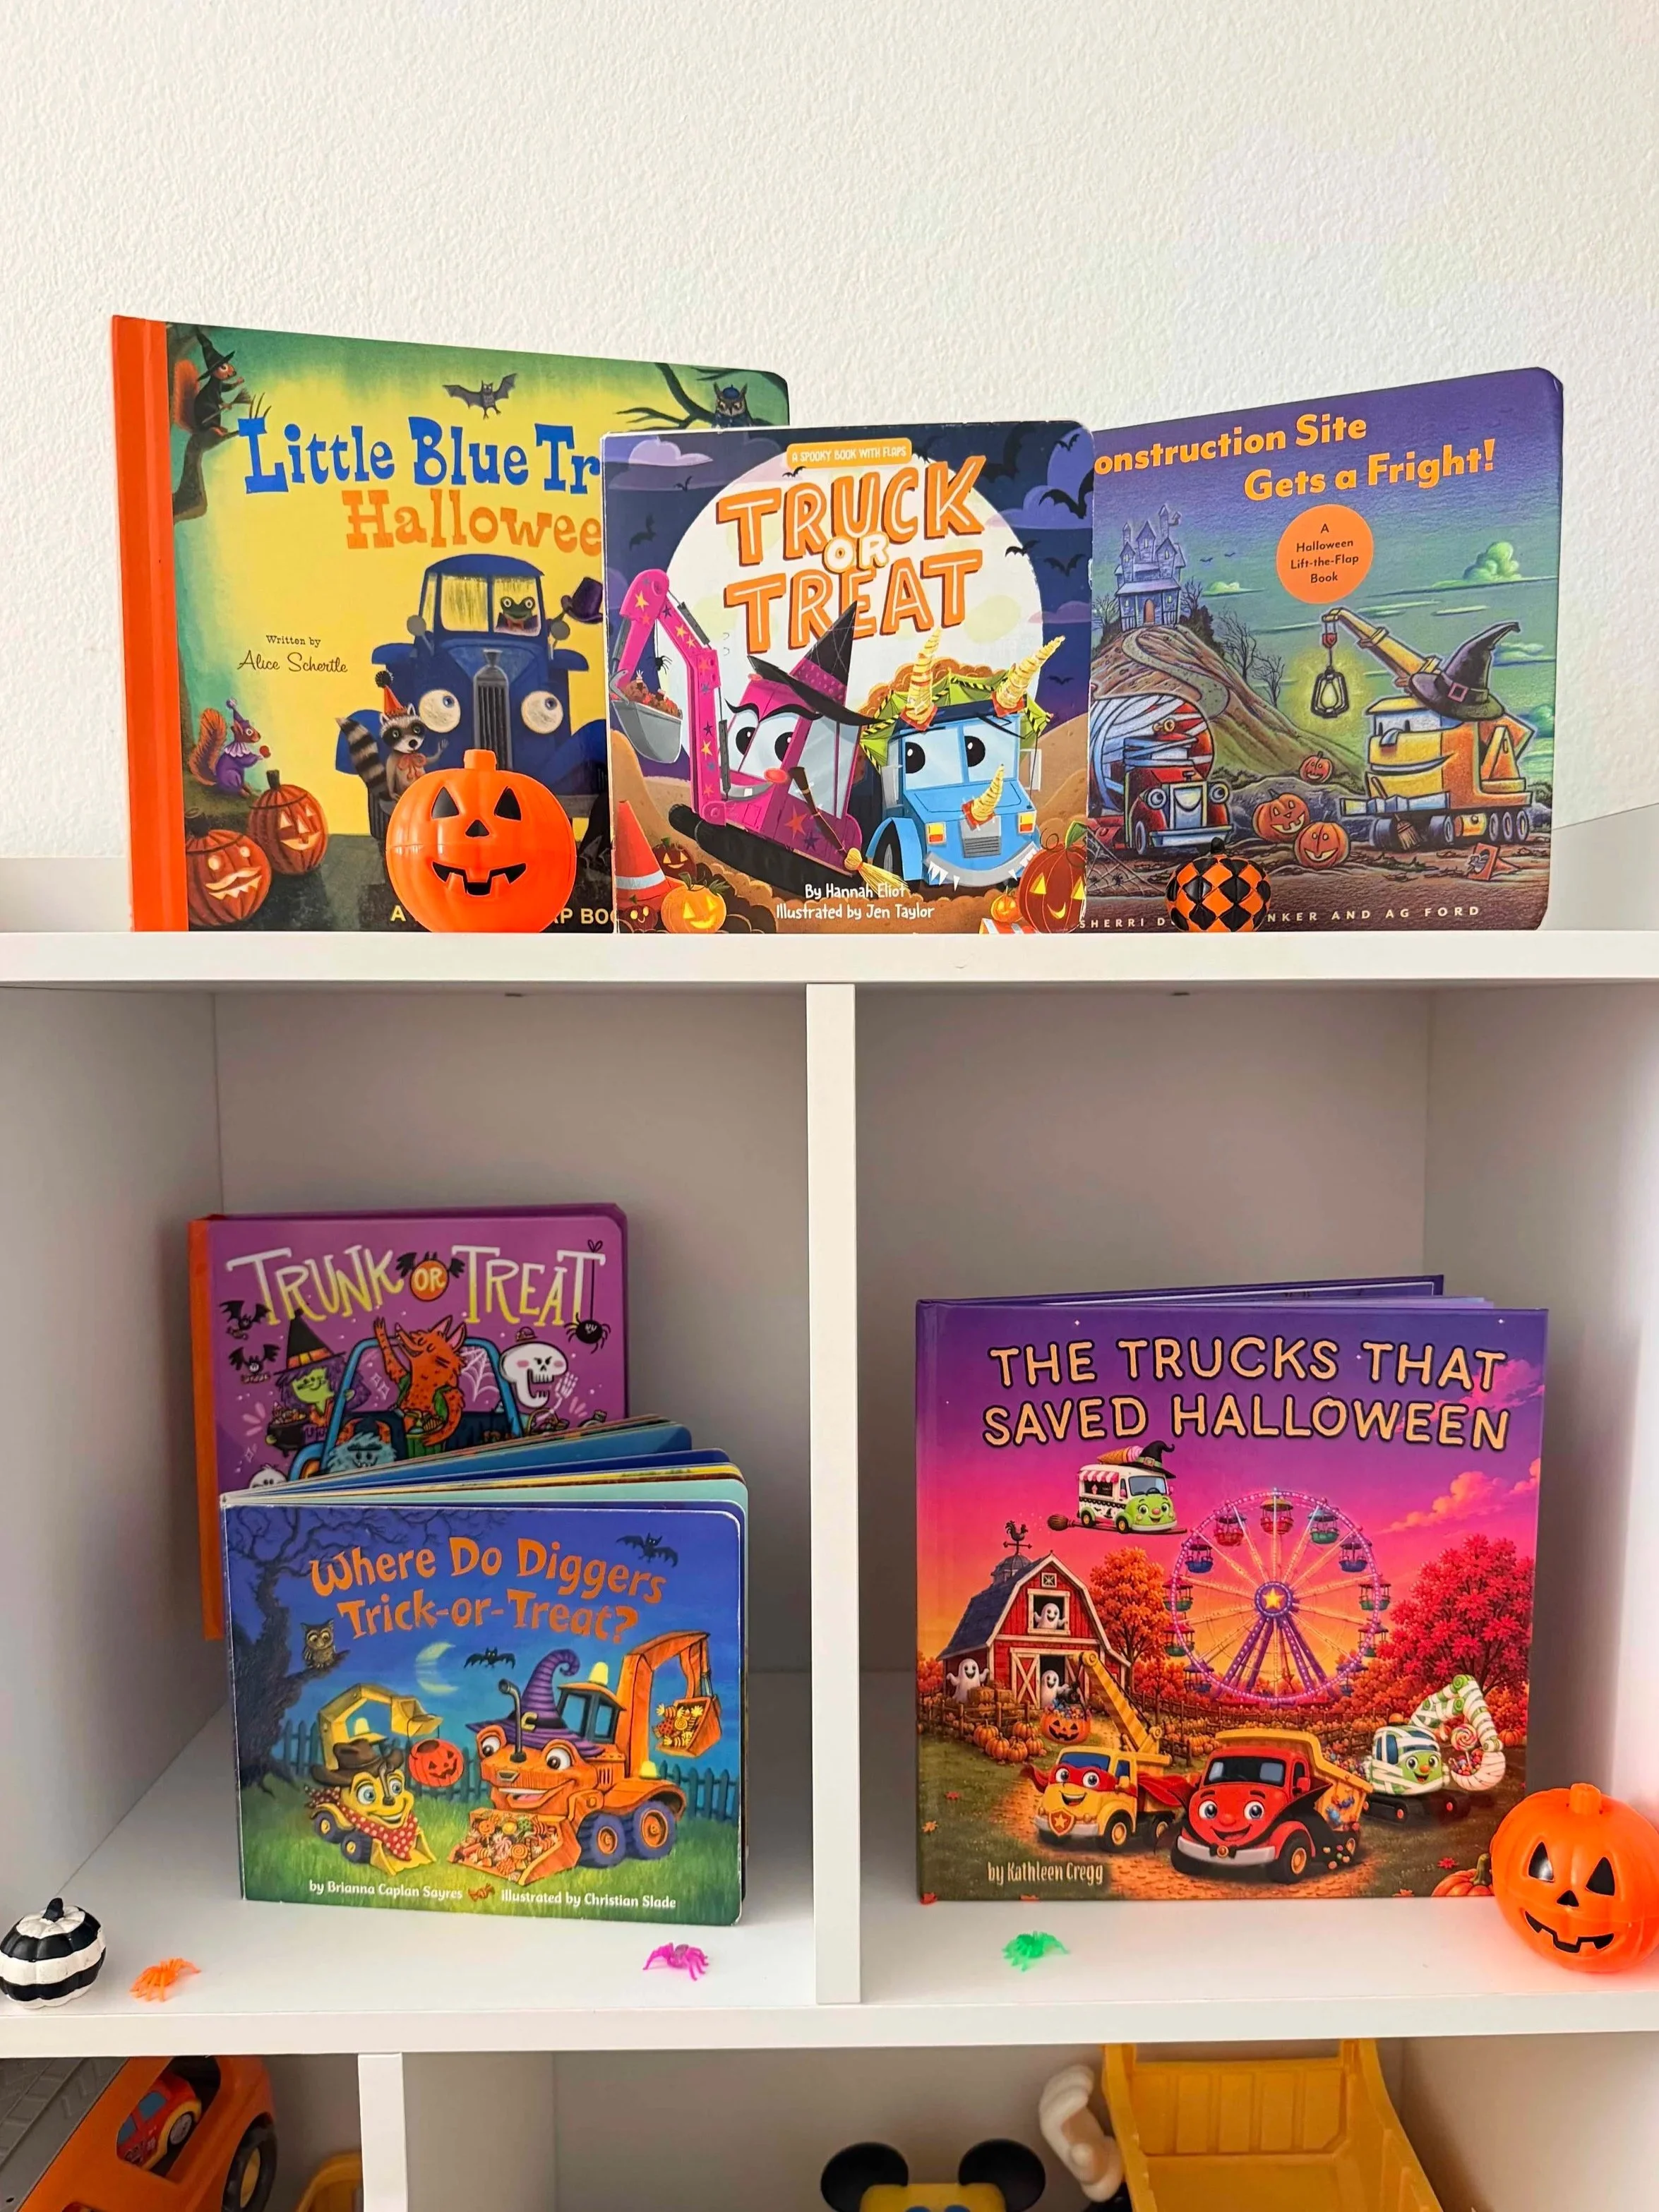
I actually wanted the ghost on the house to have the same happy, friendly feeling as the ghosts in my newest children’s book, The Trucks That Saved Halloween. I wanted the book to make Halloween feel magical and fun for little kids without being scary, and that seemed perfect for our cookie house too.
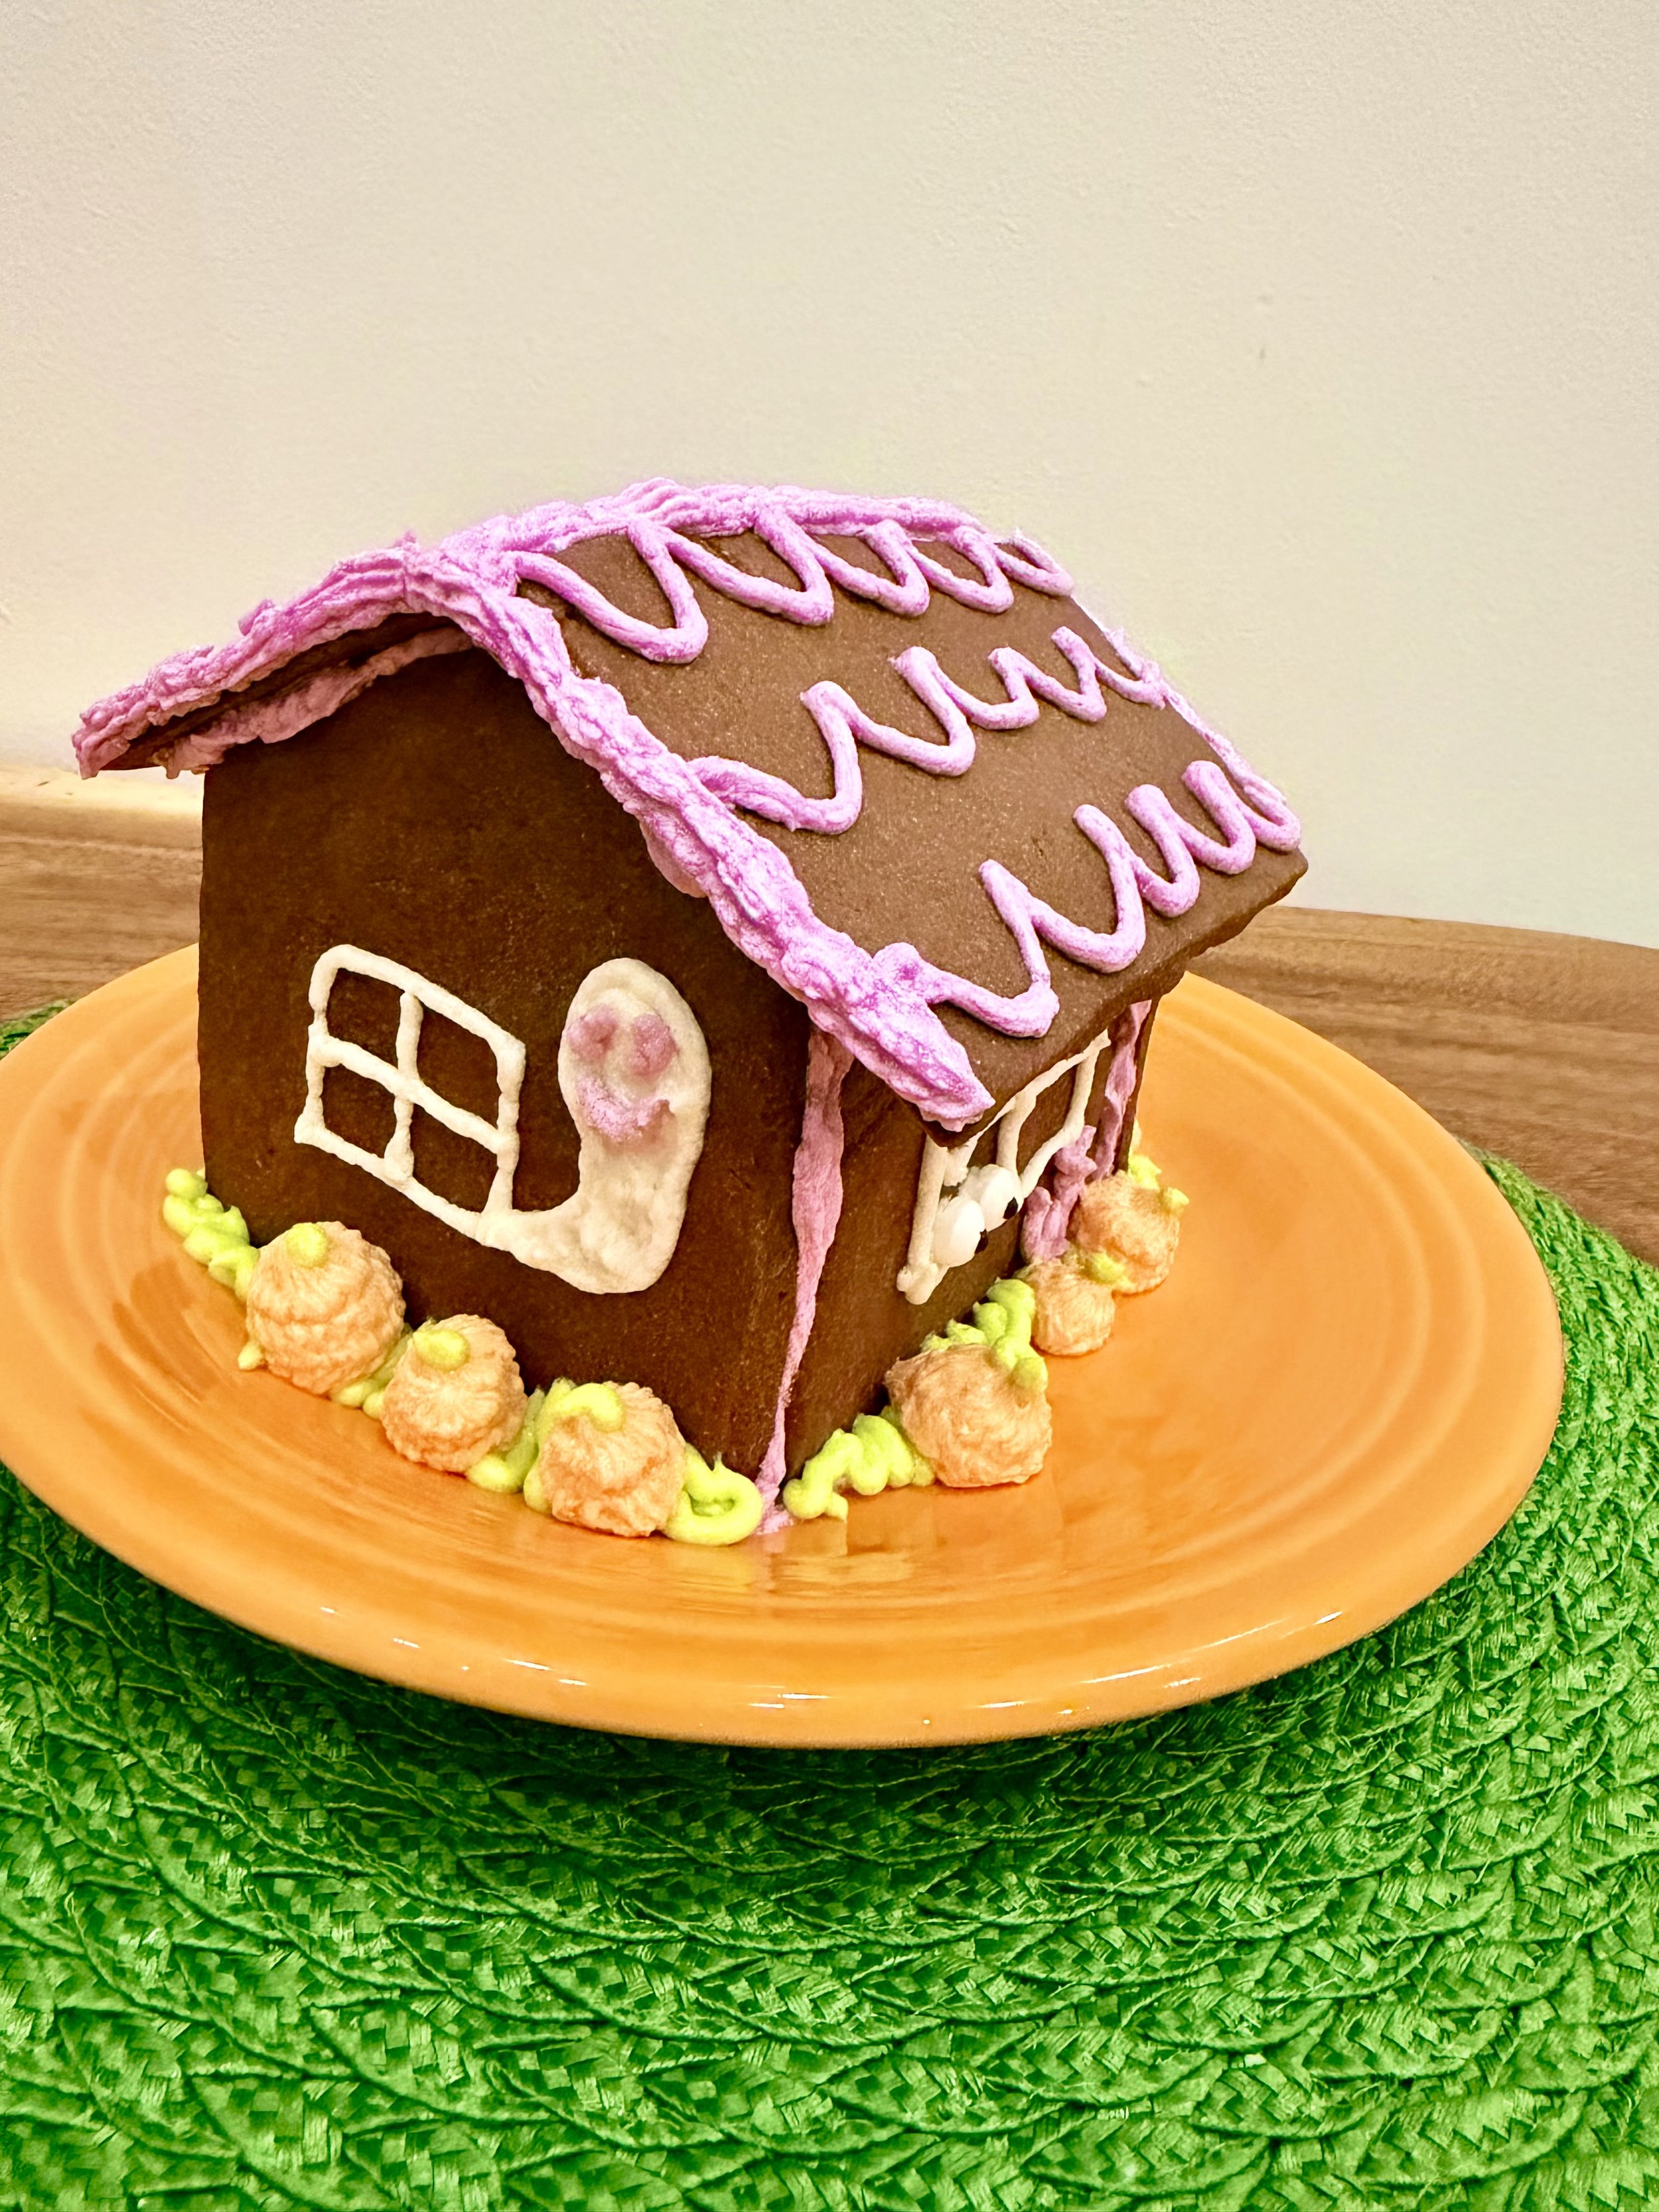
Frosting Friendly Ghost on Chocolate cookie house
Use My Cookie House Template
You don’t have to figure out how to engineer a cookie house from scratch!
I use the same basic house template for my different holiday cookie houses and change the dough, colors and decorations depending on what I’m making.
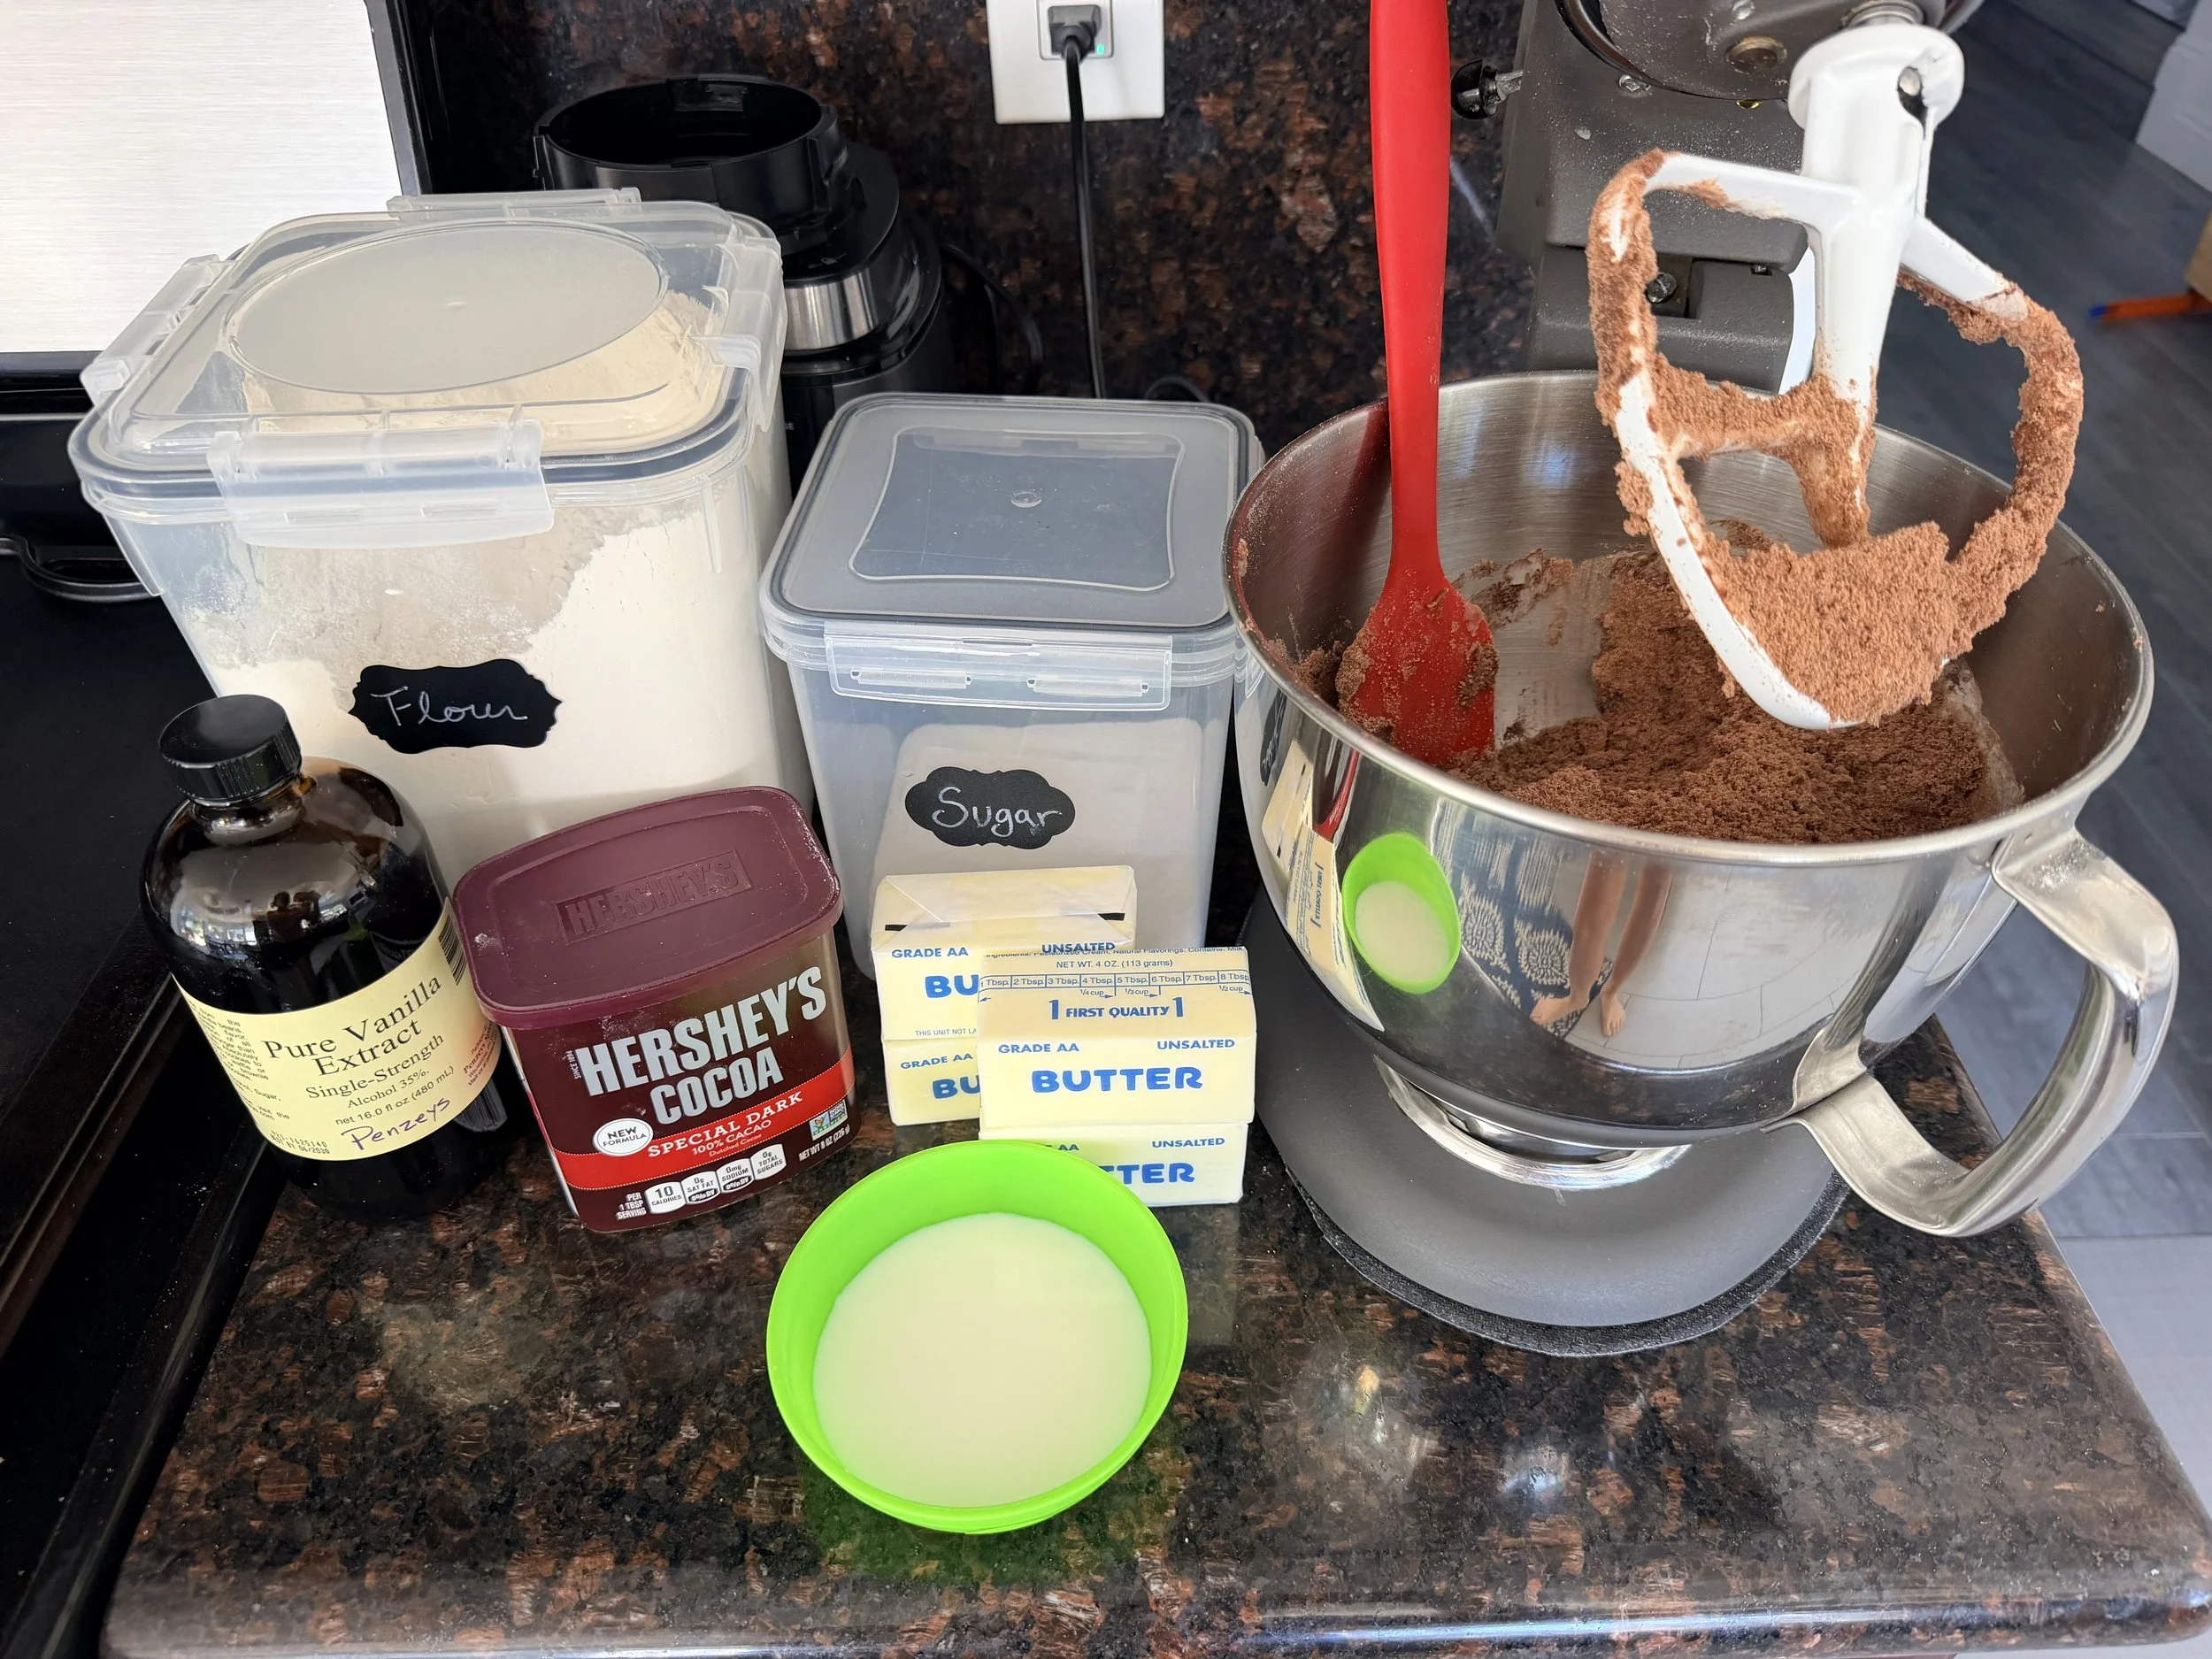
Chocolate Cookie House Ingredients - easy to make with kids!
You can also read my Printable Gingerbread House Kit Guide for more tips on working with the template and putting your house together.
For Halloween, we’re using that familiar house shape but giving it a completely different look with chocolate cookie walls, bright Halloween buttercream and spooky-cute decorations.
Making My First Chocolate Cookie House
I’ve experimented with this little house quite a bit now—from my Valentine’s Day Sugar Cookie House to my Leprechaun Trap Sugar Cookie House and Easter Sugar Cookie House—but this was my first time turning the actual cookie dough chocolate.
So yes, there was some trial and error involved!
That’s part of the fun of these houses for me.
I’m not trying to create a professional bakery showpiece. I want something I can make in my own kitchen, decorate with my kids and—most importantly—actually eat afterward.
The basic process is:
Make → Chill → Roll → Cut → Bake → Decorate → Chill → Build → Eat!
And I have one little trick that makes cutting out the house pieces much easier.
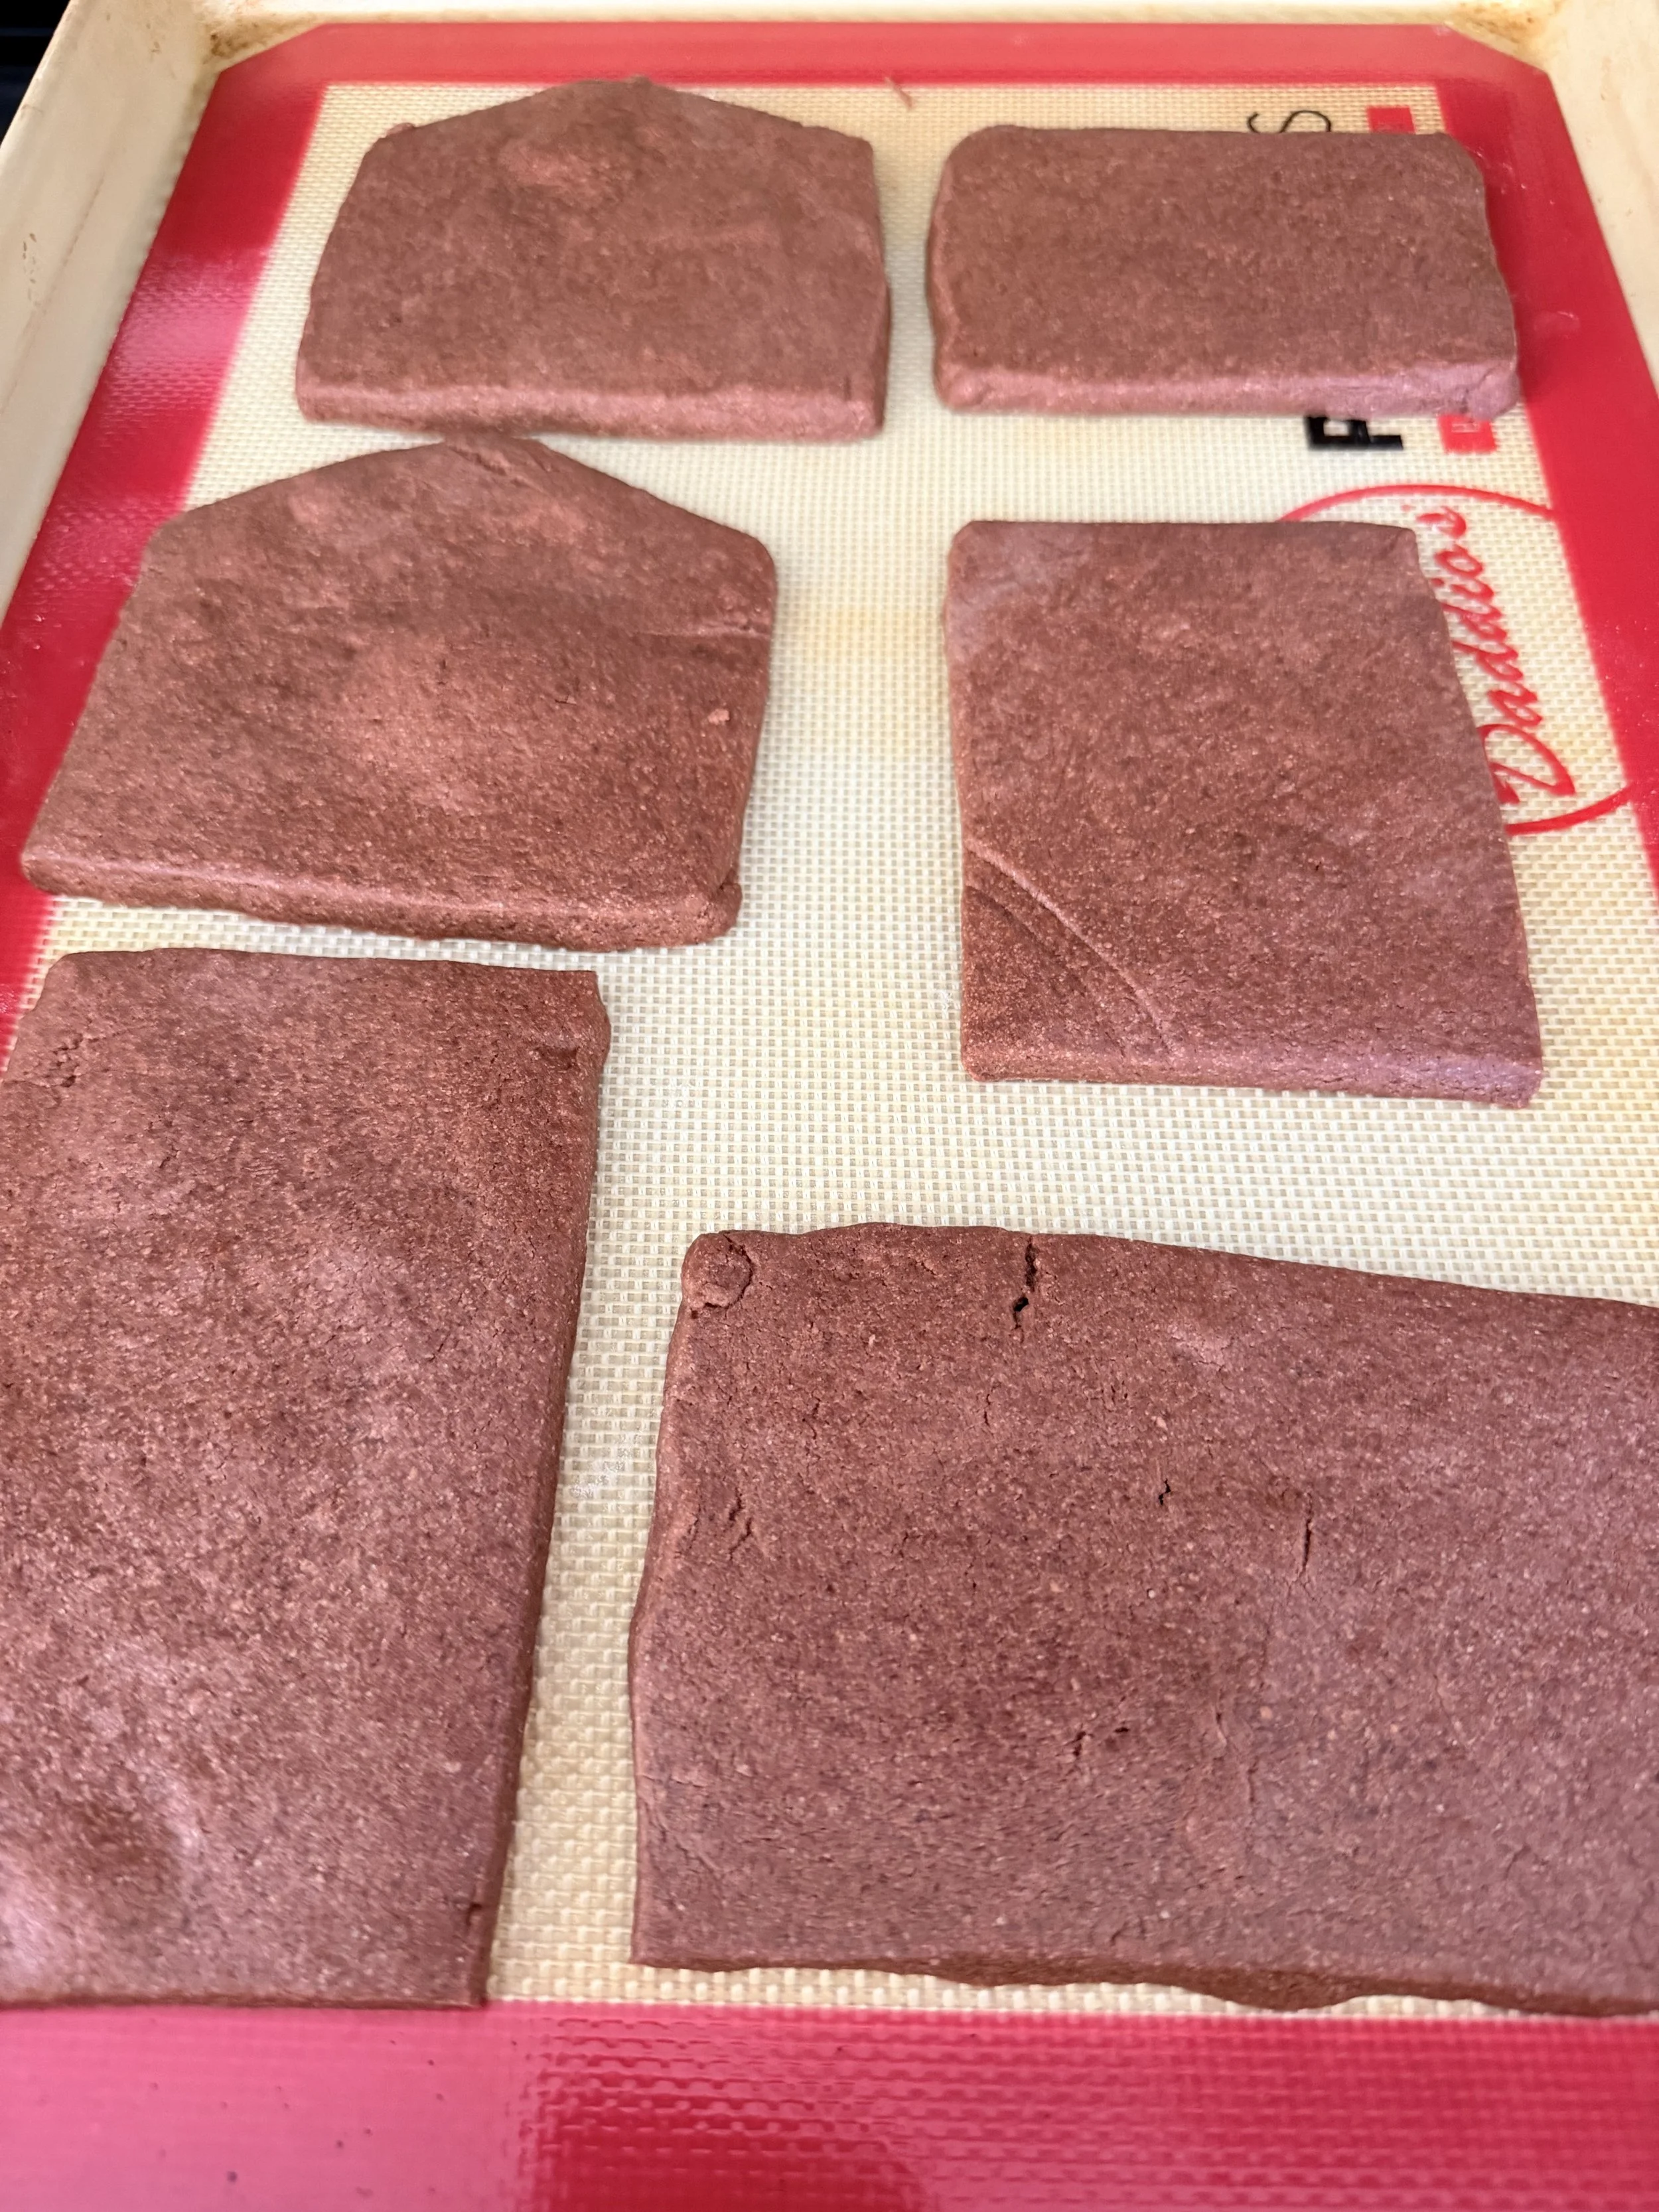
Chocolate cookie house pieces
Cut Your Cookie House With a Pizza Slicer
Once my chocolate cookie dough is rolled out, I place my house templates directly on top of the dough and cut around them.
My favorite tool for this is actually a pizza slicer!
It’s such a simple thing, but I find it much easier to get those long, straight edges with a pizza slicer than trying to work around the template with a knife.
I try to keep the dough an even thickness so all of the pieces bake consistently.
Once the pieces are baked, check your edges. If any have spread or become uneven, carefully trim them so they’ll fit together more easily when it’s time to assemble the house.
Then let everything cool completely before decorating.
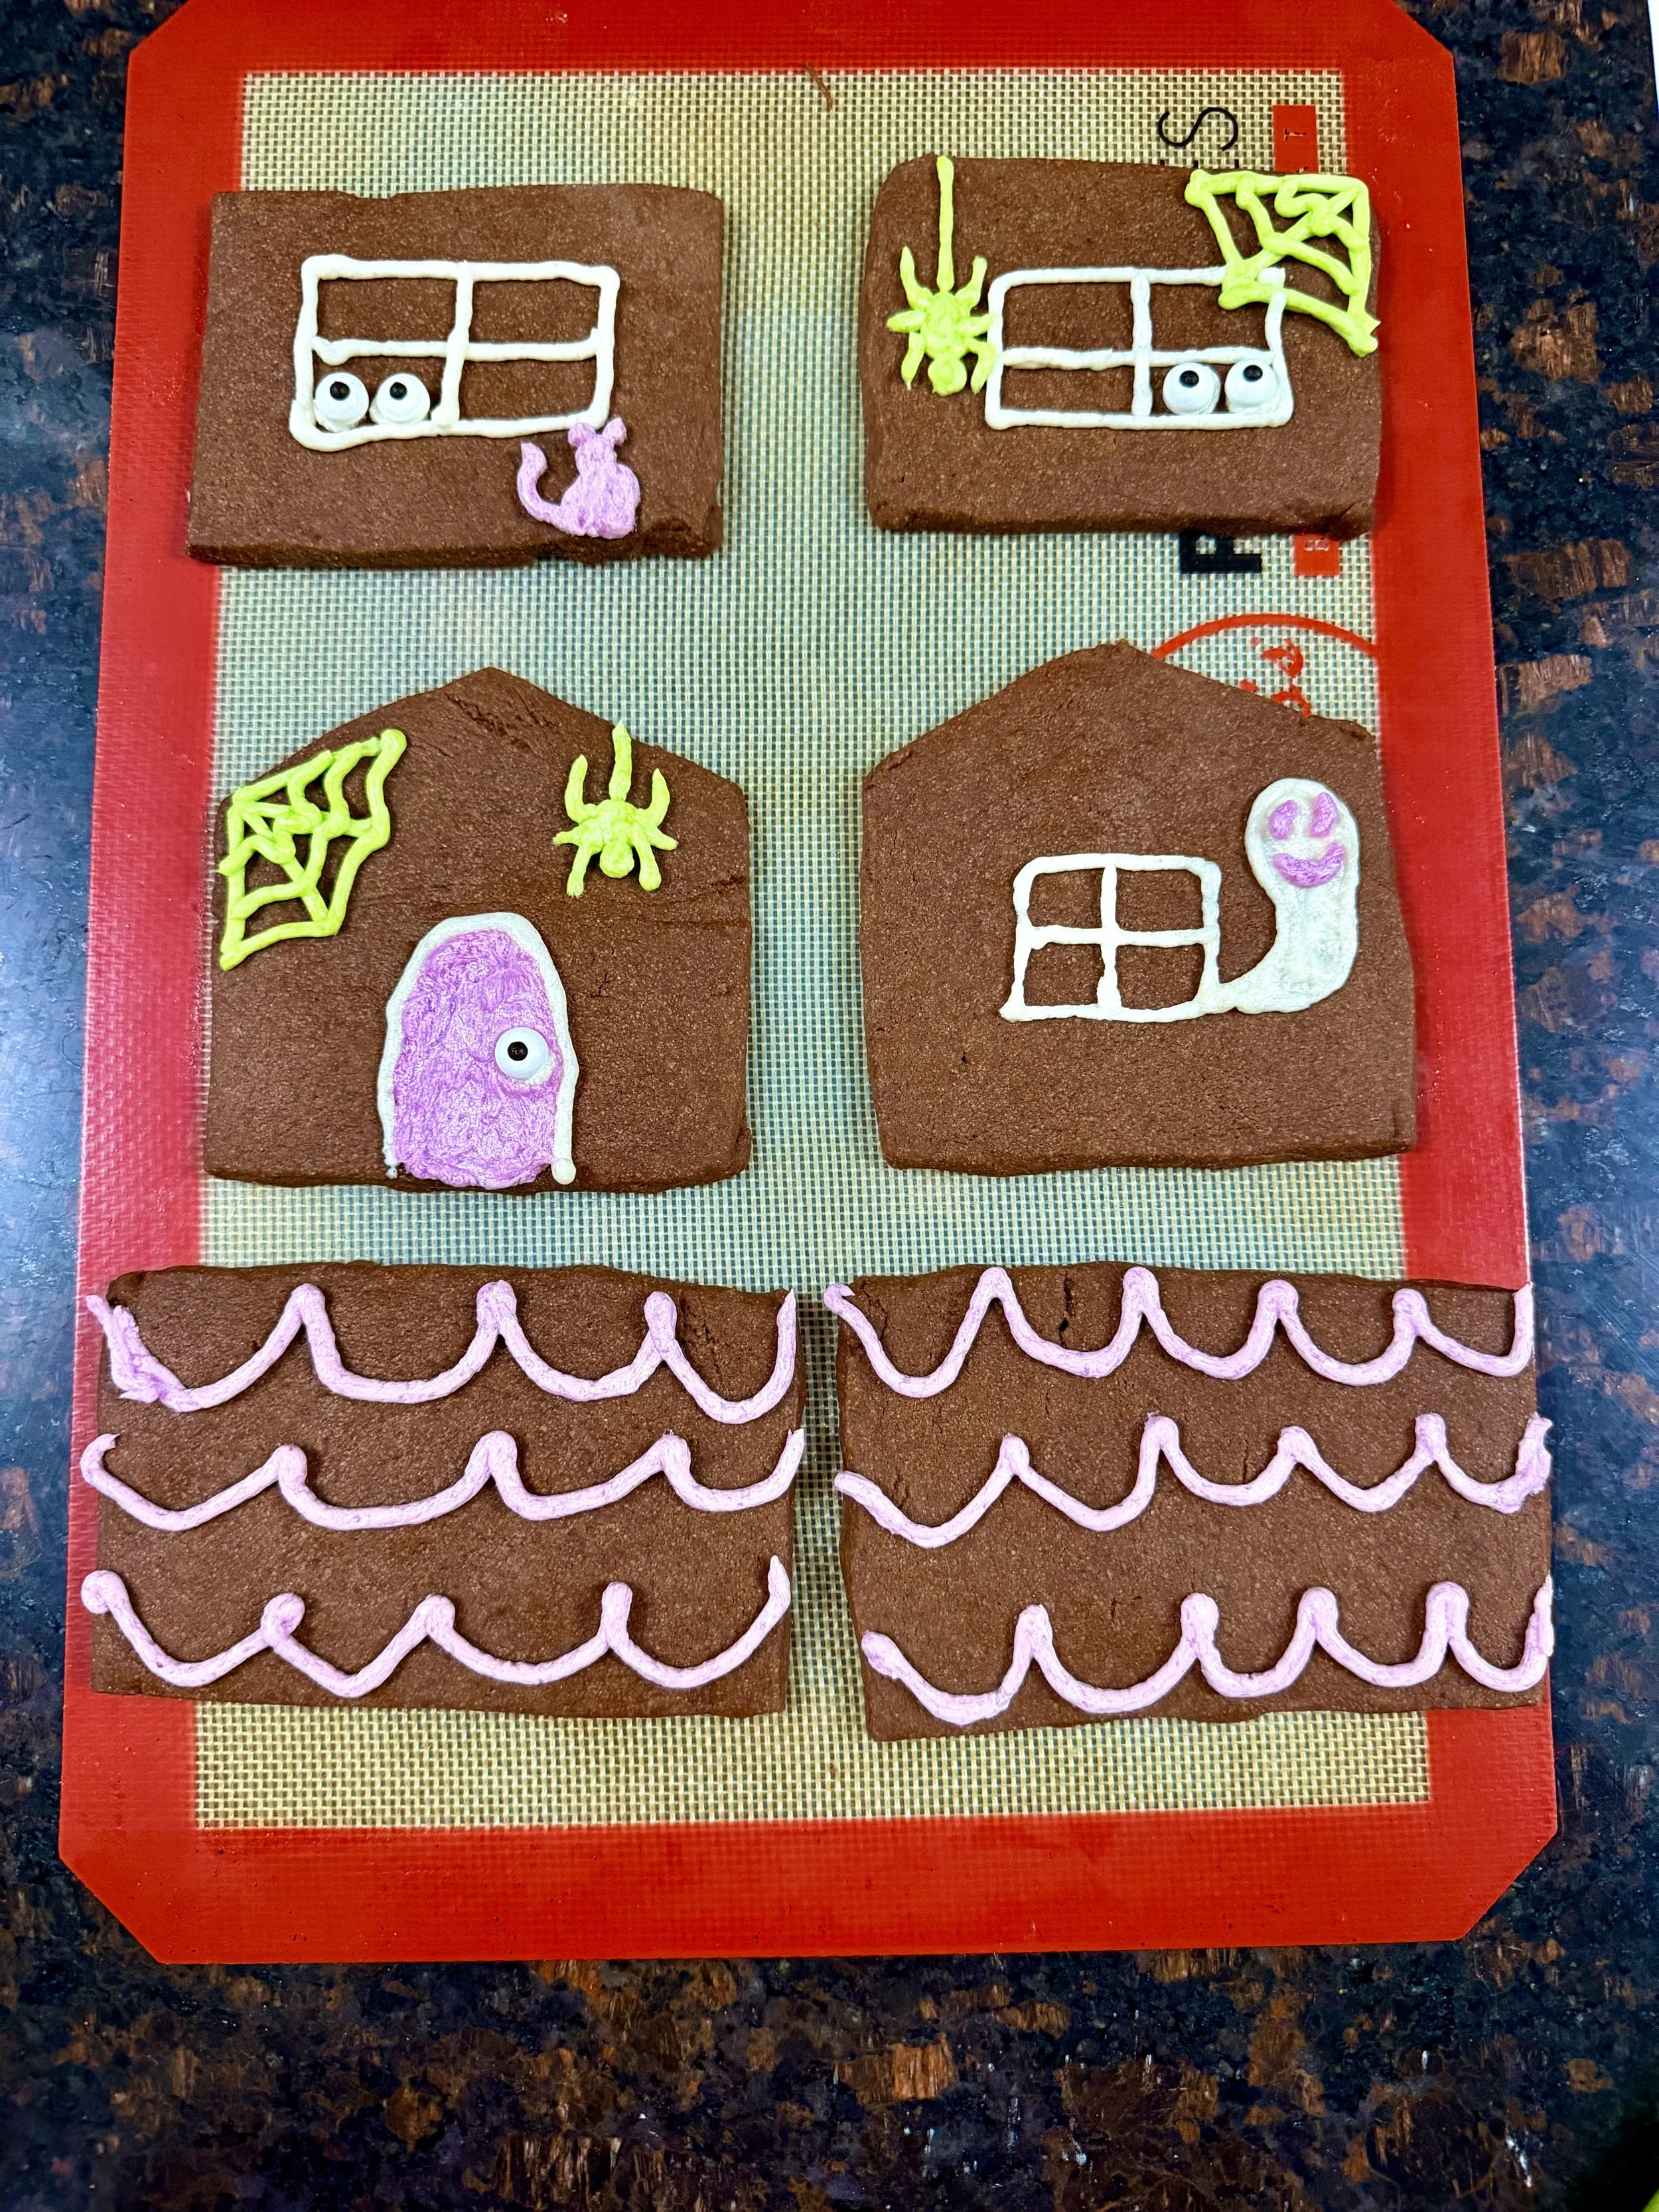
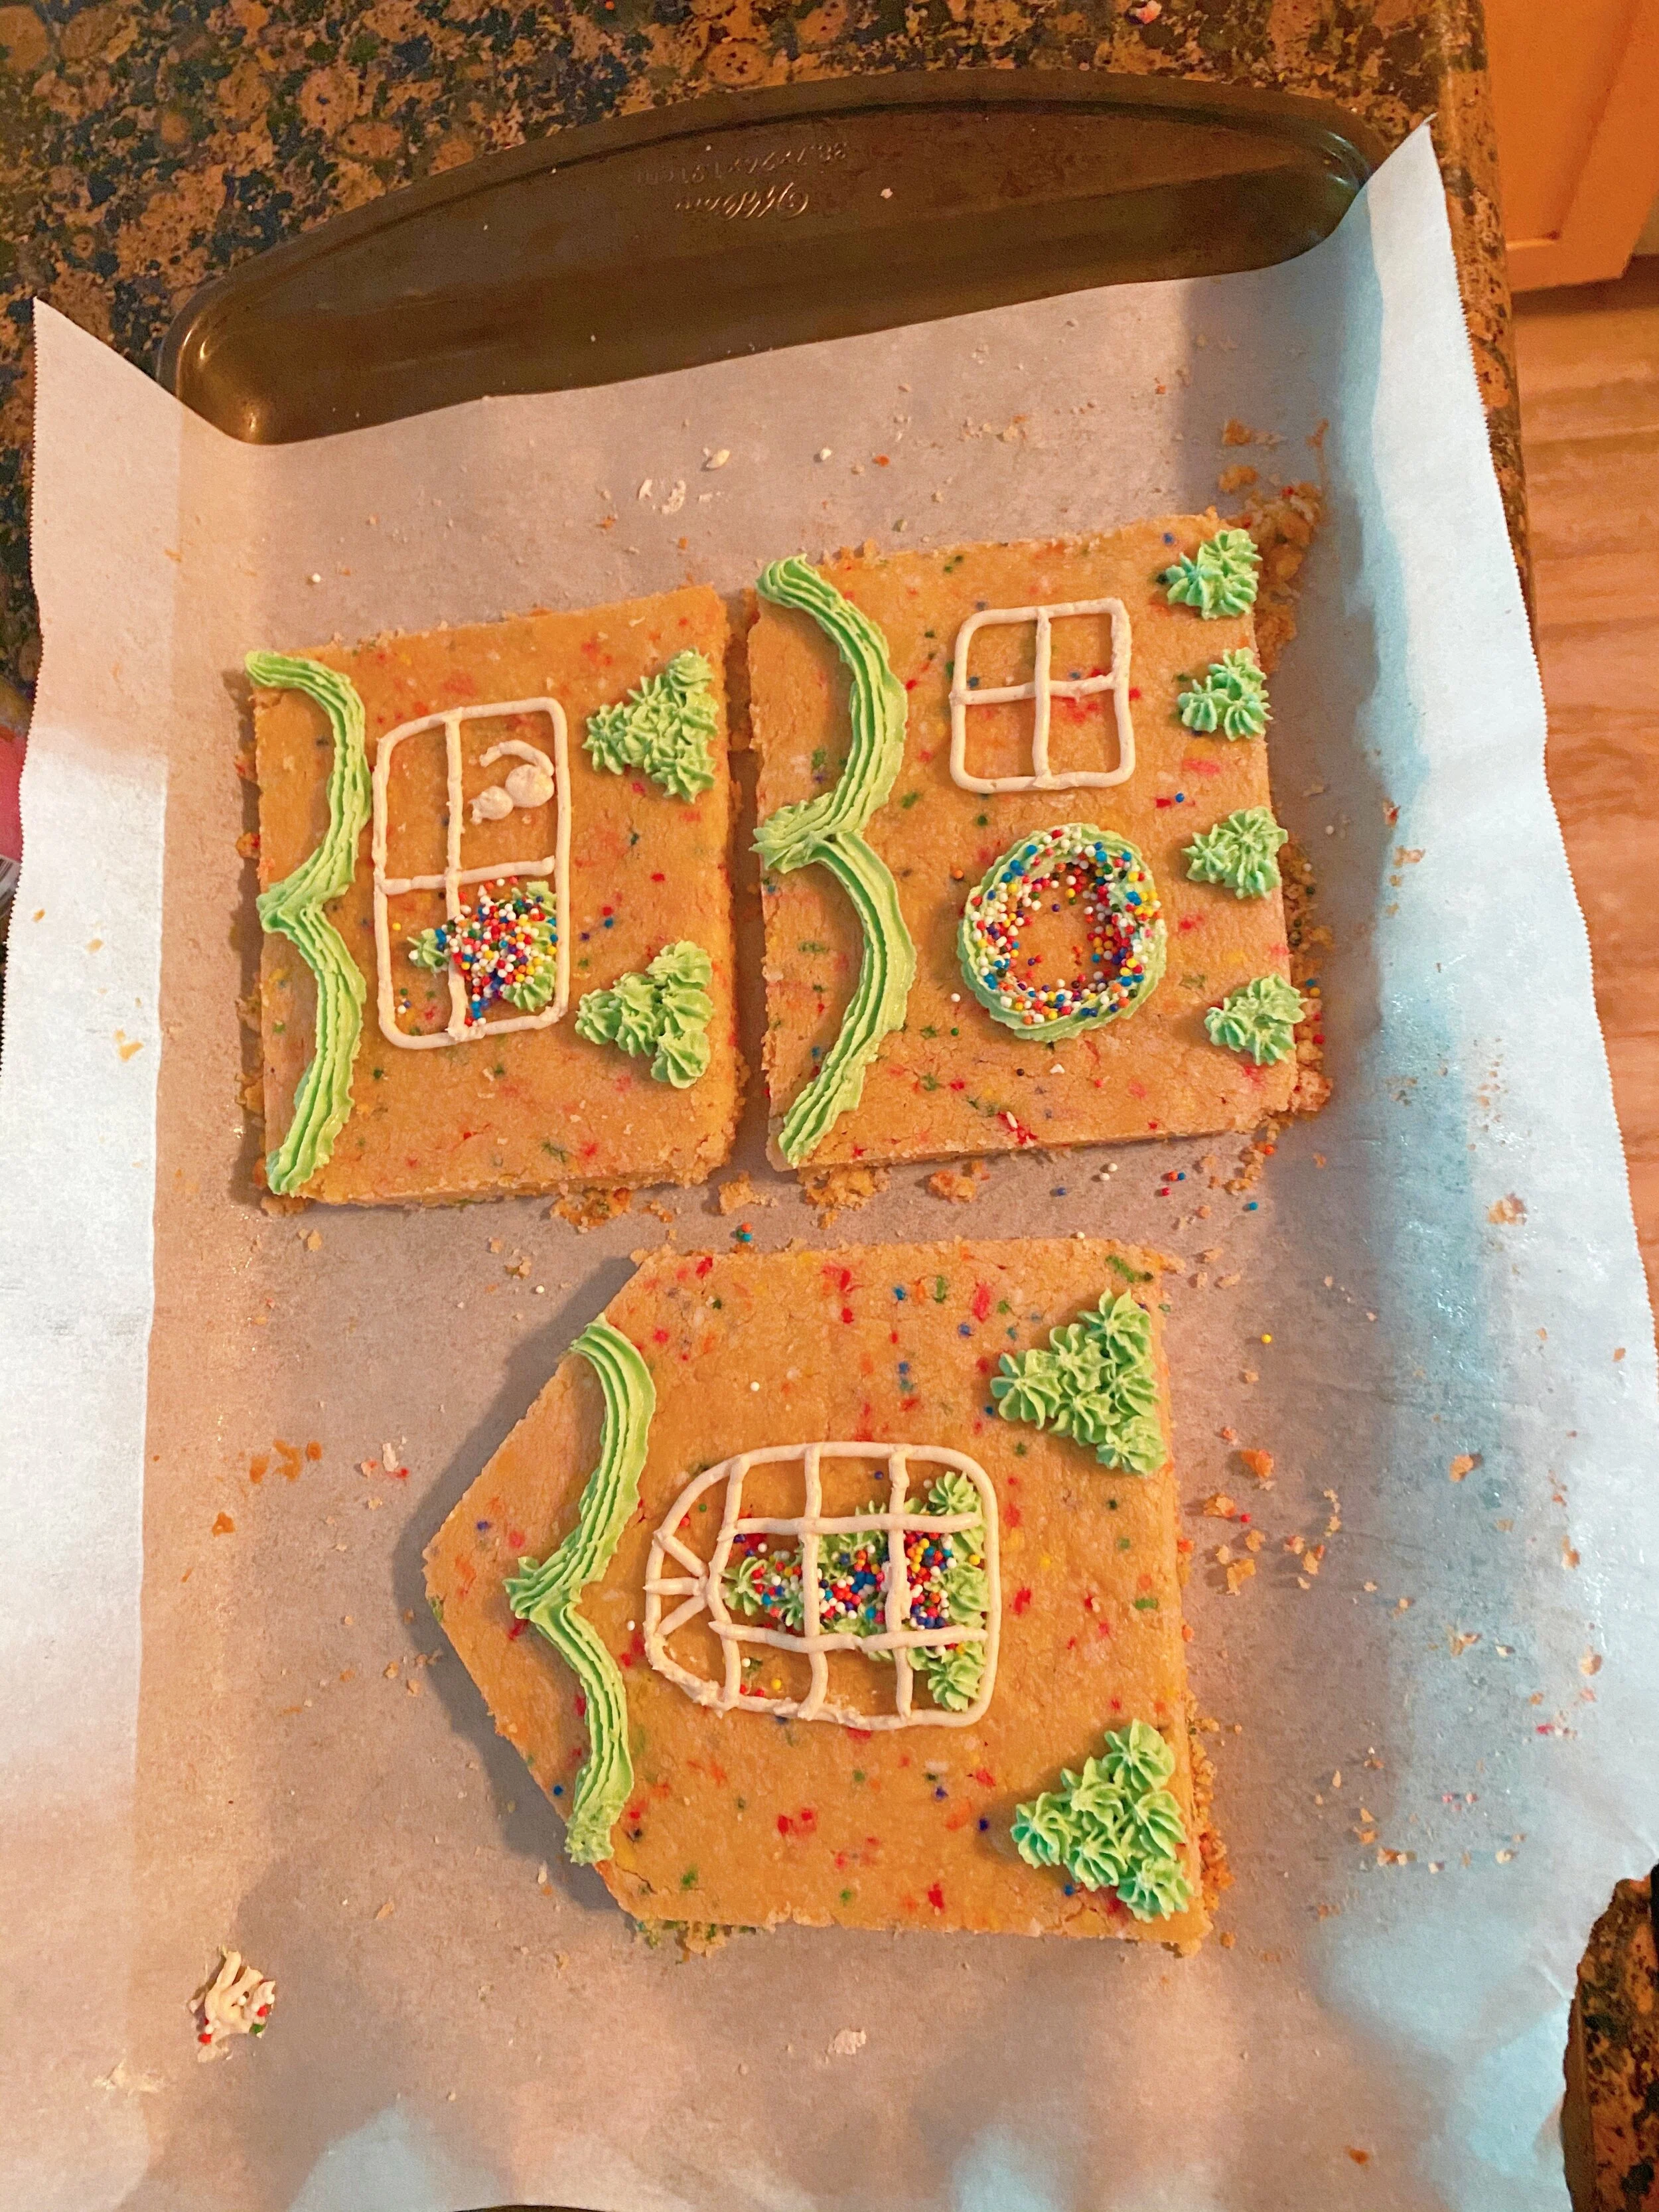
Decorate frosting on house pieces before assembly
Decorate the House BEFORE You Build It
This is probably my biggest cookie-house tip:
I decorate the pieces while they’re still flat.
I find it SO much easier.
Instead of assembling a blank house and then trying to pipe a straight line sideways onto a vertical wall, I can lay everything out on the counter and decorate comfortably.
This is when I pipe the windows, doors, roof and most of my Halloween details.
For my haunted house, I used my purple, orange and green buttercream against the chocolate cookie.
This was exactly what I had pictured when I decided to try chocolate dough. The colors really stand out against the darker cookie without me needing to make black frosting.
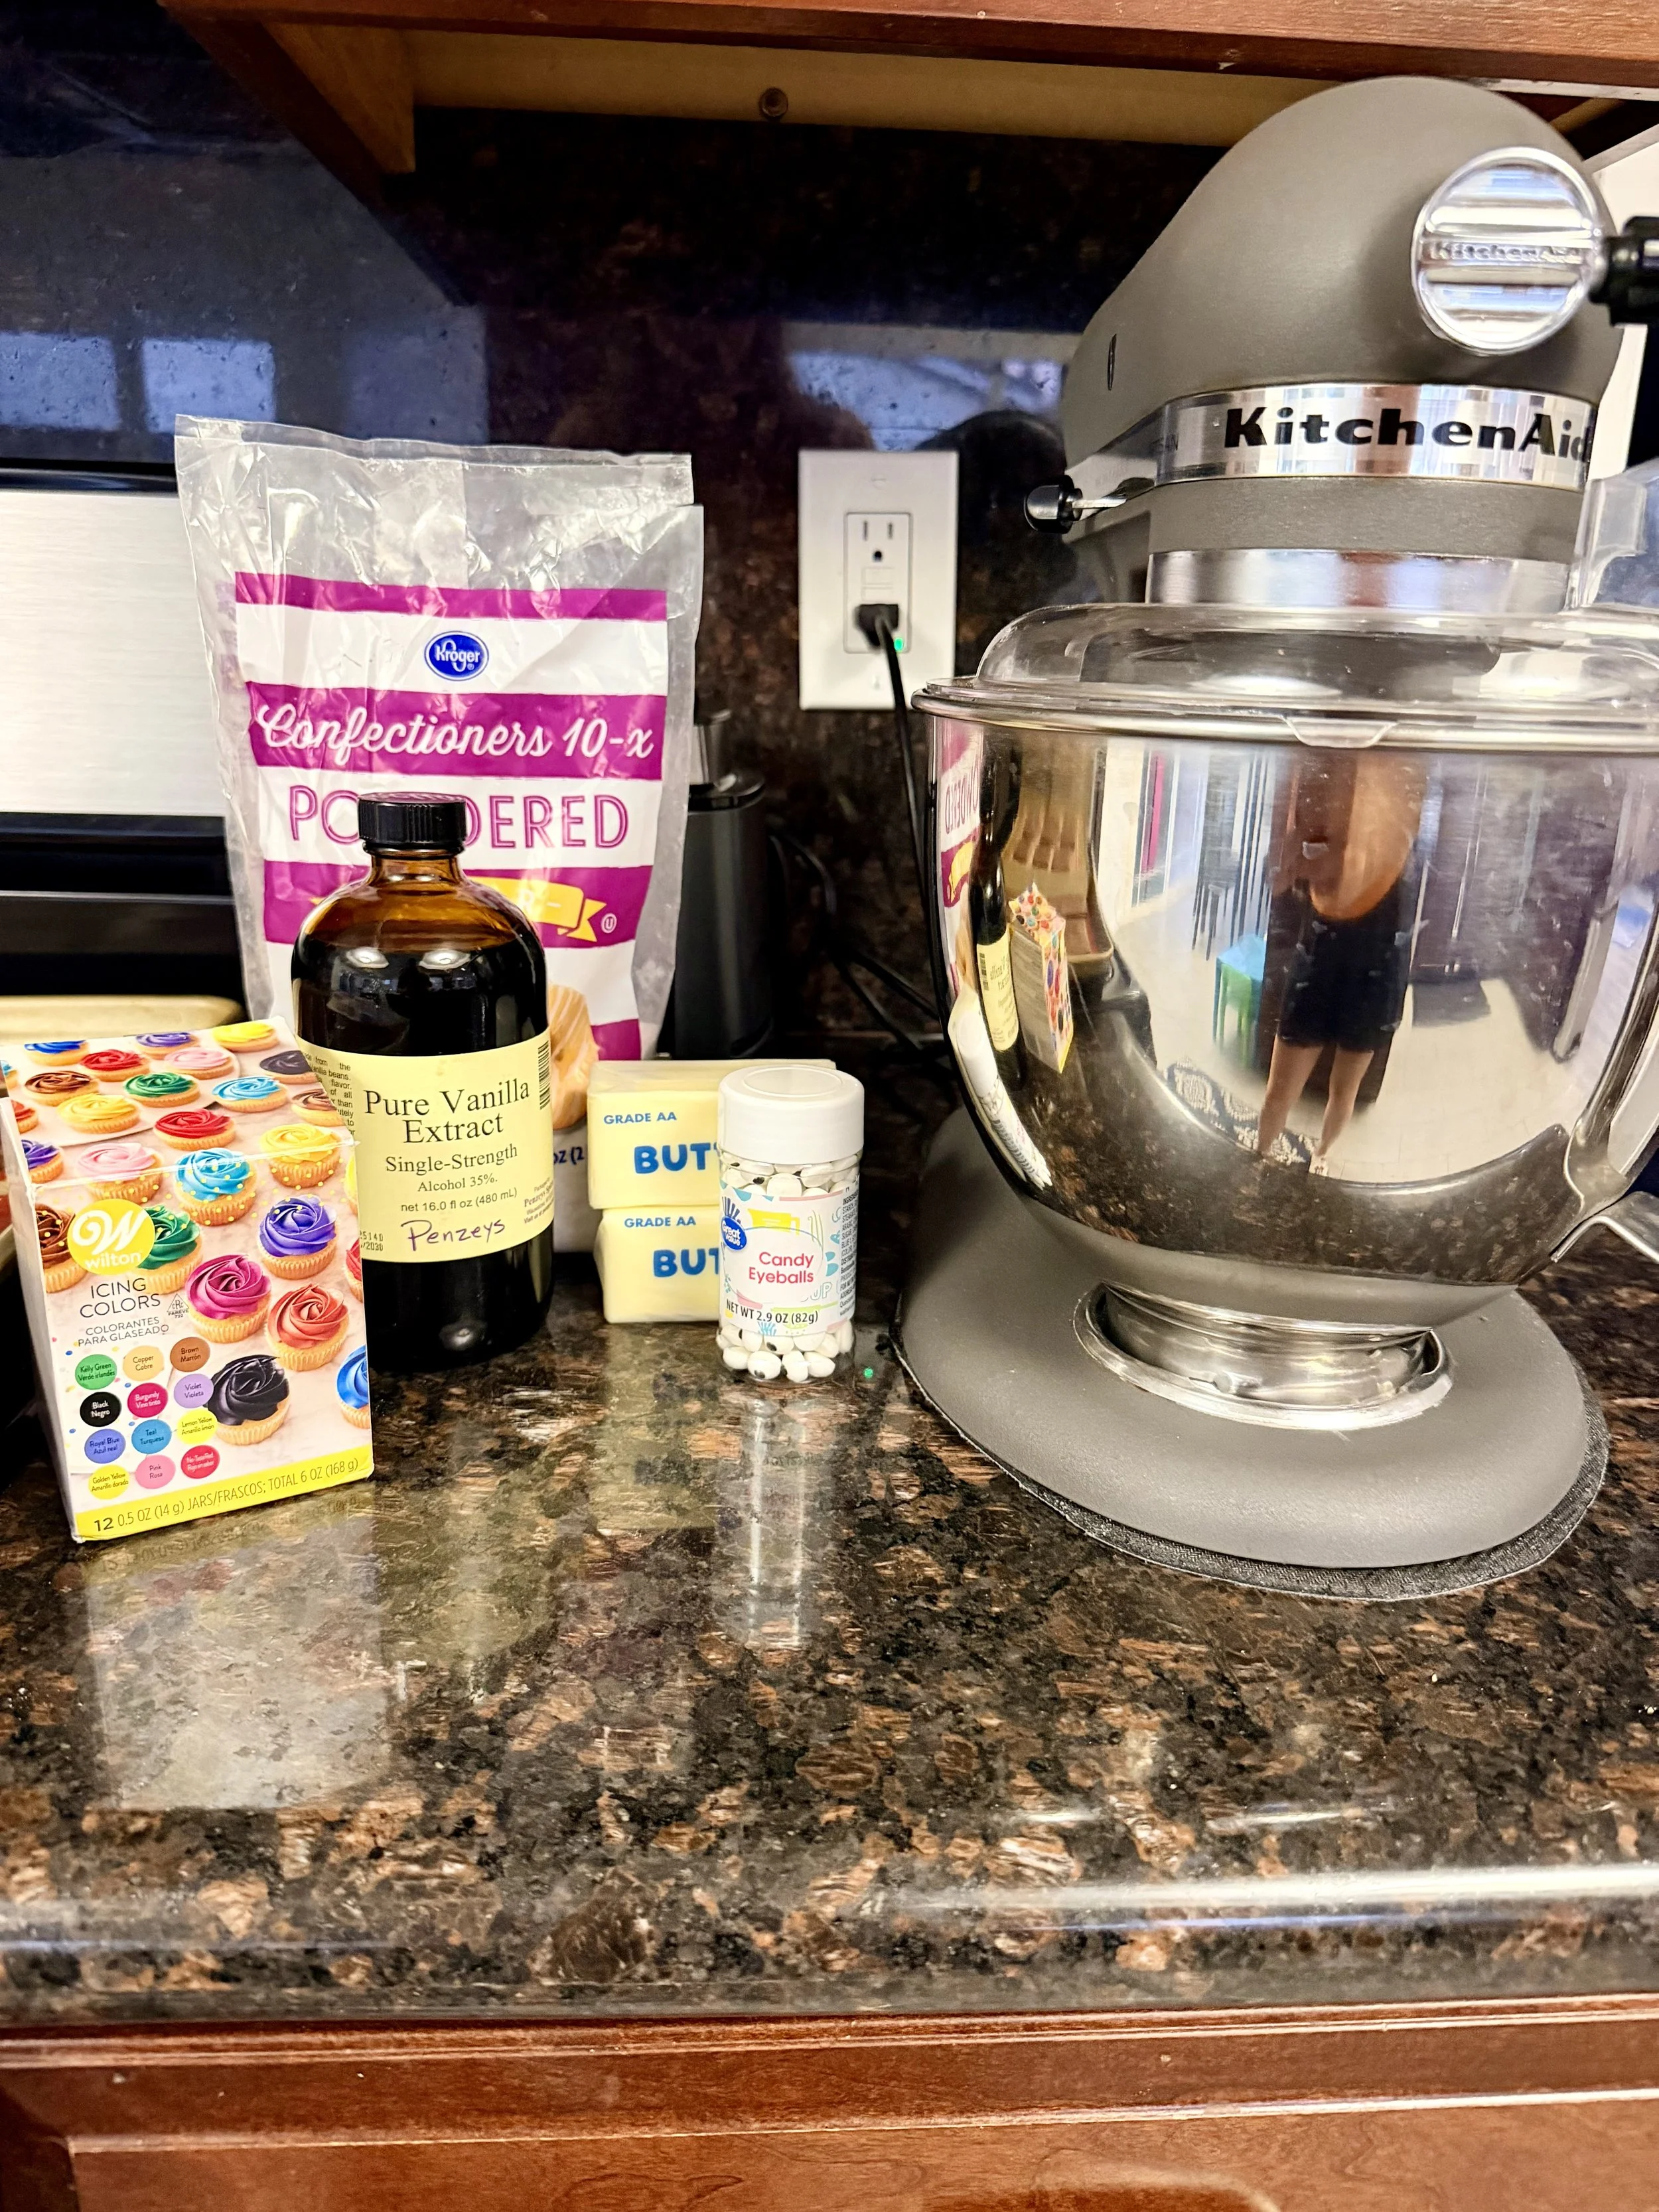
Buttercream frosting ingredients for Halloween Chocolate Cookie House
Why I Use Buttercream Frosting
There are other frostings you can use for cookie-house construction, but I’m sticking with my favorite:
Buttercream!
My intention is to eat this house.
I don’t want it to sit on my counter until December as a Halloween decoration. I want everyone to break pieces off and enjoy it.
So taste matters to me.
Buttercream is what I love to eat, which is why I continue using it for my cookie houses.
Chill the Decorated Pieces Before Building
Once I’ve decorated all of my pieces, I put them in the refrigerator so the buttercream can set a little before I start handling everything.
This also gives me the perfect built-in break.
I usually use this time to clean my kitchen.
By this point, there are mixing bowls, piping bags, frosting and cookie crumbs everywhere, so I clean everything up while the frosting firms.
Then it’s construction time!
How I Assemble My Cookie House
Once the decorated pieces have chilled and the frosting has firmed up a bit, I take everything out and start assembling.
I put the walls together first. You can use cans from your pantry to help support the walls while you’re working if you need an extra set of hands.
Once the walls are stable, I add the roof.
Since I’ve already done most of my decorating while the pieces were flat, I don’t have nearly as much detailed piping to do at this point.
Instead, I use additional buttercream to help cover seams and add the finishing touches that make the whole house come together.
Then comes the really fun part.
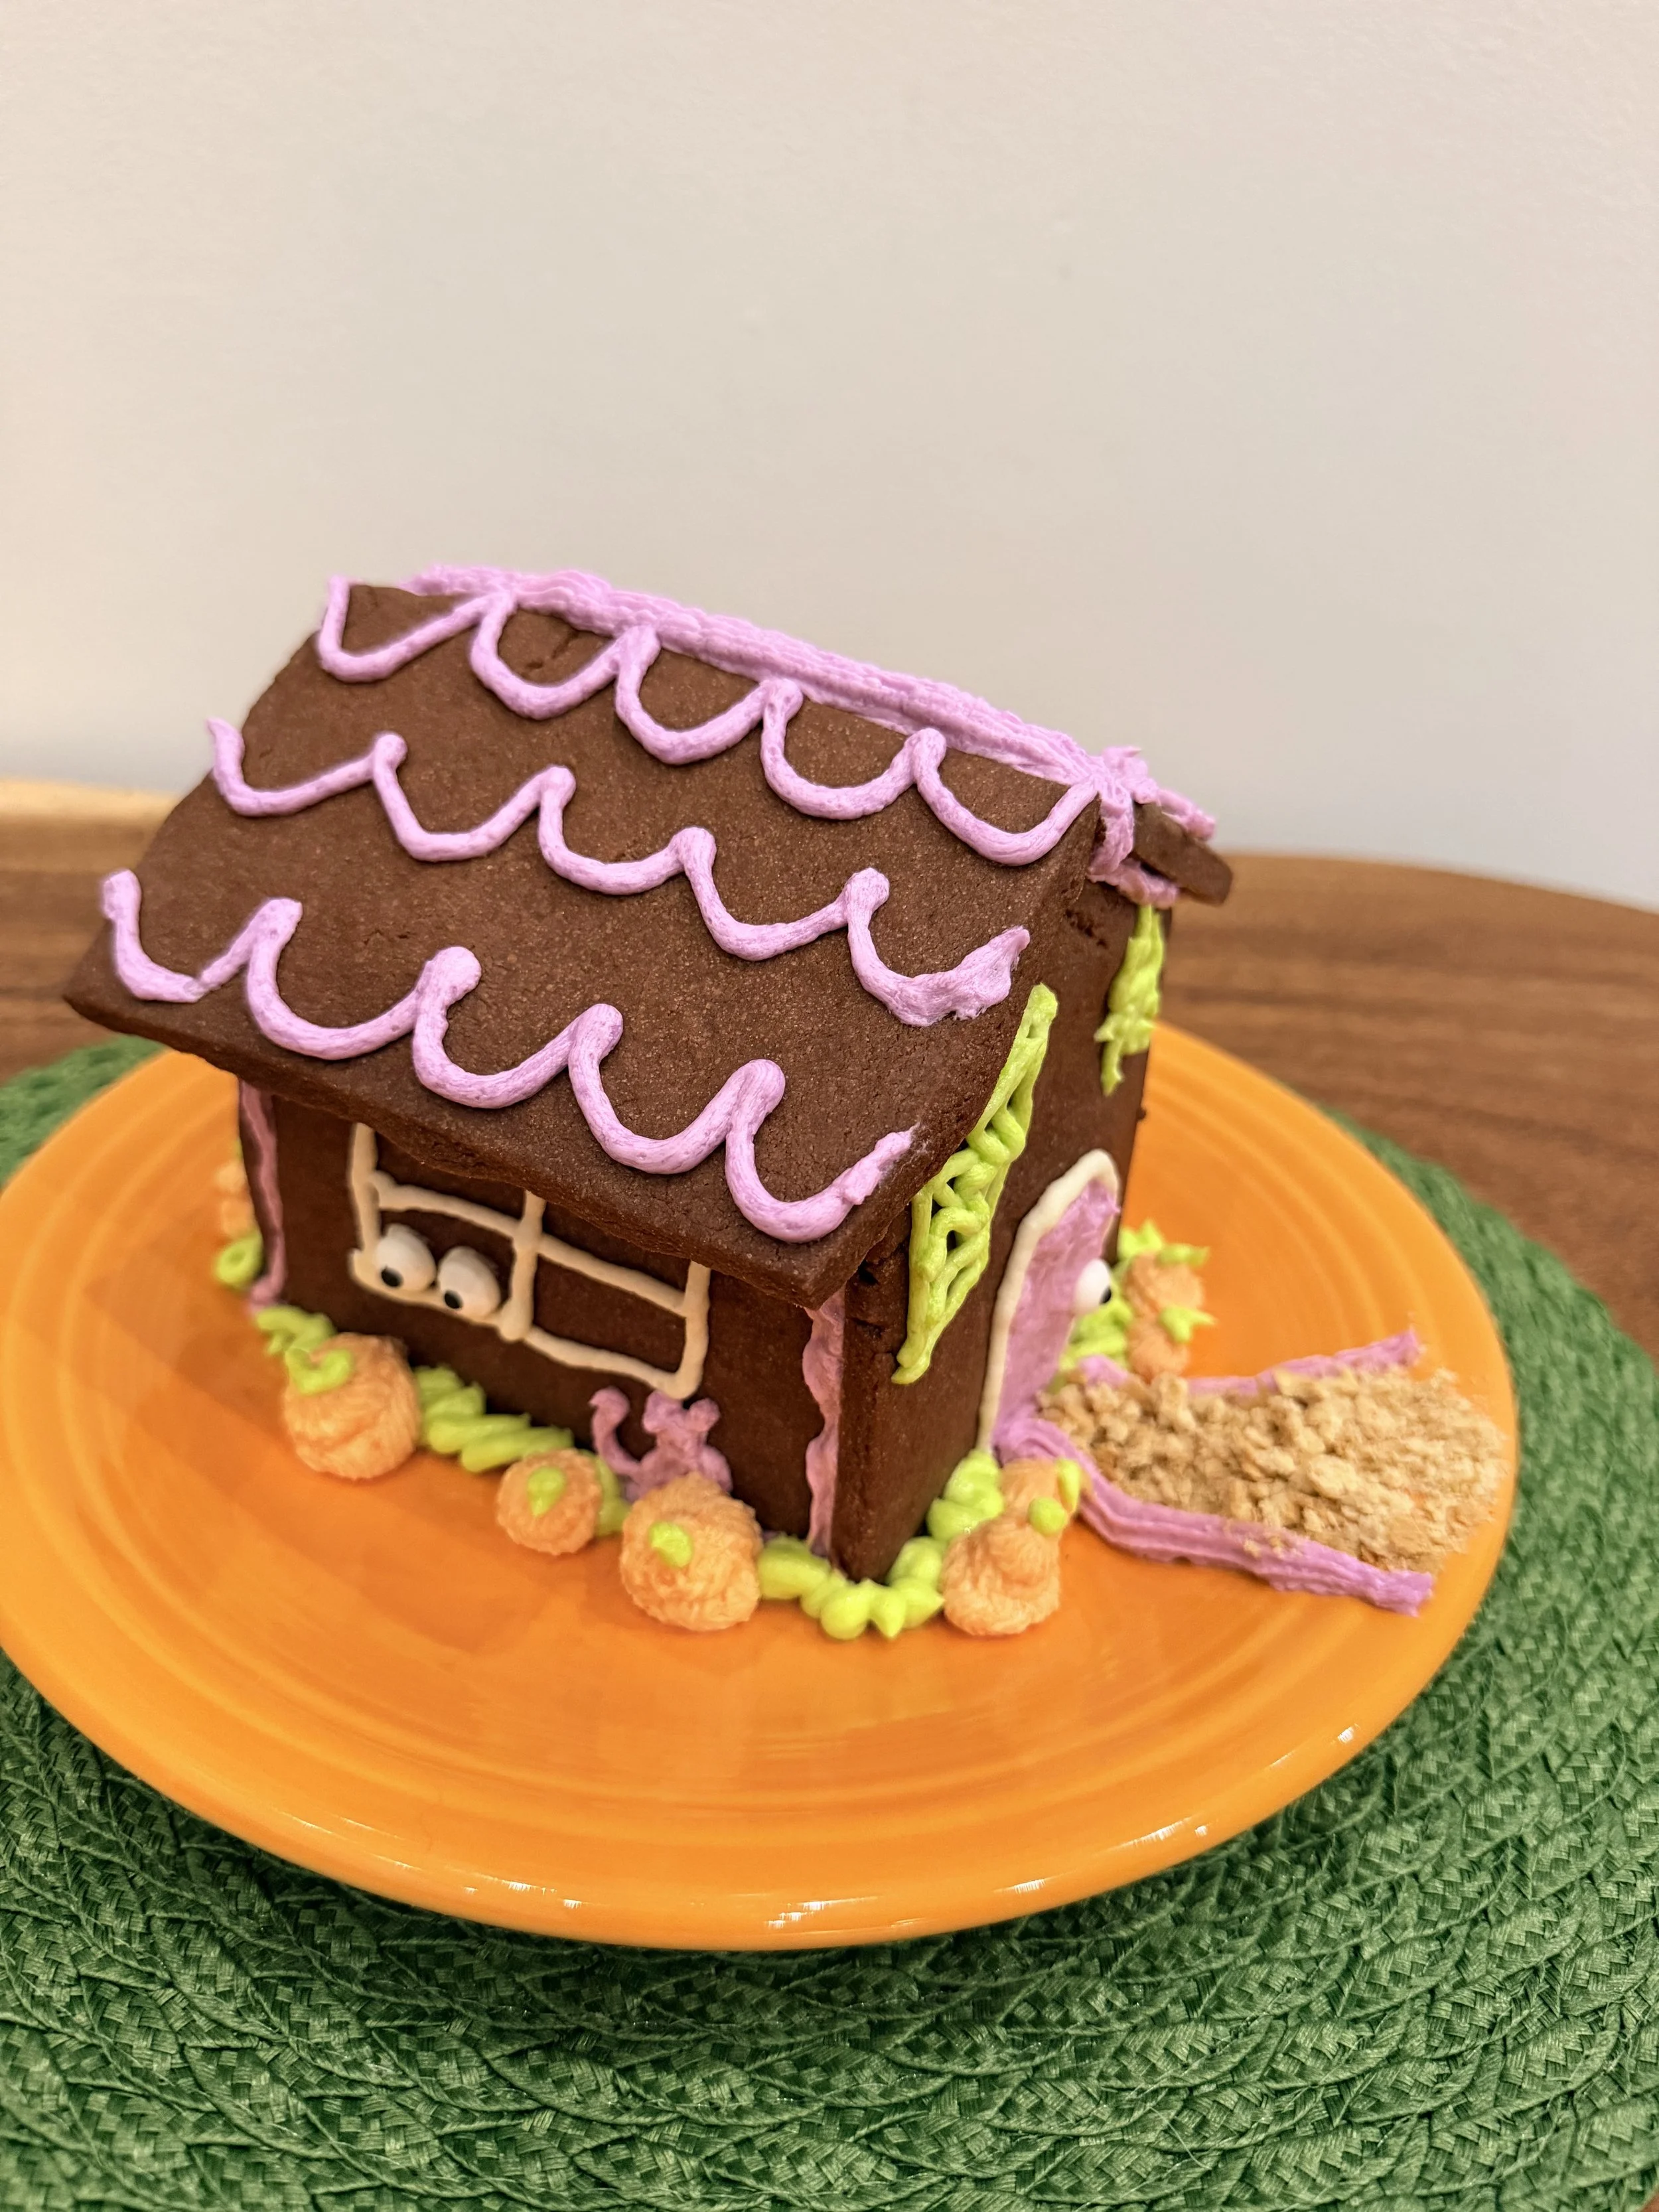
How to make 3-D Frosting Pumpkins
How Do You Make 3-D Frosting Pumpkins?
This was one of the decorating problems I really wanted to solve for the Halloween house.
I didn’t just want pumpkins piped onto the walls.
I wanted actual little 3-D pumpkins standing around the house.
I wanted them to make the cookie house feel like its own little Halloween scene, almost like a miniature pumpkin patch.
Once I figured these out, they became one of my favorite details on the entire house.
How to Make 3-D Buttercream Pumpkins
I wanted little pumpkins that could sit around the cookie house instead of simply piping flat pumpkins onto the walls. I found this cute buttercream pumpkin technique from Kaotic Krunch and adapted it for my haunted cookie house.
You'll need:
Orange buttercream frosting
A piping bag
An 8B open star piping tip or similar
A small amount of green buttercream frosting
A second piping bag with a small opening or small round piping tip
Step 1 — Fill Your Piping Bag
Fit a piping bag with an 8B open star tip and fill it with orange buttercream.
The open-star tip is what creates all of those little ridges around the pumpkin, so you don't have to pipe each pumpkin line individually.
Step 2 — Hold the Piping Bag Straight Up
Position the piping tip directly over the spot where you want your pumpkin.
Hold the bag straight up and down at about a 90-degree angle, rather than holding it sideways.
Keep the tip close to the surface without pressing it against it.
Step 3 — Pipe the Pumpkin
Squeeze the piping bag with steady pressure and keep the tip in the same place.
Don't swirl it around like you're frosting a cupcake.
Let the buttercream build upward and outward into a little round pumpkin shape.
Once the pumpkin is the size you want, stop squeezing first, then gently lift the piping tip straight up.
You should now have a little 3-D orange pumpkin with ridges already built into it!
Step 4 — Add the Green Stem
Using your green buttercream, pipe a tiny stem directly onto the center of the pumpkin.
Start with just a little bit—you can always add more.
If you want to get fancy, add a tiny green curl or leaf beside the stem. But I'm keeping mine simple!
Step 5 — Make a Little Pumpkin Patch
Repeat with pumpkins in slightly different sizes.
I actually like them better if they aren't all identical. A few tiny pumpkins mixed with slightly larger ones will make the area around the haunted house look more like a little pumpkin patch.
Tip: Practice your first pumpkin or two on a piece of parchment paper before piping them around your finished house. If they look terrible, you can scrape the frosting back into the bowl and try again. No one ever has to know!
Don’t Forget the Friendly Ghost!
Every haunted house needs a ghost.
Ours just isn’t particularly good at being scary.
I wanted a cute, happy little ghost instead, which is also a fun nod to The Trucks That Saved Halloween.
The ghosts in the book are meant to be friendly and whimsical rather than frightening, and I wanted this little guy to have the same personality.
[PHOTO: Friendly ghost on haunted cookie house]
Add Your Finishing Touches
Once the house is standing, anything goes!
This is when I add the little decorations around the base of the house, cover any seams that need some extra frosting and make the whole scene feel finished.
You could decorate your Halloween cookie house with:
Candy corn
Halloween sprinkles
Candy pumpkins
Chocolate candies
Gummy worms
Mini marshmallow ghosts
Pretzel fences
Bats
Black cats
Colorful windows and doors
Fall leaves
A candy path
More pumpkins!
There really aren’t rules here.
Make it spooky. Make it silly. Let the kids take over.
Or—in our case—make it cute and colorful.
Can You Actually Eat a Cookie House?
YES!
In fact, that’s the point of mine.
This isn’t one of those cookie houses that’s going to sit untouched as a decoration for three months.
My intention is absolutely to eat it.
That’s one of the reasons I care about making a cookie I actually like and using buttercream frosting that tastes good.
We’ll leave the finished house out for a little while so everyone can enjoy looking at it—and inevitably start sneaking pieces—but then I move it to the refrigerator.
Partly because I’m trying to keep it fresh.
And partly because I do not need to invite every ant in the neighborhood into my kitchen.
I try to have us eat the house within about one week.
If there are still pieces left after that, I break them up and put them in the freezer.
Then we can pull out a piece of chocolate Halloween house whenever we want a treat!
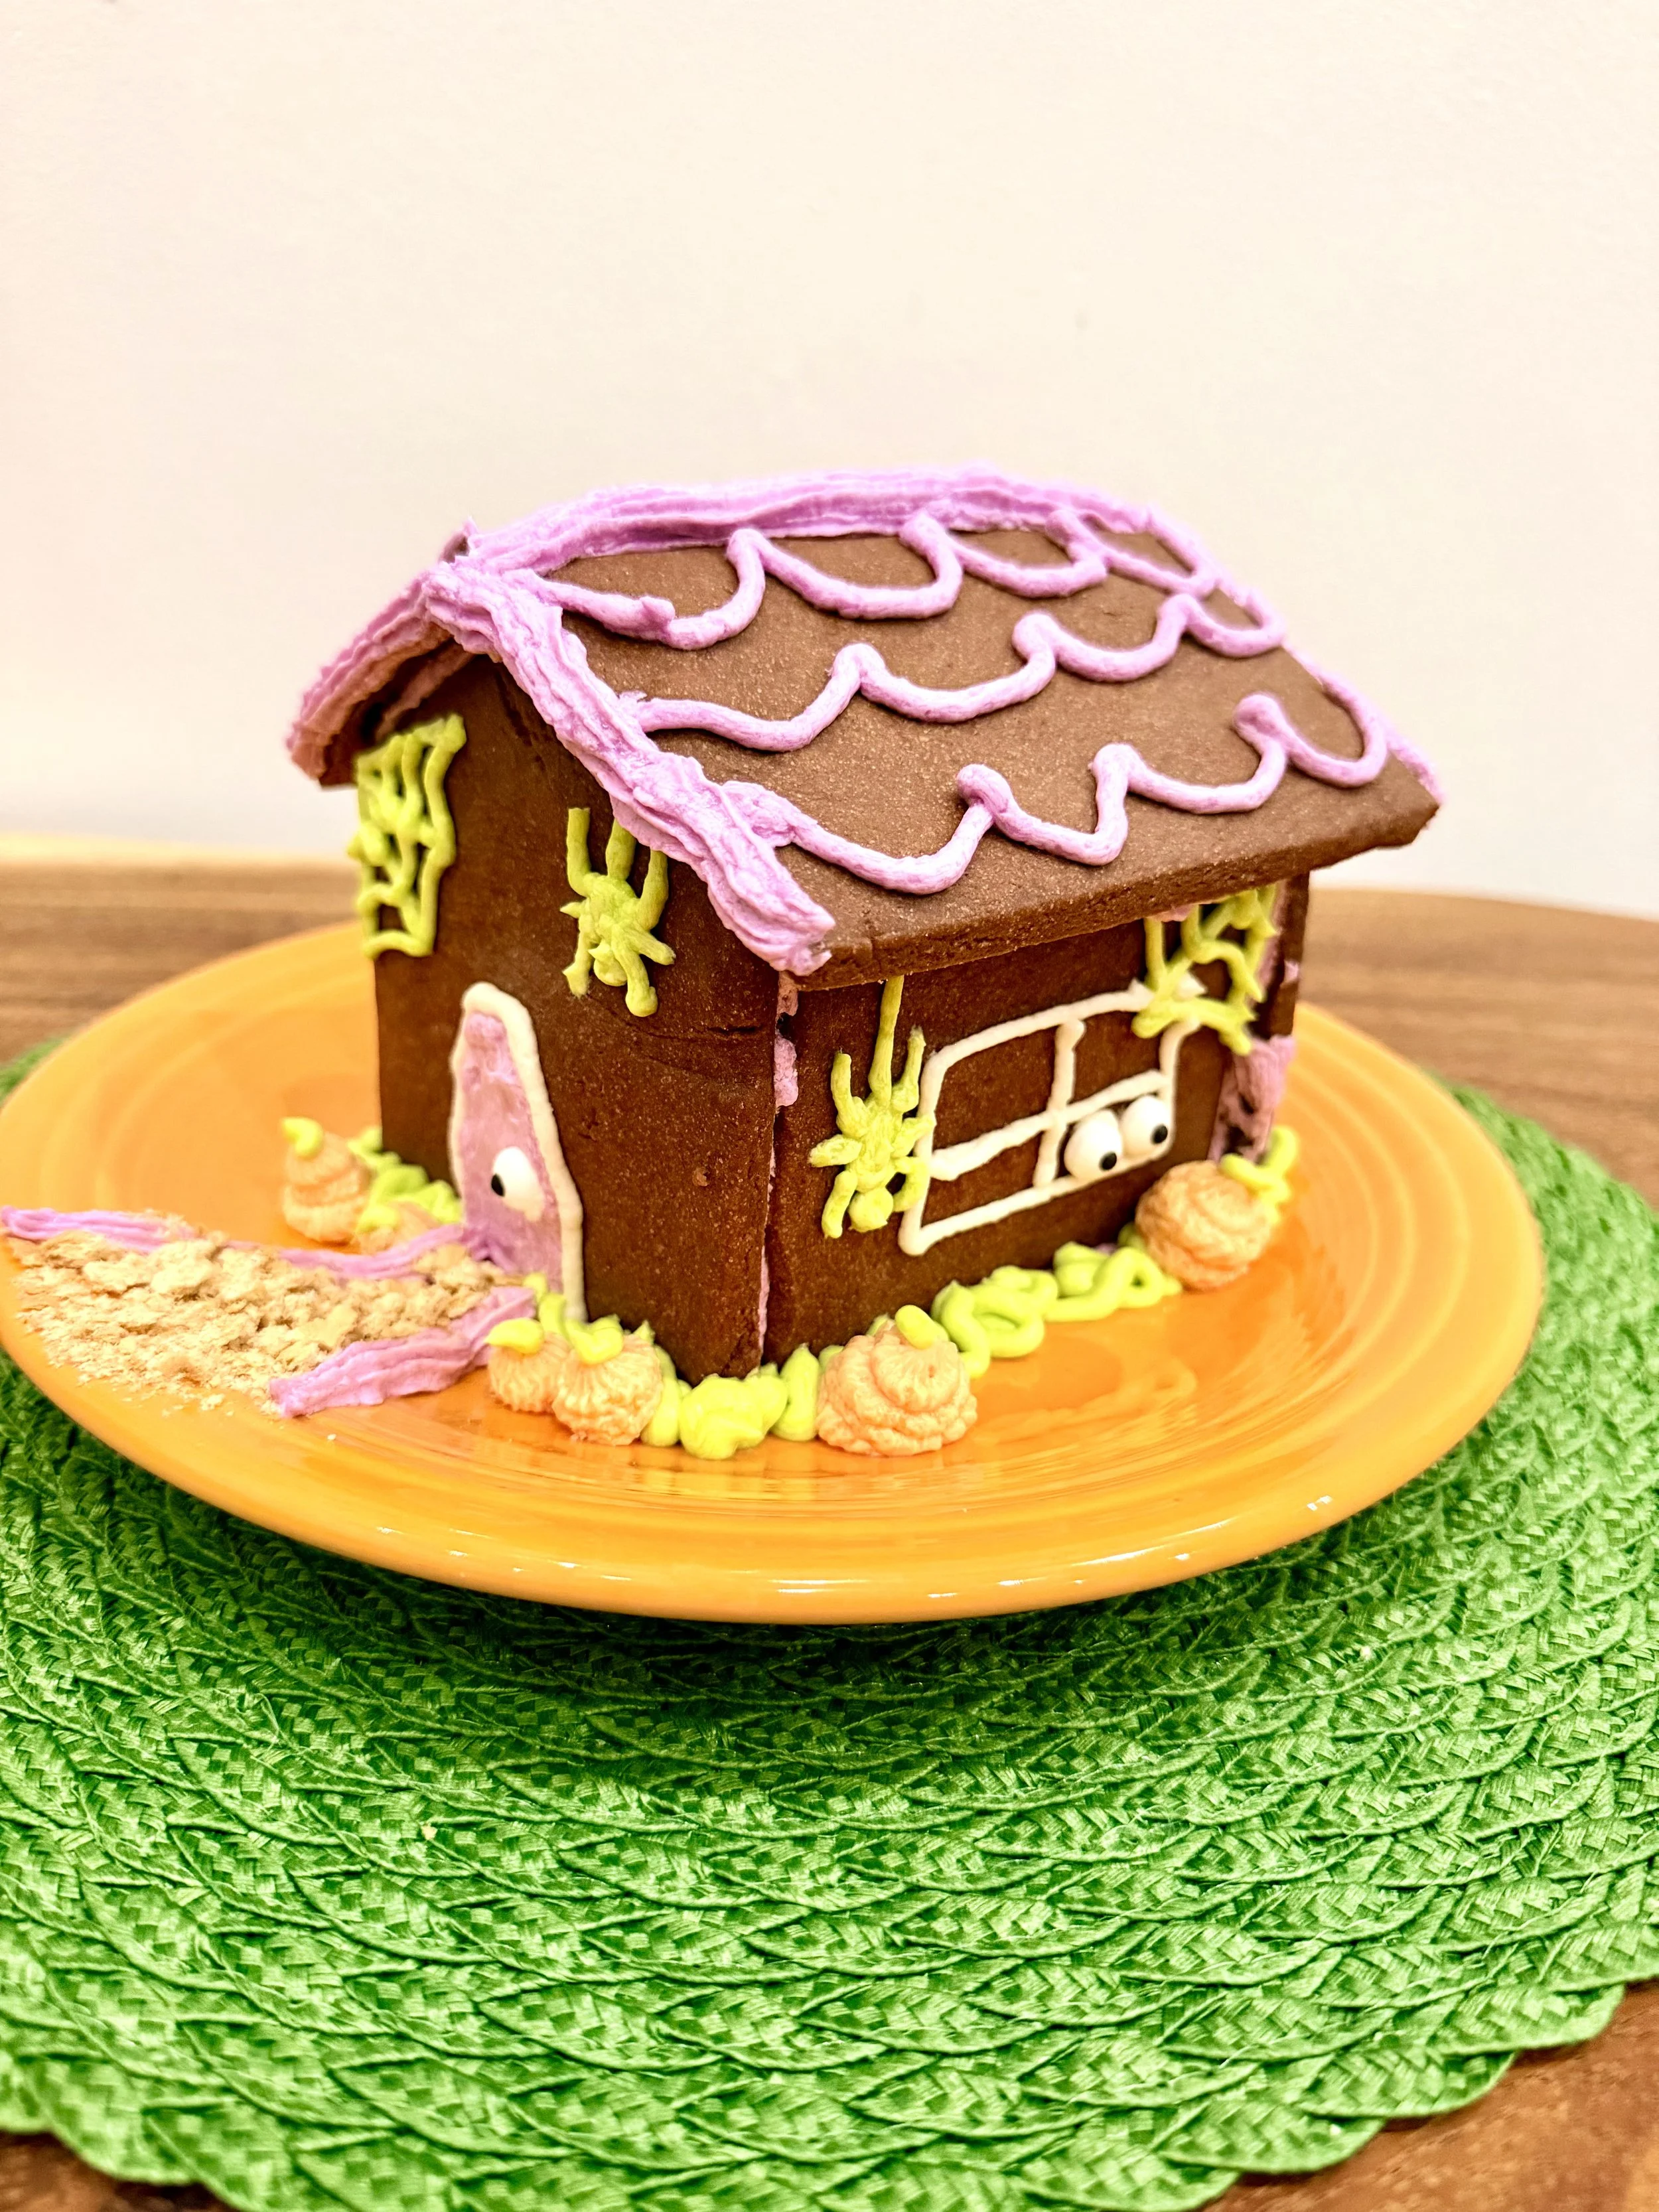
Chocolate Cookie House Recipe - Haunted Halloween House
Chocolate Cookie House Recipe
This recipe is based on the sturdy sugar cookie dough I use for my other cookie houses, adapted into a chocolate version for Halloween.
Chocolate Cookie House Ingredients
2 cups butter, softened
1 1/4 cups sugar
2 tablespoons milk
2 teaspoons vanilla extract
½ cup cocoa
4 cups all-purpose flour
Plus:
Buttercream frosting
Purple, orange and green food coloring
Halloween candy and sprinkles for decorating
Step 1 — Make the Chocolate Cookie Dough
In a large mixing bowl, beat the softened butter with an electric mixer on medium to high speed for about 30 seconds.
Add the sugar and beat until combined, scraping down the sides of the bowl as needed.
Add the milk and vanilla.
Gradually beat in the cocoa and as much of the flour as you can with the mixer. Stir in any remaining flour by hand until everything is combined.
Step 2 — Chill the Dough
Divide the dough in half and cover tightly.
Chill for about 1 hour, or until the dough is firm enough to handle and roll easily.
Can I Make the Cookie House Dough Ahead of Time?
Yes!
I actually love this option if you’re making the house with kids because you don’t have to make, chill, bake AND decorate everything in one day.
You can make the cookie dough a day ahead and keep it tightly covered in the refrigerator.
The dough can be refrigerated for up to 2 days. If it’s too firm to roll when you take it out, just let it sit at room temperature briefly until it’s workable.
Step 3 — Preheat and Prep
Once your dough is chilled and you’re ready to bake, preheat the oven to 325°F.
There’s no reason to have your oven preheating for the entire hour while your dough chills!
Line your baking sheets with parchment paper or silicone baking mats.
Get your cookie house templates and pizza slicer ready too.
Step 4 — Roll and Cut the House Pieces
Working with one portion of dough at a time, roll it on parchment paper or a silicone baking mat to approximately 1/8- to 1/4-inch thick.
For a cookie house, I like to keep the pieces toward the thicker side so they’re sturdy enough to build with.
Lightly flour the top of the dough as necessary to keep it from sticking to your rolling pin.
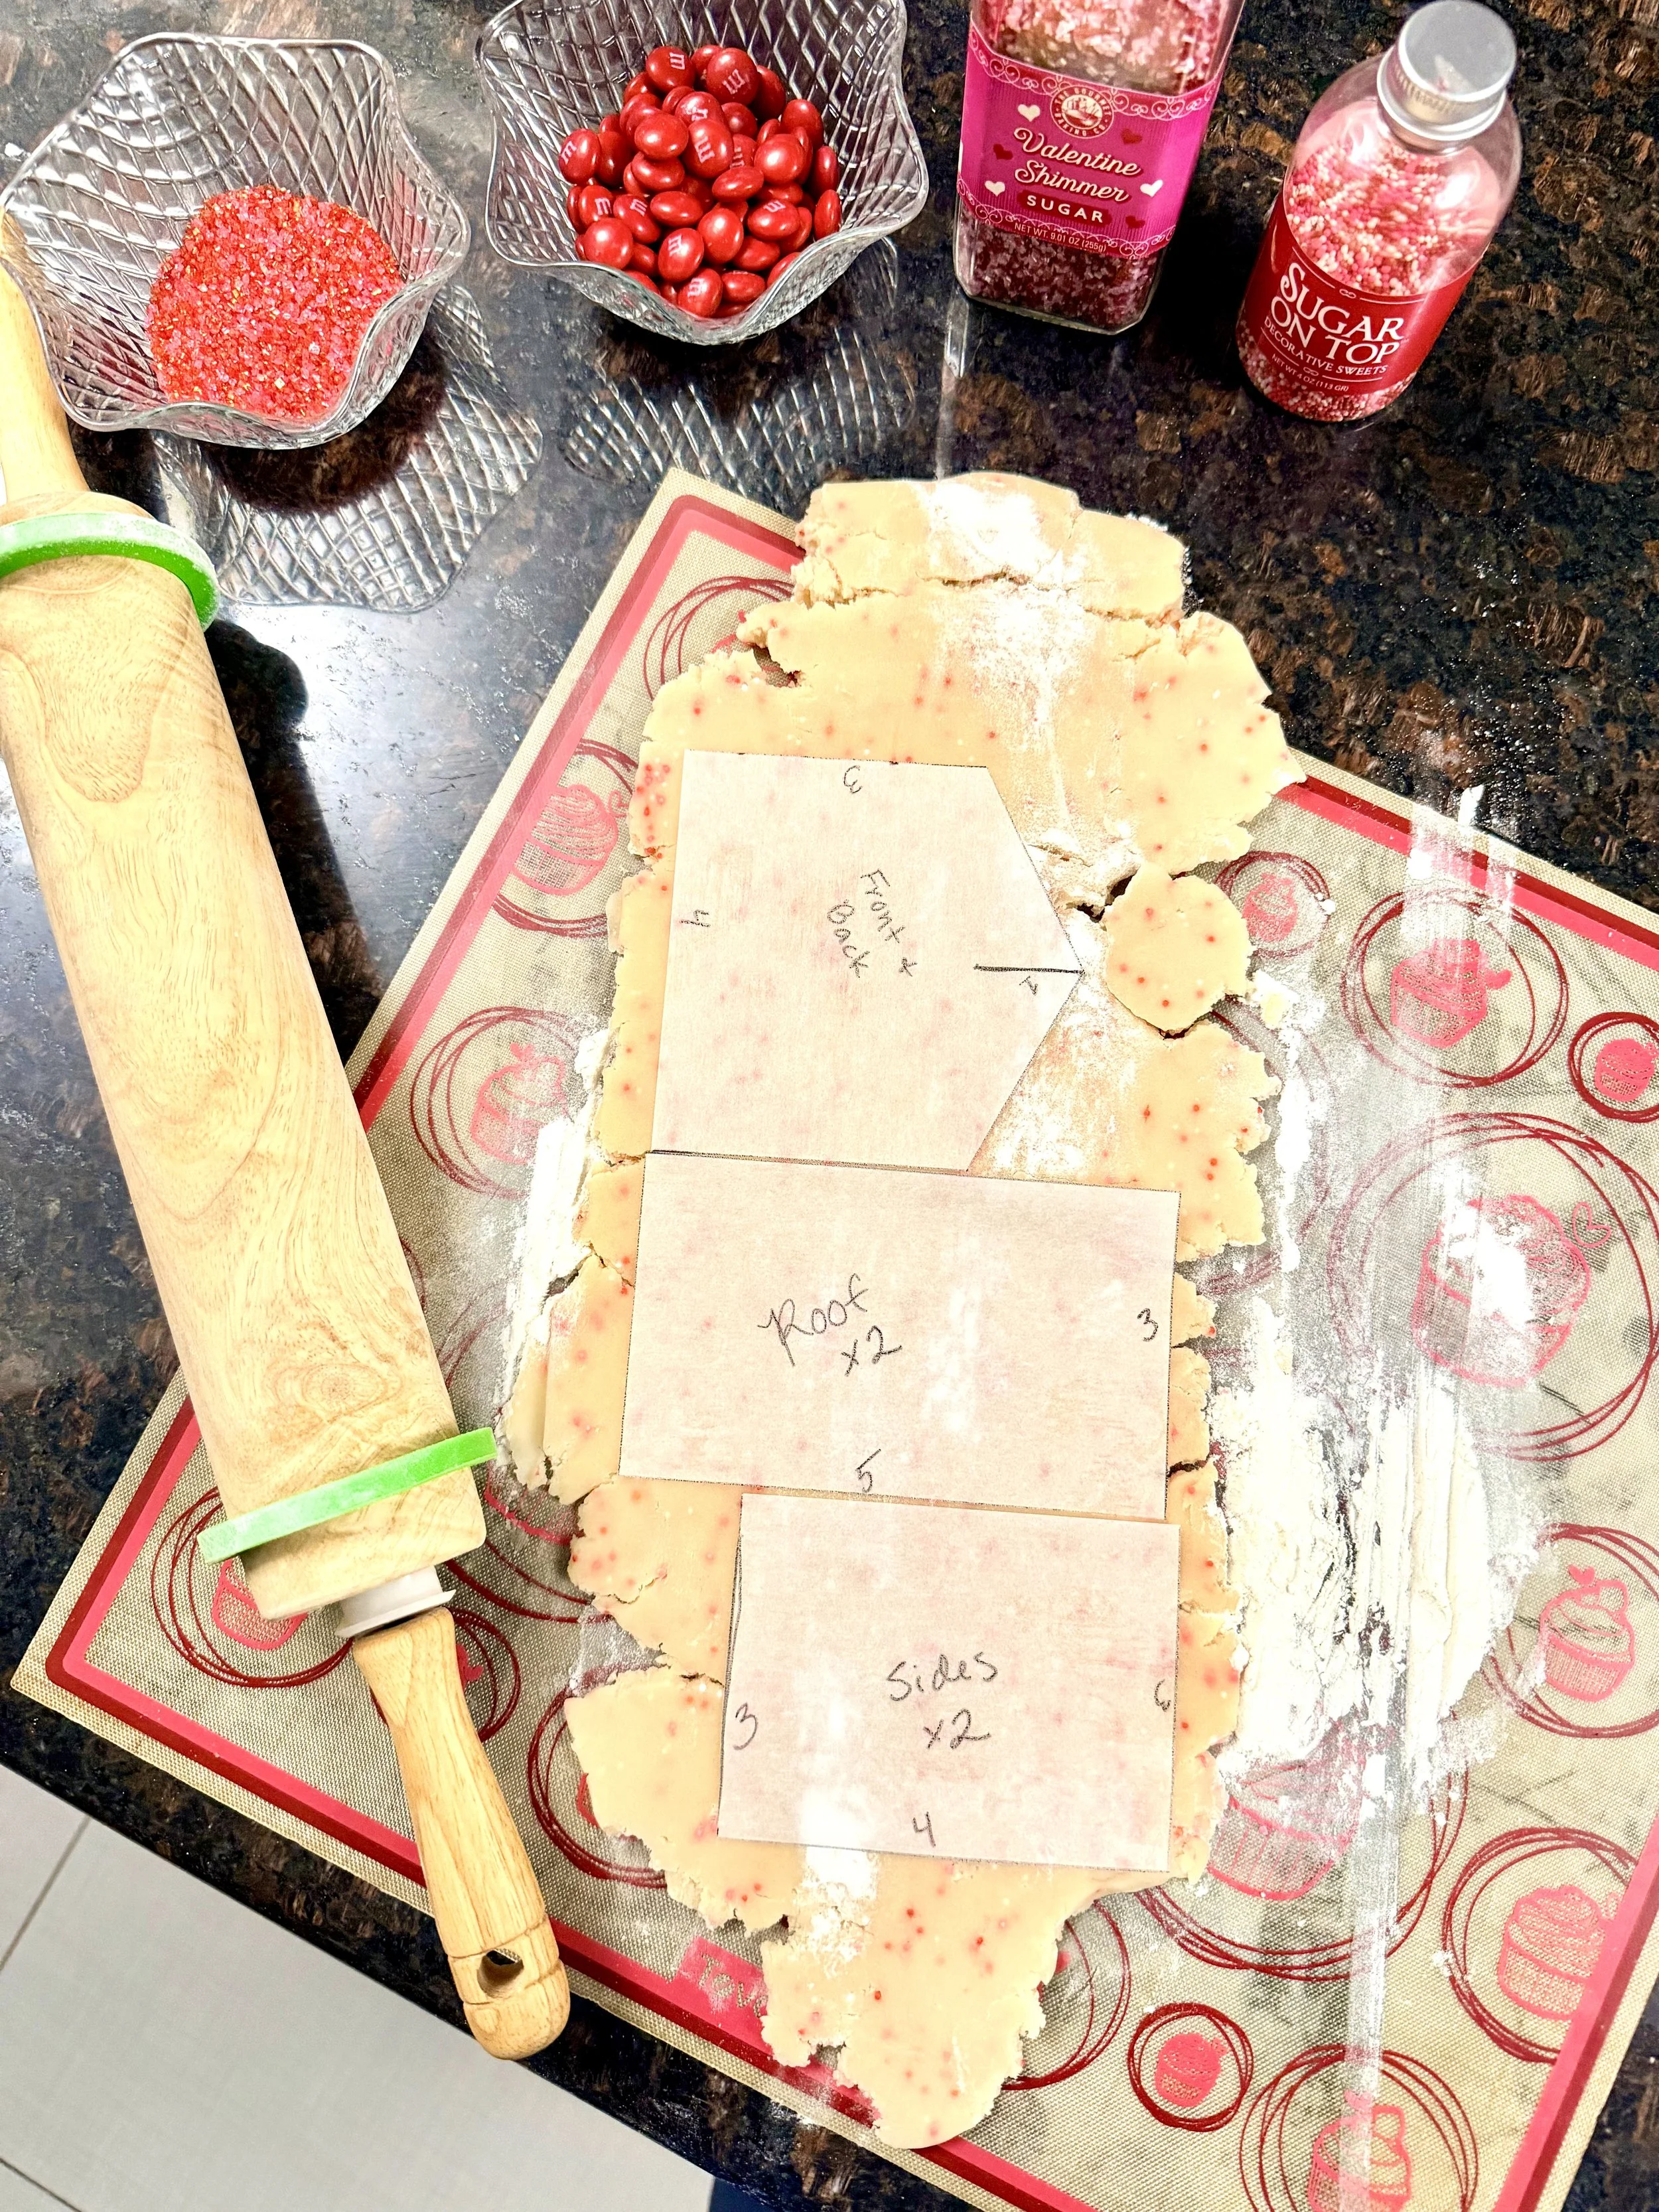
Place your cookie house templates directly onto the rolled dough.
Use a pizza slicer to cut around the template and create your walls and roof pieces.
Step 5 — Bake
Bake the cookie house pieces at 325°F for approximately 12–15 minutes.
Larger or thicker pieces may need a little more time, so watch the cookies rather than relying entirely on the timer.
The cookies should be set and the edges firm.
Once they’re out of the oven, check the edges of your house pieces. If needed, carefully trim any uneven areas so the pieces fit together cleanly.
Allow all of the pieces to cool completely before decorating.
Step 6 — Decorate the Pieces Flat
Lay your cooled walls and roof pieces flat on your work surface.
Decorate them with buttercream frosting, adding your doors, windows, roof details and other Halloween decorations.
It’s much easier to do the detailed decorating now than after the house is standing!
Step 7 — Refrigerate
Carefully place the decorated pieces in the refrigerator to allow the buttercream to firm.
This is when I clean the kitchen!
Once the frosting has set enough that you can comfortably handle the pieces without destroying your decorations, you’re ready to build.
Step 8 — Assemble the House
Use buttercream to attach your walls.
If necessary, place soup cans or other sturdy cans next to the walls to help hold everything upright while you work.
Once the walls are stable, carefully attach the roof pieces.
Step 9 — Add the Finishing Touches
Now cover any visible seams with additional frosting and add your pumpkins, friendly ghost, candy, sprinkles and other Halloween decorations.
Then stand back and admire your chocolate haunted house…
…before everyone starts asking when they can eat it.
More Sugar Cookie House Ideas
Apparently I can’t stop turning this little cookie house into something new for every holiday!
If you had fun making the Halloween version, try another one throughout the year:
🎄 The Original Sugar Cookie Gingerbread House
The house that started it all! My gingerbread-house alternative made with sugar cookies and buttercream frosting.
💘 Valentine’s Day Sugar Cookie House
A sweet Valentine’s version—no gingerbread required.
☘️ Leprechaun Trap Sugar Cookie House
Turn your cookie house into a colorful leprechaun trap with a rainbow path and gold coins.
🐰 Easter Sugar Cookie House
My spring bunny cottage with buttercream grass, jelly bean eggs and Easter details.
Or visit my Sugar Cookie House Guide to see all of my cookie-house tips, designs and ideas in one place.
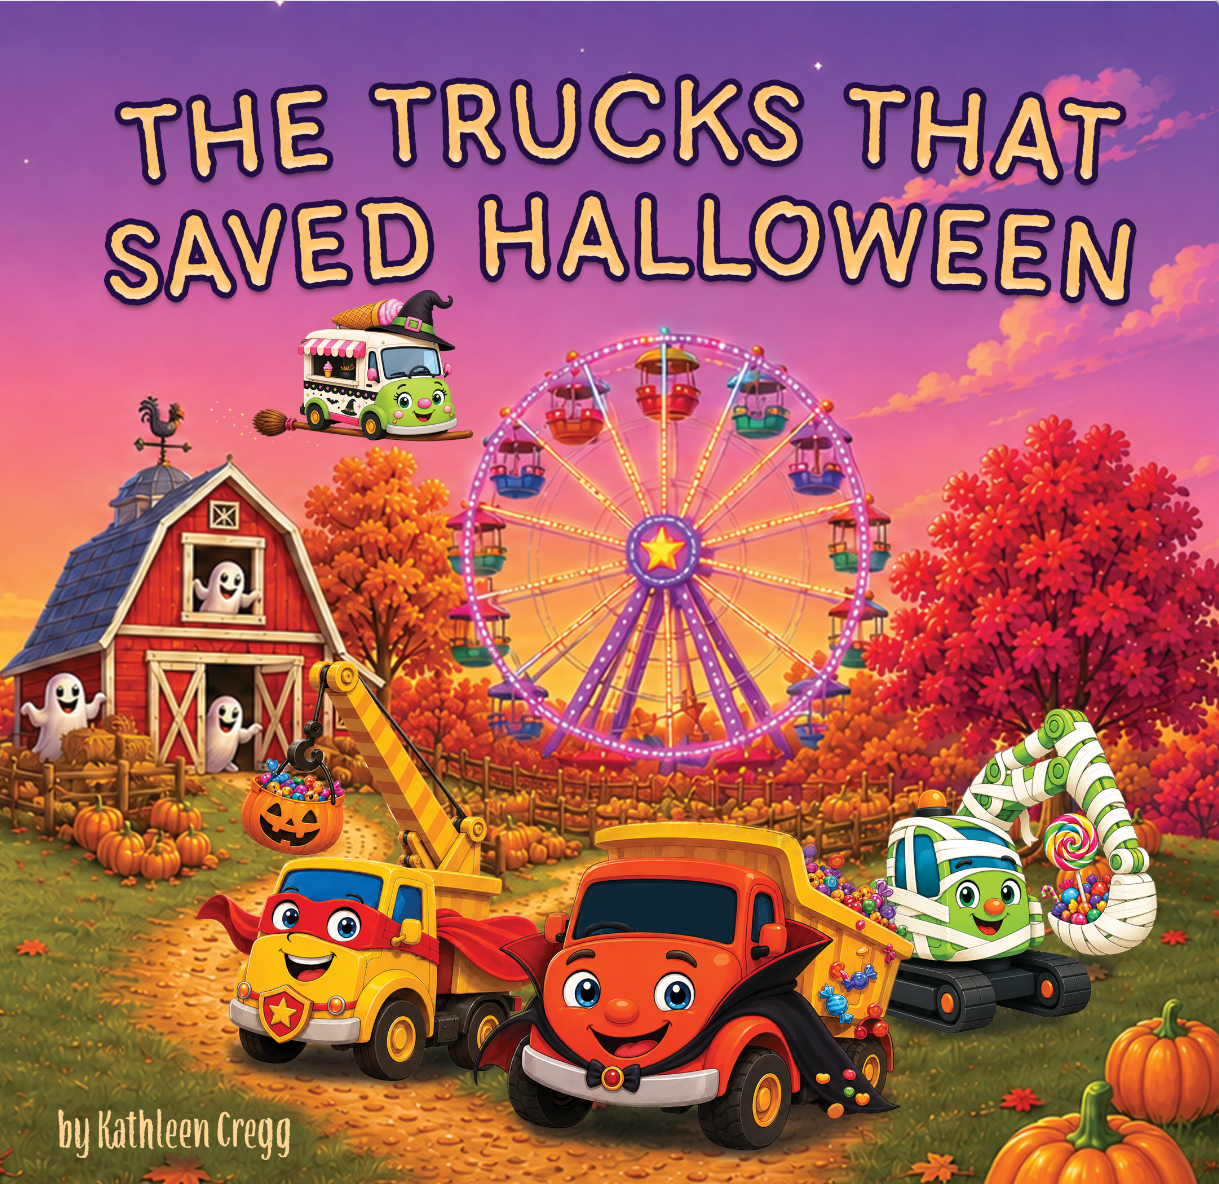
The Trucks that Saved Halloween
More Not-So-Spooky Halloween Fun
And apparently cookie houses aren’t the only thing getting the cute Halloween treatment around here!
My newest children’s book, The Trucks That Saved Halloween, was also inspired by my love of colorful, kid-friendly Halloween fun.
Dump Truck, Excavator and Crane Truck discover that Halloween is a little too quiet, so the Truck Team gets to work transforming an old farm into a cheerful Halloween carnival filled with pumpkins, rides, games, costumes, treats and a little silly Halloween magic.
It’s a not-too-spooky Halloween adventure made especially for little truck lovers.
And yes, there are friendly ghosts there too!
READ THE STORY BEHIND THE TRUCKS THAT SAVED HALLOWEEN
Between our chocolate haunted house and the Truck Team’s Halloween carnival, I think we’re officially ready for Halloween around here.
Happy haunting! 🎃👻🍫
See the Cookie House Guide or similar blog posts:
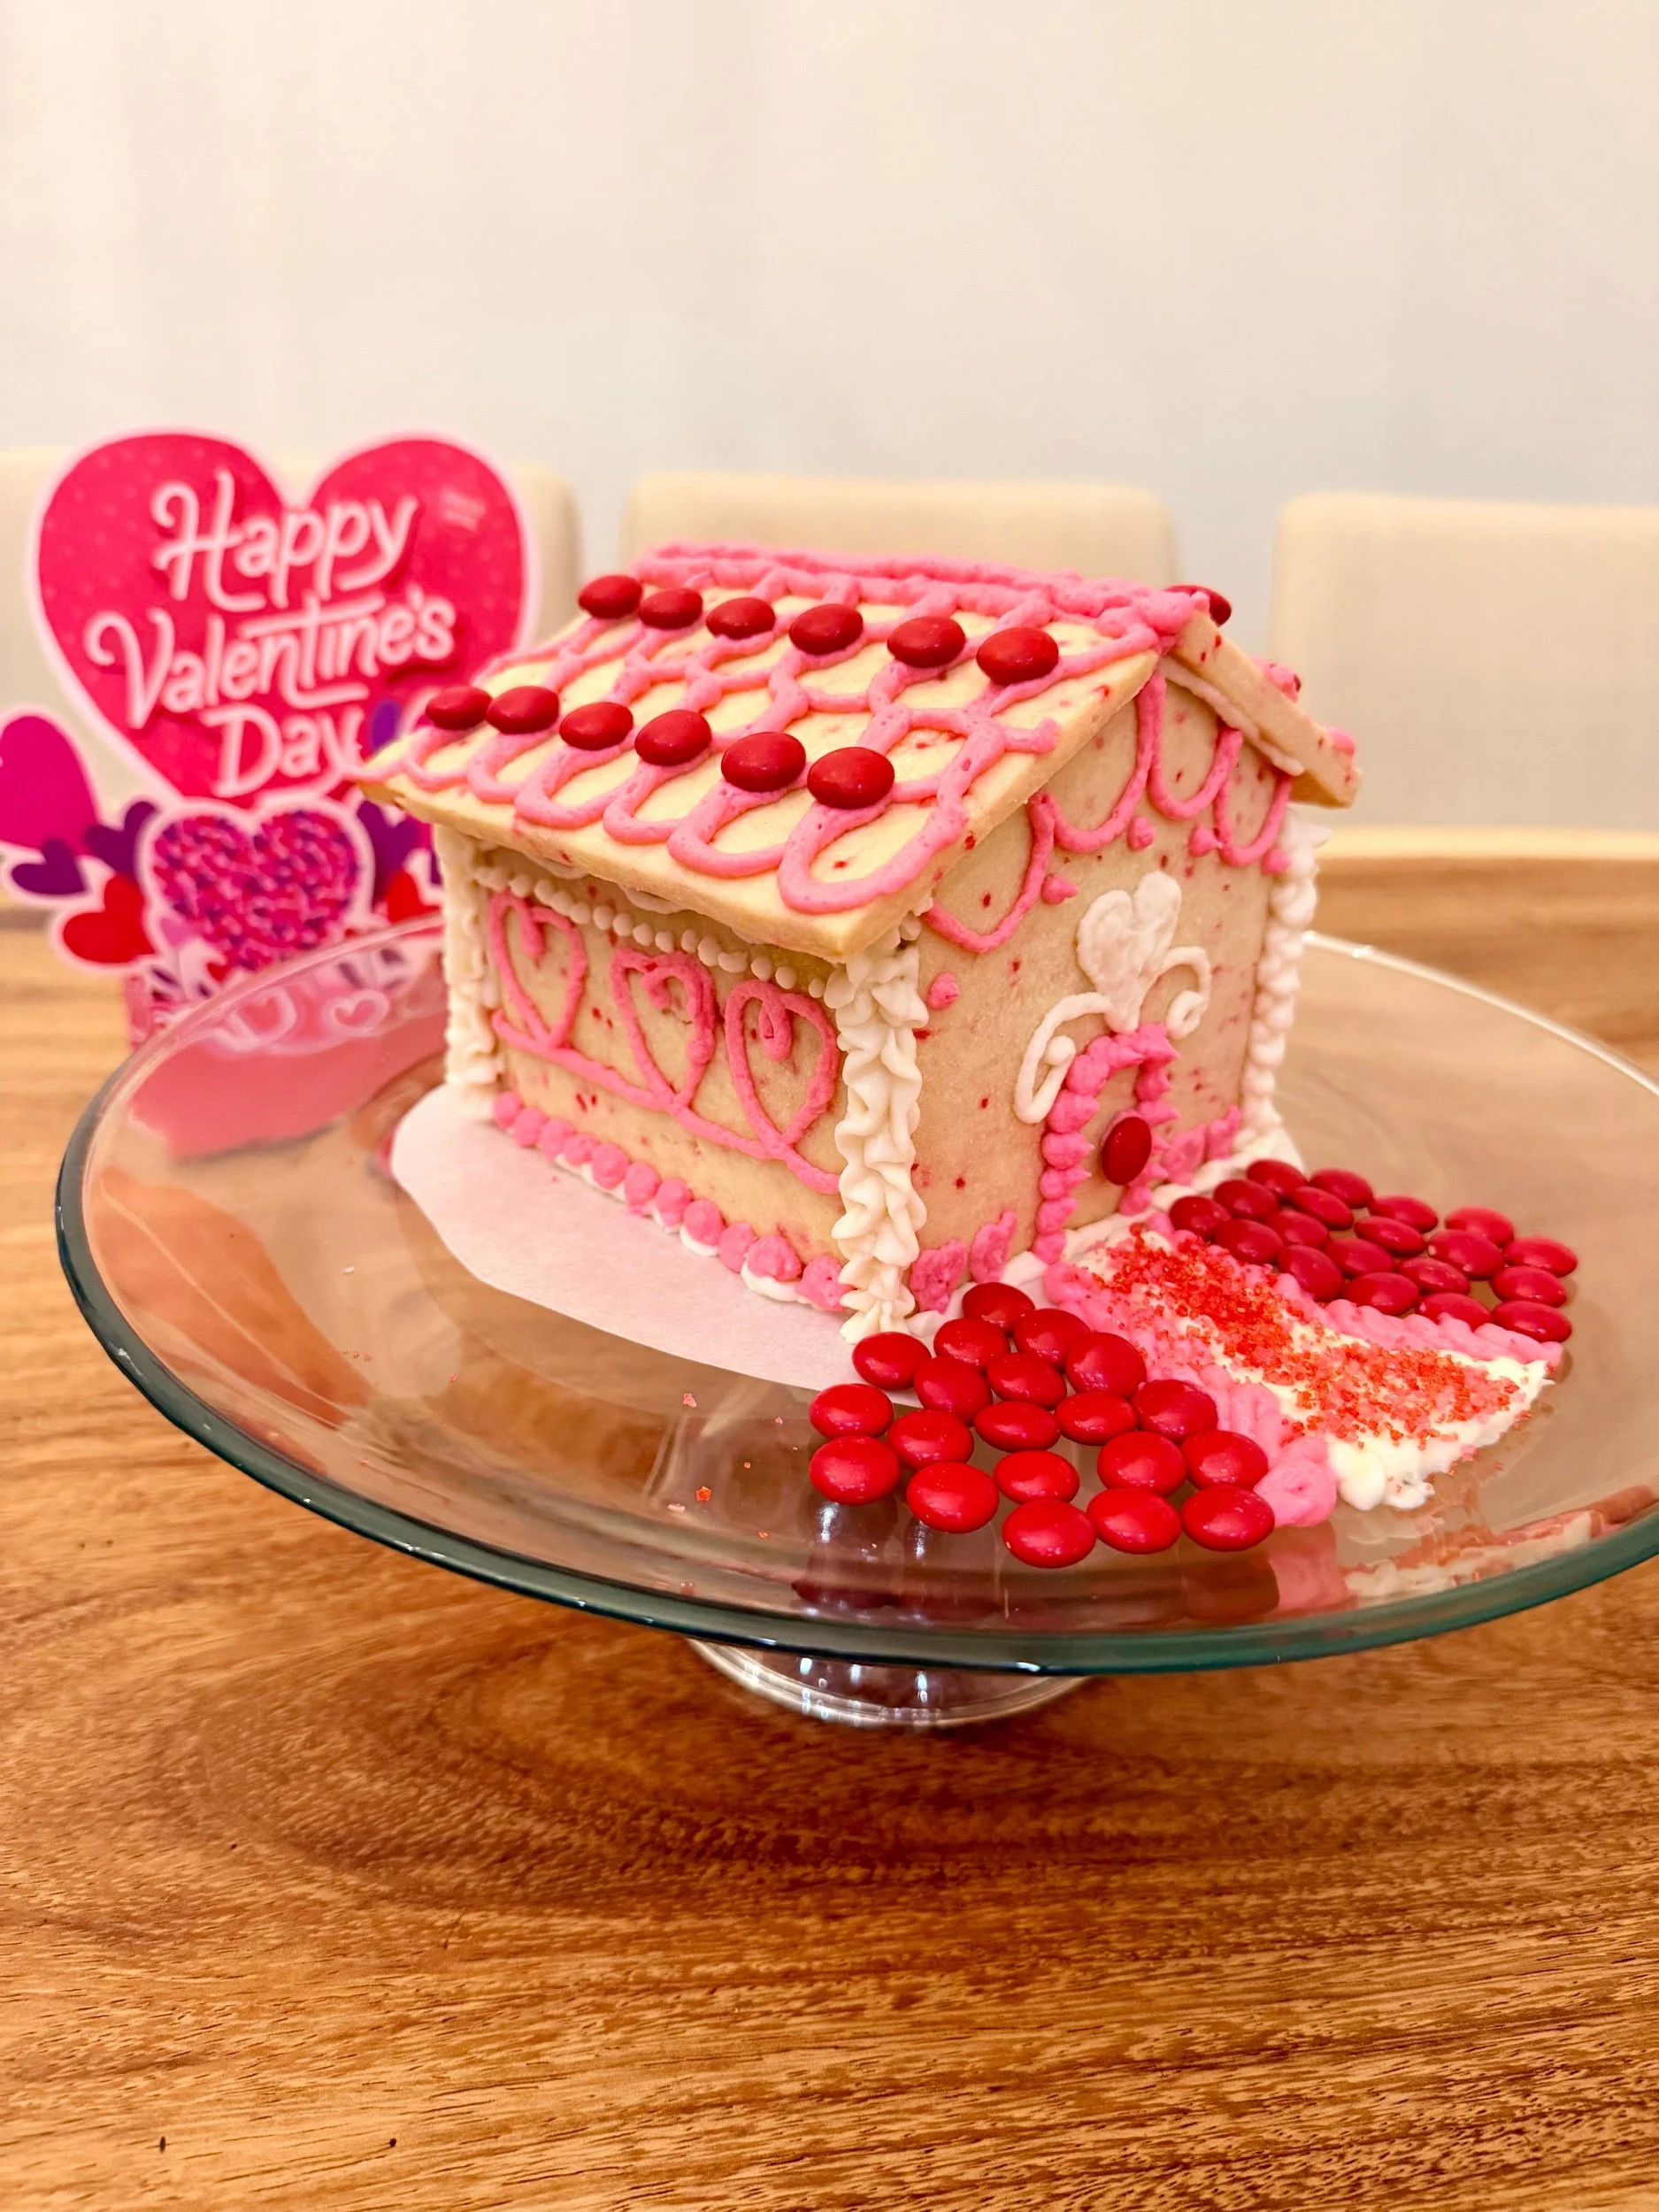
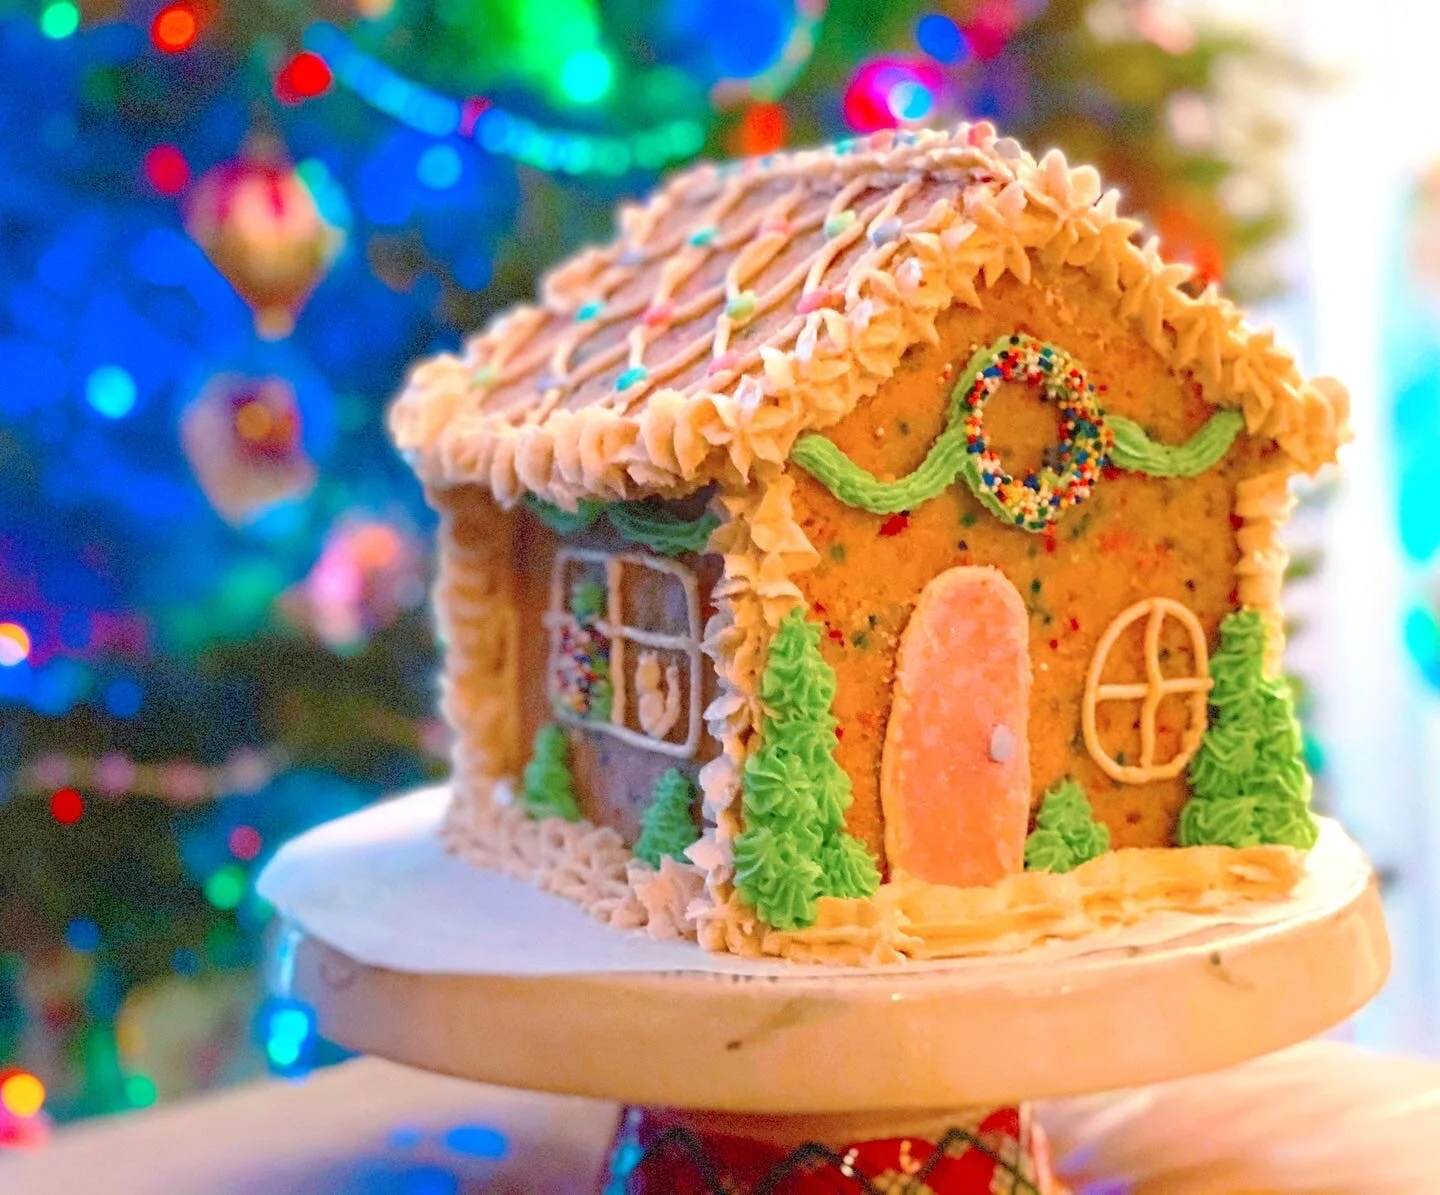
Easter Sugar Cookie House (Easy Spring Bunny Cottage)
Make an adorable Easter sugar cookie house with jelly bean eggs, piped buttercream grass, and a bunny detail on the back. Easy, kid-friendly spring build!
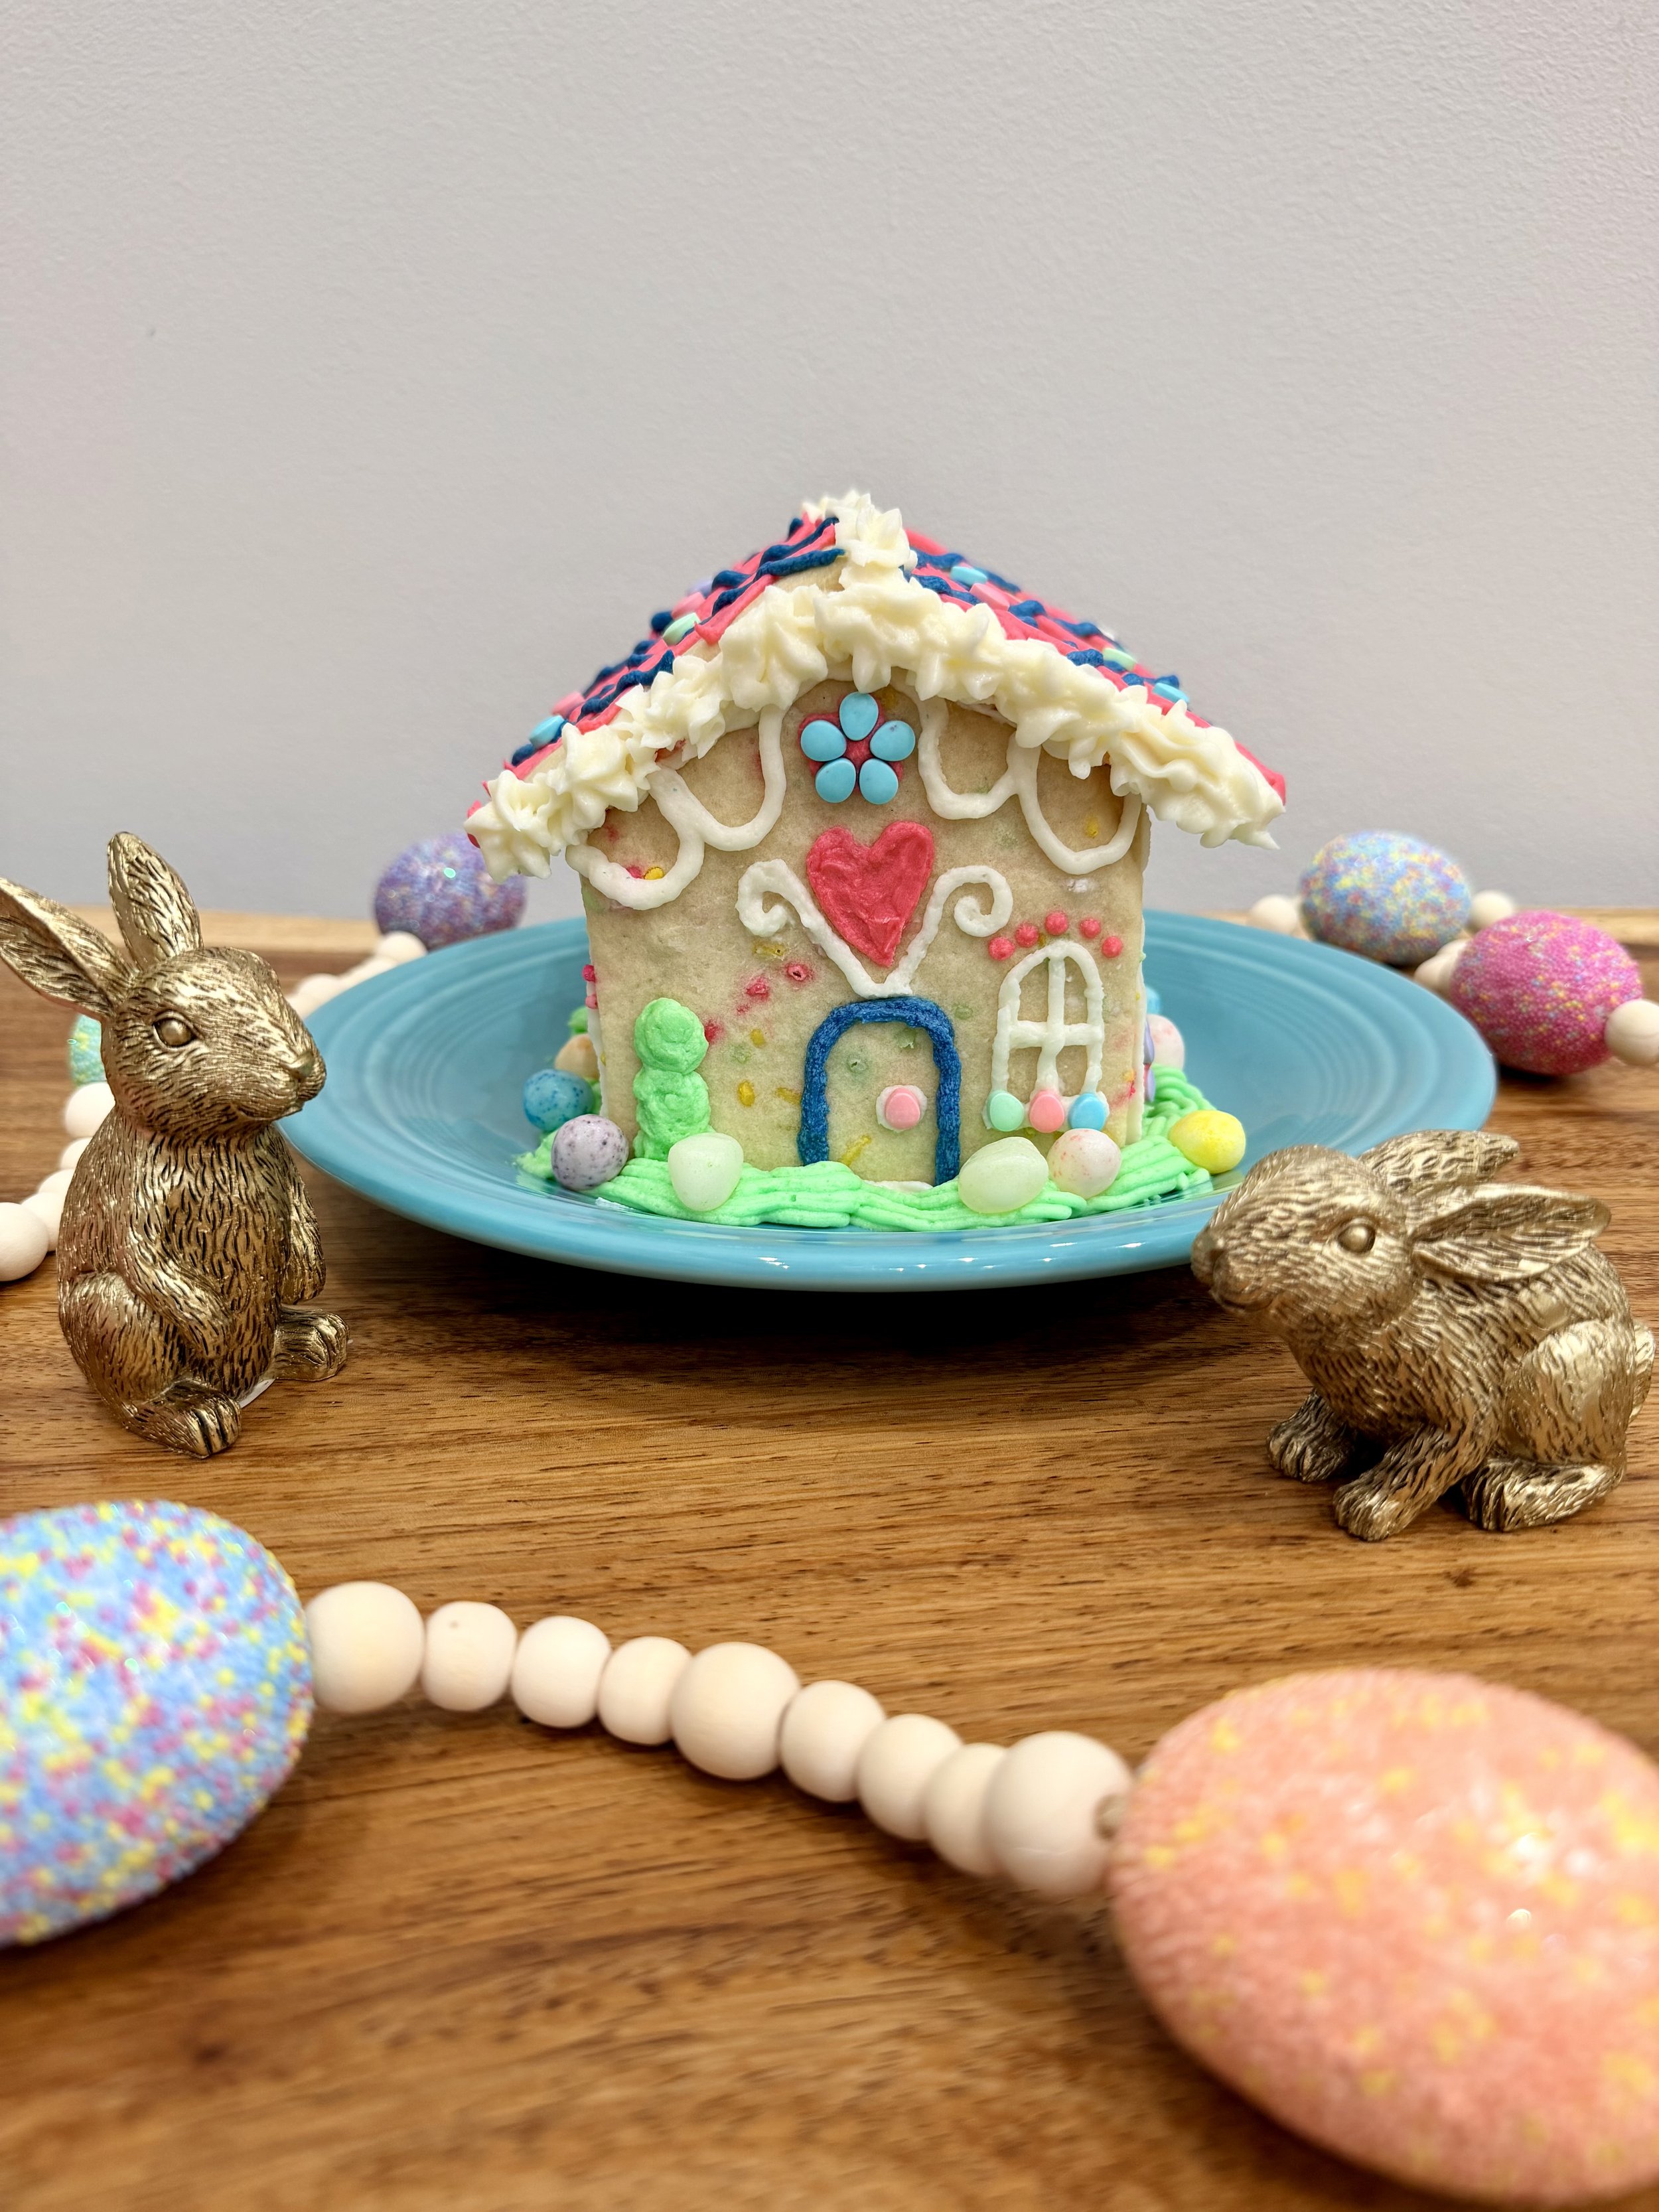
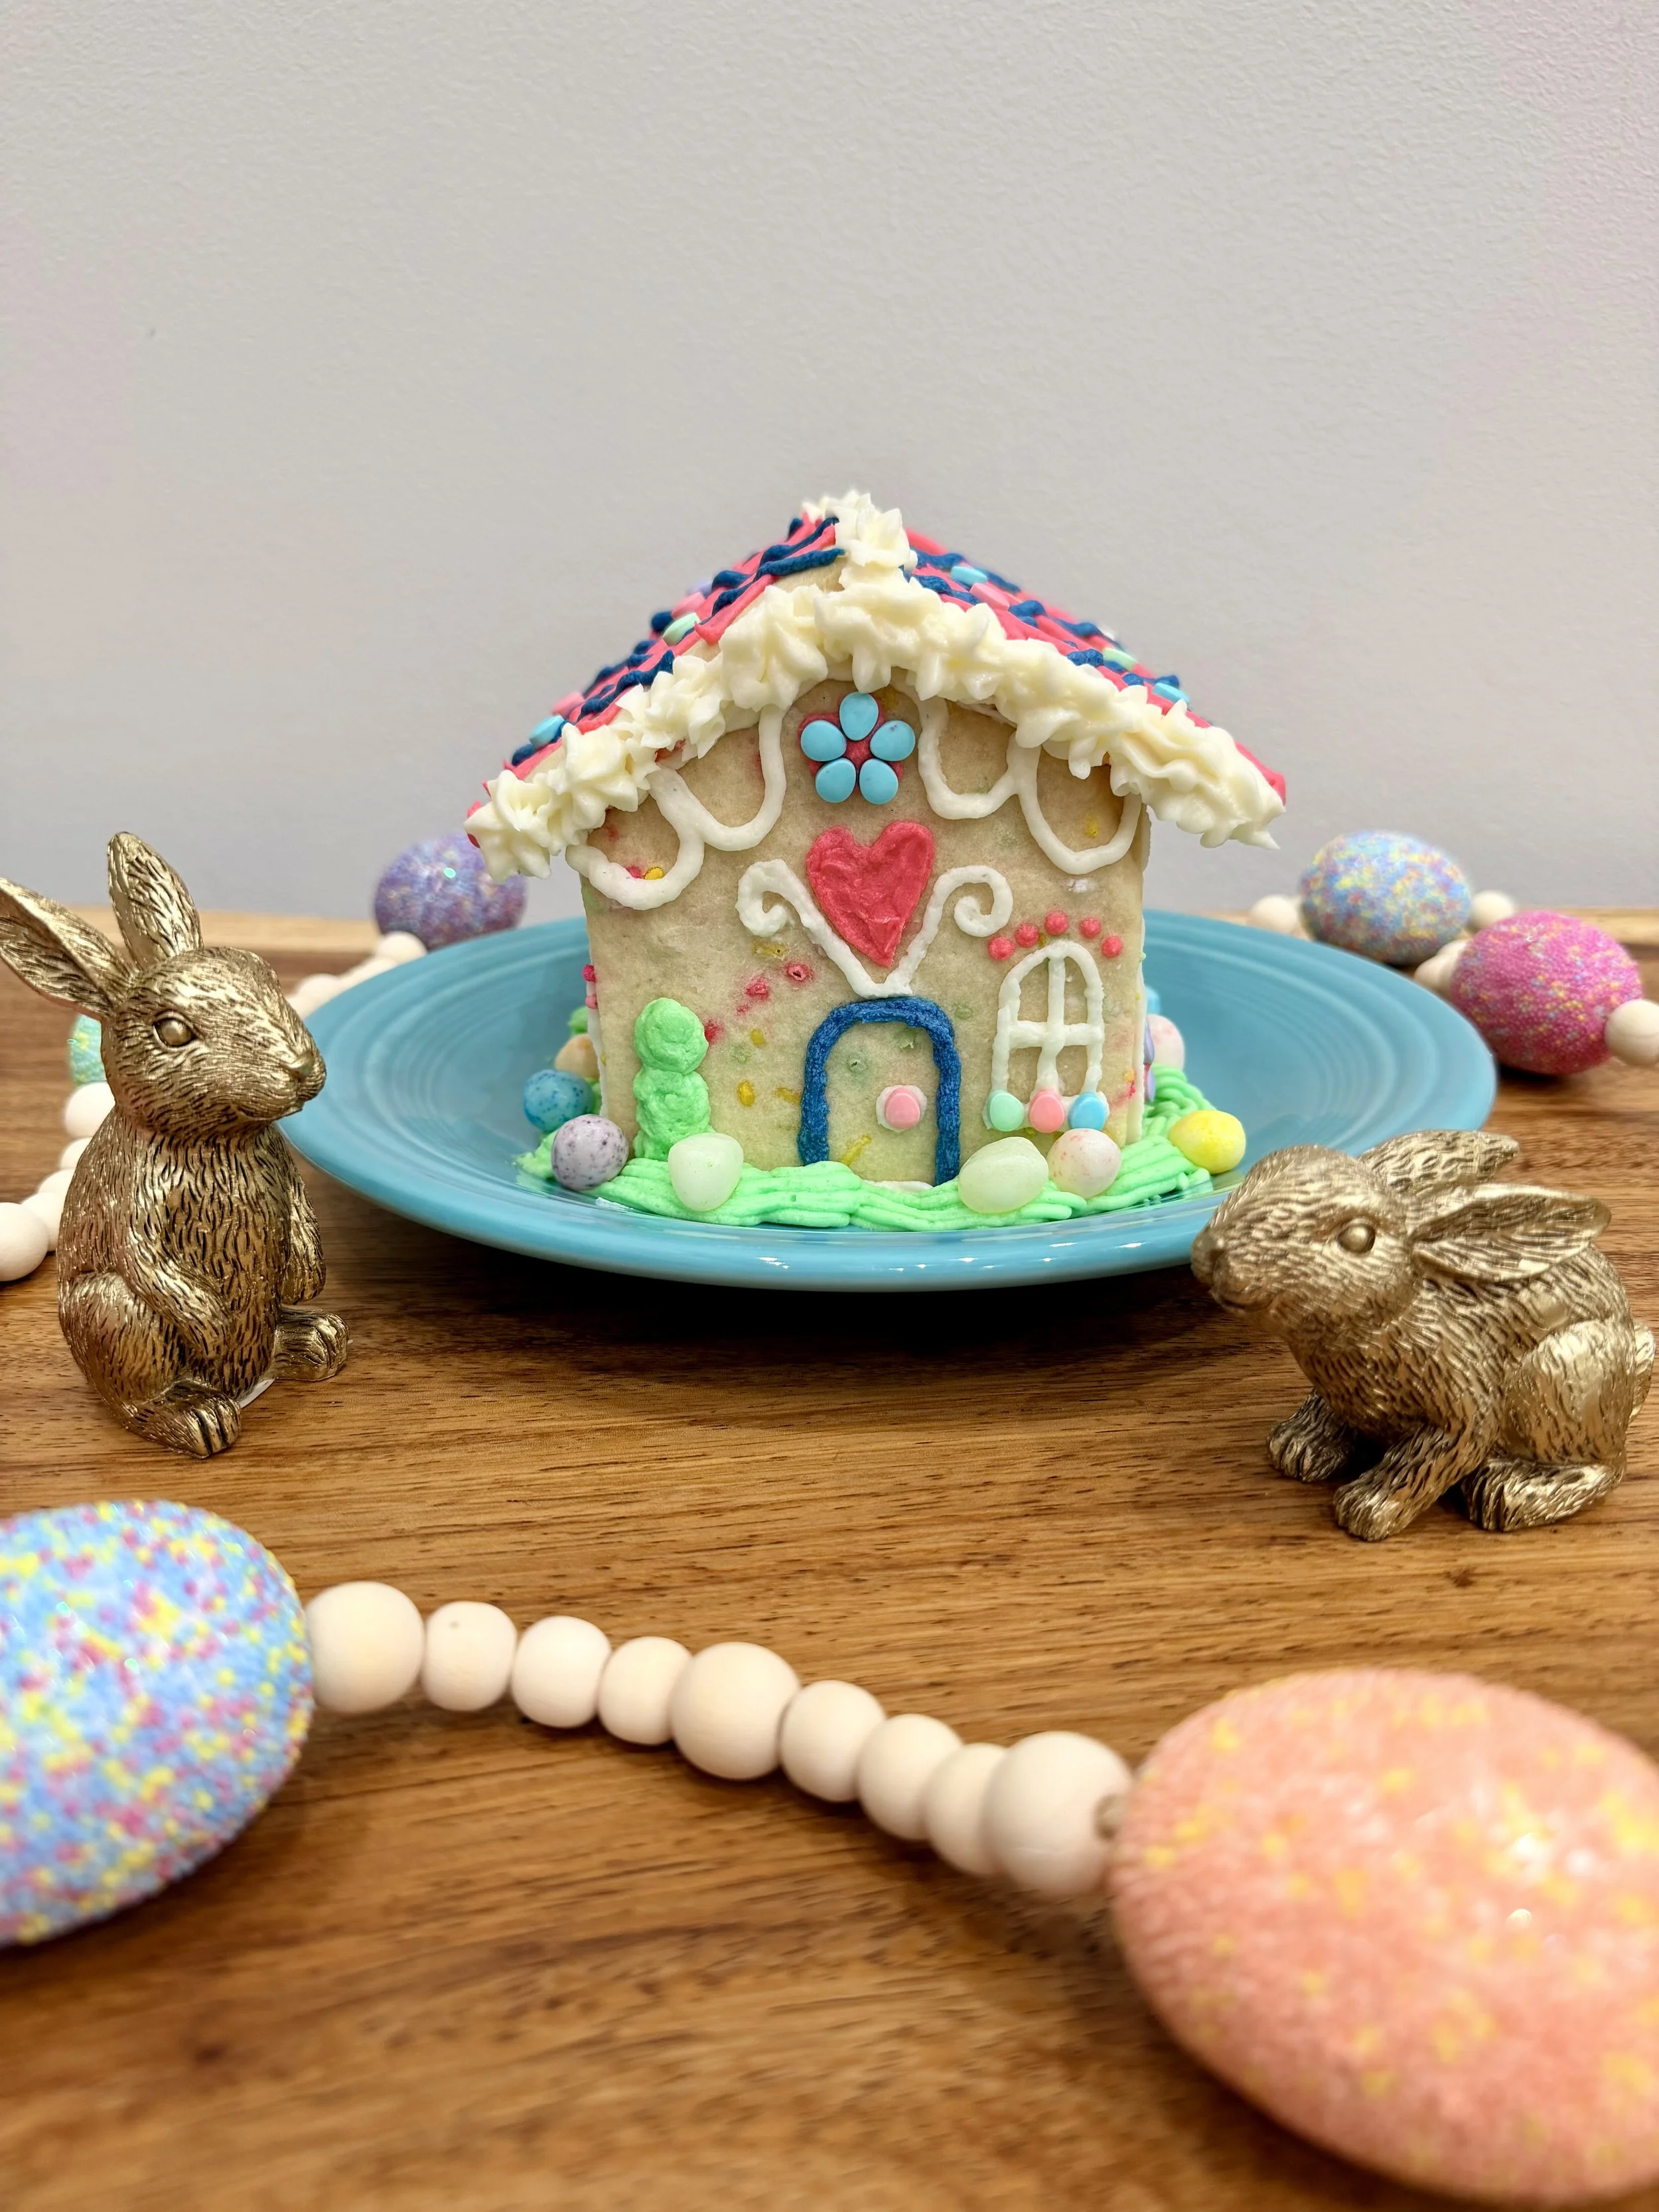
Easter Sugar Cookie House with piped grass, jelly bean eggs, and pastel buttercream details. A fun and easy spring baking project for kids.
Easter Sugar Cookie House (Easy Spring Bunny Cottage!)
If you’ve been around here for a while, you know I will take any excuse to build a sugar cookie house.
🎄 Christmas? Obviously.
💘 Valentine’s Day? Pink doors, yes please.
☘️ St. Patrick’s Day? Leprechaun trap activated.
At this point, building seasonal sugar cookie houses has basically become a tradition in our house — and I love finding new ways to decorate the same simple base.
And now… we have our Easter Bunny Cottage. 🐰💐
This sweet little spring house is decorated with jelly bean eggs, piped buttercream grass (which honestly MAKES the whole thing), tiny egg “tulips,” and a bunny surprise on the back. It’s cheerful, colorful, and surprisingly simple to make.
If you’ve already made one of our houses, this one will feel super easy. And if you haven’t — don’t worry, I’ll link everything you need.
Watch the full step-by-step video below before you start:
🐰 Make the Sweetest Easter Basket
If you’re putting together Easter baskets this year, I rounded up all my favorite ideas for truck-loving kids (including my book + coloring book 🤍).
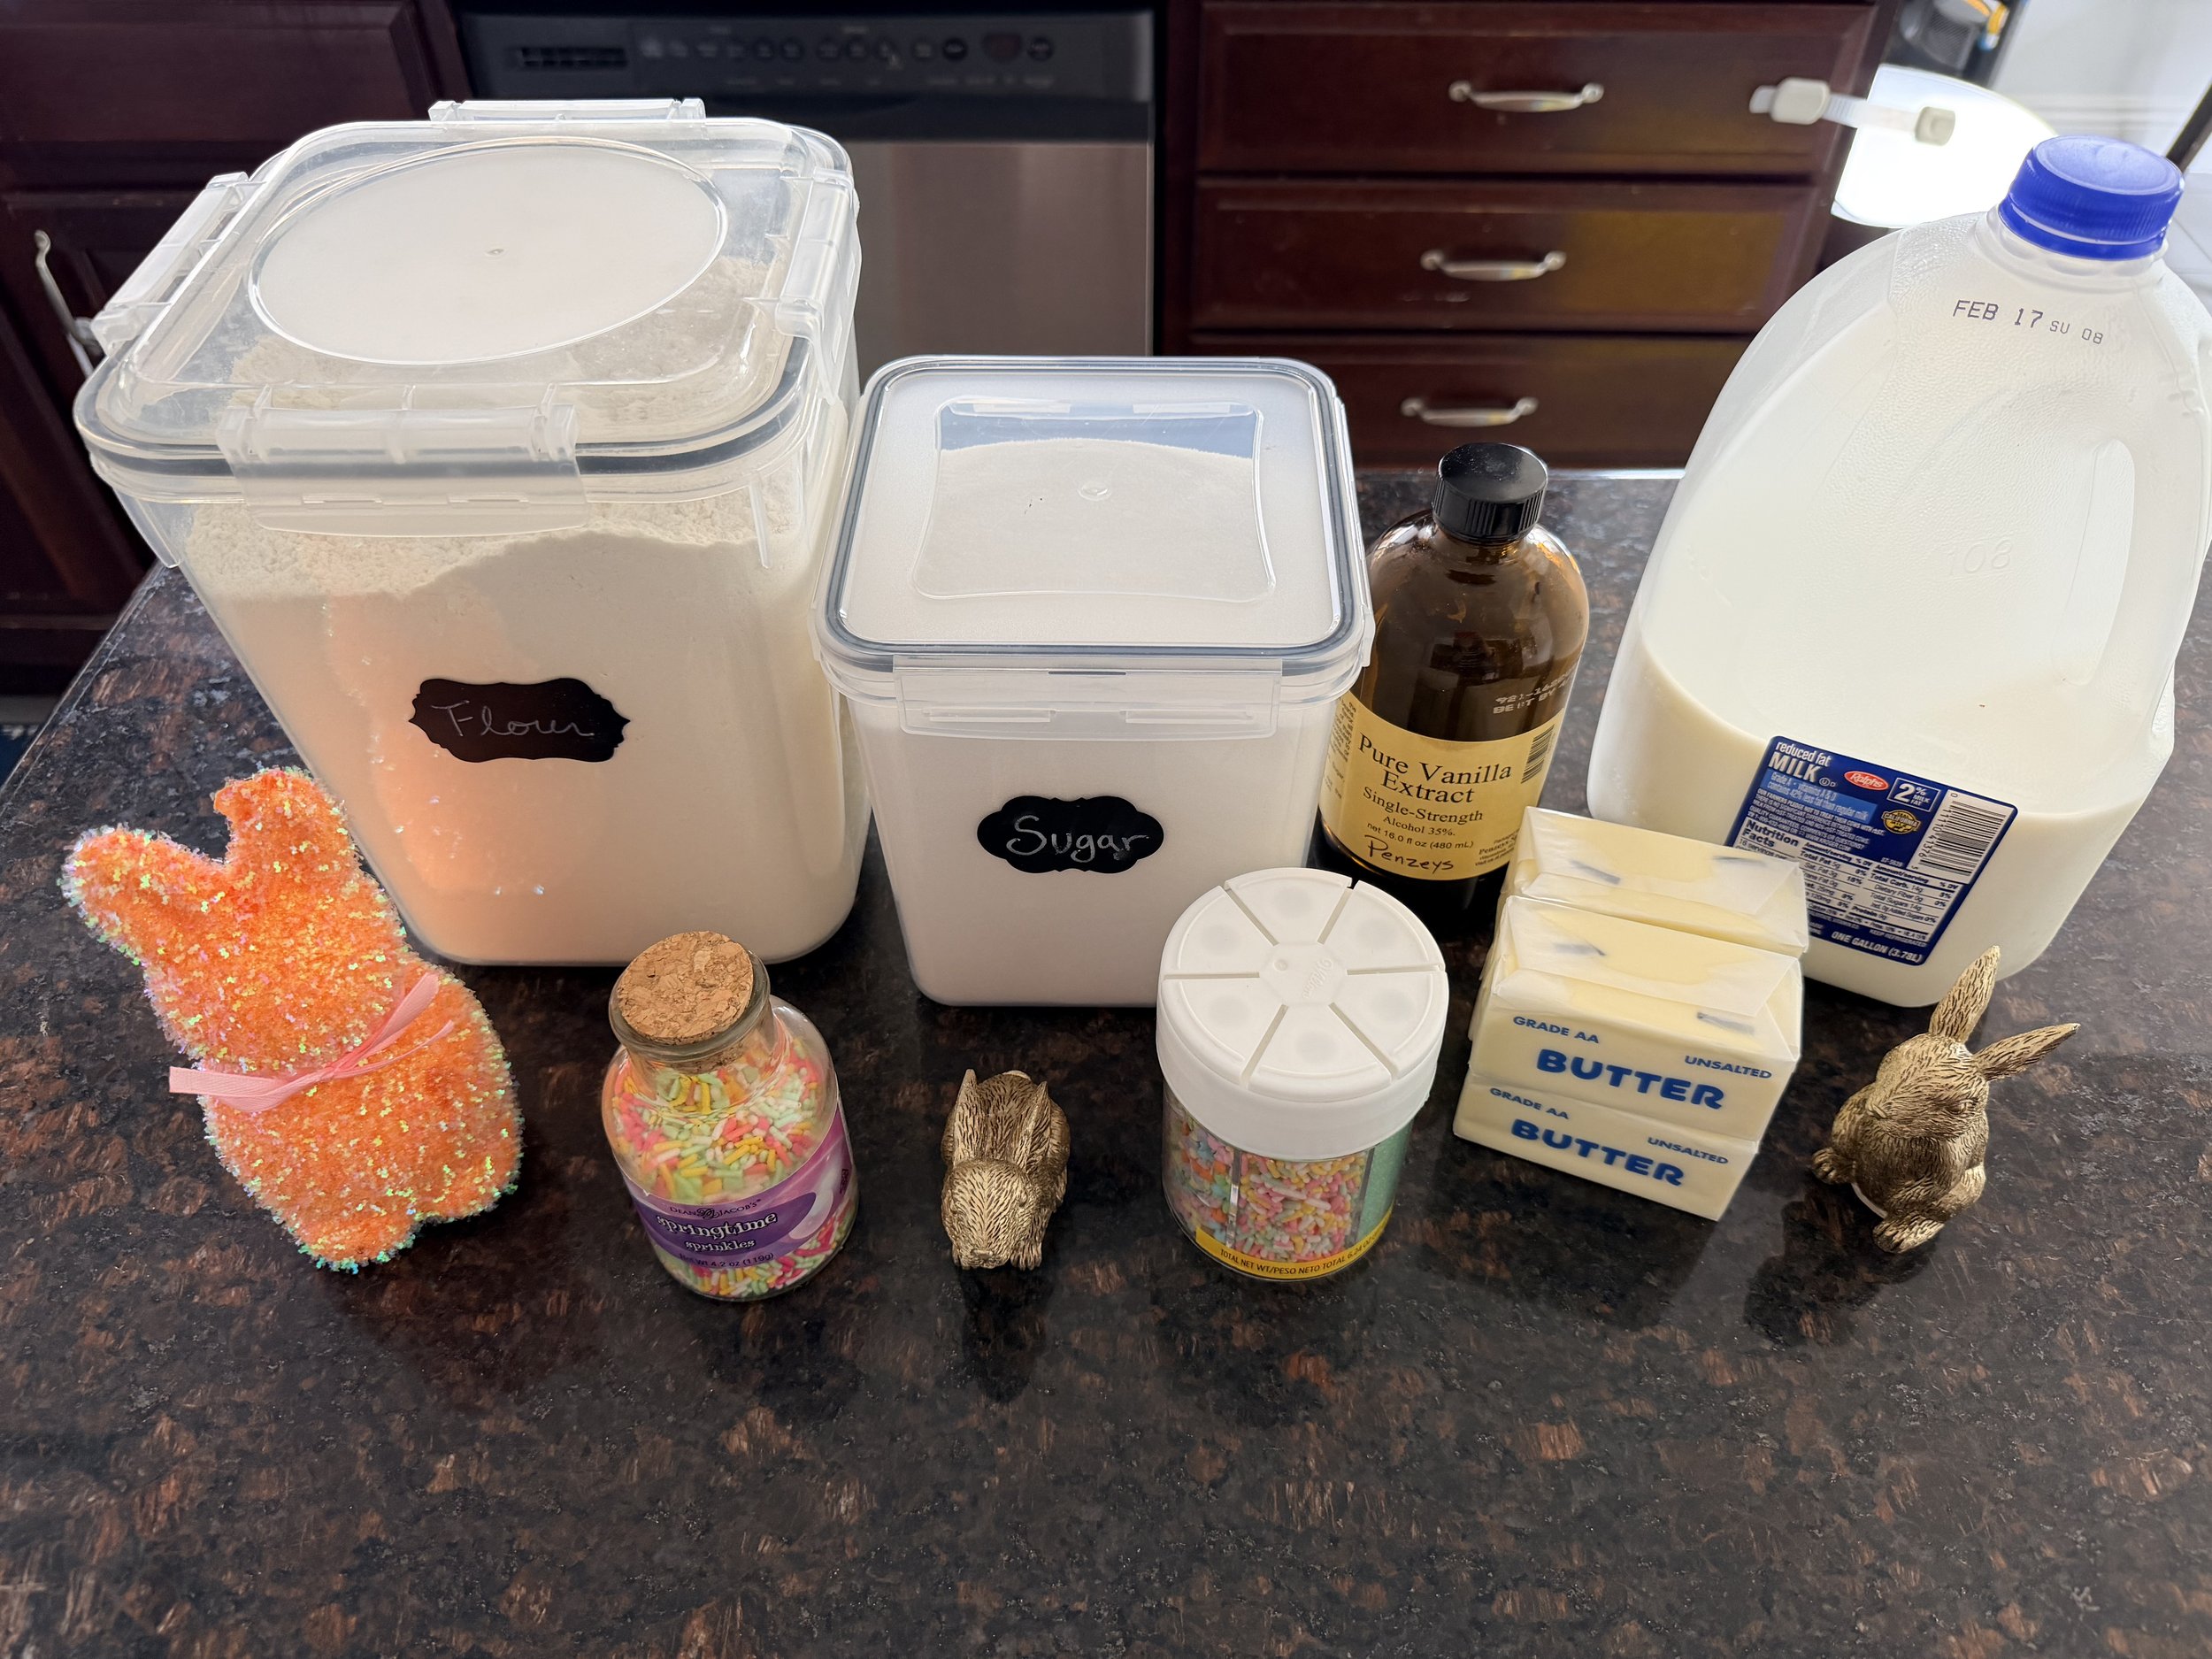
Simple pantry staples are all you need for a sugar cookie house — flour, sugar, butter, and a little vanilla magic.
Why I Make a Sugar Cookie House (Instead of Gingerbread)
I’ll be honest — I’m just not a huge fan of gingerbread.
It’s beautiful. It smells festive. But the taste? Not my favorite.
And if you’ve ever built a traditional gingerbread house, you know it can be:
Hard to cut
Hard to chew
And sometimes hard to get kids excited about eating
That’s why I started making sugar cookie houses instead.
They’re:
✔️ Softer
✔️ Sweeter
✔️ Easier to work with
✔️ And honestly more fun to decorate
Plus — my sugar cookie dough does not include eggs, which gives it a sturdier structure than many “no eggs” gingerbread recipes that have been trending lately. My frosting recipe does not have eggs either as I worry about raw eggs in the icing since I actually consume it (after I admire it for a day or 2).
If you’ve searched for:
no eggs gingerbread house
gingerbread house alternative
easy cookie house template
You’re in the right place.
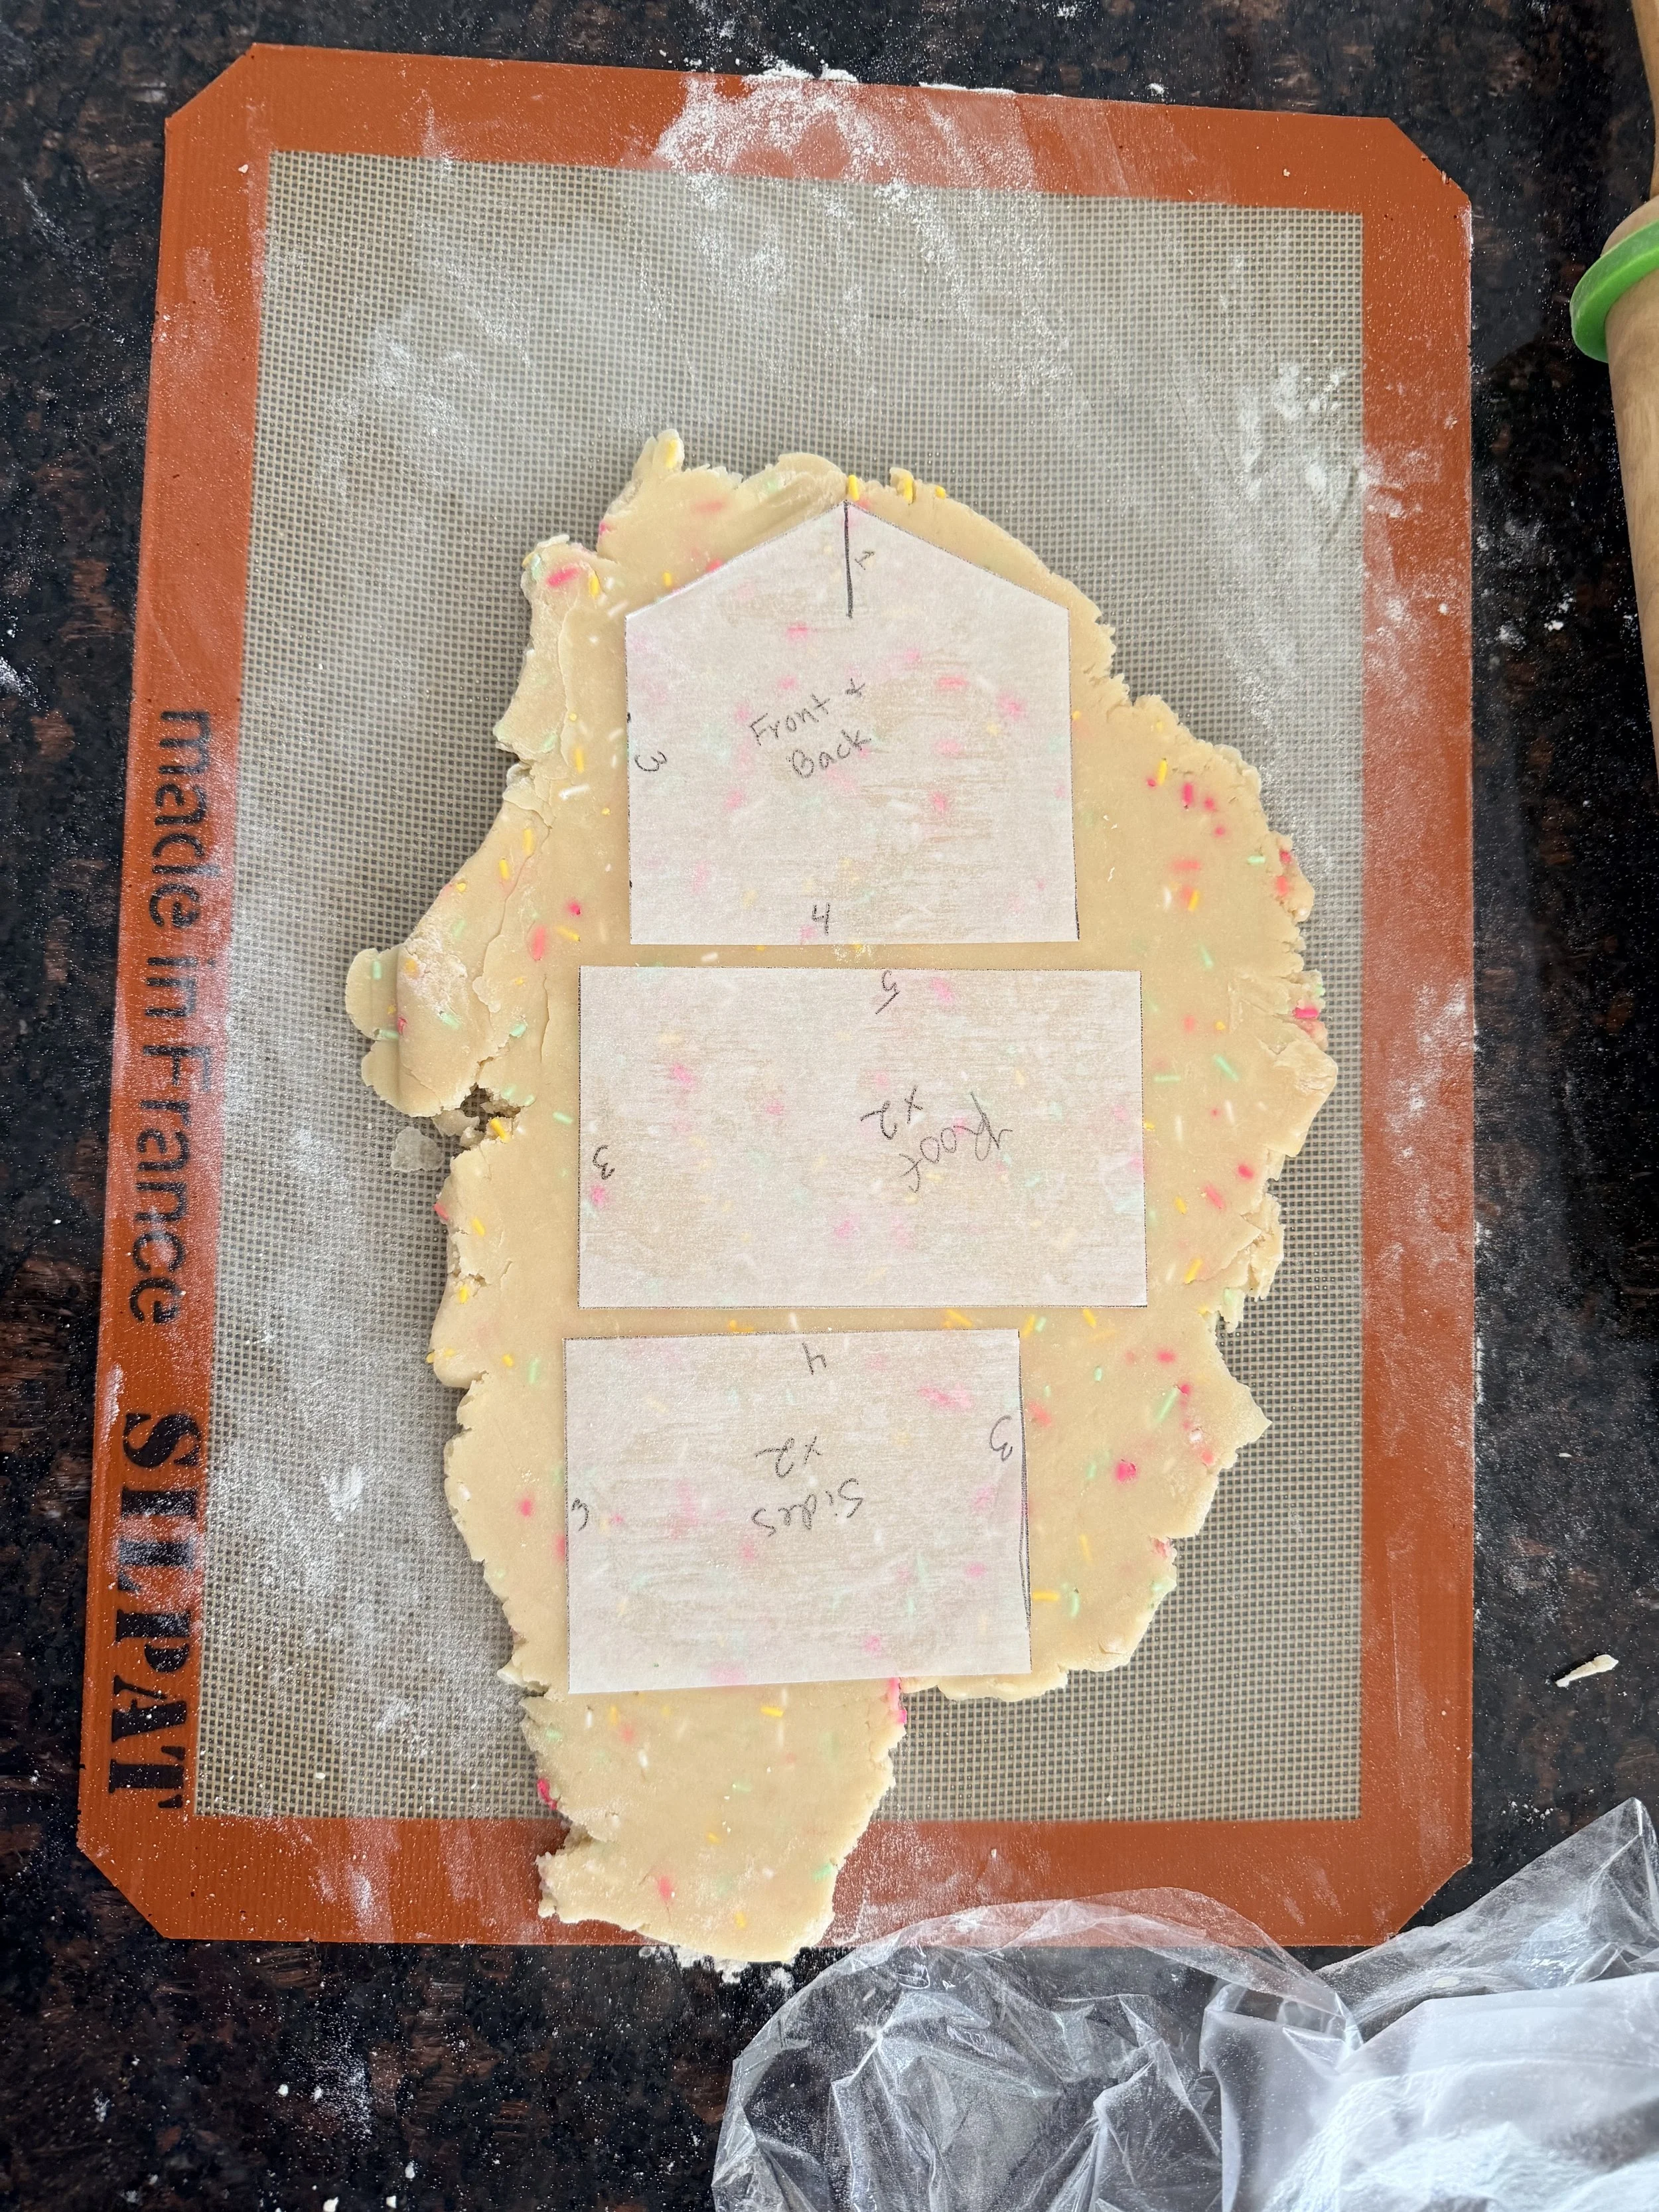
My go-to sugar cookie house template — simple, sturdy, and way easier than gingerbread.
I use the same simple, sturdy template for all of my seasonal houses — Christmas, Valentine’s Day, St. Patrick’s Day, and now Easter.
You can grab the printable template here:
👉 Printable Sugar Cookie House Template
It’s designed to bake flat, assemble easily, and hold up to lots of buttercream and candy.
Why I Love This One
This house feels:
✔️ Bright
✔️ Happy
✔️ Kid-friendly
✔️ Totally customizable
The pastel jelly bean eggs give it that instant Easter vibe. But the real star? The piped buttercream grass.
That little textured border around the base pulls everything together and makes it feel polished — even if your walls aren’t perfectly straight (mine rarely are 😉).
And the back might be my favorite part…
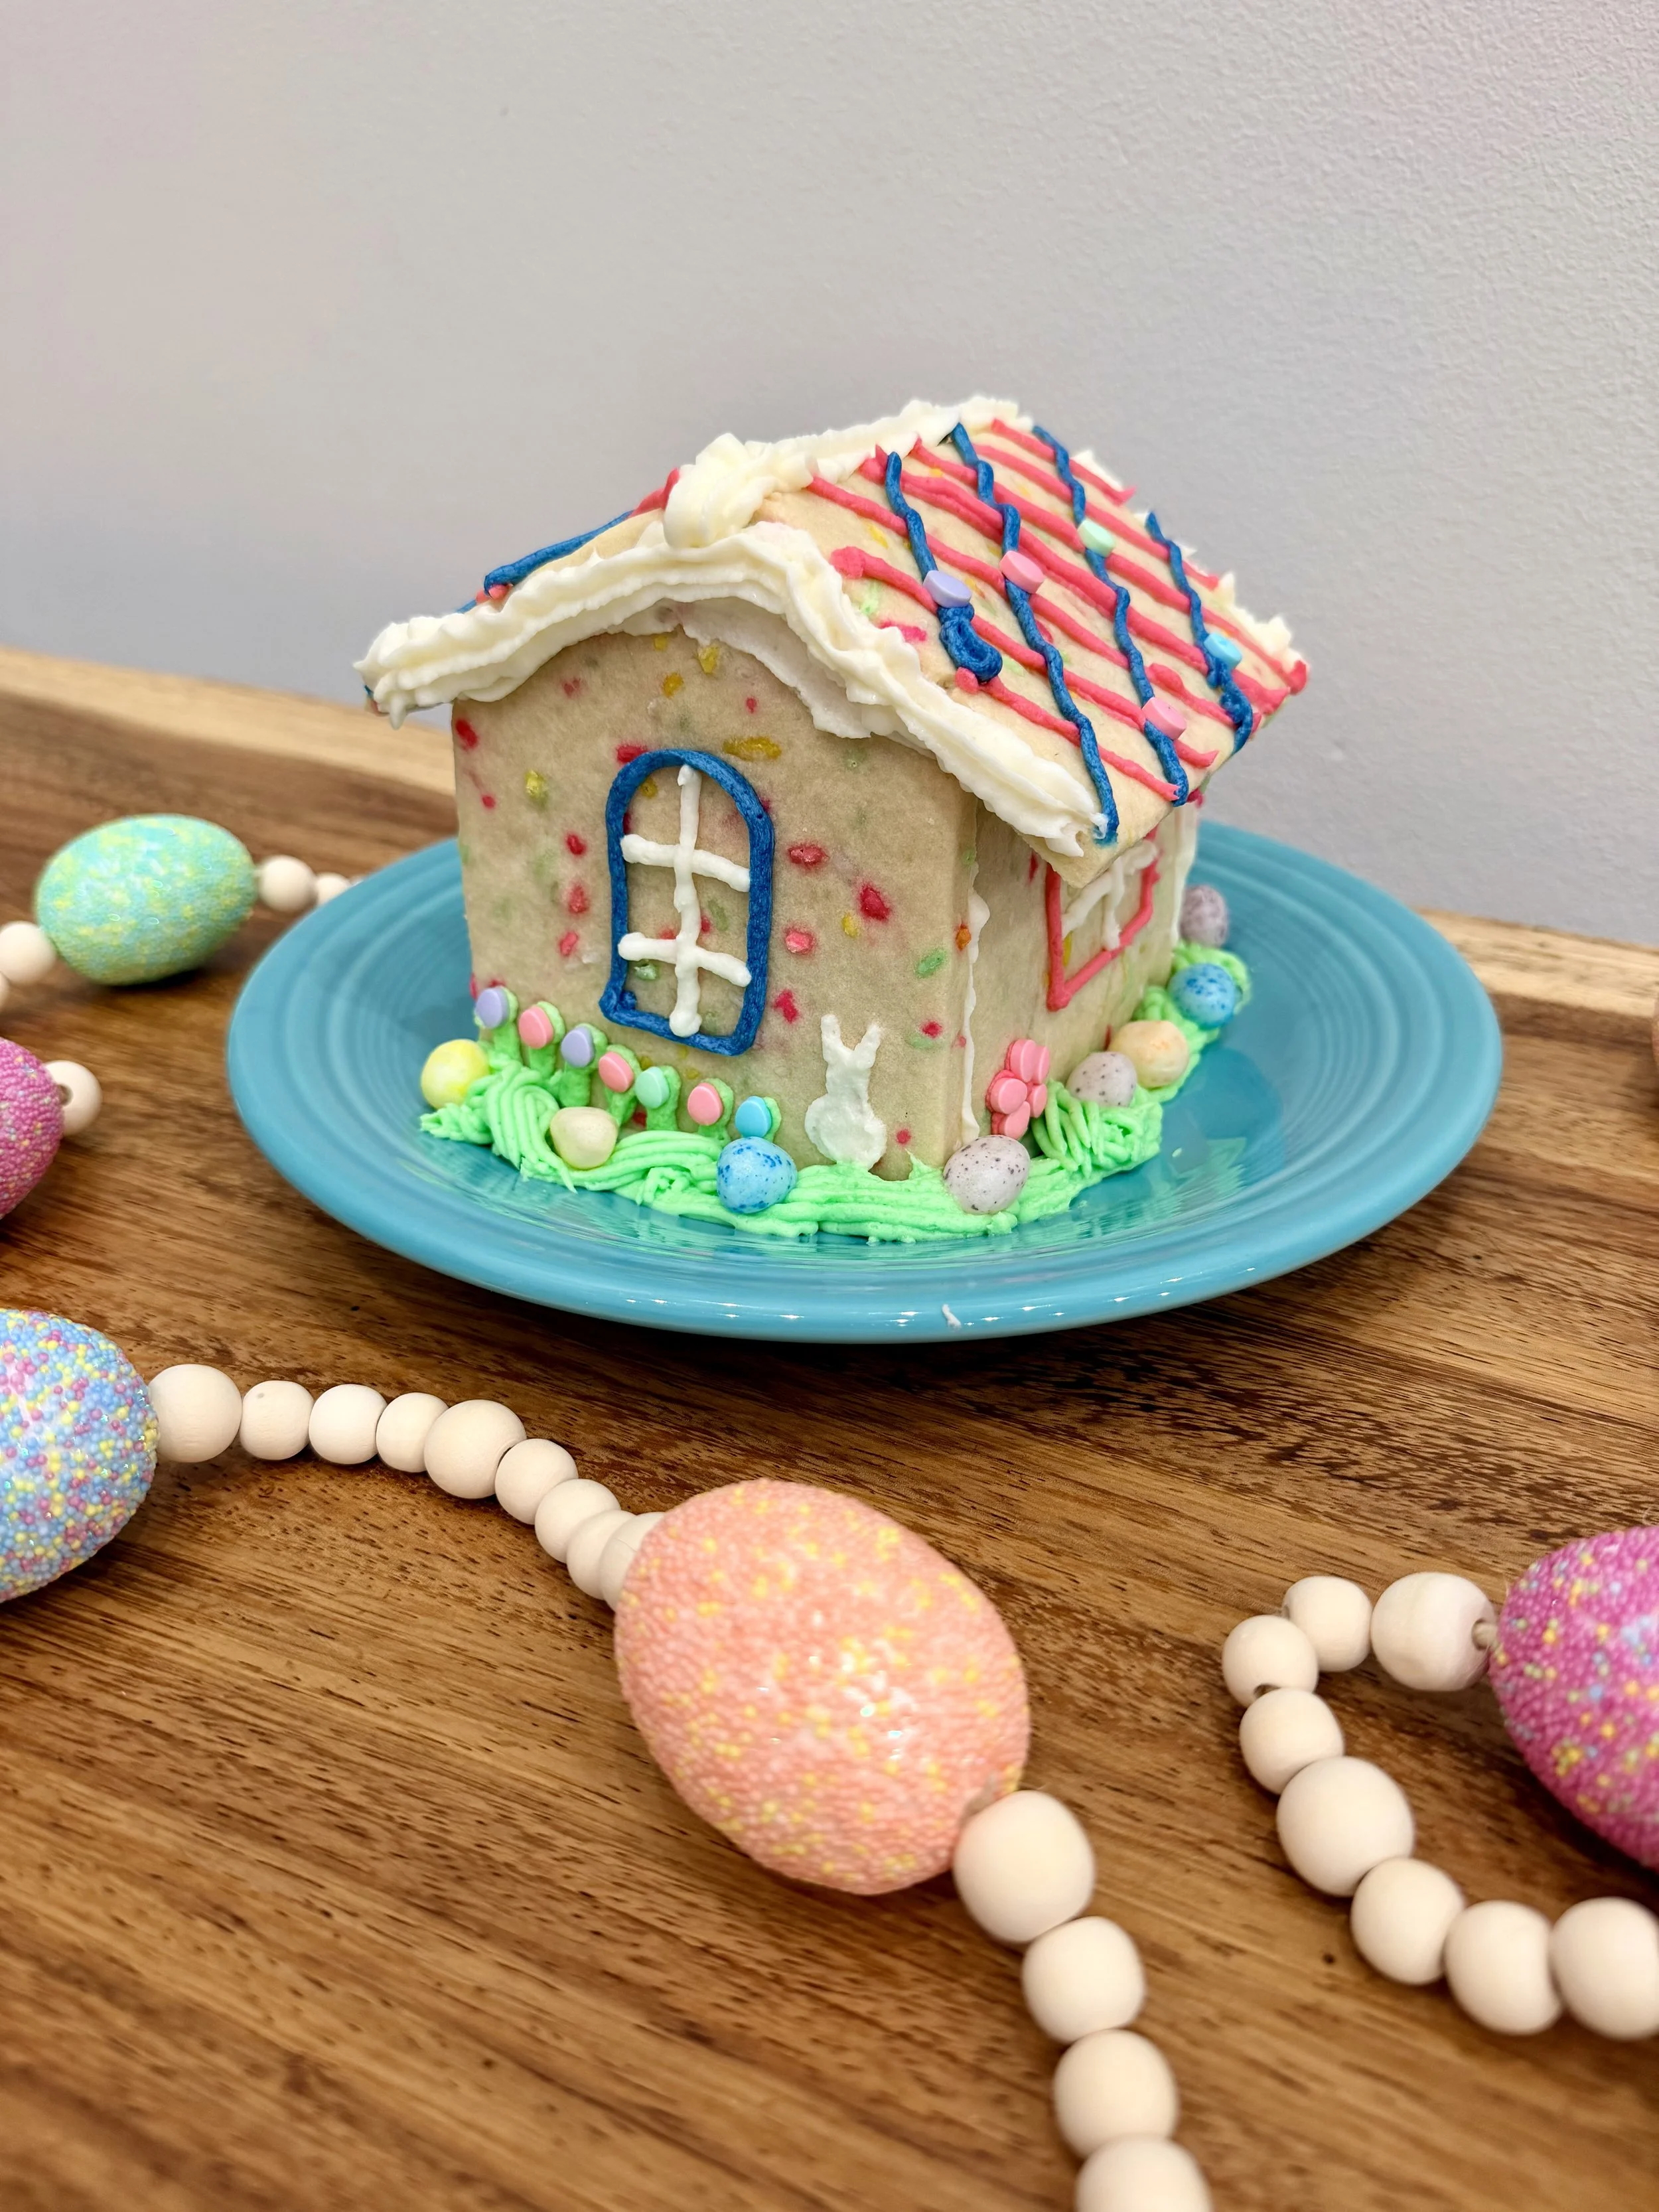
Back view of the Easter sugar cookie house featuring a piped bunny silhouette, buttercream grass, and pastel candy tulips.
The Bunny + Tulip Details 🐰🌷
On the back of the house, I piped a simple white bunny silhouette.
Nothing complicated — just a basic shape. It doesn’t have to be perfect. In fact, a slightly imperfect bunny feels even more charming.
I’ve made enough sugar cookie houses over the years to know that “perfect” isn’t the goal — fun is. None of my houses are flawless, but every single one has been full of creativity (and a lot of buttercream).
Then I added little “tulips” made from tiny egg-shaped candies pressed into piped green stems.
It’s such an easy way to create dimension without complicated piping techniques.
If you can pipe:
A line
A blob
And grass
You’ve got this. If I can make this house, you absolutely can too.
Watch How to Assemble a Sugar Cookie House (Timelapse)
Want to see how it all comes together?
Here’s a quick timelapse of assembling this Easter bunny cottage — from panels to piped grass to jelly bean eggs.
It always amazes me how a few flat cookie pieces turn into a full little spring house.
Watch how to assemble an Easter sugar cookie house step-by-step in this quick timelapse. See how the panels come together, how the buttercream holds everything in place, and how easy it is to decorate.

How to Pipe Grass, Bunnies & Easy Tulips
You don’t need fancy decorating skills for this house — just a few simple piping tricks and the right buttercream consistency.
Once you get the hang of it, decorating is the fun part.
🌱 Piping Buttercream Grass
The grass around the base is what really makes this house feel finished. It hides seams, frames the cottage, and instantly gives it that spring look.
What to use:
A grass tip (I used the Wilton #233 grass tip or #29)
Or snip tiny slits into the end of a piping bag
How to pipe it:
Hold the bag straight up and down if you want the grass to stand upright
Or hold it slightly sideways and squeeze around the house like I did here
Squeeze, pull up slightly, release
Repeat around the base
Short squeezes create fluffy texture. Don’t drag — just squeeze and lift.
That texture instantly makes the house feel complete.
🐰 How to Pipe a Simple Bunny
The bunny on the back looks detailed, but it’s really just a silhouette.
Keep it simple:
Start with a small oval for the body
Add a circle for the head
Two long ears
A tiny tail
That’s it.
You’re not drawing a realistic rabbit — just a sweet shape. Slightly imperfect actually makes it softer and cuter.
🌷 Easy Candy Tulips
These are my favorite little shortcut.
Instead of piping full flowers, I did this:
Pipe a small green stem
Press a tiny egg-shaped candy at the top or you can pipe an egg-shape with frosting
Done
It’s the easiest “flower” trick ever and adds instant color and dimension.
Need more inspiration? Check out my favorite Sugar Cookie House Pinterest Board for design inspiration!
Buttercream Consistency Tip (Very Important!)
If your icing is too soft, everything will slump.
If it’s too stiff, your hand will hurt.
You want it thick enough to:
Hold its shape
Stand up when piped
Not slide down the walls
When you dip a spoon into your frosting, it should hold a soft peak at the end.
That’s the sweet spot.
A Few Icing Tips I’ve Learned Over the Years
After making more sugar cookie houses than I can count, here are a few small tricks that make decorating easier:
Save white icing for glue first.
If you’re making colored frosting, set aside enough white buttercream to assemble your house. You can always turn white icing into another color — but you can’t turn green back into white without making more.Use a glass to fill your piping bags.
After inserting your piping tip, place the bag inside a pint glass and fold the top of the bag over the rim. Spoon your icing in. It keeps everything clean and makes filling so much easier.
Decorating sugar cookie houses should feel fun — not stressful. A little prep goes a long way.
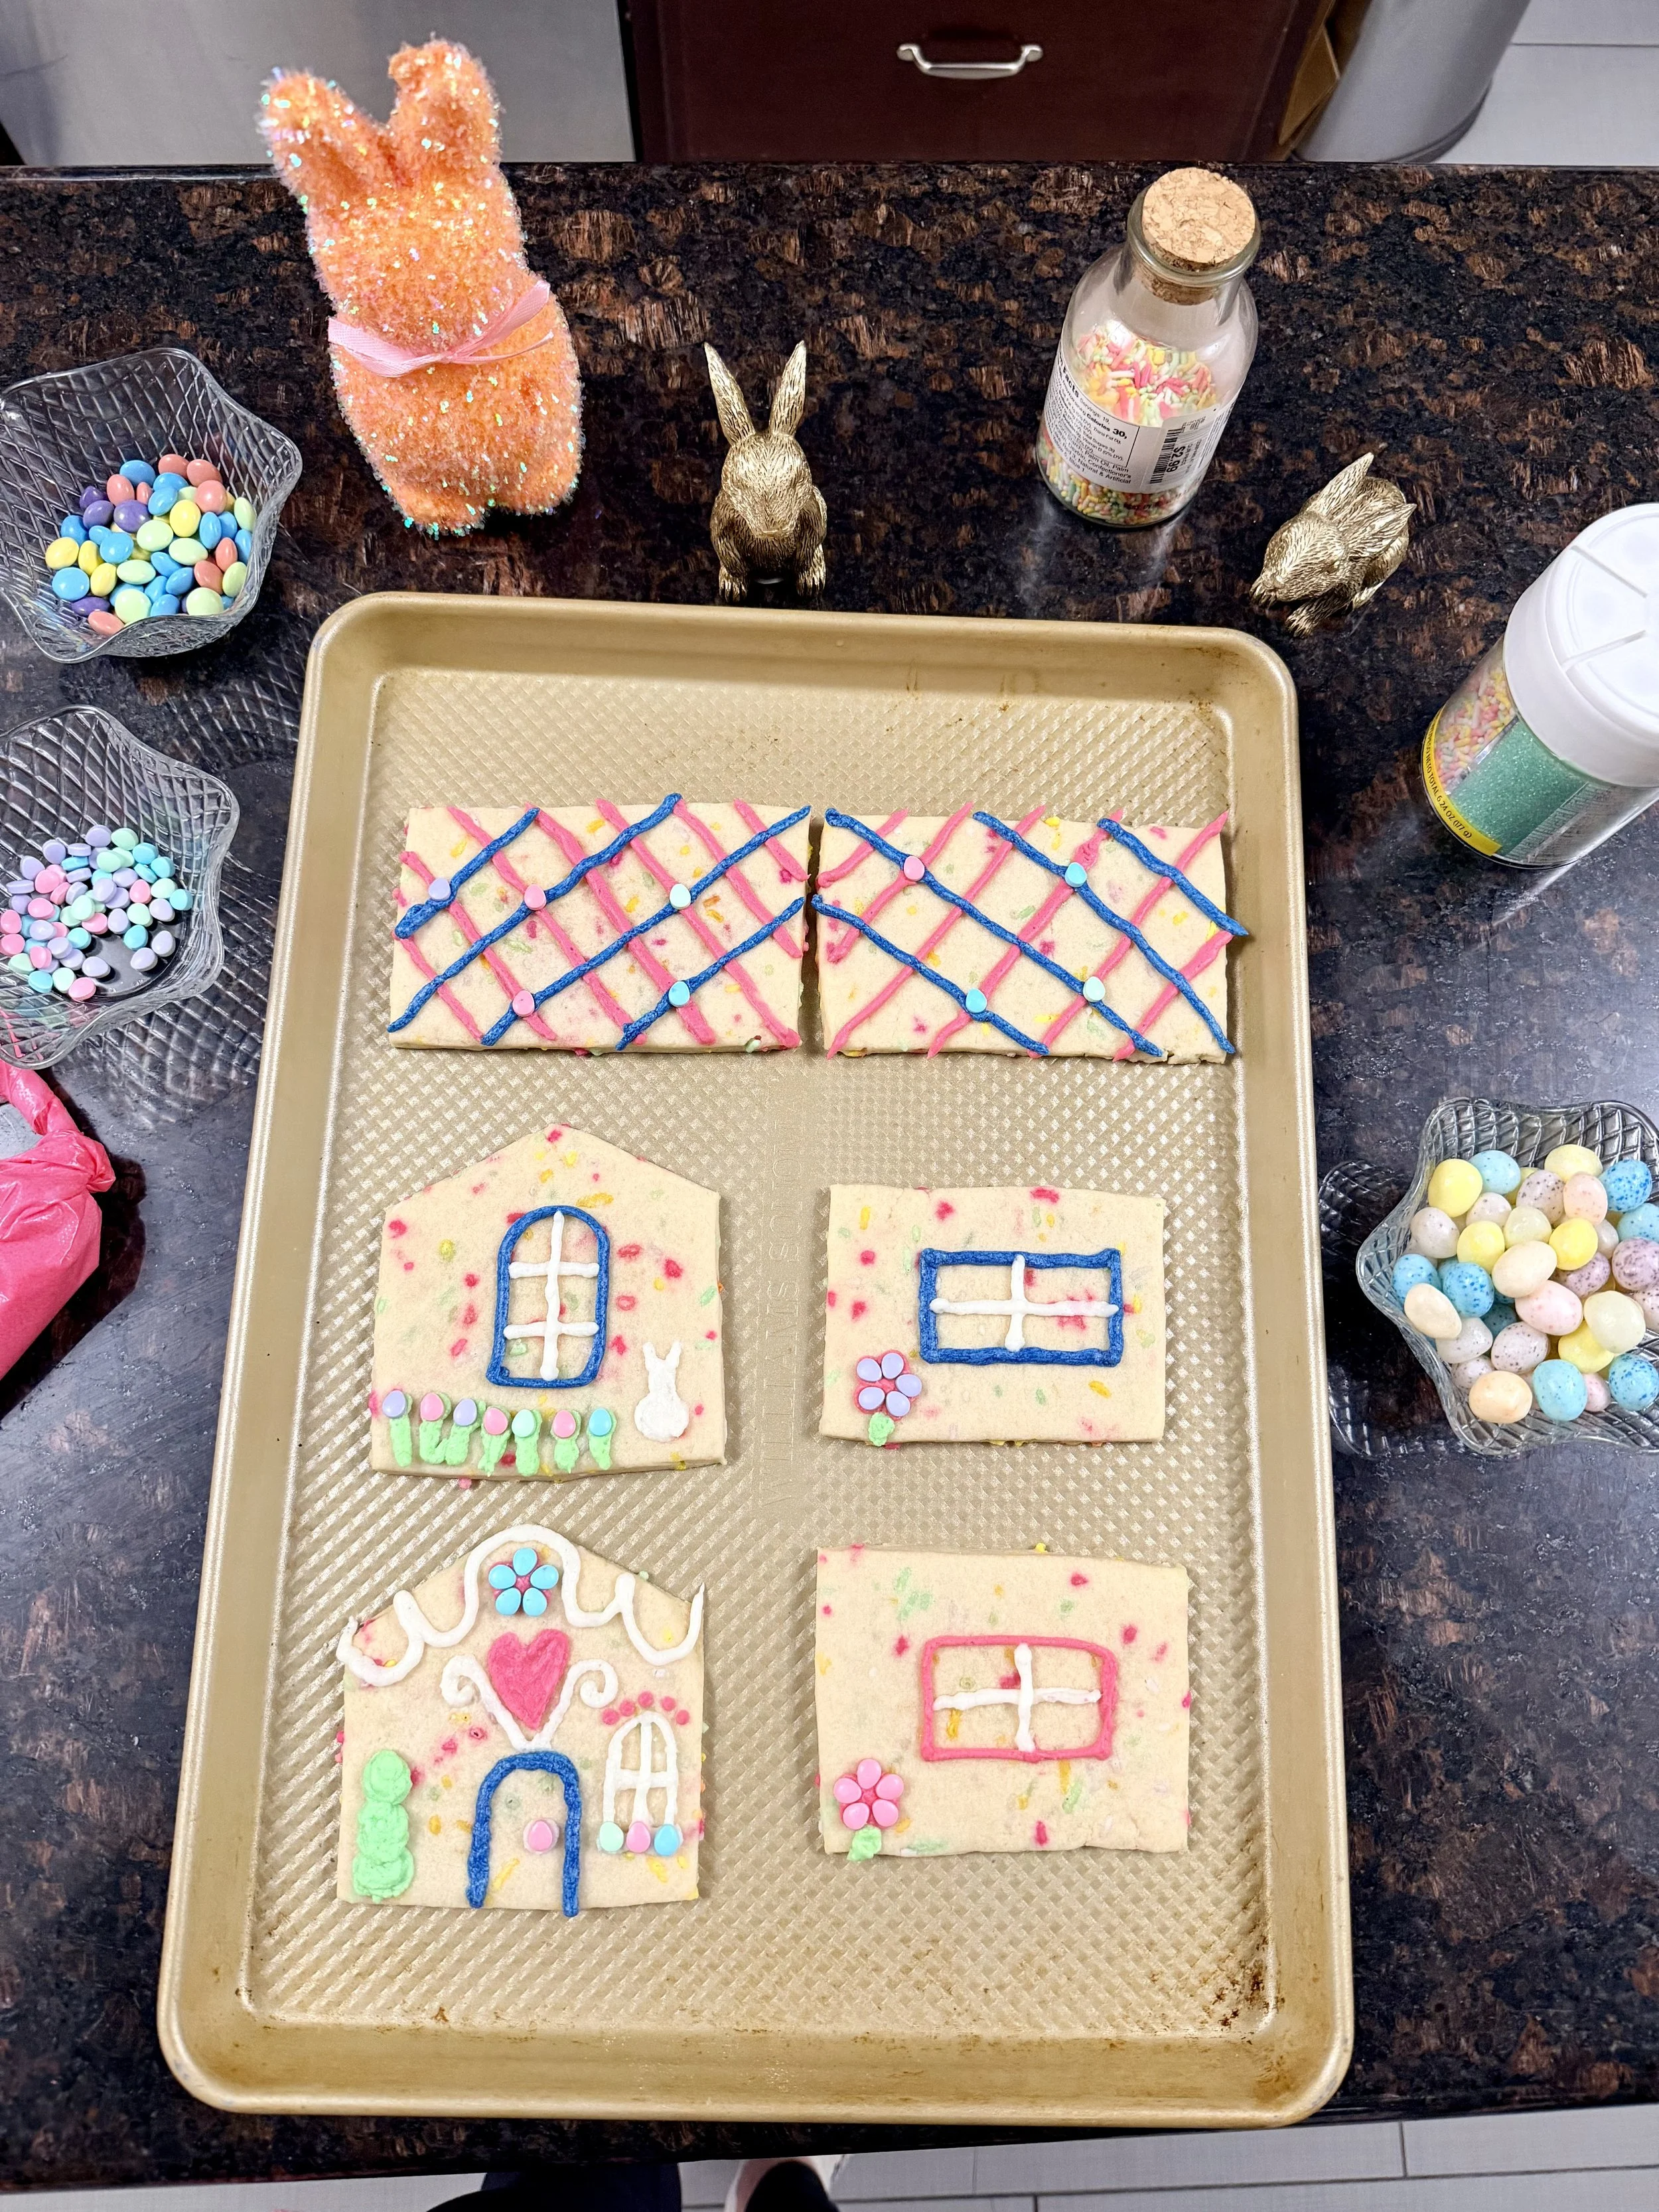
I always decorate the panels first — way easier than trying to pipe on a standing house.
What I Used to Decorate the Easter Cottage
I had a good time shopping the Easter candy aisle for this one! My design developed in my head as I selected my decorations.
My classic sugar cookie house dough (same recipe from my original post)
Buttercream icing for decorating
Jelly bean eggs
Tiny egg-shaped candies for tulips
Spring sprinkle mix (optional but fun)
A grass piping tip (or just snip your piping bag!)
If you need the base recipe + template, start here:
👉 How to Make a Sugar Cookie Gingerbread House (Recipe + Template Included)
👉 Or grab the printable in the shop here:
Printable Gingerbread House Kit
If you’re new to this series, you’ll also love:
💕 Valentine’s Day Sugar Cookie House
🍀 Leprechaun Trap Sugar Cookie House
🎄 Christmas Sugar Cookie House
📘 The Sugar Cookie House Guide
They all use the same easy base build.
How to Make It Feel “Easter”
You don’t need special cutters. Just change the decor:
Pastel colors instead of bold Christmas tones
Jelly bean eggs instead of gumdrops
Grass around the base
A bunny detail on the back
Tiny candy flowers
That’s it.
Same structure. Totally different vibe.
Tips for Success
1. Let Your Walls Cool Completely
Spring sugar cookie dough can soften quickly. Fully cool walls before assembly.
2. Use Thicker Buttercream for Structure
You want your icing thick enough to hold shape — especially for the roof and grass.
3. Pipe the Grass Last
It’s the finishing touch. Once it goes on, the whole house looks complete.
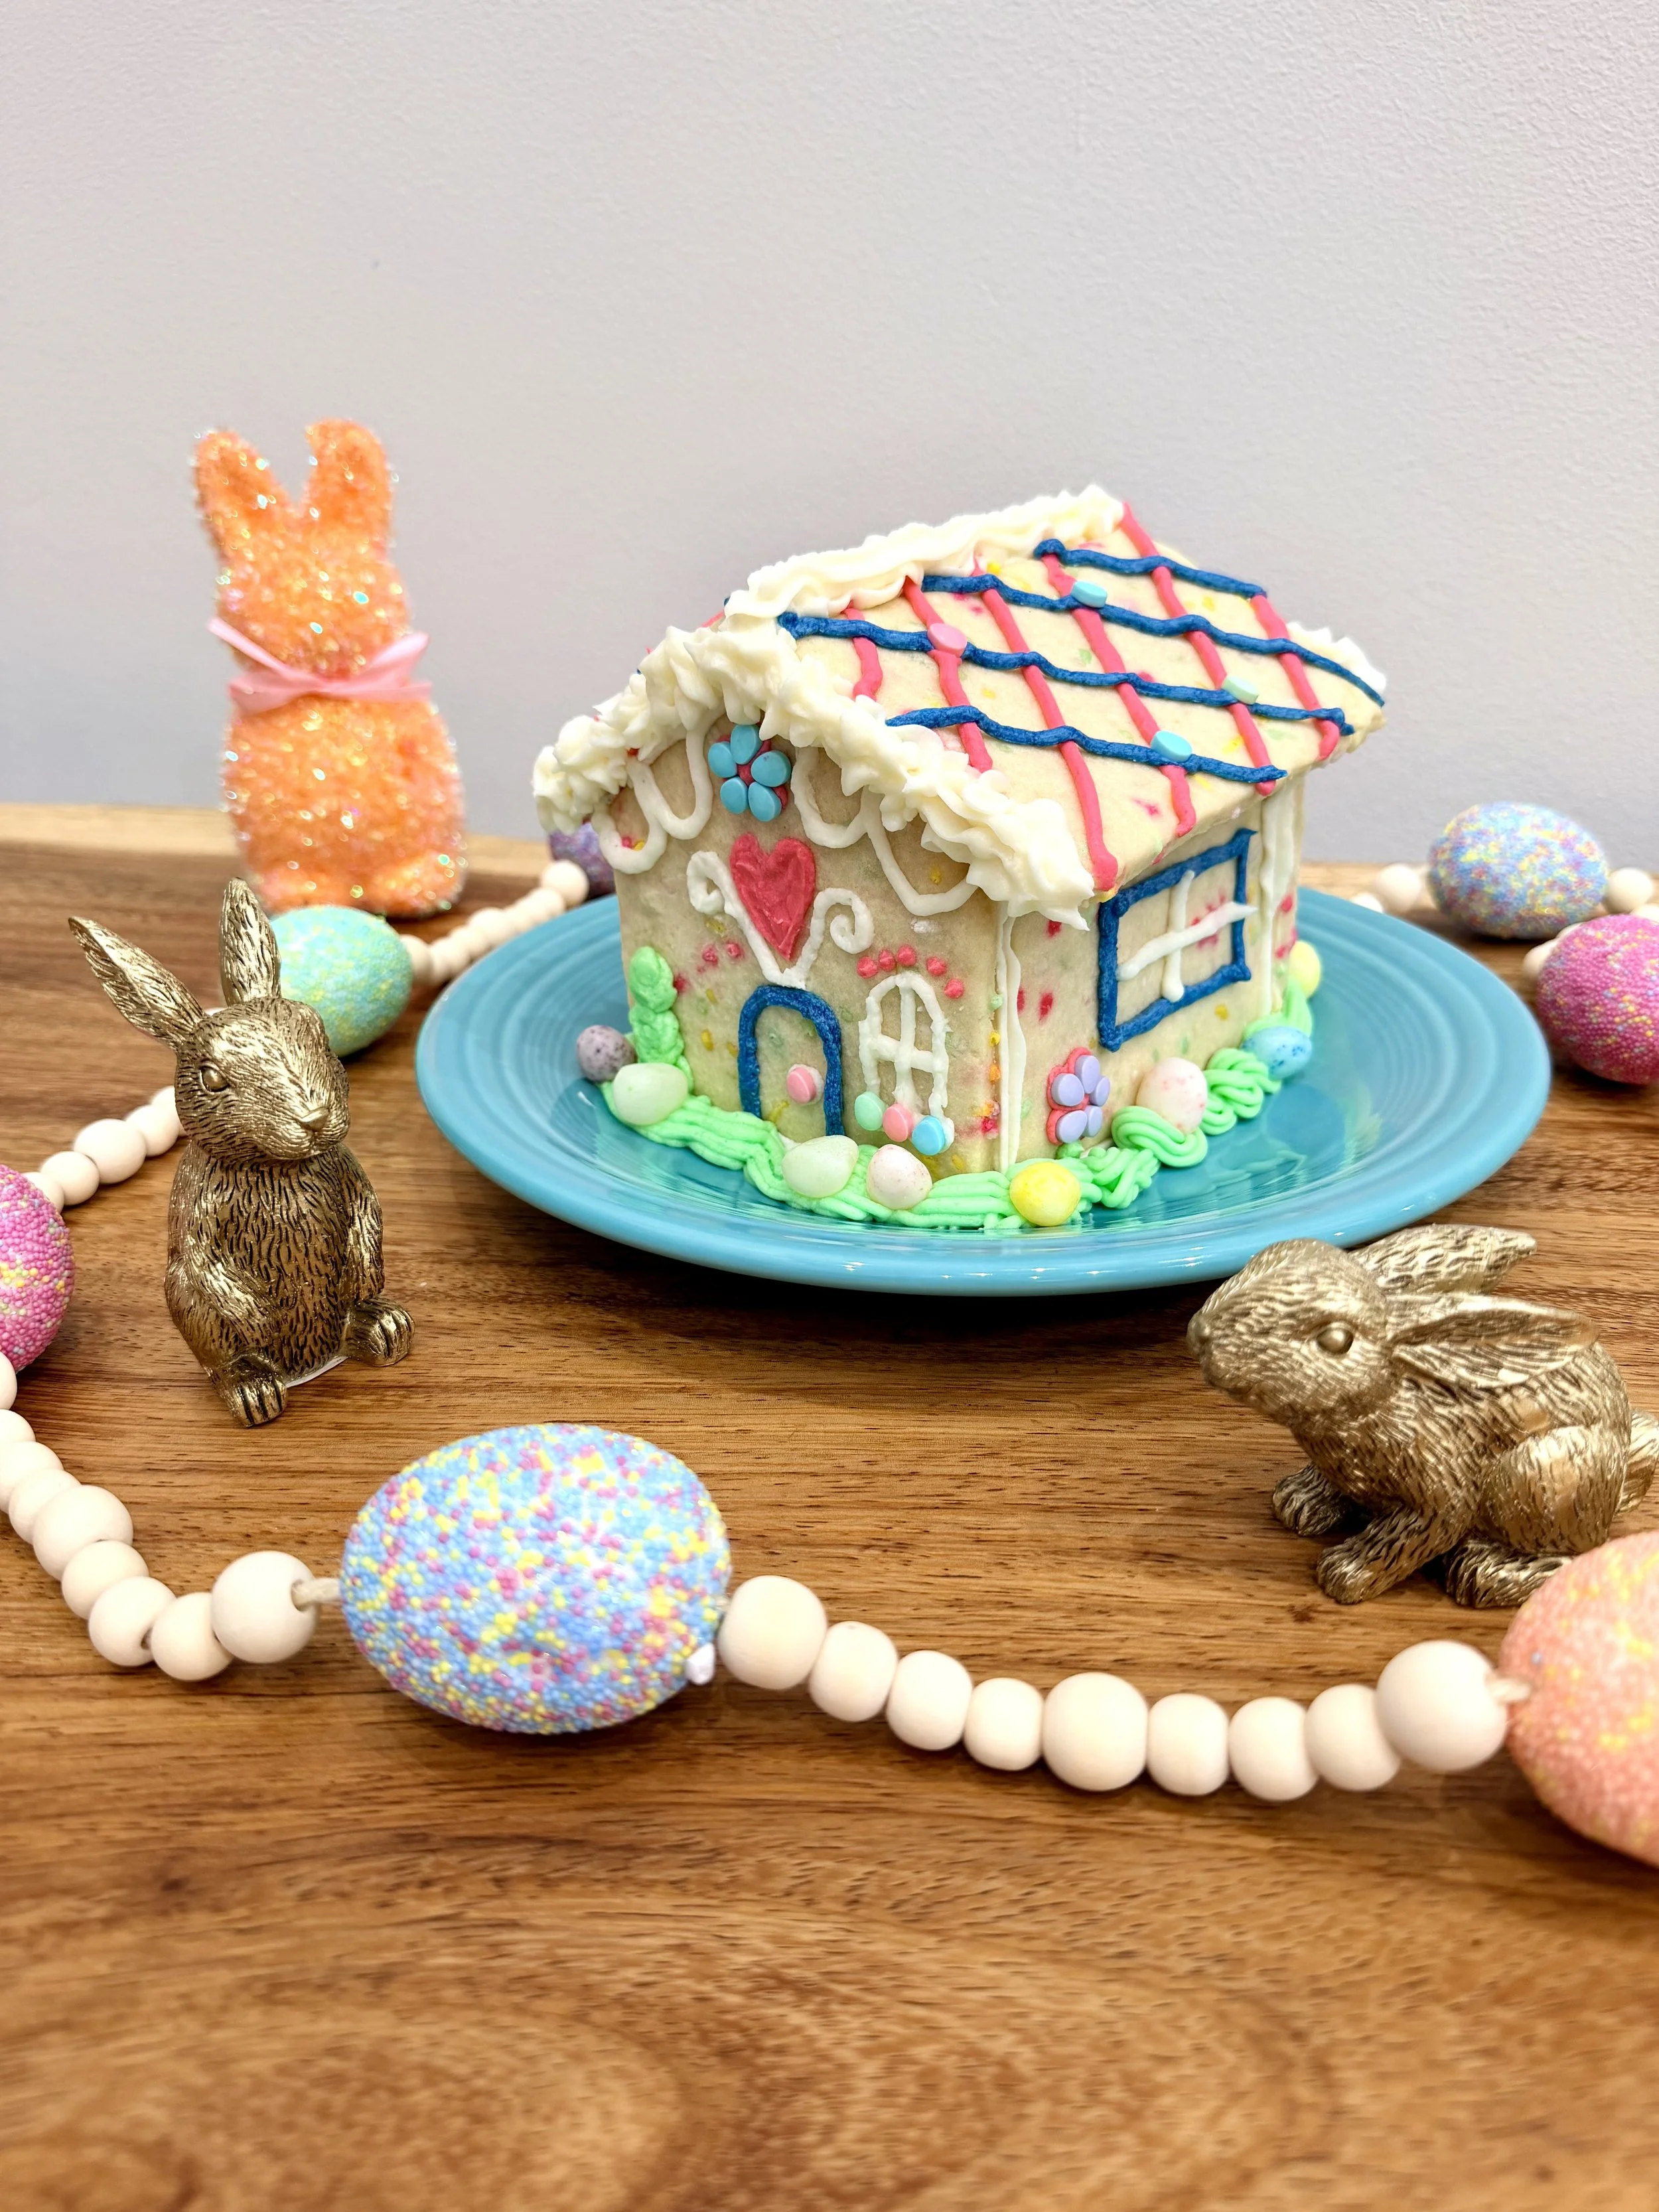
Spring baking just got a whole lot cuter 🐰🌷
Make It a Family Tradition
I love how this series has evolved.
What started as a Christmas gingerbread alternative has turned into a year-round decorating tradition.
And I honestly think this Easter version might be one of the cutest yet.
It’s sweet without being complicated.
Colorful without being chaotic.
And festive without needing a single gingerbread spice!
If you make one, tag me @thesweetestescapes — I love seeing your houses come to life.
And if you want to build your own, grab the template and start here:
Spring baking just got a whole lot cuter. 🐣💕

The Trucks That Saved the Park — a colorful, rhyming picture book about teamwork, nature, and building something beautiful together.
NEW CHILDREN’S BOOK - THE TRUCKS THAT SAVED THE PARK
If you’re putting together Easter baskets this year, this little cookie house pairs perfectly with a spring book and a few colorful treats. We’ll actually be celebrating the release of The Trucks That Saved the Park on March 14 — and I can’t think of a sweeter way to welcome spring than books, baking, and a little creativity.
Frequently Asked Questions About Making an Easter Sugar Cookie House
Can I use store-bought cookie dough for a sugar cookie house?
You can, but I recommend a sturdier homemade dough if you want your house to hold up well. Store-bought dough tends to spread more, which can make assembly tricky. If you’re following my template, my sugar cookie house recipe is designed to bake flat and strong.
What kind of icing works best for assembling a cookie house?
Thick buttercream works beautifully for decorating, but you’ll want it sturdy enough to act as “glue.” The icing should hold a soft peak when you lift a spoon — not runny, and not stiff like cement. If it’s too soft, the walls may slide. If it’s too stiff, piping will be difficult.
How do you pipe grass with buttercream?
To pipe buttercream grass, use a grass tip like the Wilton #233 or #29, or snip tiny slits into a piping bag. Hold the bag straight up and down, squeeze gently, pull up slightly, and release. Short squeezes create fluffy texture that looks just like spring grass.
How far in advance can I make a sugar cookie house?
You can bake the panels 1–2 days in advance and store them in an airtight container. Once assembled and decorated, the house will stay fresh for several days at room temperature. Just keep it in a cool, dry place.
Do I need special tools to make an Easter sugar cookie house?
No special tools are required. A piping bag (or even a zip-top bag with the corner snipped), a basic piping tip, and simple Easter candies are all you need. The decorations are what make it feel seasonal — not fancy equipment.
Love this Easter sugar cookie house?
📌 Don’t forget to pin it so you can come back and build your own bunny cottage later!
More Sweet Posts:
Leprechaun Trap Sugar Cookie House 🍀
Turn a sugar cookie house into a magical leprechaun trap! This fun St. Patrick’s Day activity includes a rainbow path, “Free Gold” door, and gold coin bait kids will love.
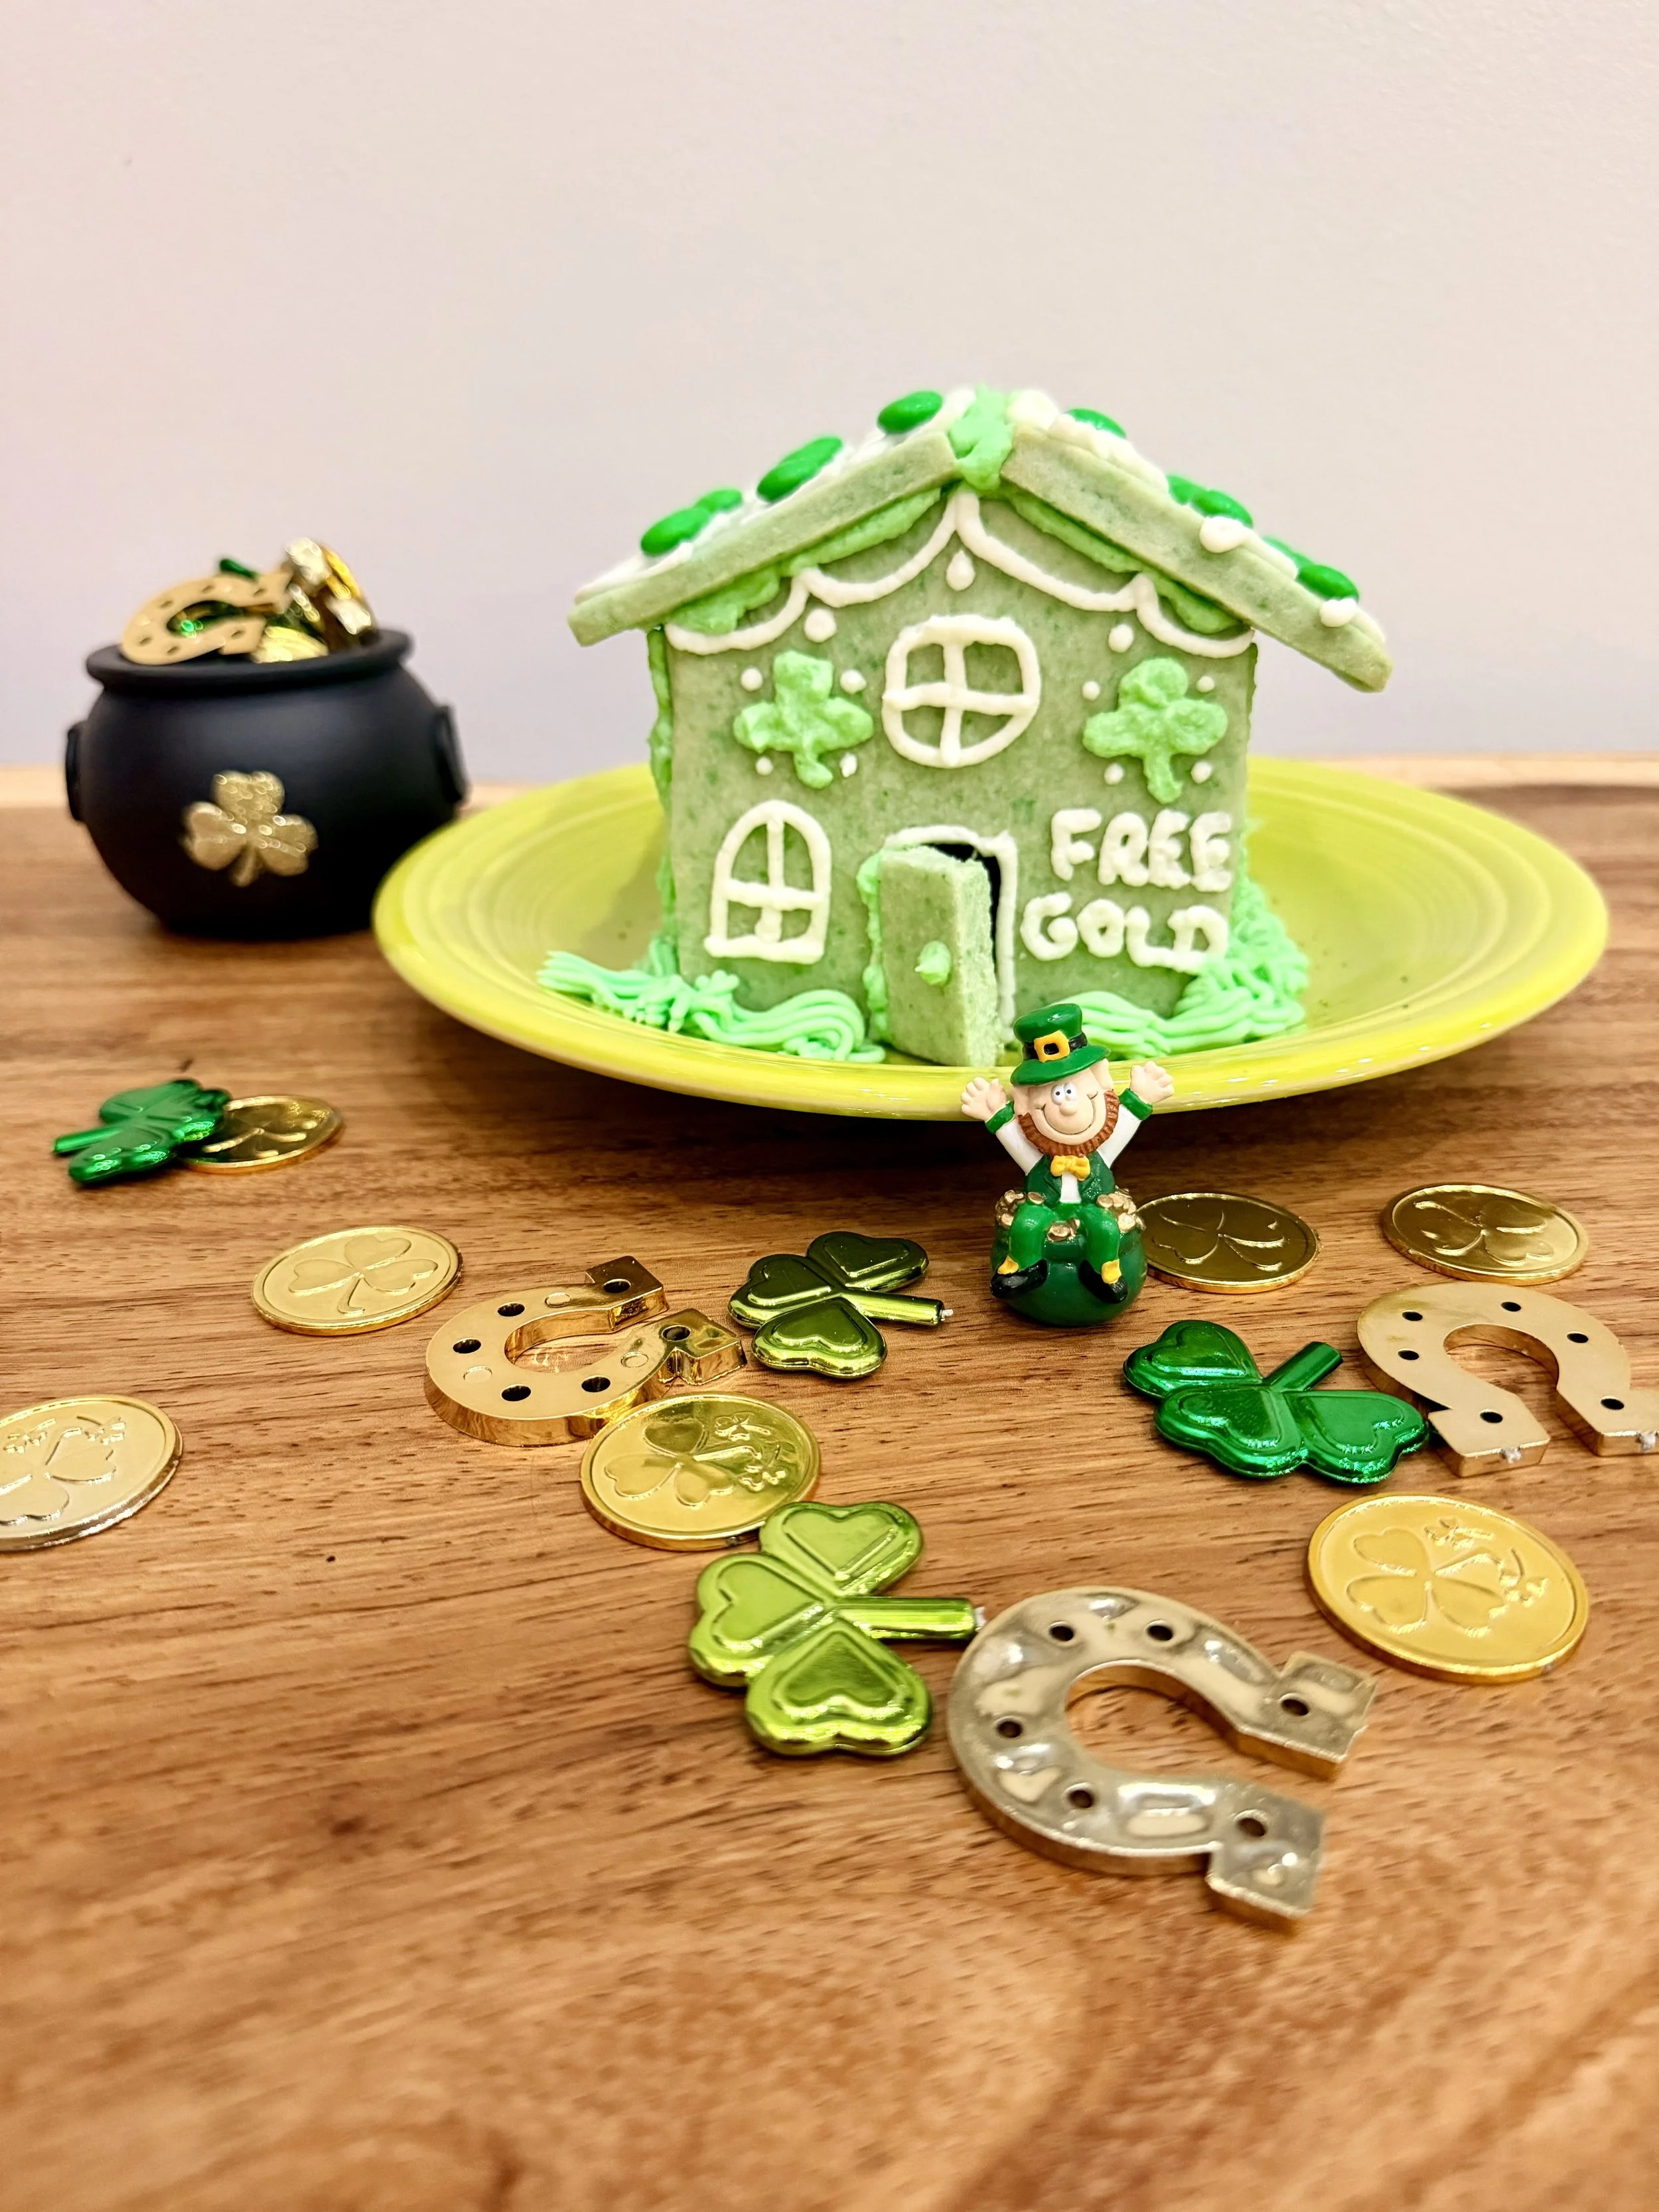
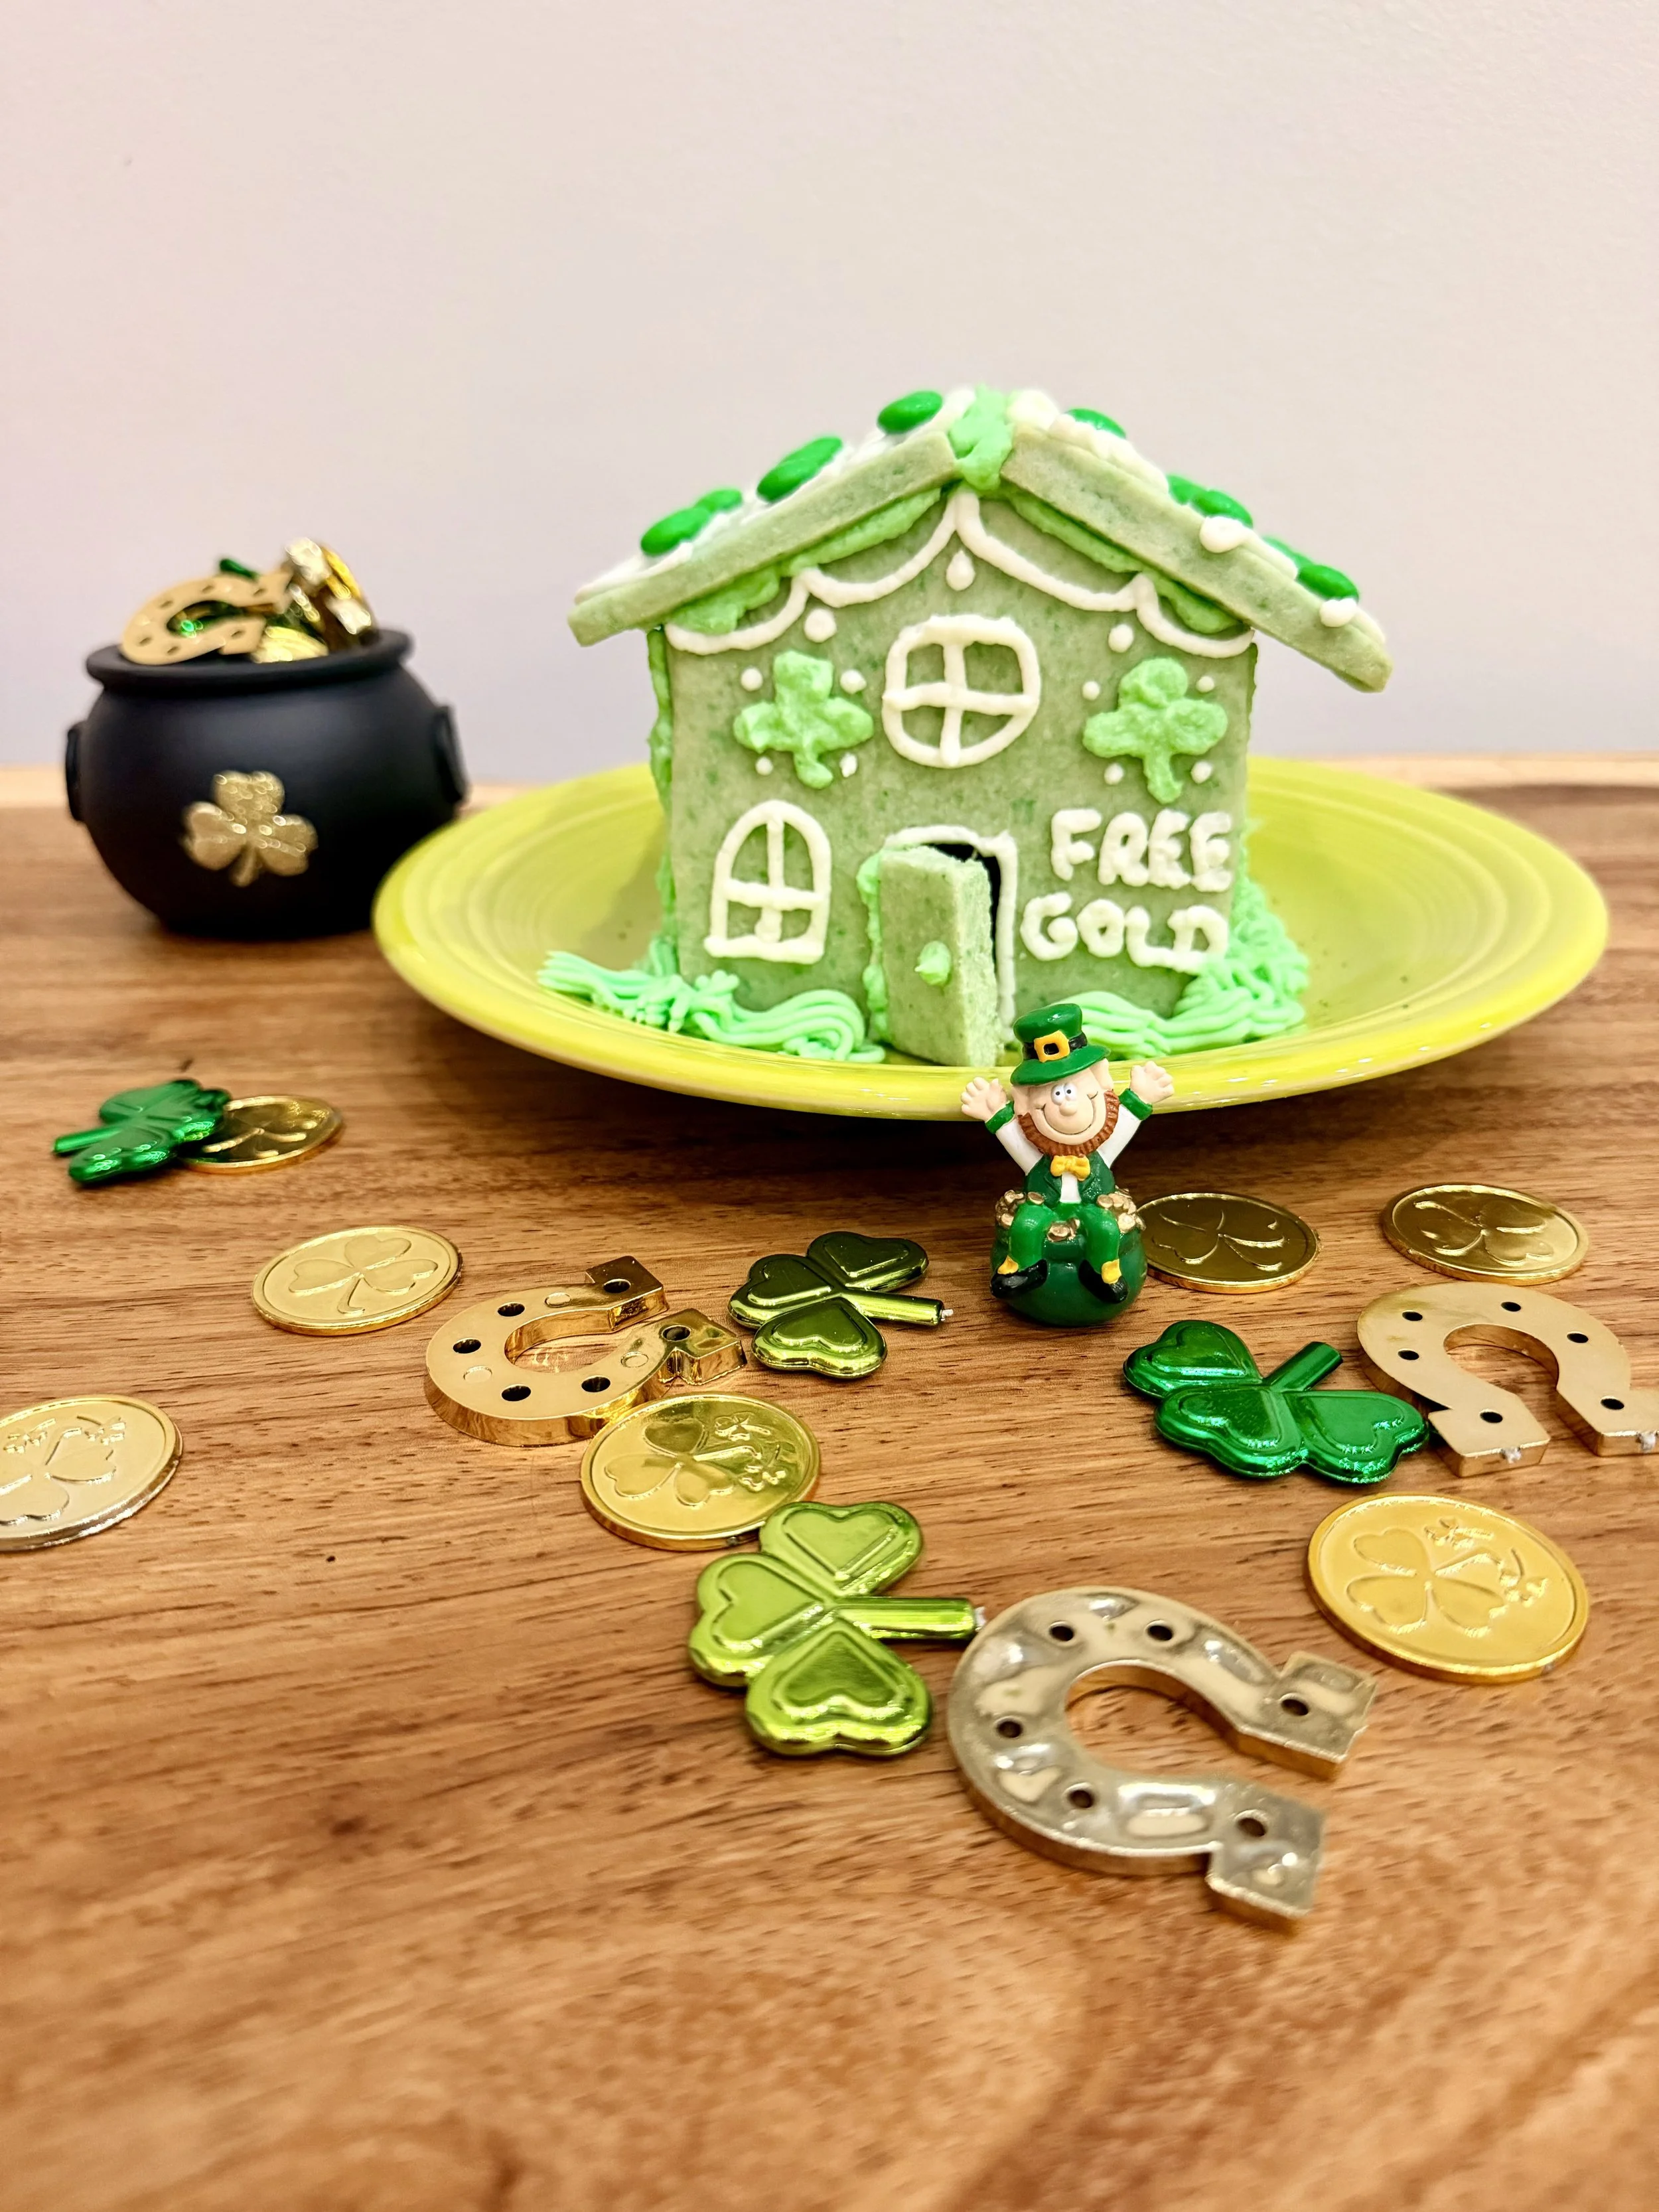
Leprechaun trap sugar cookie house with gold coins, and “Free Gold” front door for St. Patrick’s Day.
A Magical St. Patrick’s Day Treat for Kids
If you’re looking for a fun St. Patrick’s Day tradition that’s equal parts creative, festive, and delicious, this Leprechaun Trap Sugar Cookie House is it. Instead of a paper or shoebox trap, we’re turning a classic sugar cookie house into a playful leprechaun trap—complete with a rainbow path, shiny gold coins, and a tiny front door that’s just too tempting for a mischievous leprechaun to resist.
This is the kind of activity kids talk about all year long… and yes, the leprechaun always escapes. 😉
Why Make a Leprechaun Trap Sugar Cookie House?
Leprechaun traps are a beloved St. Patrick’s Day tradition in classrooms and homes, but most are made from cardboard or paper. Turning the idea into a fully edible sugar cookie house makes it feel extra special—and gives kids something they can help decorate and eat.
This sugar cookie trap works for:
A St. Patrick’s Day family activity
A festive dessert centerpiece
A classroom-inspired tradition at home
Kids who love holiday cookie houses (even outside of Christmas!)
If you already love making sugar cookie houses for the holidays, this Leprechaun Trap Sugar Cookie House is the perfect St. Patrick’s Day twist. It uses the same easy sugar cookie dough, simple assembly, and kid-friendly approach—but adds a playful purpose: catching a sneaky leprechaun!
Instead of cardboard or shoebox traps, this one is fully edible, totally festive, and becomes part of a tradition kids will remember year after year.
Start With a Sugar Cookie House (No Gingerbread Required)
If you’re new to cookie houses or want a refresher, you don’t need to reinvent anything here. This leprechaun trap uses the same base method I use for all of my sugar cookie houses.
👉 Start here: How to Make a Sugar Cookie Gingerbread House (Recipe & Template Included)
That post walks you through:
My tried-and-true sugar cookie dough (sturdy, no spreading)
Baking and cutting the panels
Assembly using buttercream icing
Tips to prevent cracking or collapsing
You can also grab the printable gingerbread house kit if you want to skip measuring entirely.
And if you’d rather download everything instantly, the full template is available in my shop here.
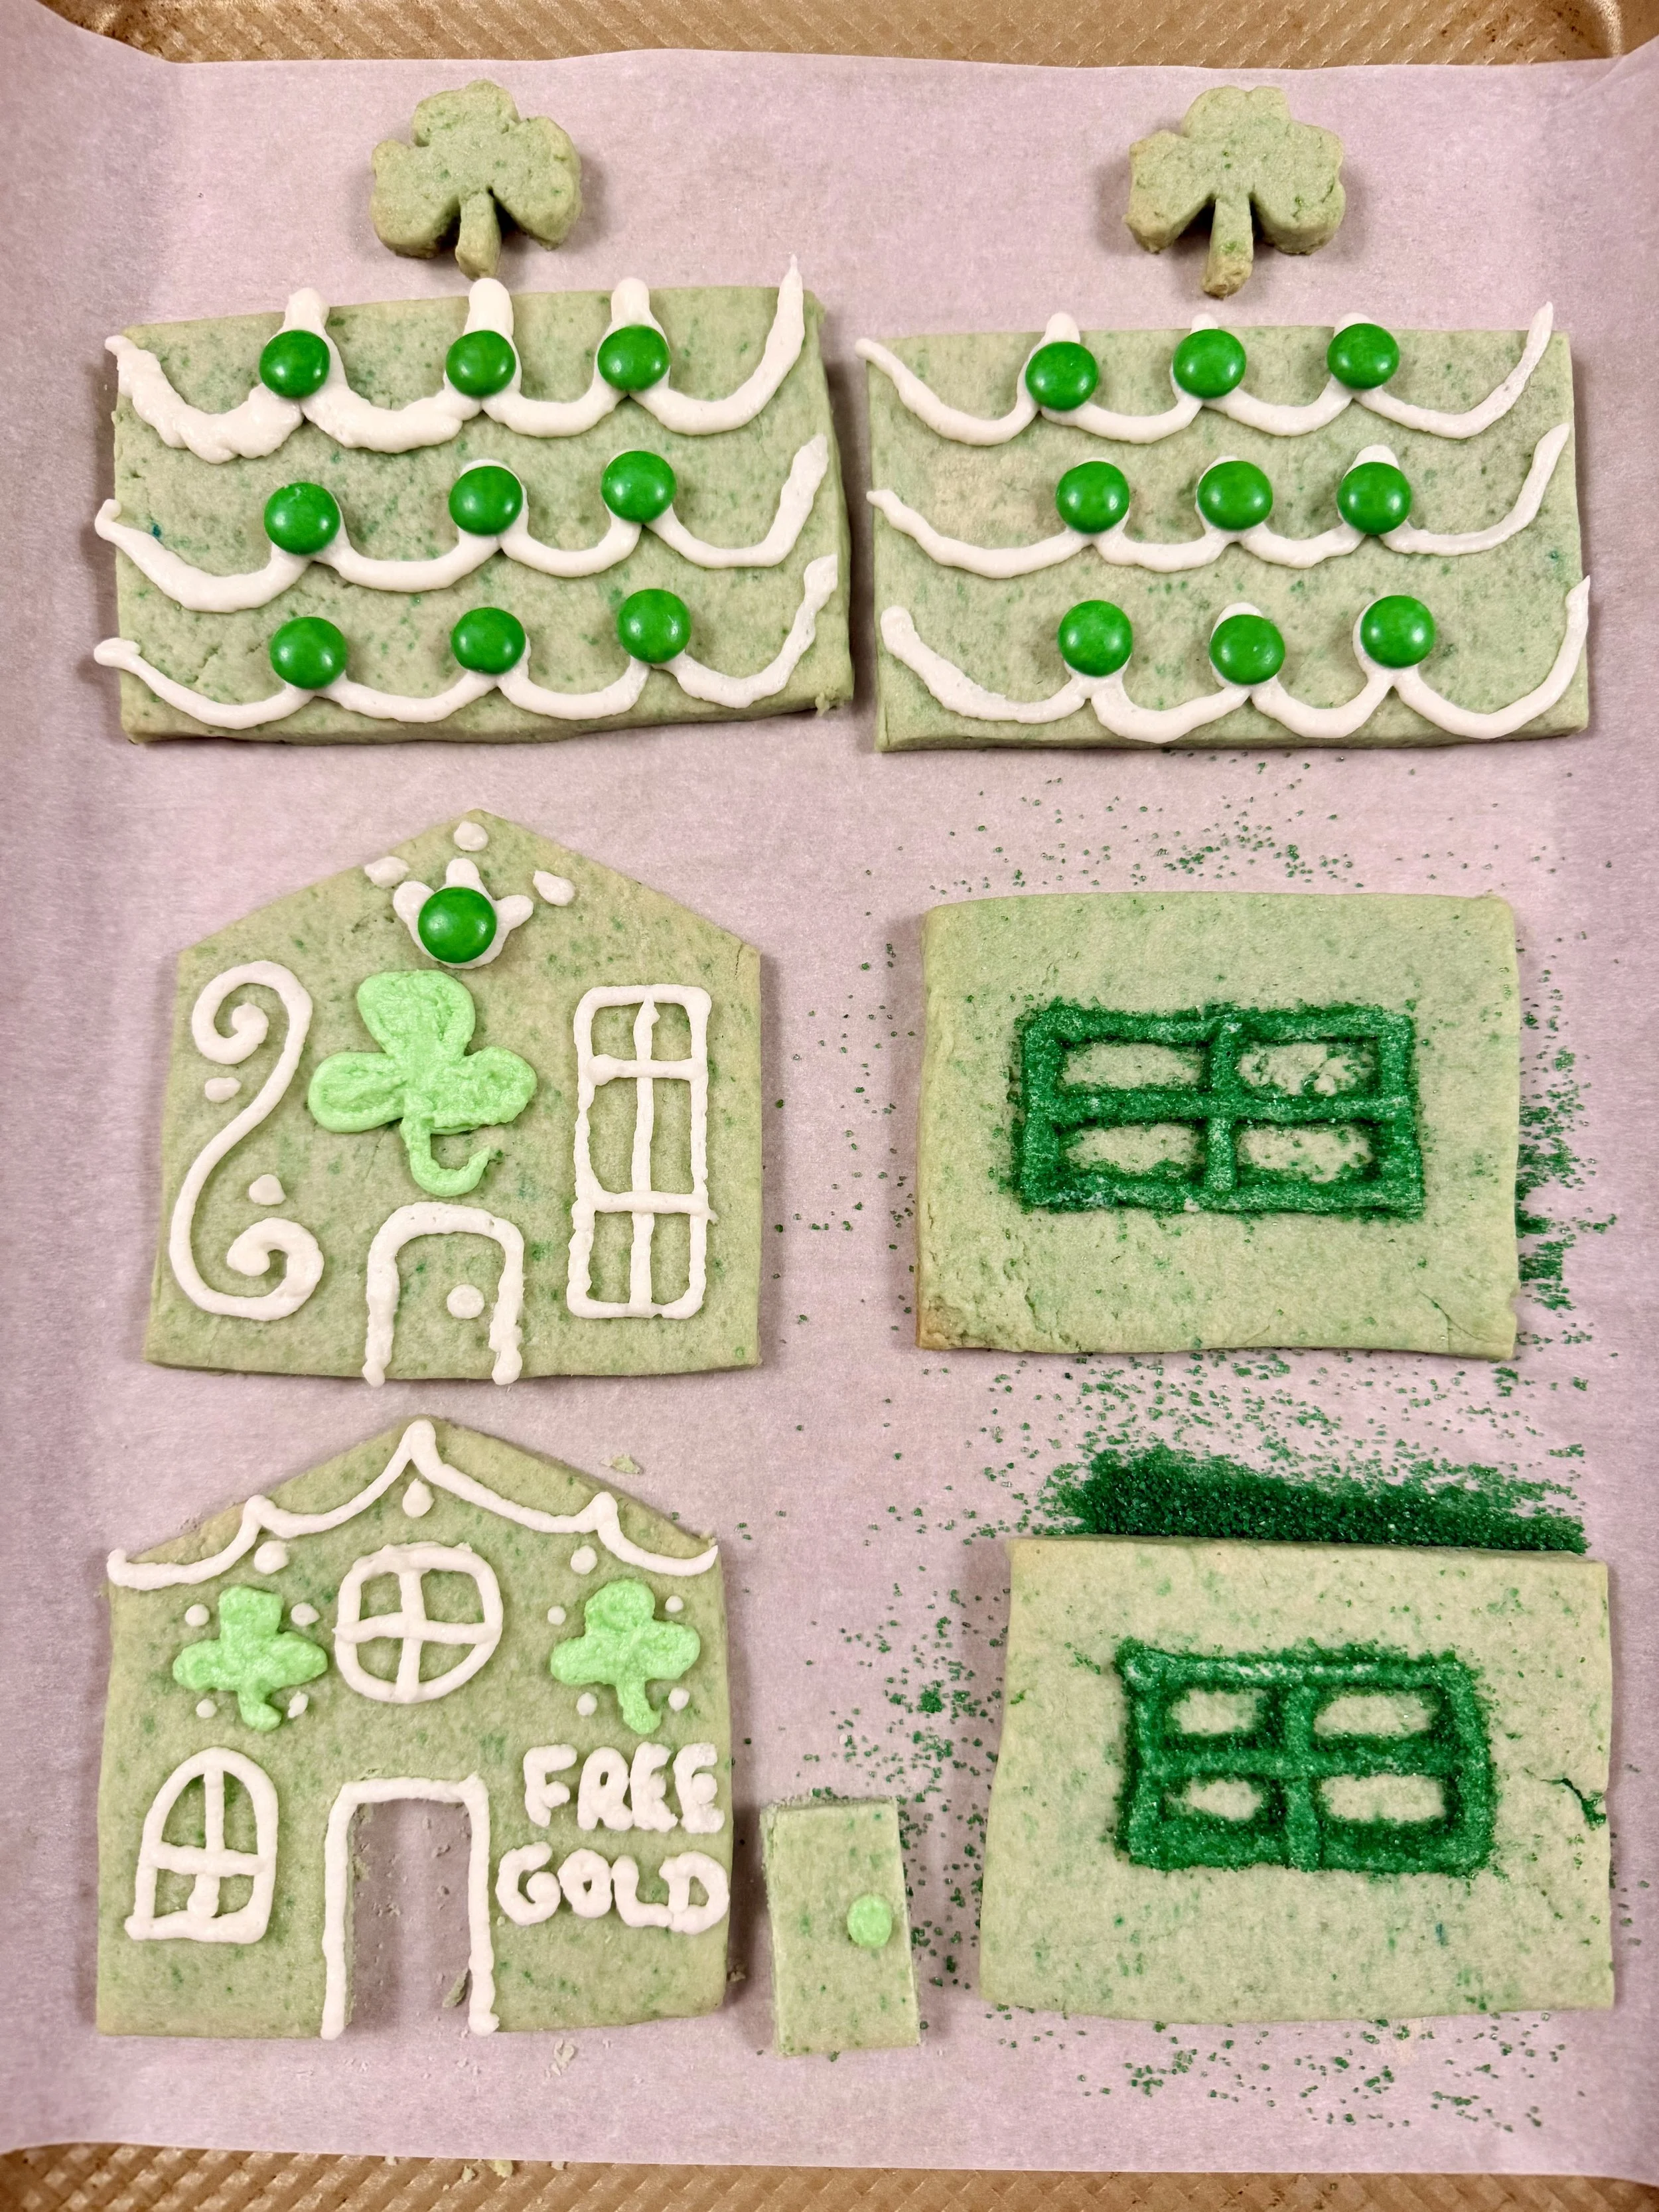
How to Turn a Sugar Cookie House Into a Leprechaun Trap
The key is giving the house a purpose—you’re not just decorating, you’re trying to lure a leprechaun inside.
I was inspired by so many ideas on Pinterest, see my St. Patrick’s Day Leprechaun Trap Board
Here are the three must-have elements that make this work:
🍯 A Little Front Door with a “Free Gold” Sign
Every good trap needs bait—and leprechauns can’t resist gold.
Add a tiny cookie or fondant door to the front of your house and hang a playful “Free Gold” sign above it. This instantly tells the story and makes the house feel intentional instead of just decorative.
Tips:
Write the sign with edible marker or royal icing
Keep it slightly crooked for a mischievous look
Add green frosting details around the door for a magical touch
This one detail alone transforms your cookie house into a true leprechaun trap.
This idea works beautifully if you’ve made other themed houses before—similar to how I style doors and details in my Valentine’s Day Sugar Cookie House
Same concept, different holiday magic.
🌈 A Rainbow Path Leading Inside
What’s more tempting than gold? A rainbow that leads straight to it.
Create a rainbow “path” that guides the leprechaun right to the front door:
Use rainbow candies, sprinkles, or icing stripes
Start the rainbow at the edge of the base and curve it toward the door
Make it feel like the leprechaun can’t miss where to go
This is also one of the most kid-friendly parts—little hands LOVE placing the rainbow colors.
This is very similar to the playful, kid-friendly decorating style I share in my Sugar Cookie House Guide, which is perfect if kids are helping.
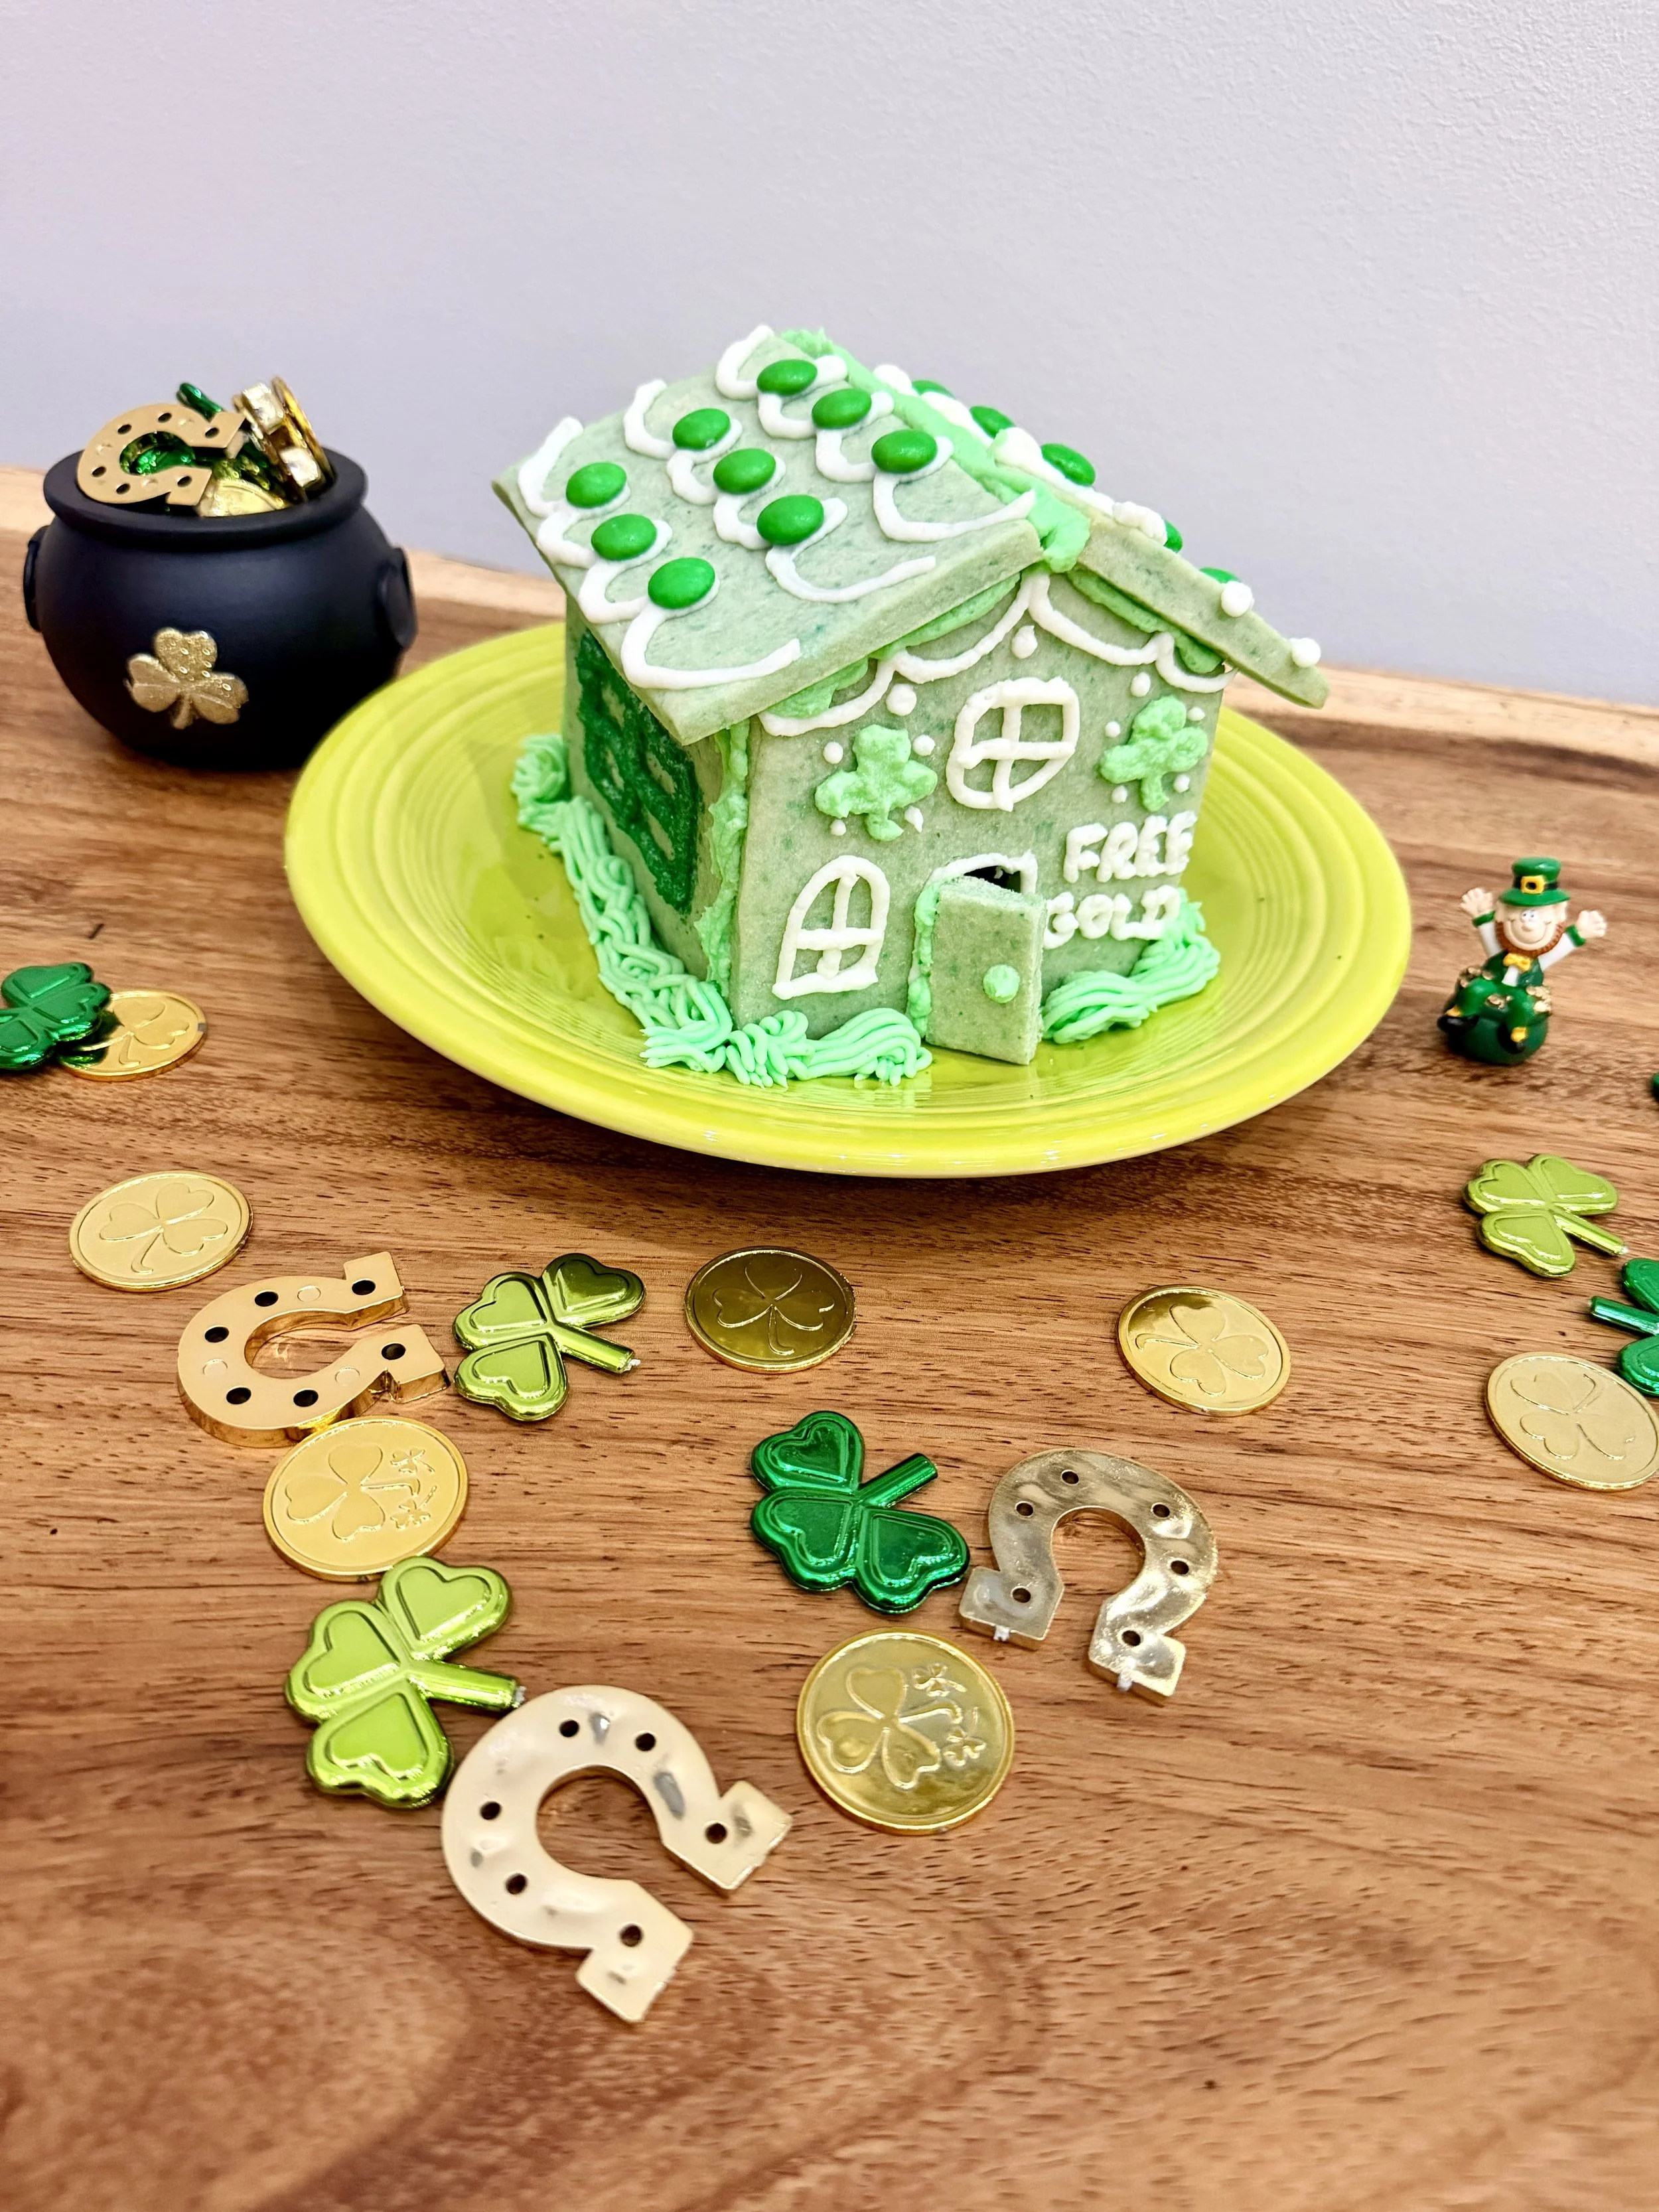
Sugar cookie house front door with a “Free Gold” sign for a leprechaun trap.
🪙 Gold Coins as Bait
This is the finishing touch that sells the entire idea.
Scatter chocolate gold coins along the rainbow path and pile a few right by the door as the ultimate temptation. You can even leave a few inside the house so it looks like the leprechaun almost fell for it.
Optional fun:
Leave one coin tipped over like it was dropped
Add green sprinkles or sanding sugar to make it sparkle
Pretend the leprechaun stole some overnight
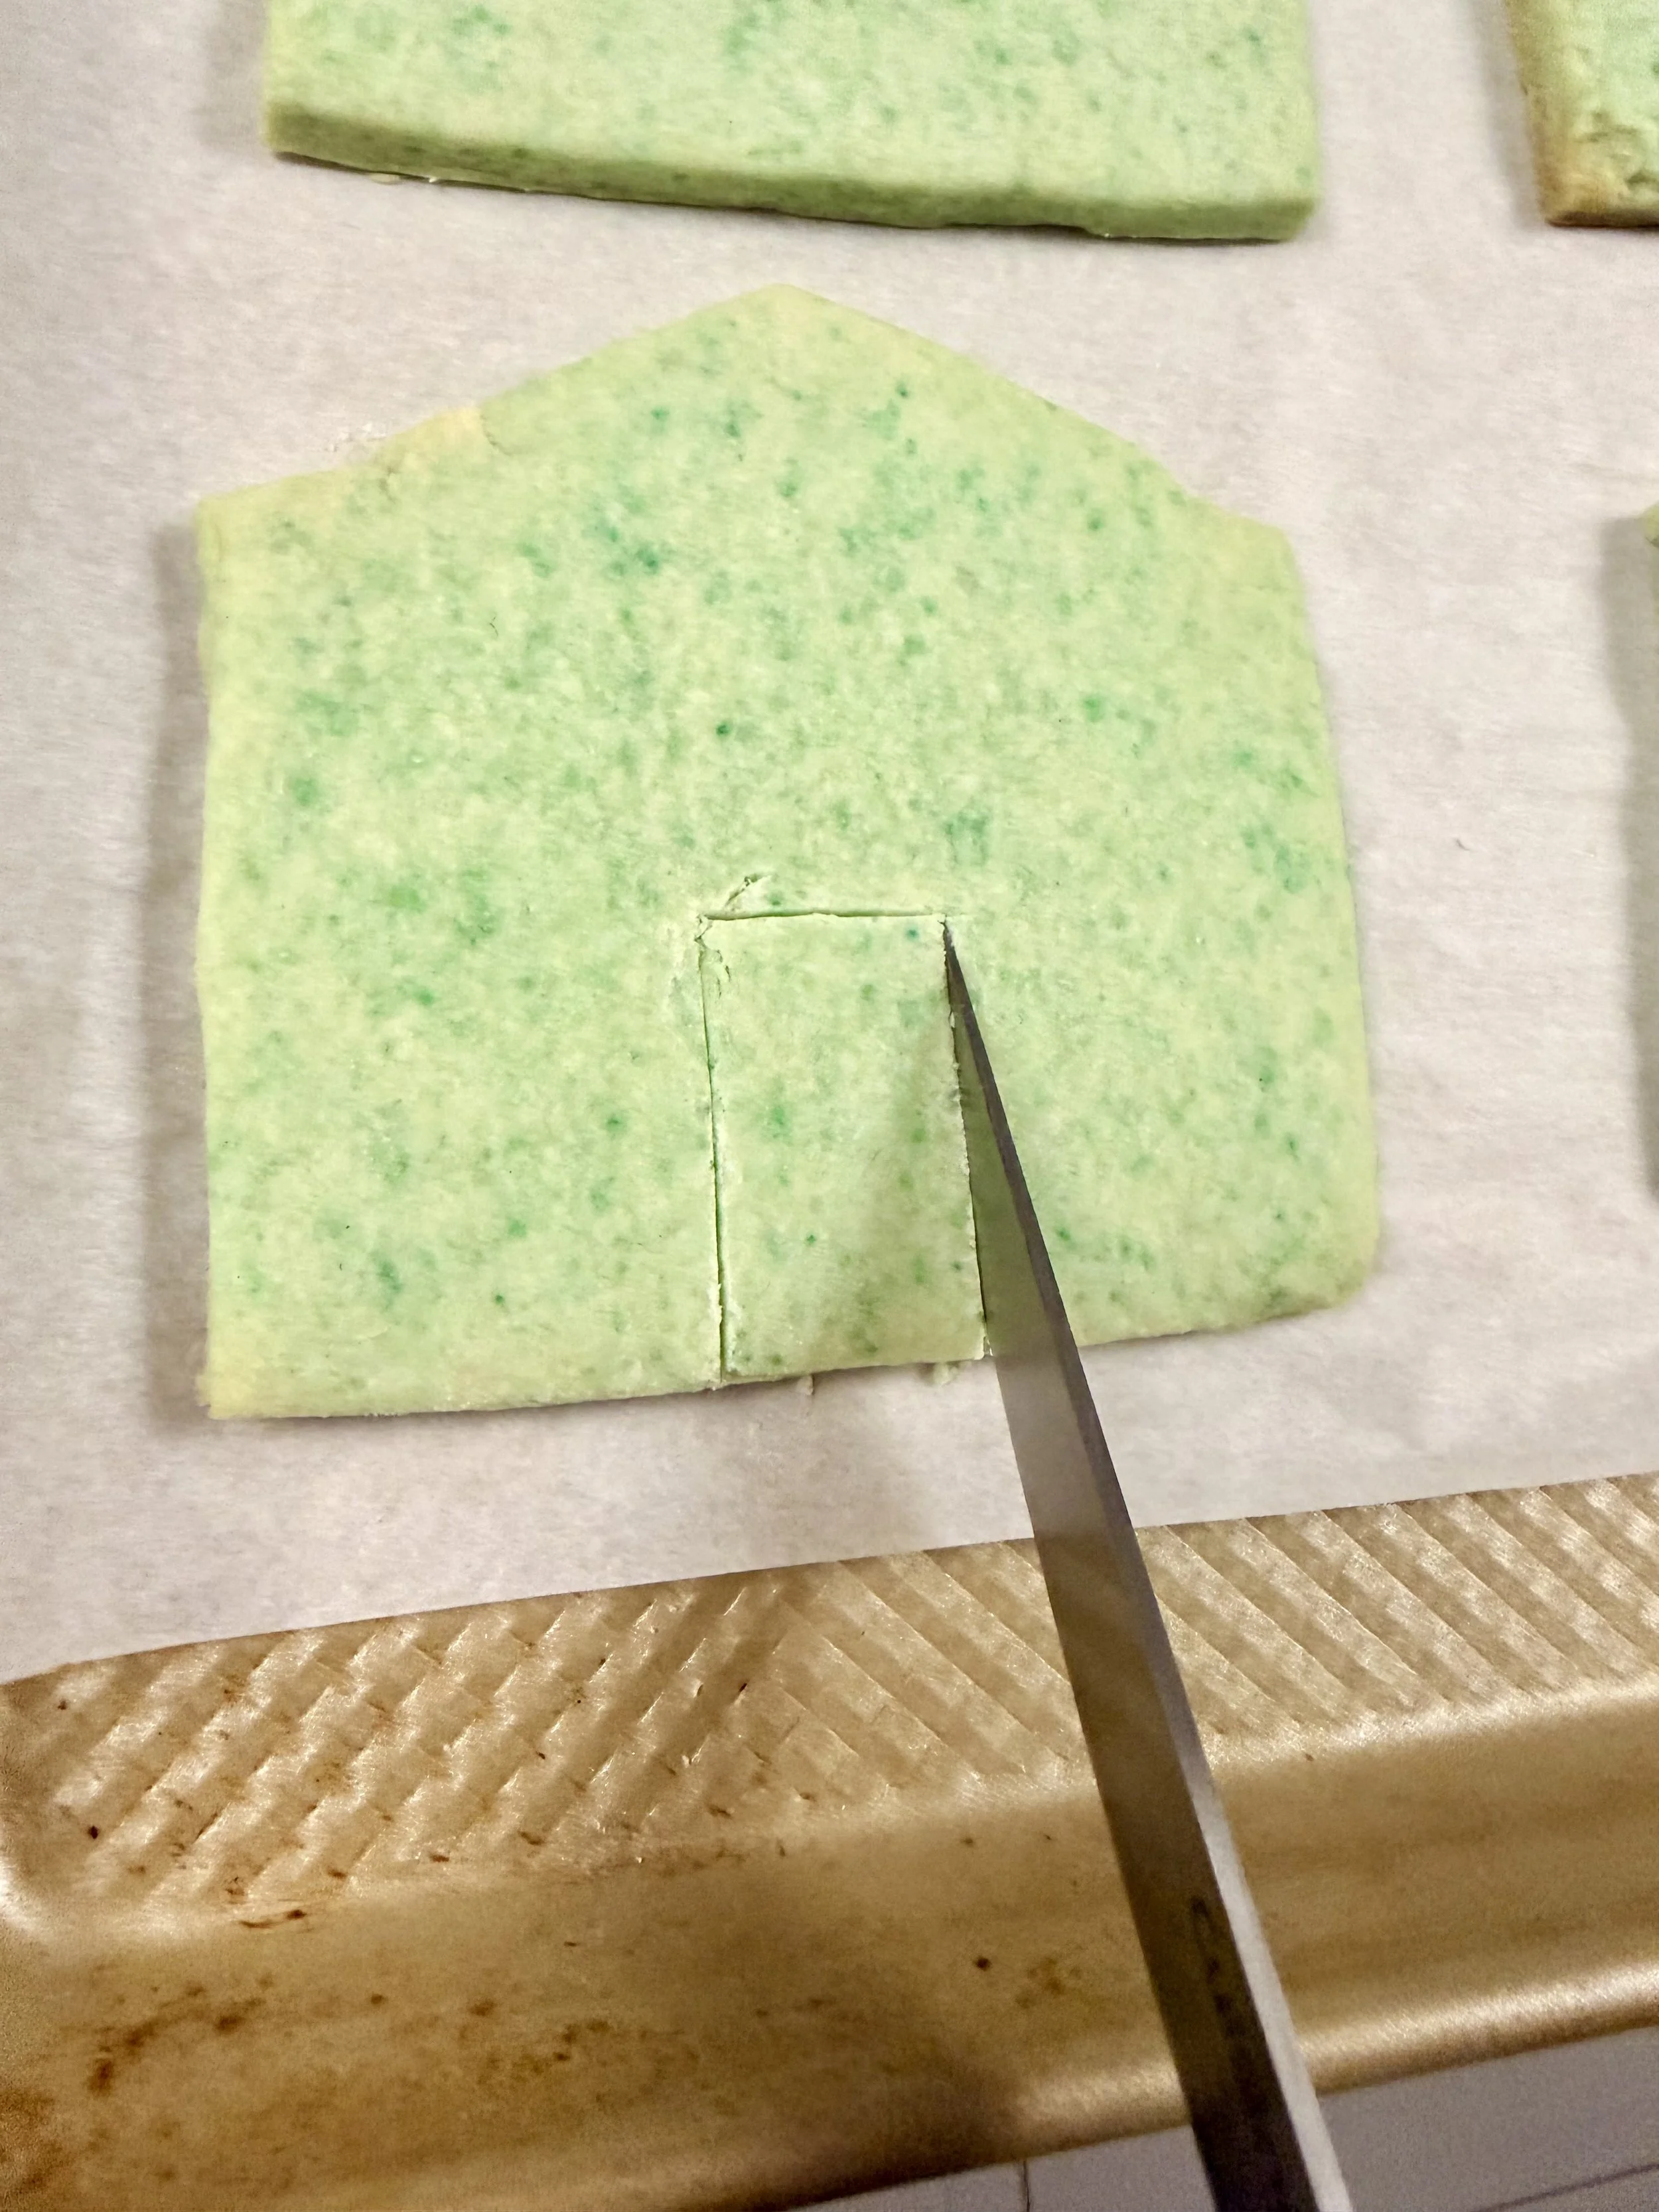
Carefully cutting the front door with a sharp steak knife into the sugar cookie panel before baking to create the leprechaun trap entrance.
Make It Interactive (and Extra Magical)
Just like with Christmas and Valentine’s Day cookie houses, the best part of a leprechaun trap isn’t building it—it’s the magic that happens after.
The next morning, kids can:
Check to see if the gold is gone
Look for tiny “leprechaun footprints” made from green sugar
Discover a note from the leprechaun thanking them for the gold
It’s the same kind of imaginative storytelling that makes holiday cookie houses so special—just with a St. Patrick’s Day spin.
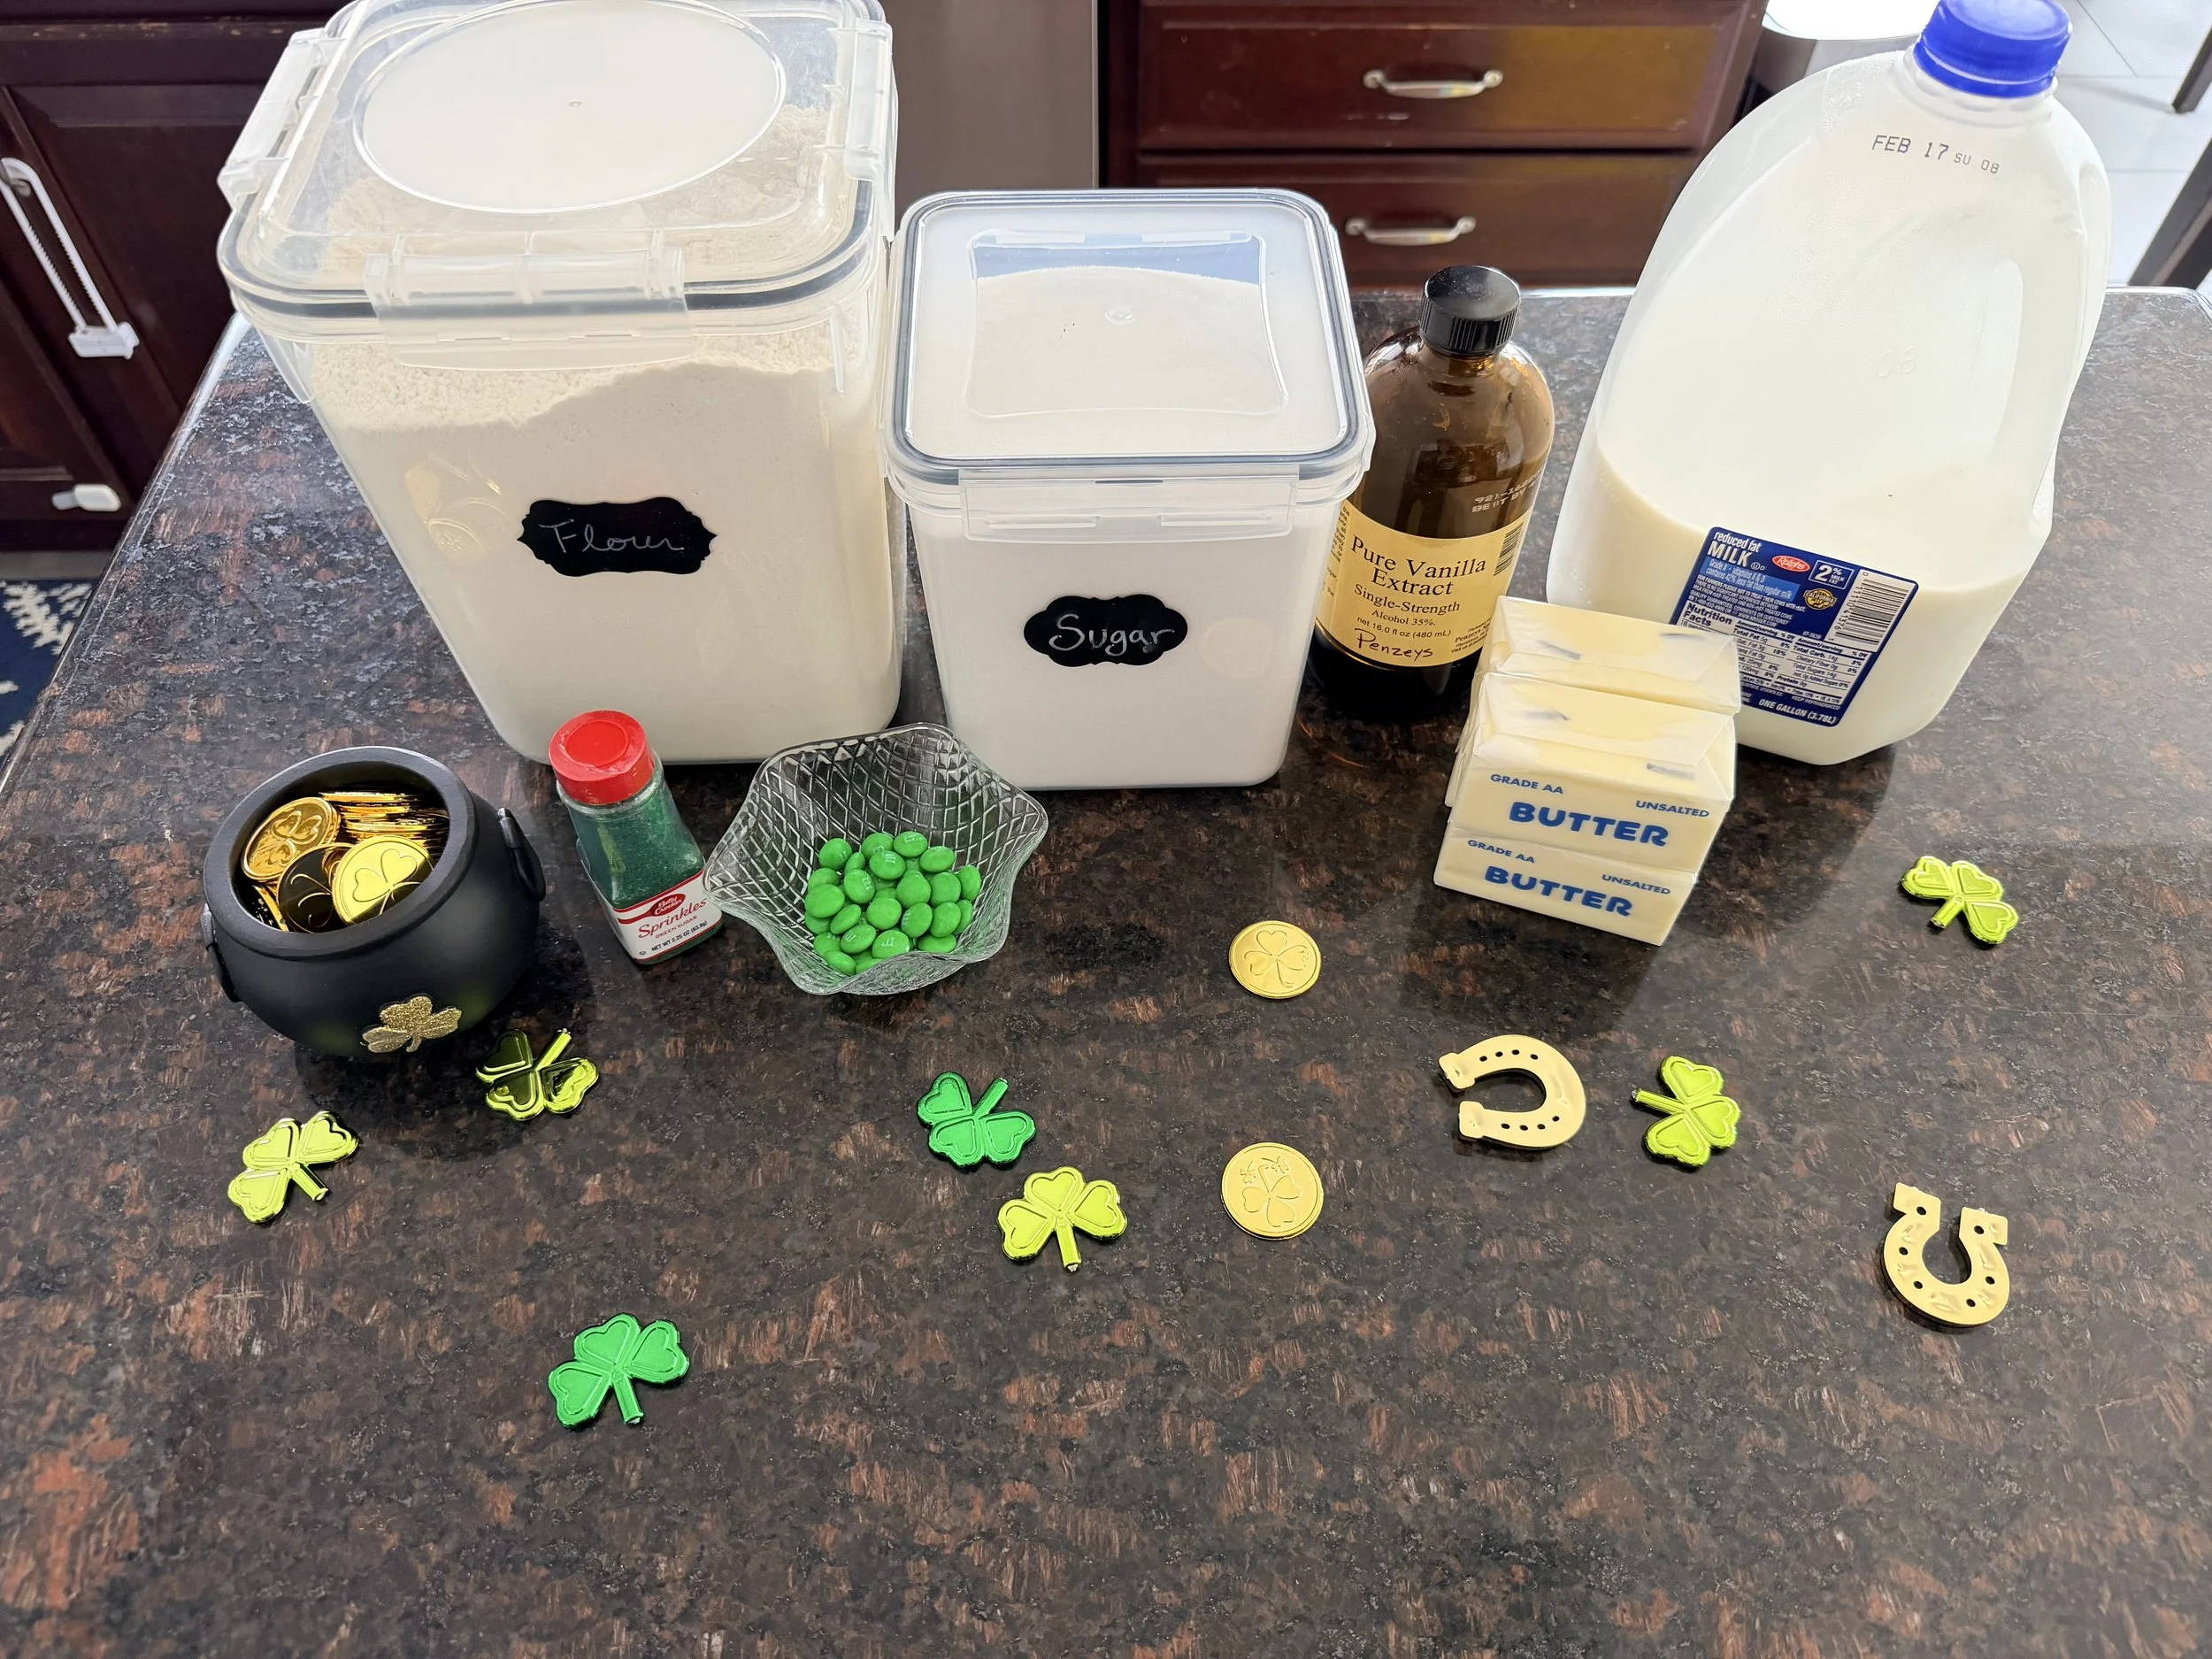
How to Build the Base Sugar Cookie House
This Leprechaun Trap Sugar Cookie House starts the same way all of my holiday cookie houses do—with easy sugar cookie dough, simple assembly, and no gingerbread required.
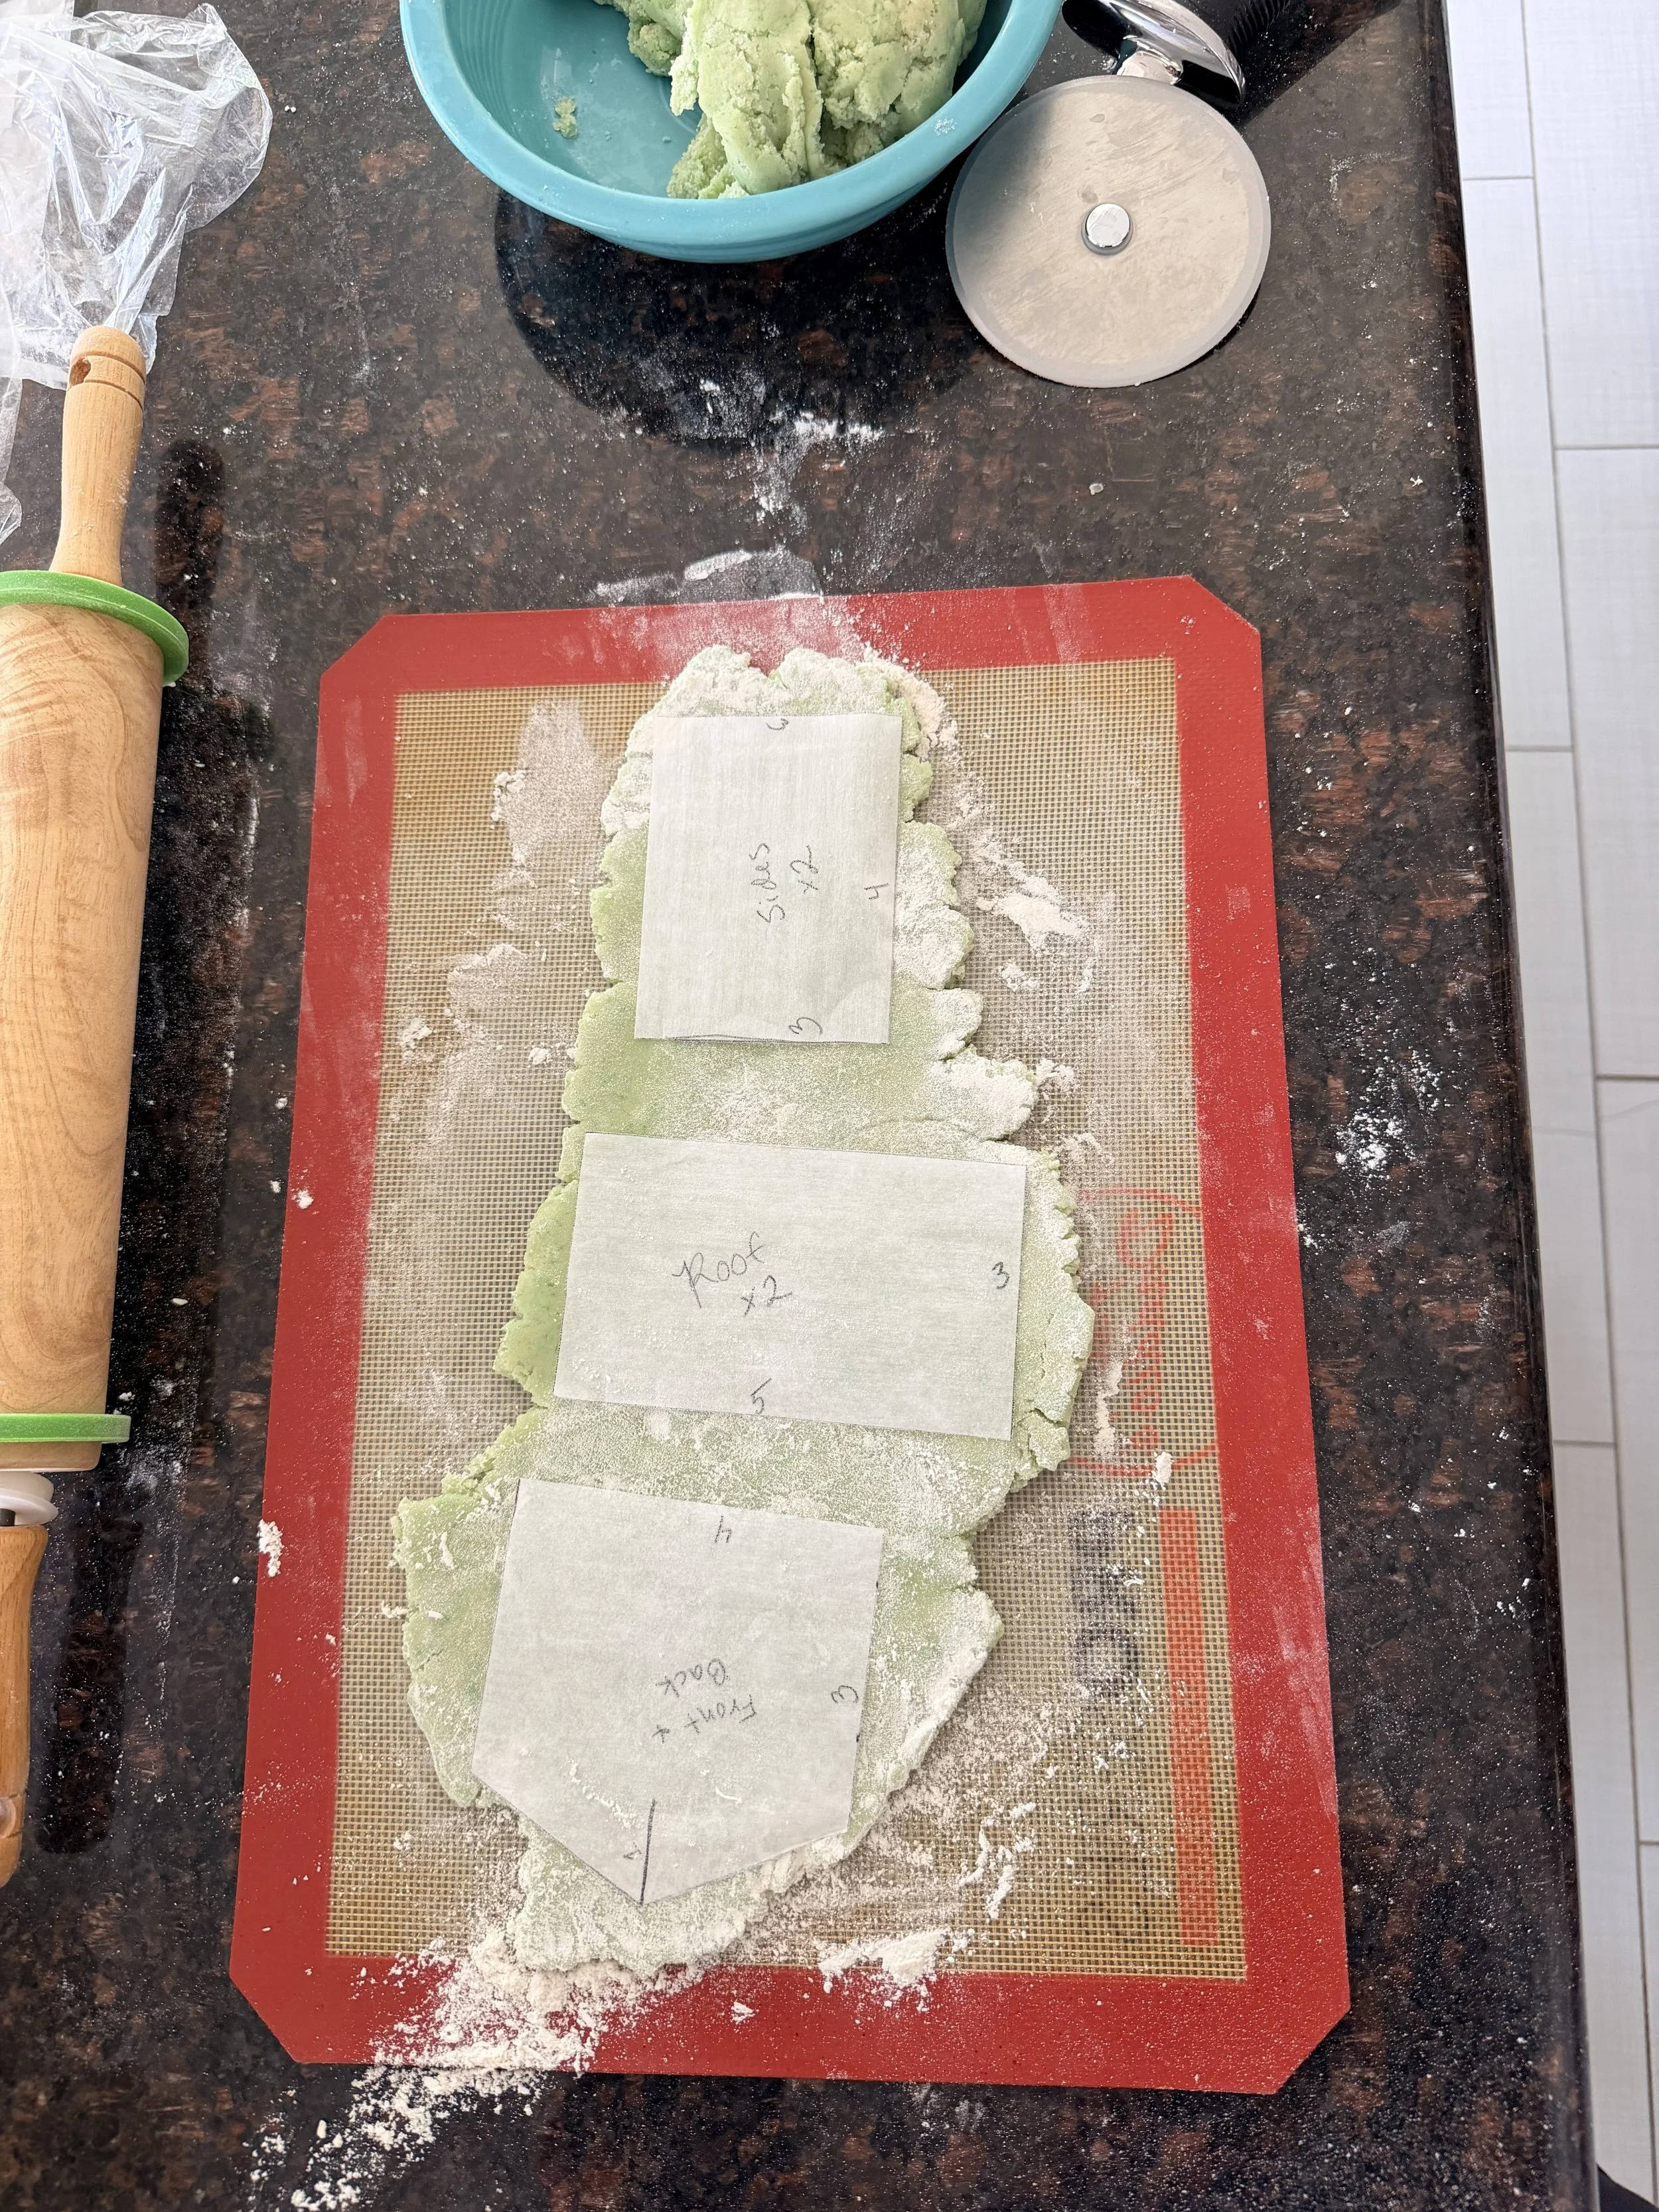
Rolling out sugar cookie dough using my printable house template before baking and assembling the leprechaun trap house.
If you’ve never made a sugar cookie house before, don’t worry. This method is sturdy, beginner-friendly, and perfect for decorating with kids.
👉 For the full recipe, exact measurements, baking times, and printable templates, start with my complete guide here:
How to Make a Sugar Cookie Gingerbread House (Recipe & Template Included)
👉 You can also grab the printable kit instantly from my shop if you want everything ready to go:
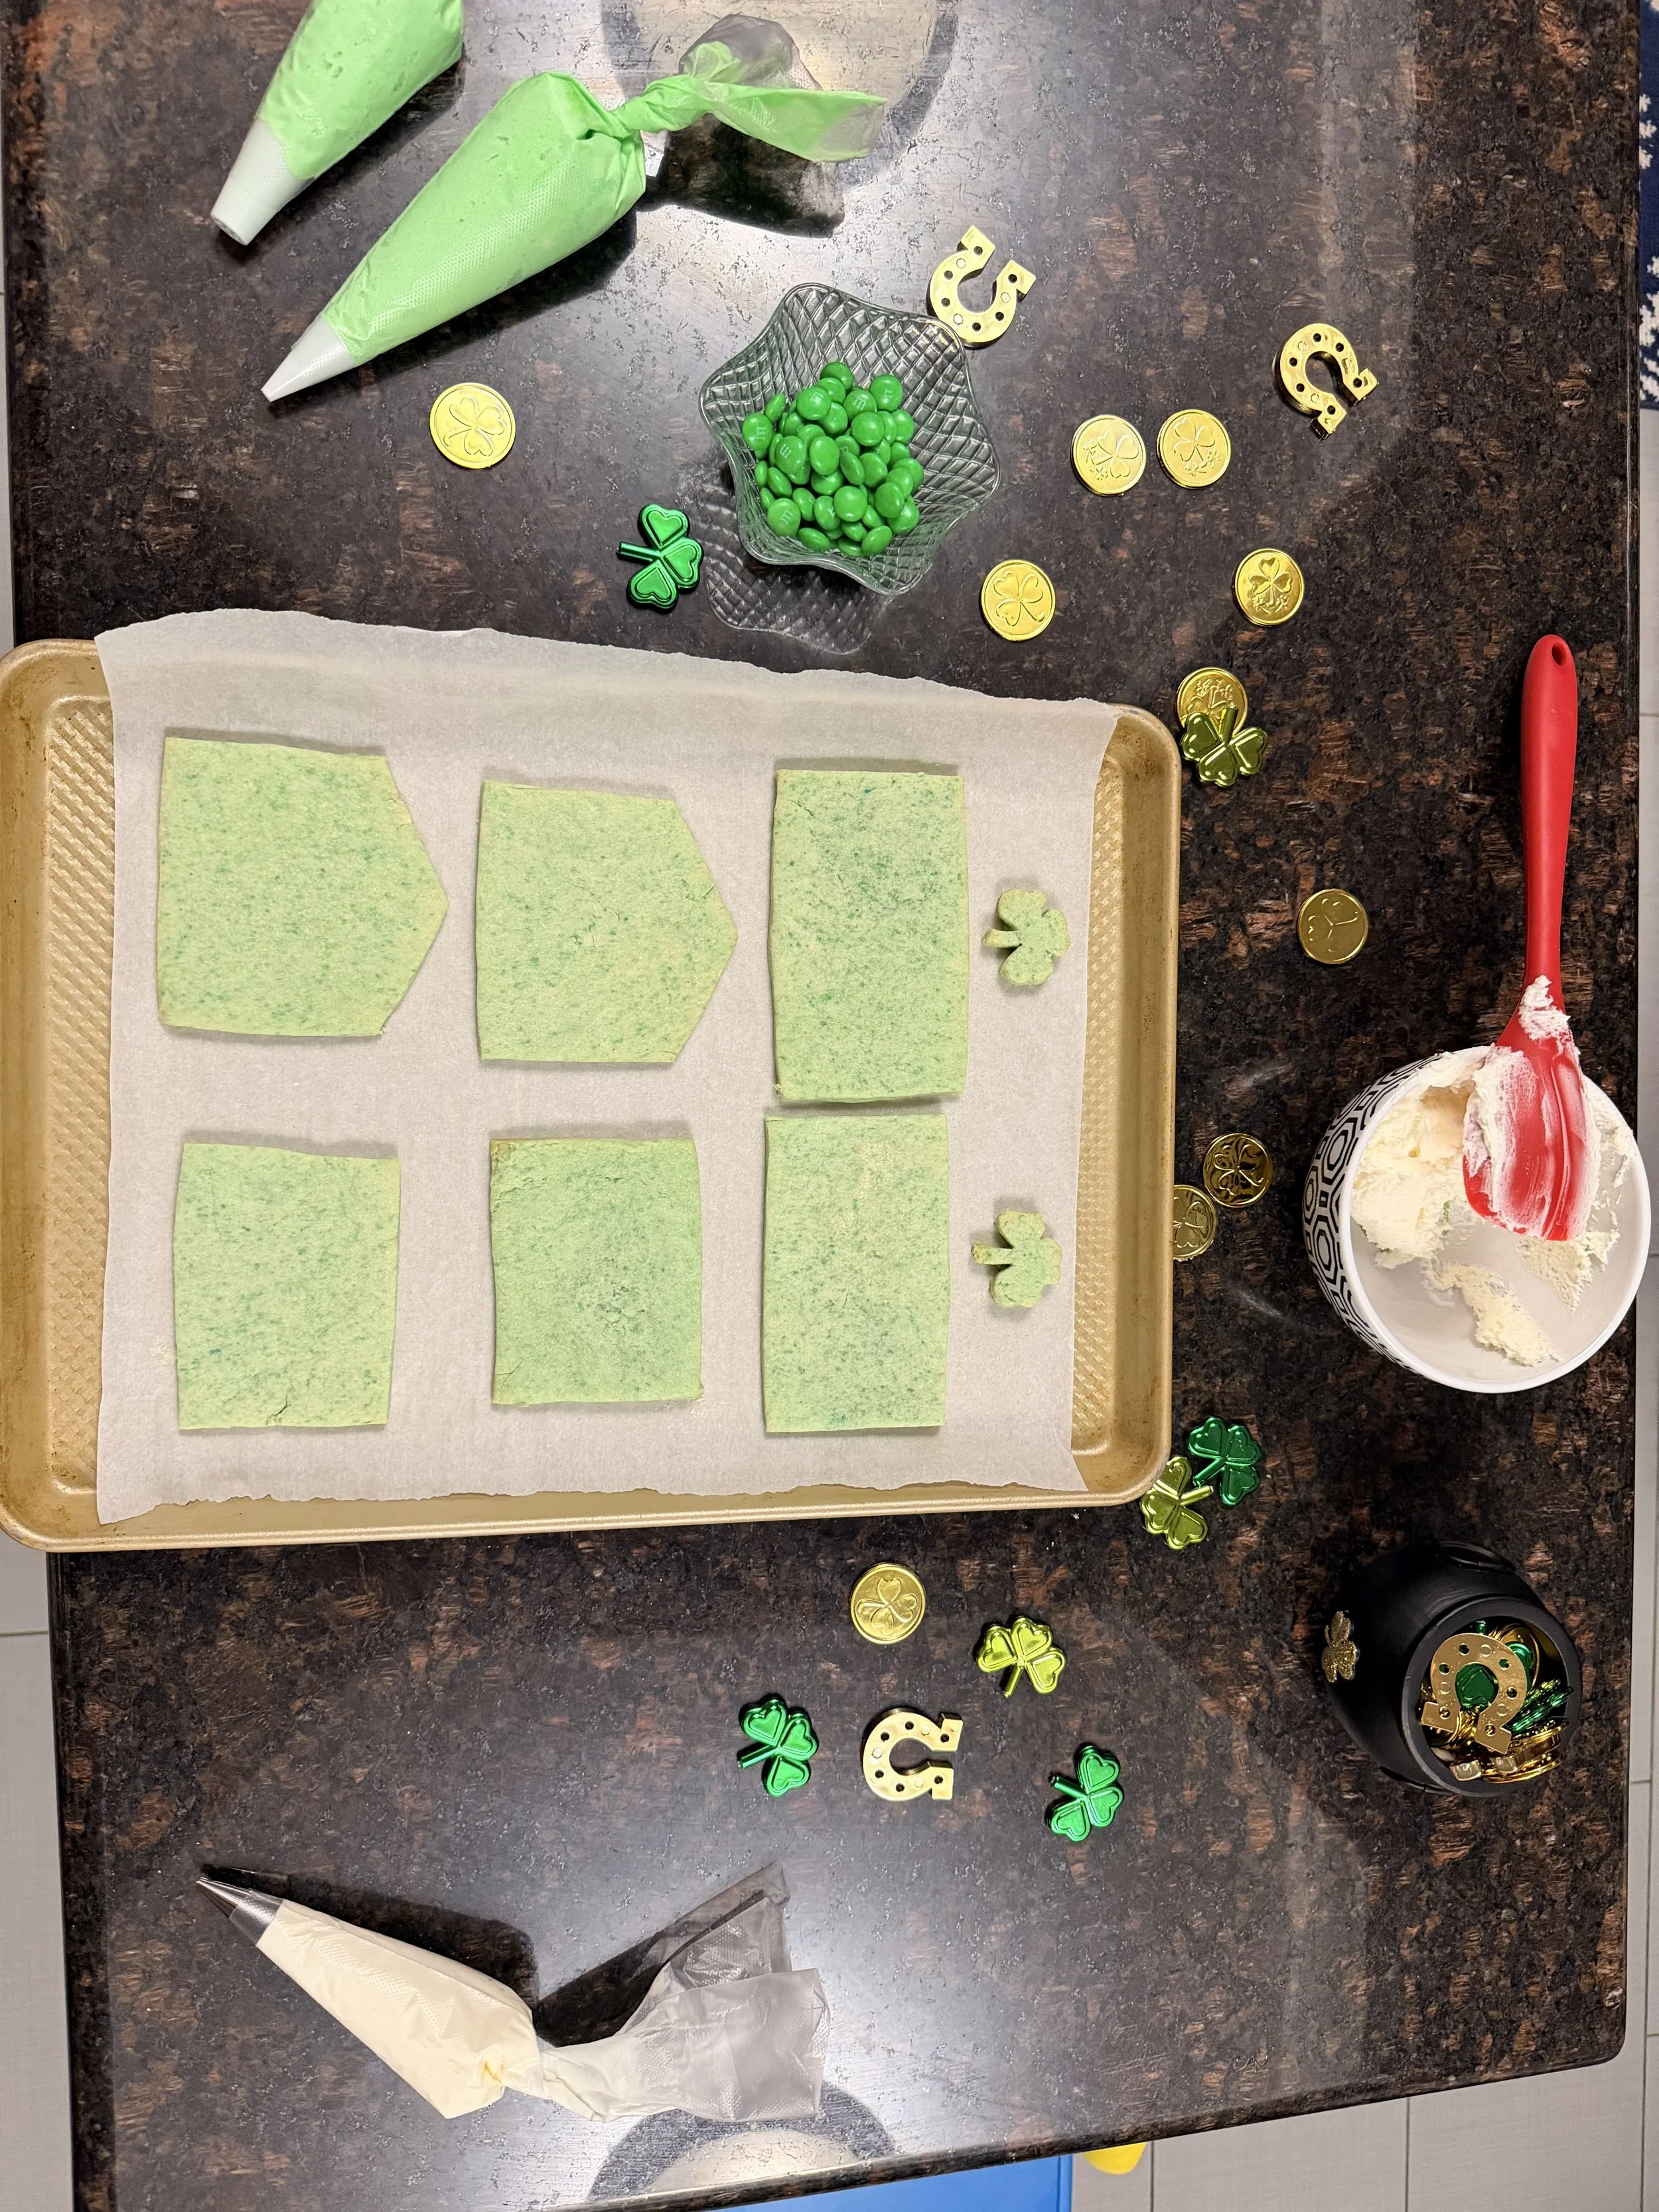
Baked sugar cookie house panels ready to assemble before turning this into a festive leprechaun trap.
Condensed Build Steps
Make the sugar cookie dough
Use a no-spread sugar cookie dough designed for building houses. Chill the dough before rolling so the panels keep their shape.Cut and bake the panels
Roll the dough evenly and cut the house pieces using my printable template. Bake until just set—firm but not browned.Let cookies cool completely
This is important. Warm cookies are more likely to crack or slide during assembly.Assemble the house
Pipe buttercream icing along the edges to attach the walls, then add the roof. Let the structure set before decorating.
See the full sugar cookie house come together in this quick timelapse before we turn it into a leprechaun trap.
Watch this sugar cookie house come together in a quick timelapse before transforming it into a festive leprechaun trap for St. Patrick’s Day. Built with sturdy sugar cookie panels and buttercream icing, this easy holiday project is perfect for decorating with kids.
If you want more kid-friendly design ideas and holiday variations, my Sugar Cookie House Guide is a great next step.

Buttercream Icing for Assembly & Decorating
Buttercream icing is what holds everything together and makes decorating fun. It’s easier to work with than royal icing and sets up well for sugar cookie houses.
How I Use Buttercream:
Thicker consistency for assembling walls and roof
Slightly softer consistency for piping details and decorations
Tips:
Use a large round piping tip or cut a small hole in a piping bag
Let the assembled house sit for 15–20 minutes before adding heavy decorations
If the icing feels too soft, chill it briefly before using
Once the base house is built, you’re ready for the fun part—turning it into a leprechaun trap with a rainbow path, gold coin bait, and a tiny “Free Gold” front door 🍀
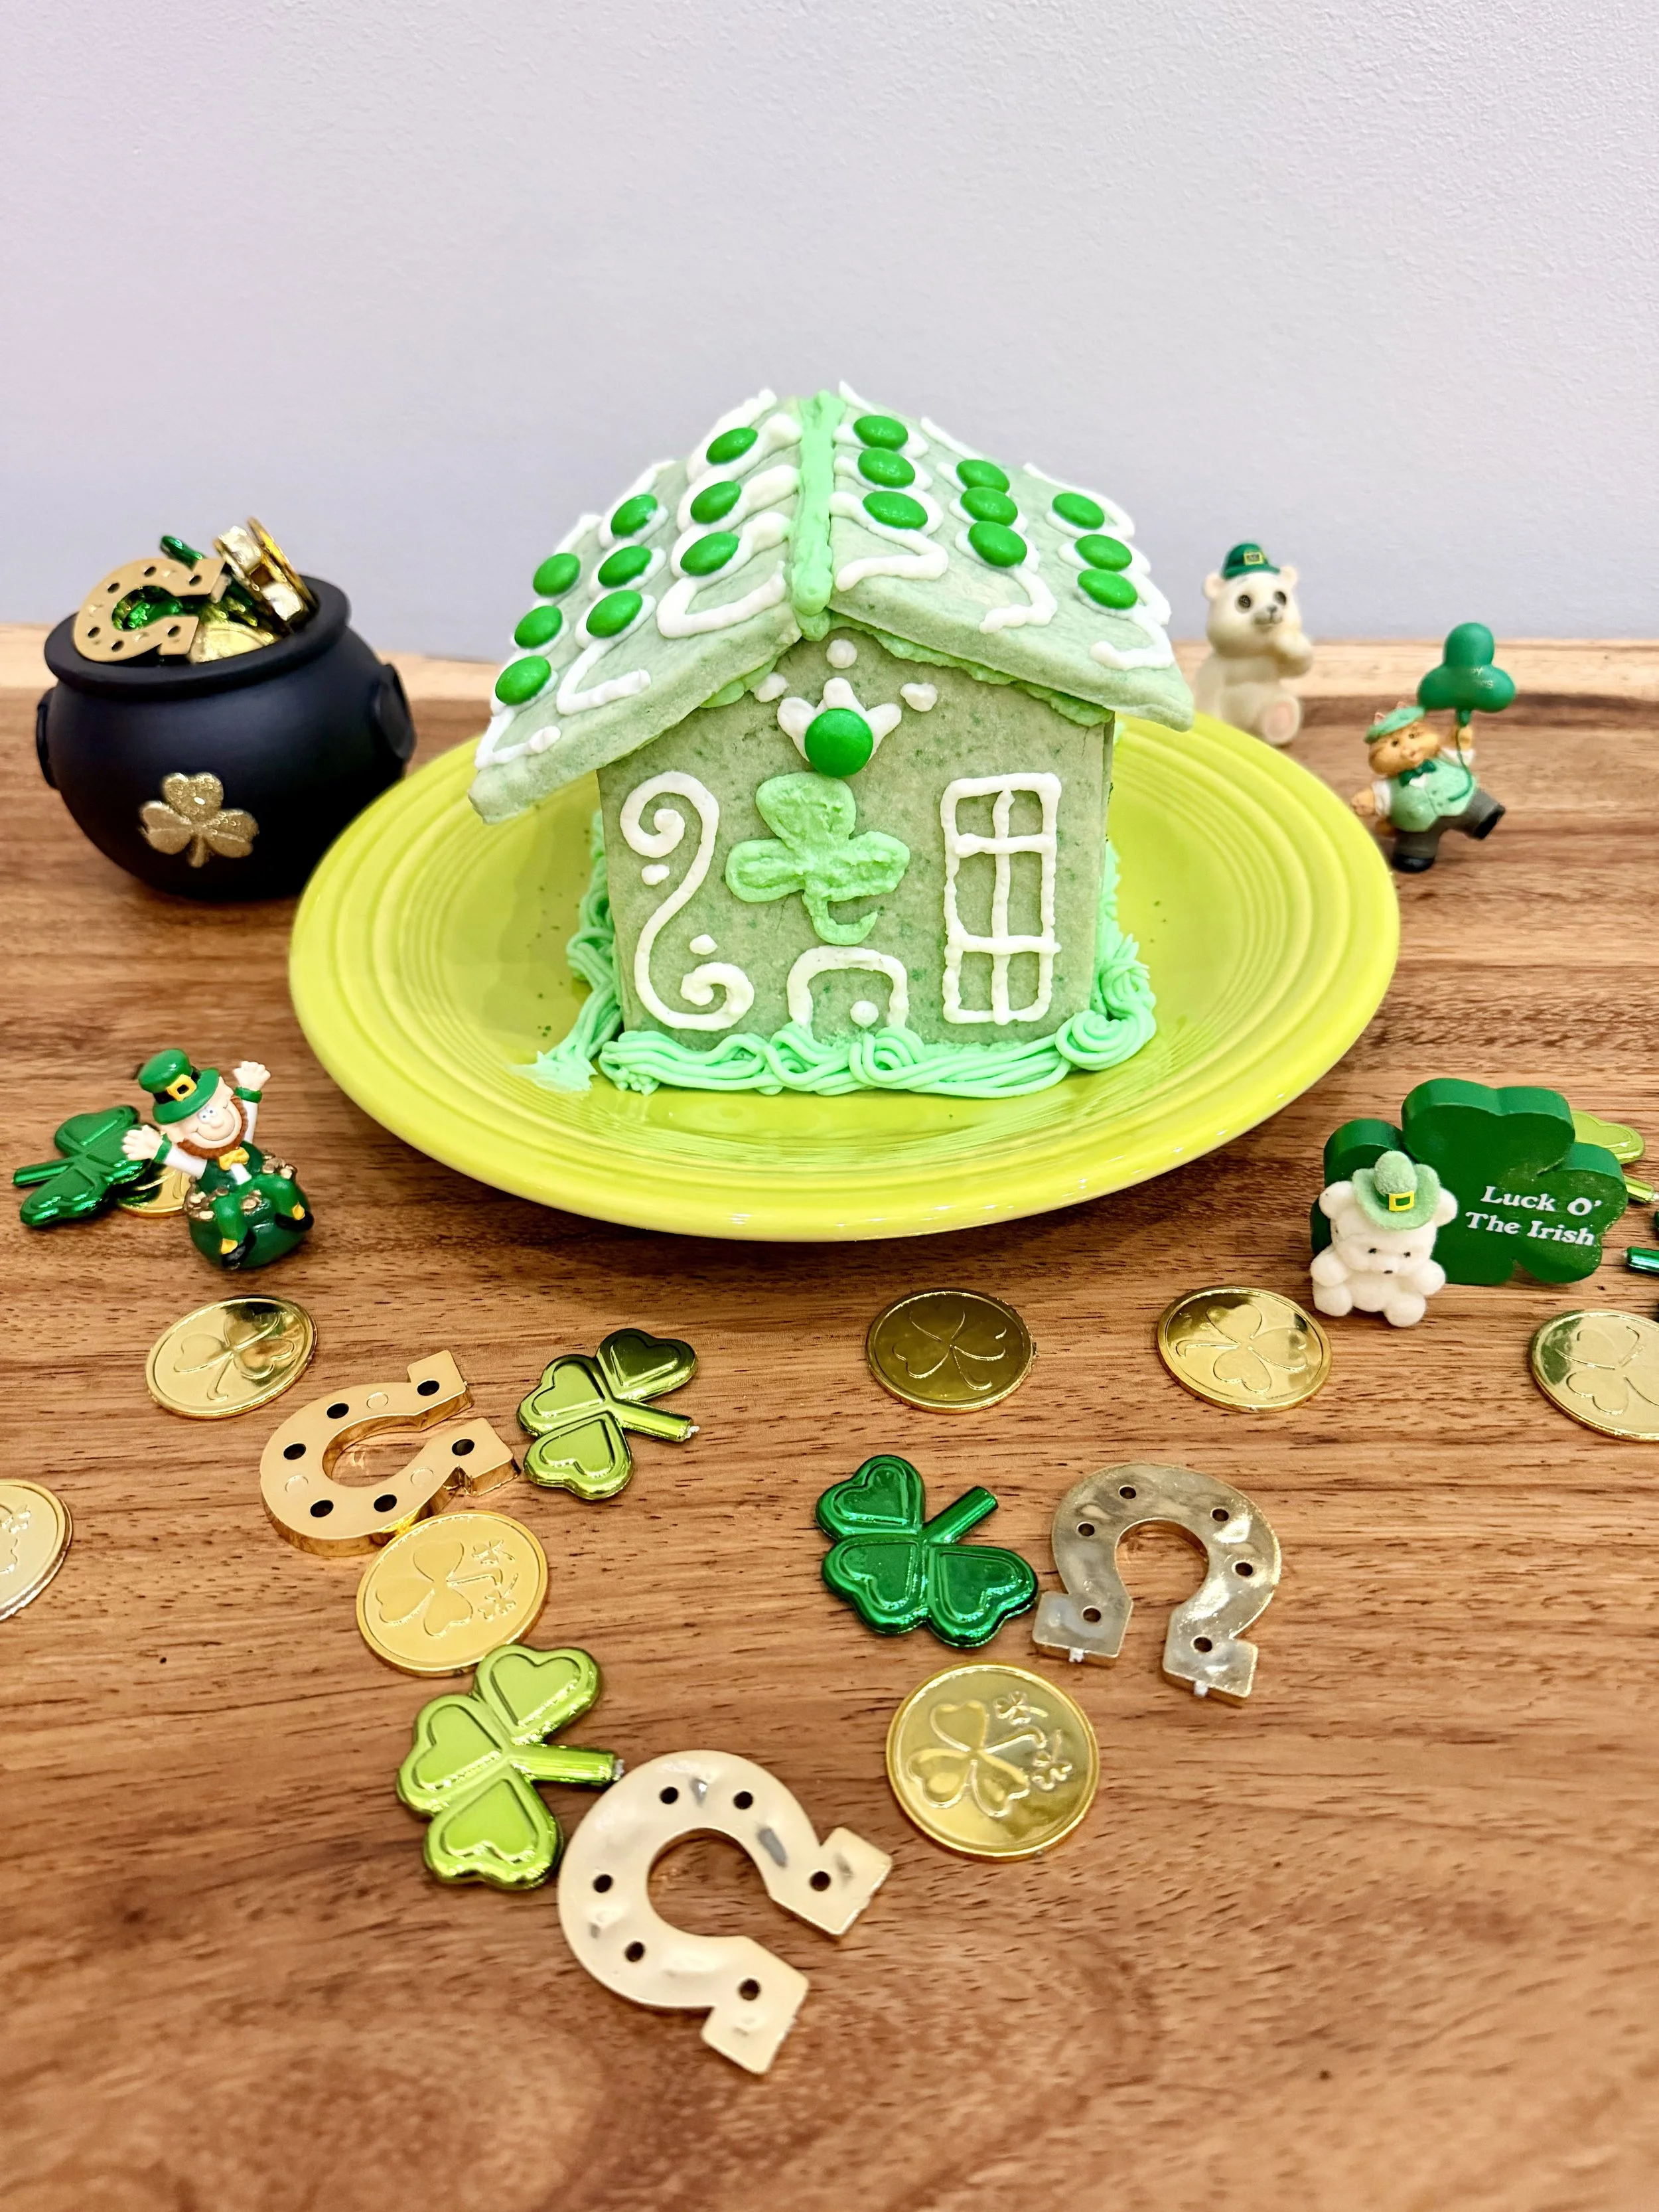
The finished leprechaun trap sugar cookie house decorated with shamrocks, green buttercream, and festive St. Patrick’s Day details.
A New St. Patrick’s Day Tradition Worth Repeating
This Leprechaun Trap Sugar Cookie House is proof that cookie houses aren’t just for Christmas. It’s festive, playful, and just the right amount of silly—perfect for celebrating St. Patrick’s Day with kids.
Whether you make it once or turn it into a yearly tradition, it’s guaranteed to bring a little extra magic (and sugar) to March. 🍀💚
If you make this leprechaun trap sugar cookie house, I’d love to see it! Save this idea to Pinterest so you can find it next March, and don’t forget to tag @TheSweetestEscapes if you share your creation on social media. 💚🍀
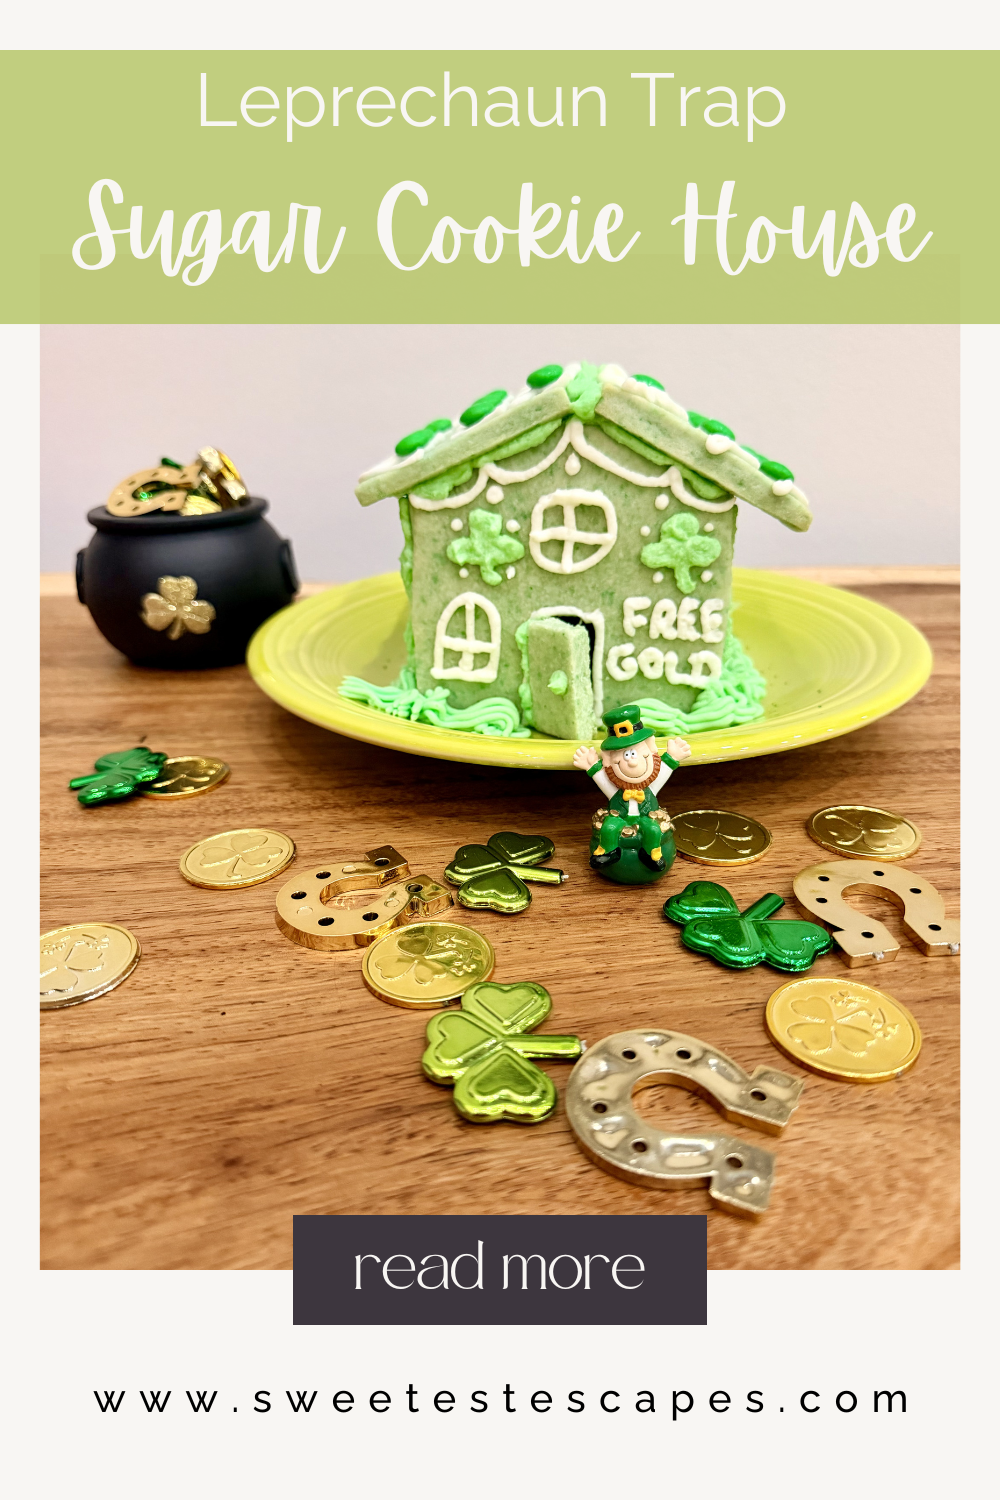
An easy St. Patrick’s Day leprechaun trap made from a sugar cookie house, complete with shamrock details and a playful “Free Gold” door.
More Holiday Posts:



Printable Gingerbread House Kit (DIY Template for Kids)
Create a festive gingerbread house with this printable DIY kit for kids and families. Includes templates and instructions. Instant download.
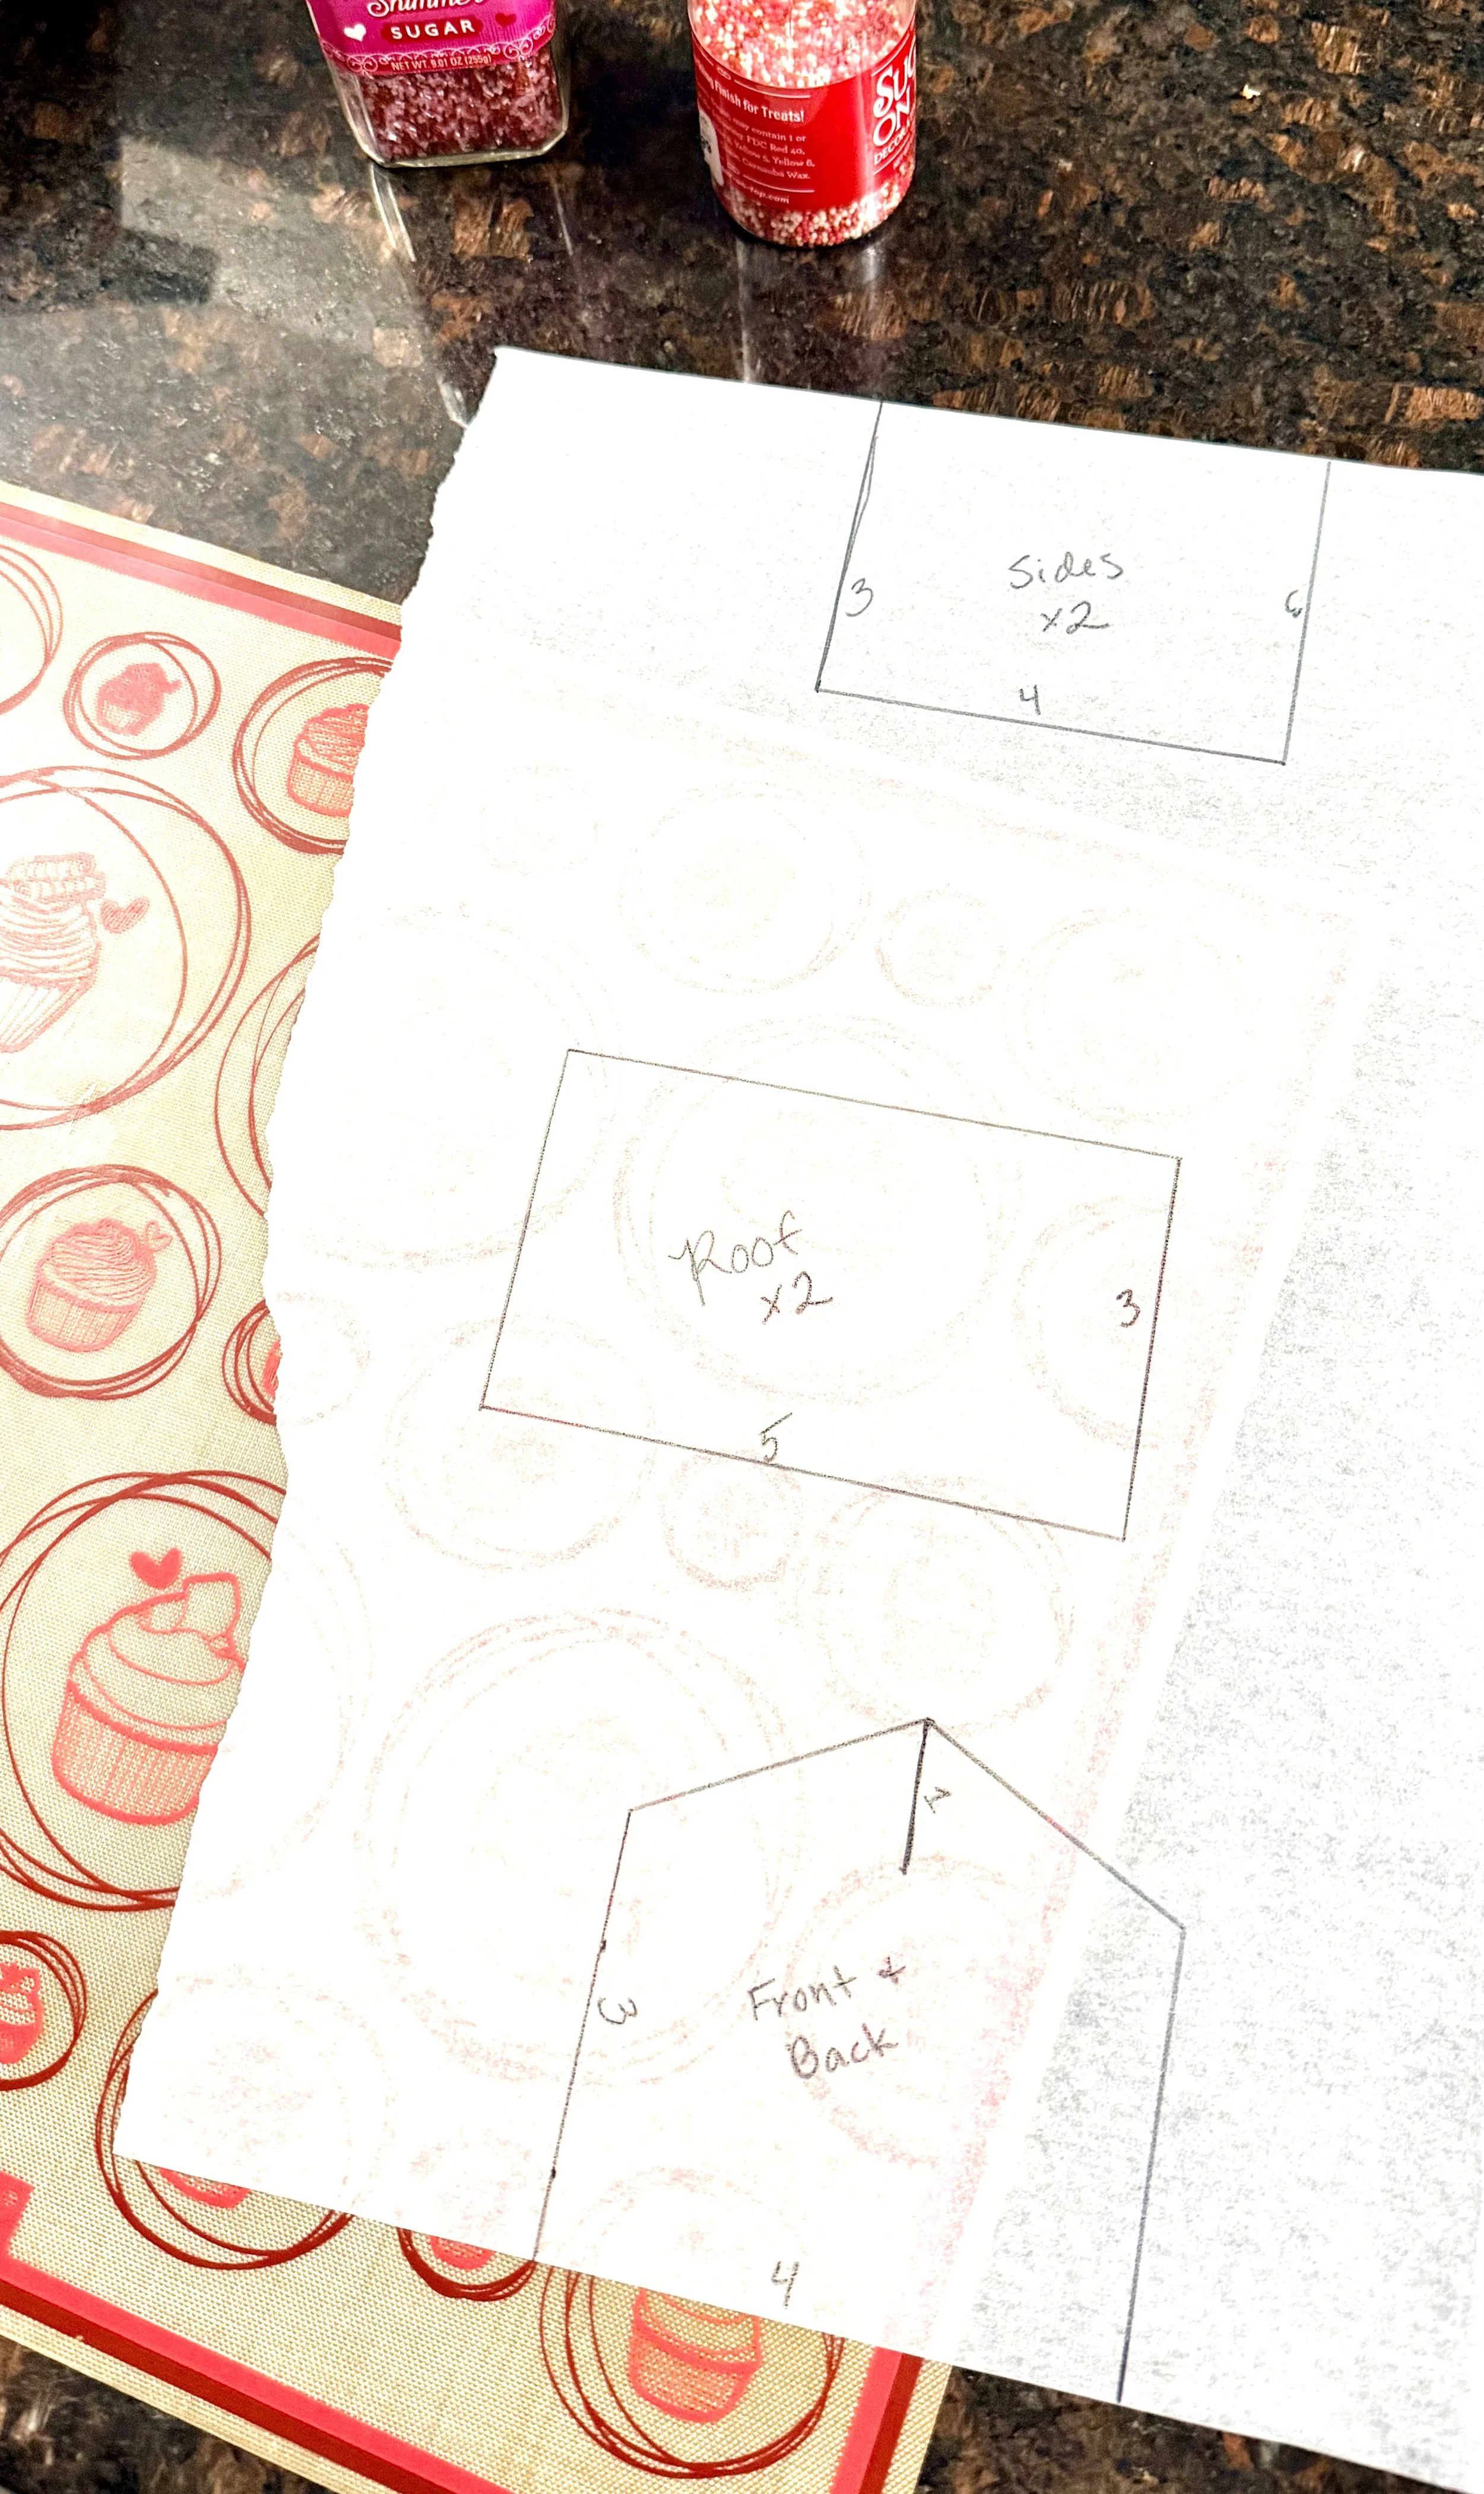
Guessing dimensions without a Printable Gingerbread House Kit
Creating a gingerbread house is one of the most magical holiday traditions—but baking, cutting, and assembling can feel overwhelming, especially with kids. This printable gingerbread house kit makes it simple to enjoy the fun without the stress.
Designed for families, classrooms, and holiday parties, this DIY kit gives you everything you need to build a festive gingerbread house using easy-to-follow templates and instructions.
👉 Get the Printable Gingerbread House Kit
Instant digital download – perfect for kids and families
What Is a Printable Gingerbread House Kit?
A printable gingerbread house kit is a digital download that includes pre-sized templates and instructions you can print at home. Instead of guessing measurements or struggling with fragile baked pieces, you’ll have a clear plan that makes assembling a gingerbread house much easier—especially with kids helping.
This kit works whether you:
Bake your own gingerbread
Use graham crackers
Want a practice run before making an edible version
What’s Included in the Gingerbread House Kit
✔ Printable gingerbread house templates (PDF)
✔ Step-by-step building instructions
✔ Decorating ideas that work for kids
✔ Tips to help prevent cracking and collapsing
✔ Instant digital download (no waiting!)
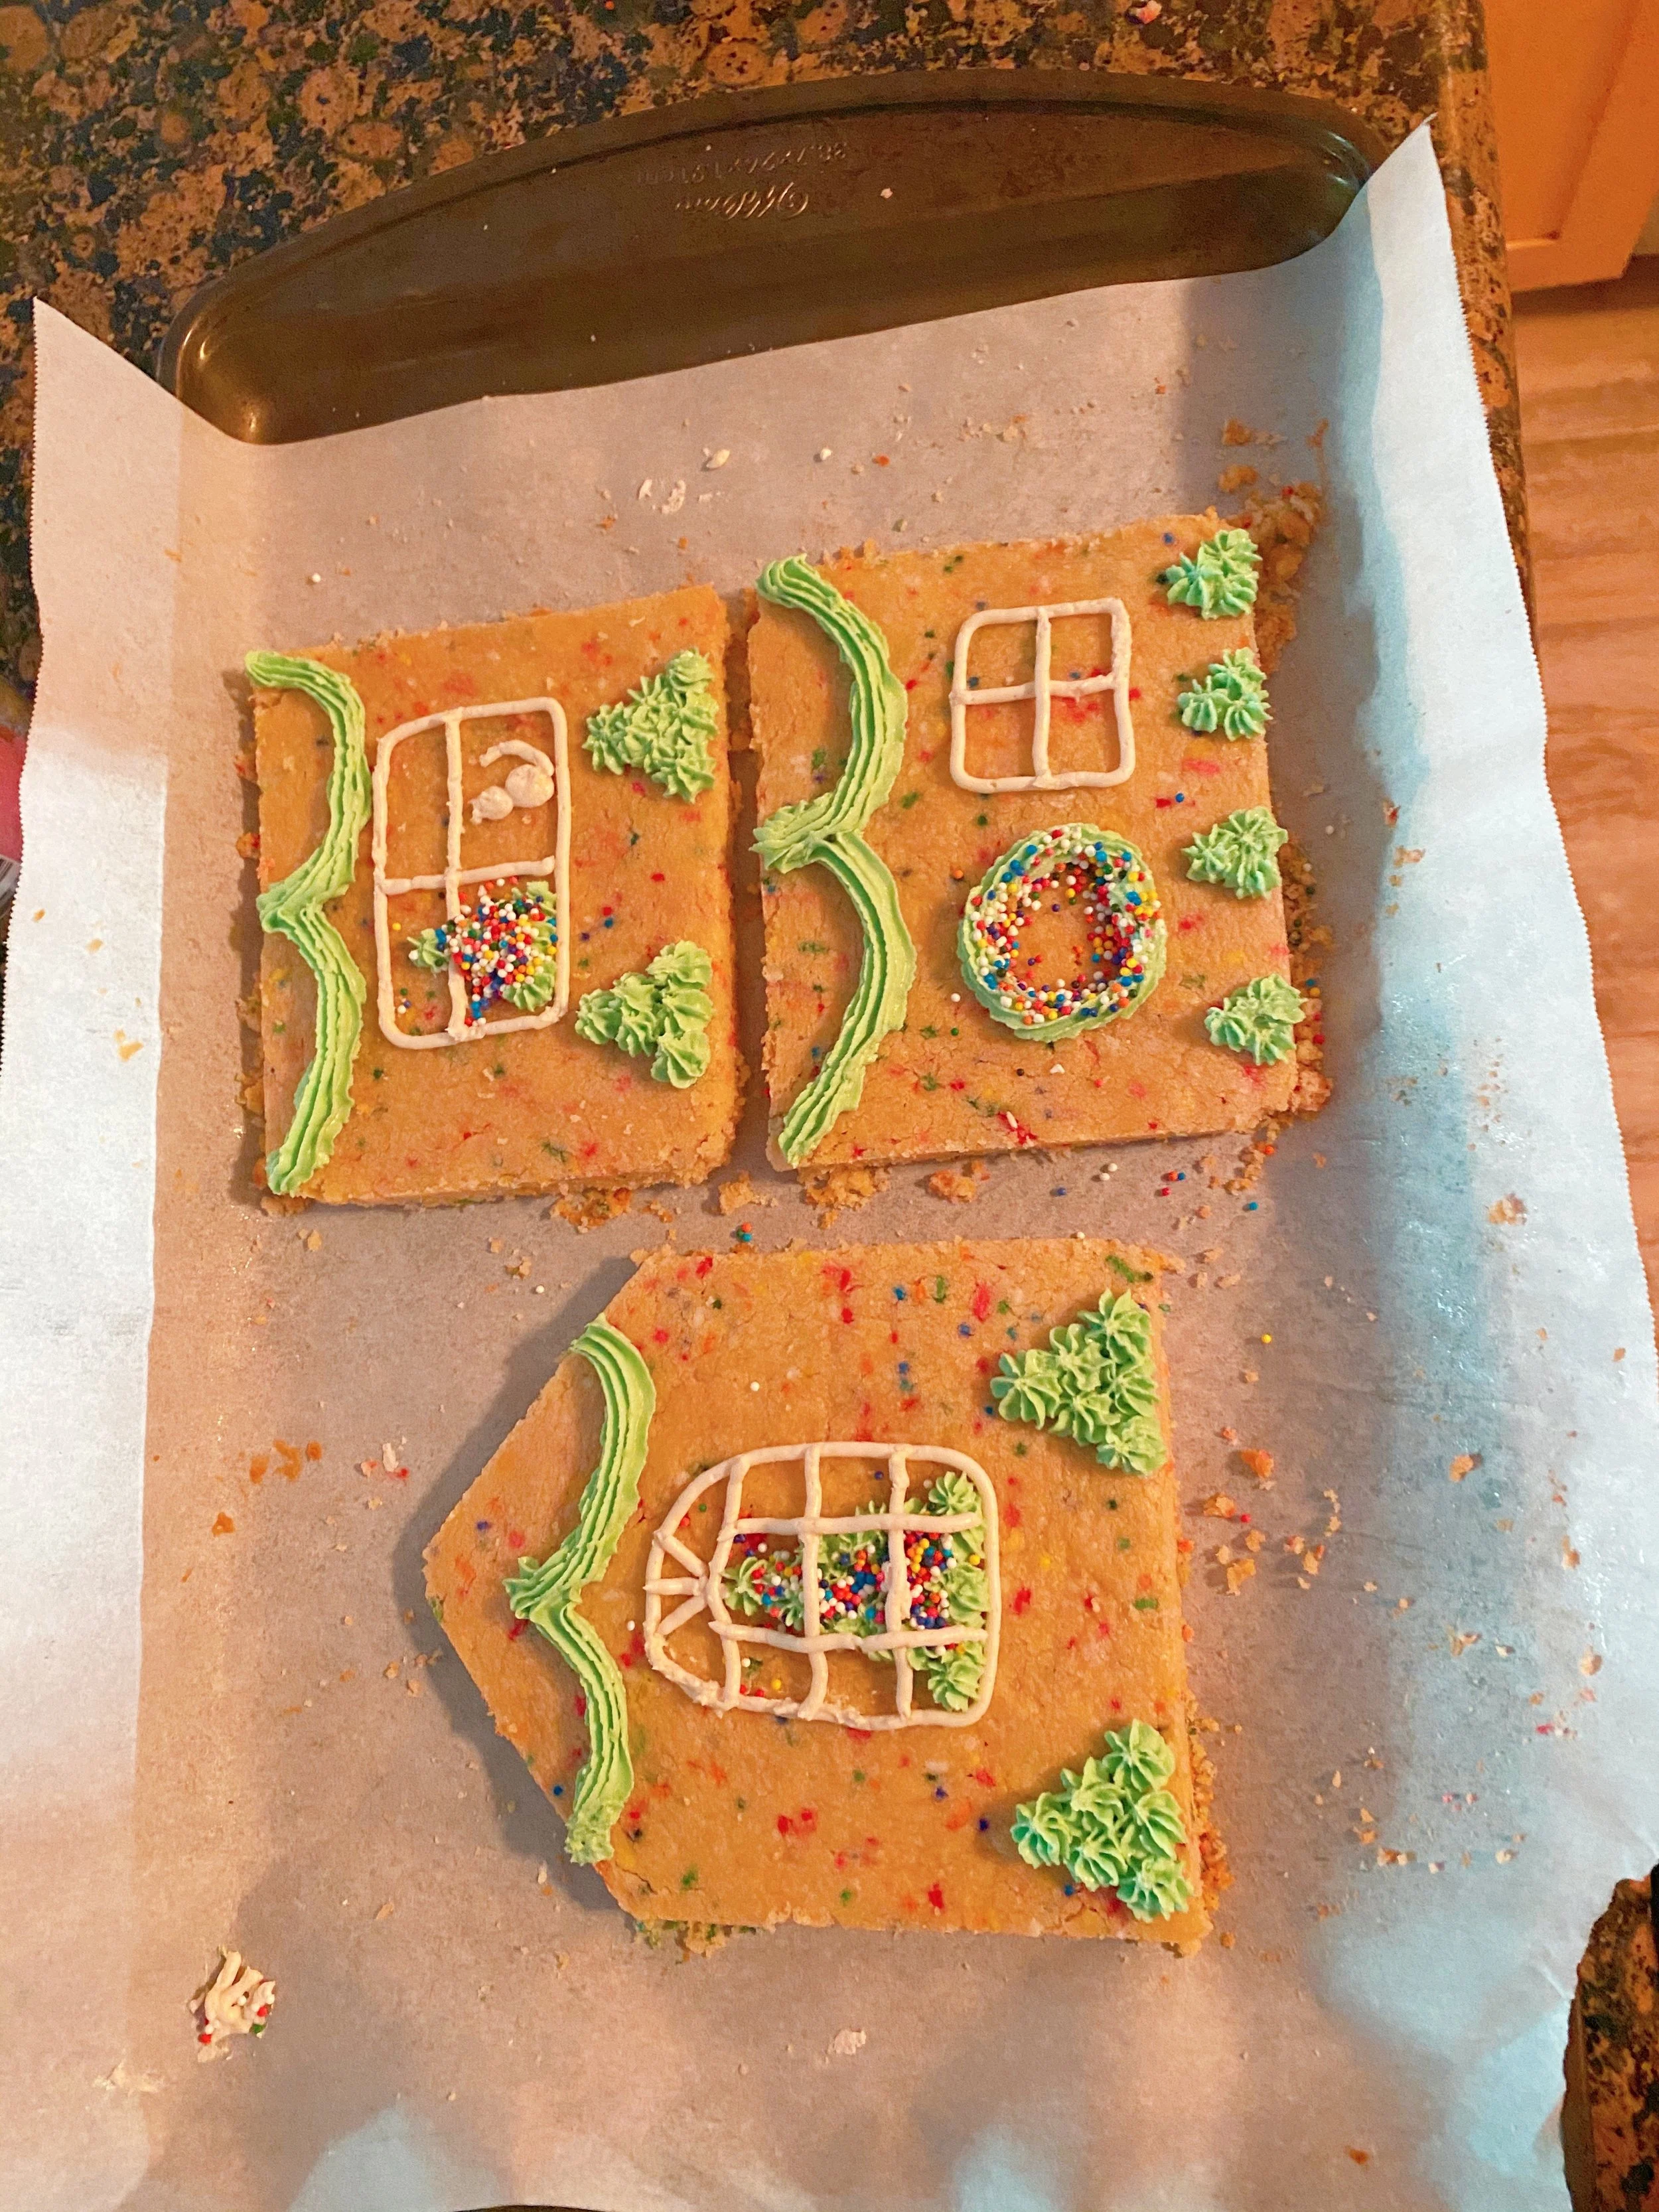
Why Families Love This Gingerbread House Kit
Why Families Love This Gingerbread House Kit
Kid-friendly: Simple shapes and clear instructions
Low stress: No guesswork or complicated measuring
Reusable: Print and use year after year
Flexible: Works with gingerbread, graham crackers, or cardboard
This makes it a great option for:
Christmas Eve traditions
Holiday baking with kids
Classroom or homeschool activities
Family holiday parties
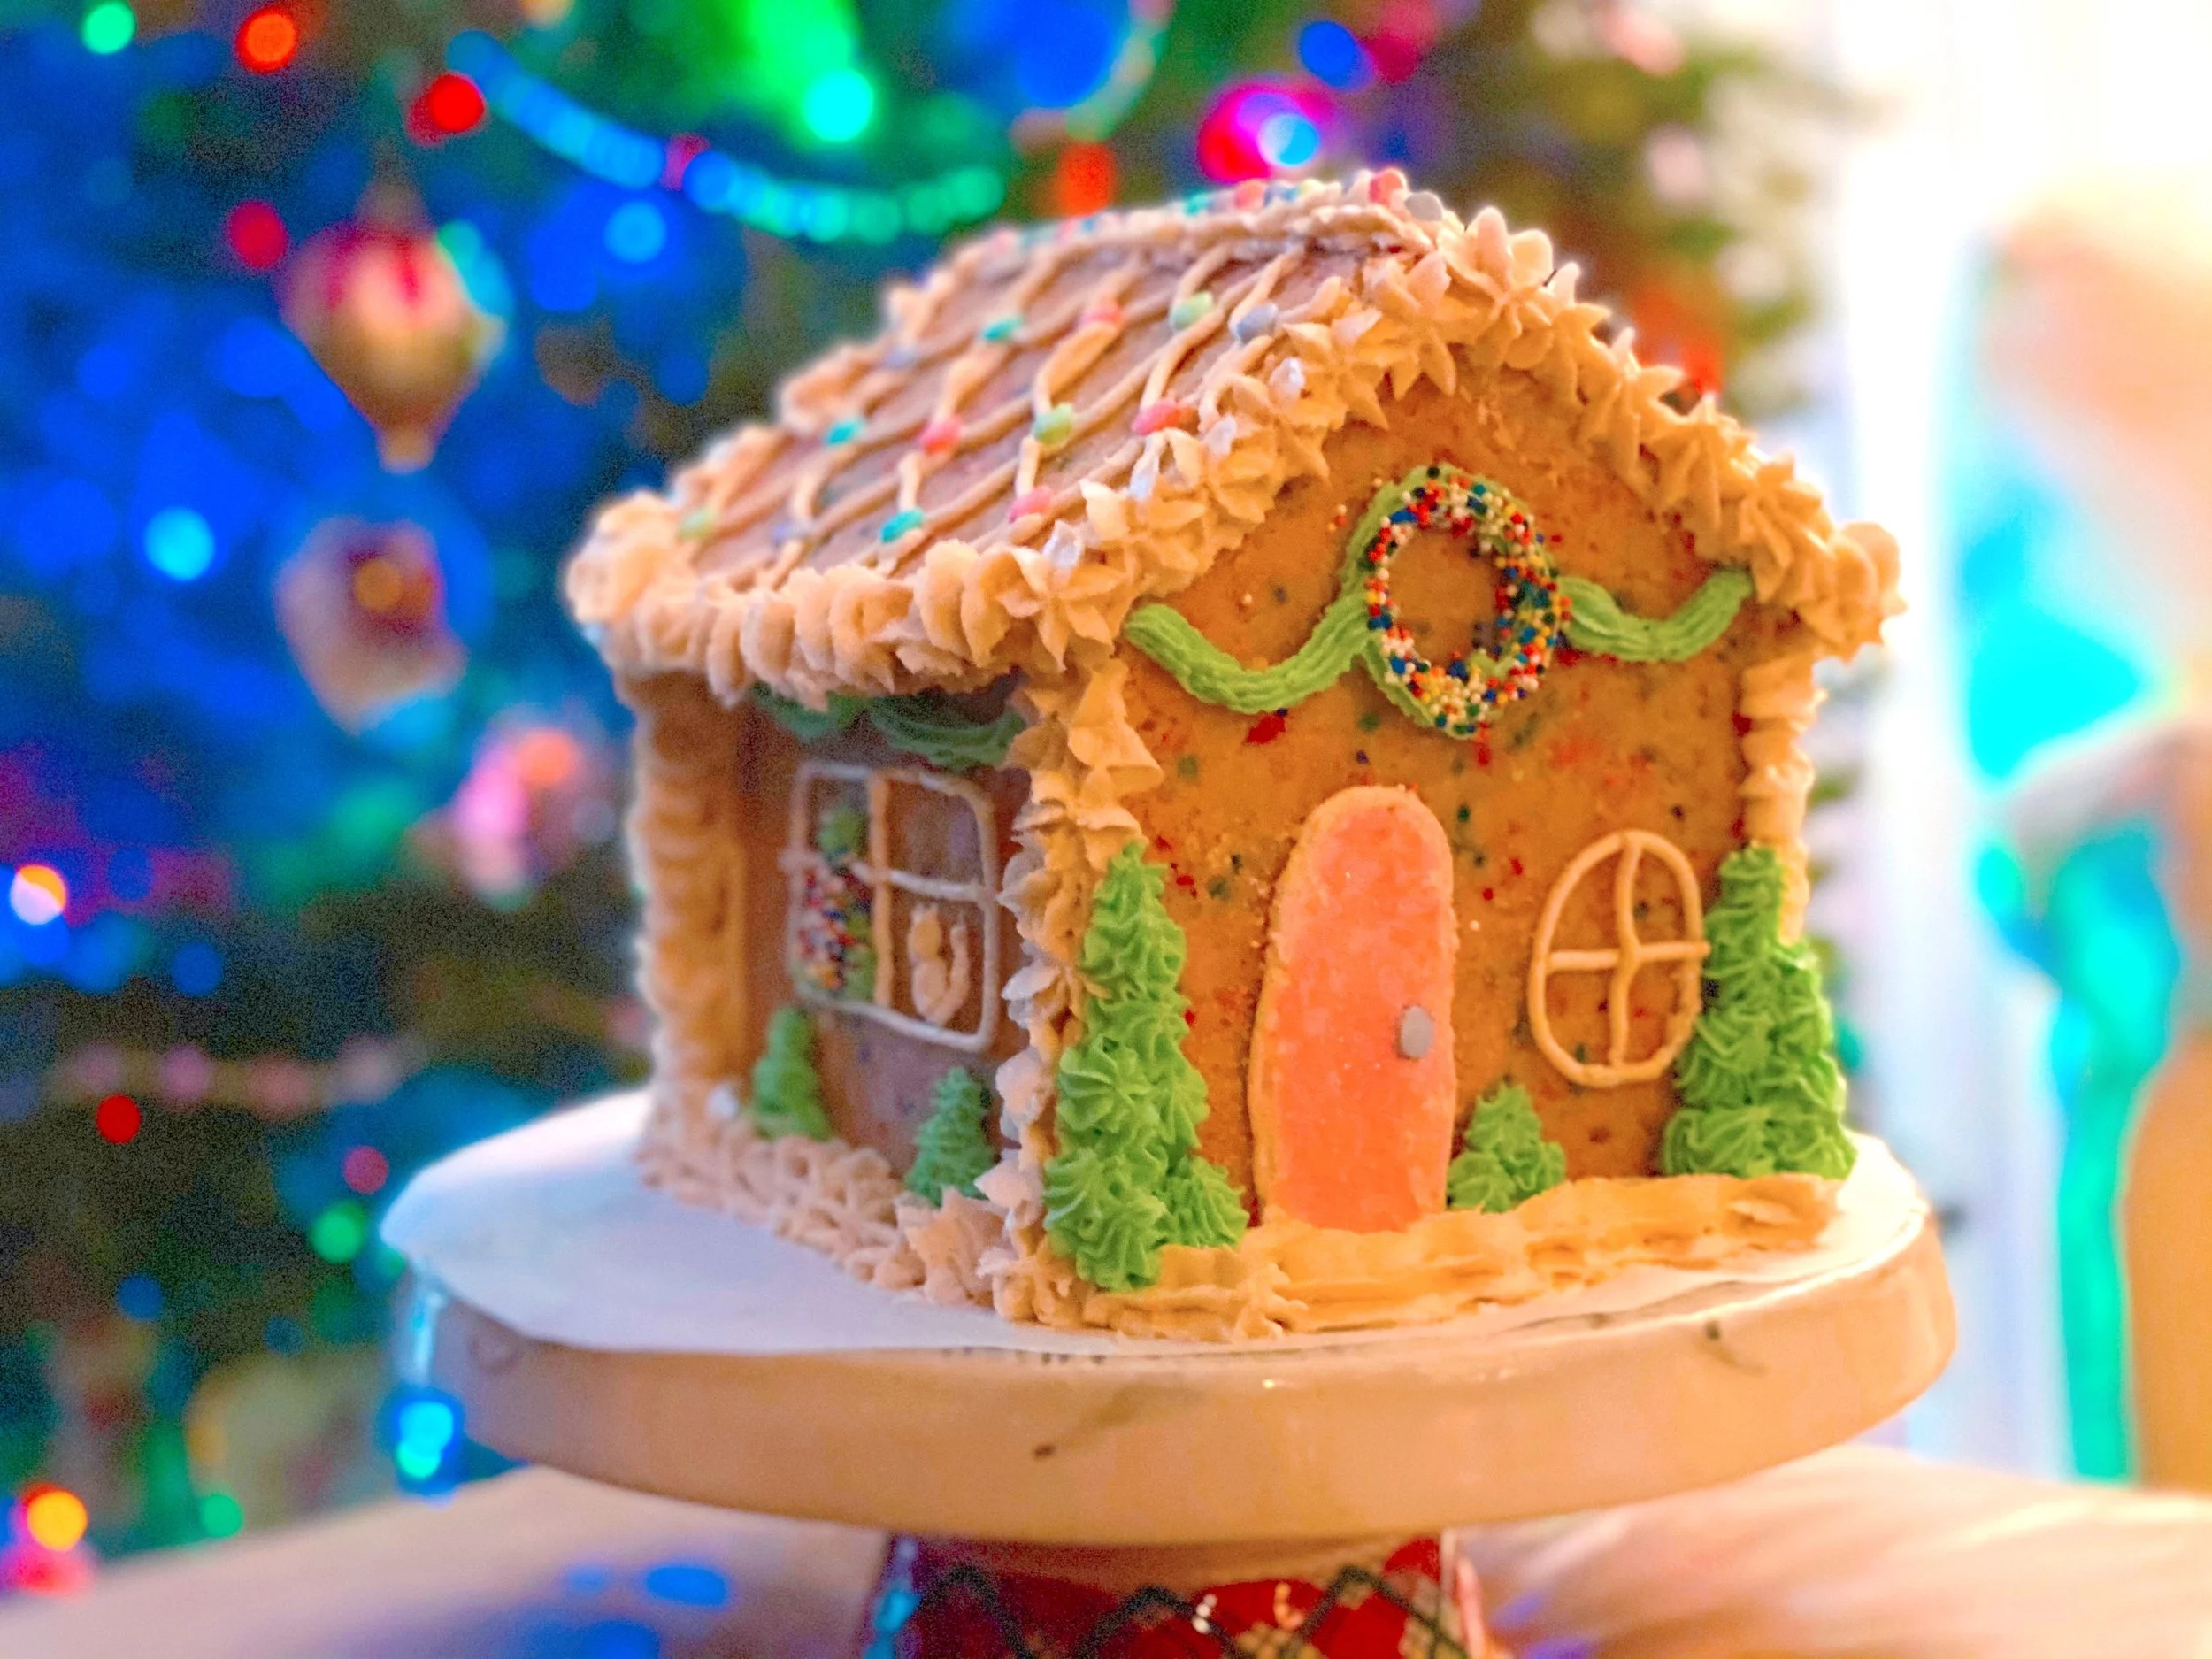
How to Use the Printable Gingerbread House Kit
Download and print the templates on standard 8.5×11 paper
Cut out the template pieces
Roll dough and using your template pieces, cut around dough creating panels (roof, side, front, and back)
Bake your house panels
Decorate with your favorite sprinkles or treats
Assemble using royal icing or buttercream frosting
Display and enjoy!
The instructions are written so kids can follow along with adult help.
Gingerbread House vs. Sugar Cookie House
If you love decorating but want an easier edible option, you might also enjoy making a sugar cookie house instead of a gingerbread house.
👉 See our Sugar Cookie House Tutorial for Kids
(Perfect if you want softer cookies and less breakage)
Frequently Asked Questions
Is this a physical gingerbread house kit?
No. This is a digital download that you print at home. Ingredients and candy are not included.
Is this gingerbread house kit good for kids?
Yes! It’s designed to be kid-friendly and works best with adult supervision.
What paper size should I use?
Standard US Letter (8.5×11). No special printer needed.
Can I reuse this kit every year?
Yes. Once purchased, you can print and reuse it for personal use.
Make Gingerbread Houses a Holiday Tradition
Creating a gingerbread house doesn’t have to be complicated to be special. With this printable gingerbread house kit, you can skip the stress and focus on what matters most—making memories, laughing through the decorating mess, and starting a holiday tradition your family will look forward to year after year. Whether you’re baking with kids, hosting a classroom activity, or planning a cozy Christmas afternoon at home, this easy DIY kit helps turn a simple idea into a meaningful experience.
This printable gingerbread house kit takes the pressure out of holiday baking and lets you focus on what matters—making memories together.
👉 Get the Printable Gingerbread House Kit – Instant Download
More Baking Posts:
Sugar Cookie House Guide (Easy, No Gingerbread Required!)
This sugar cookie house guide covers recipe for dough, assembly, decorating ideas, frosting tips, and a free template for Christmas, Valentine’s Day, and creative kid builds.
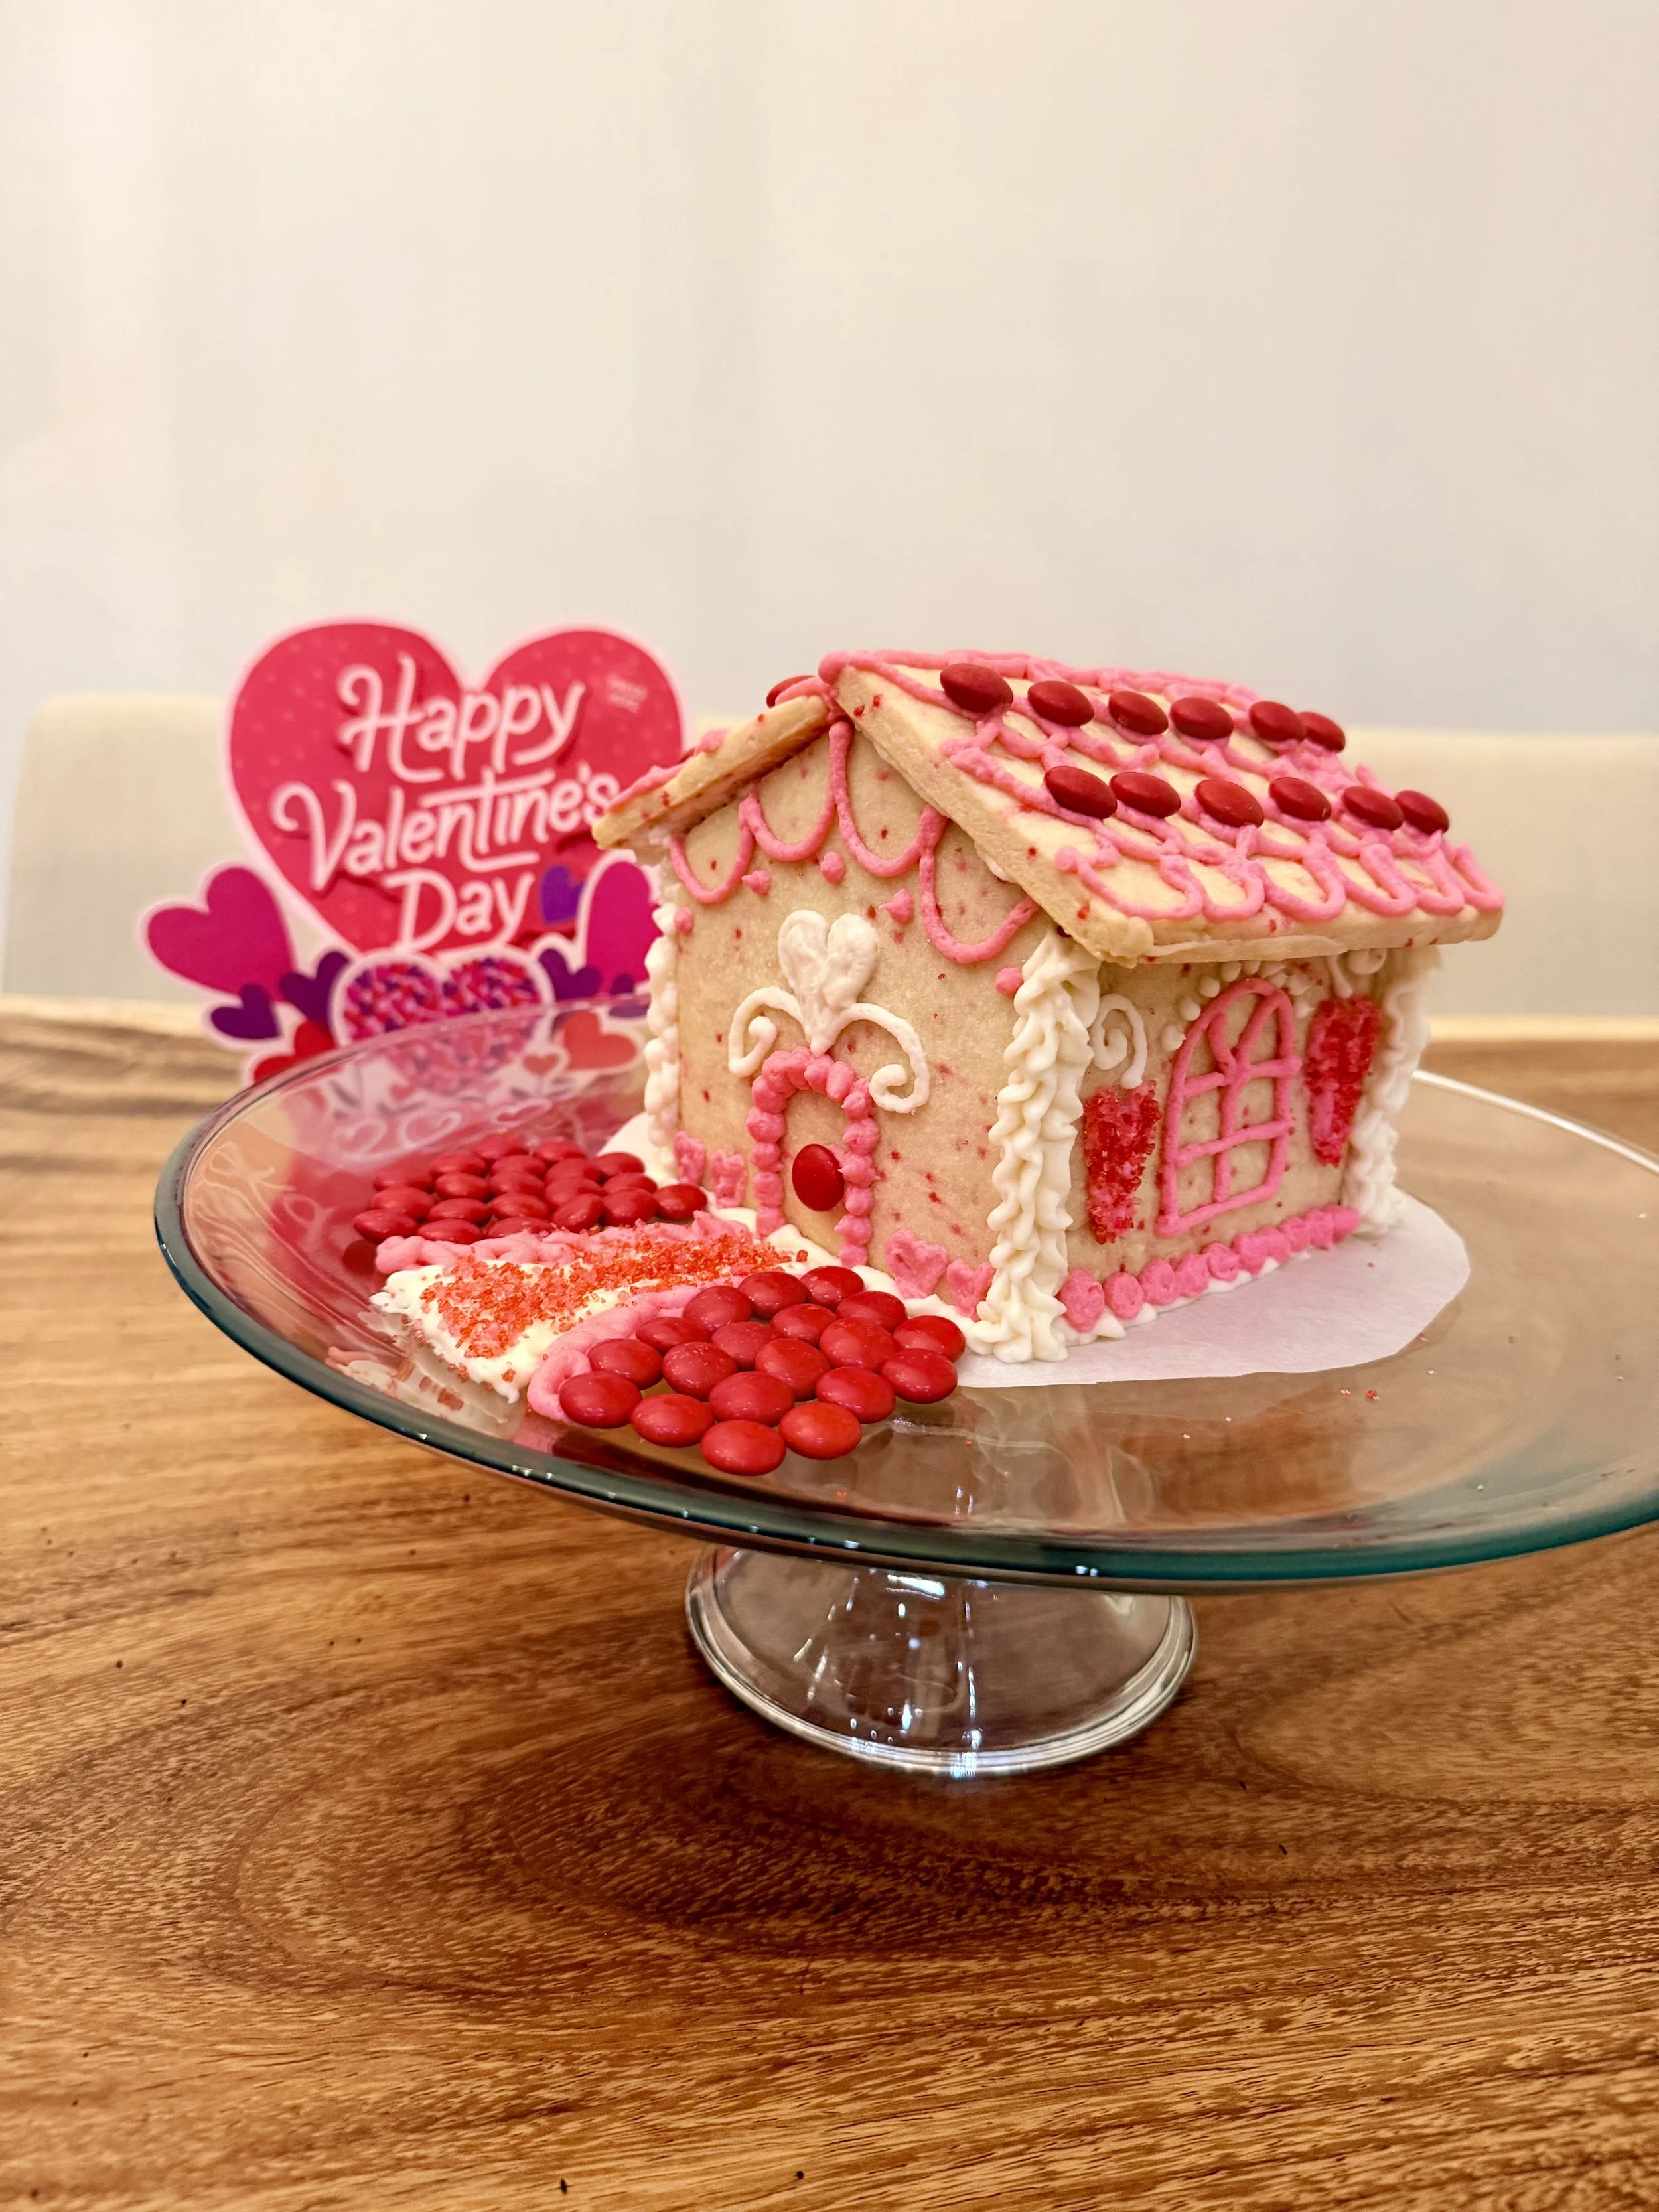
Valentine Sugar Cookie House
How to Make a Sugar Cookie House without Gingerbread- Easy and Kid-Friendly
If you love making gingerbread houses like I do, but don’t love gingerbread, this sugar cookie house guide is for you! A sugar cookie house is a fun, festive alternative that works for Christmas, Valentine’s Day, and beyond—with soft cookies, easy dough, and decorations your whole family will actually enjoy eating.
Whether you’re building a classic holiday house or a pink-and-pastel Valentine’s Day version, this guide walks you through everything you need to know, with links to step-by-step seasonal tutorials.
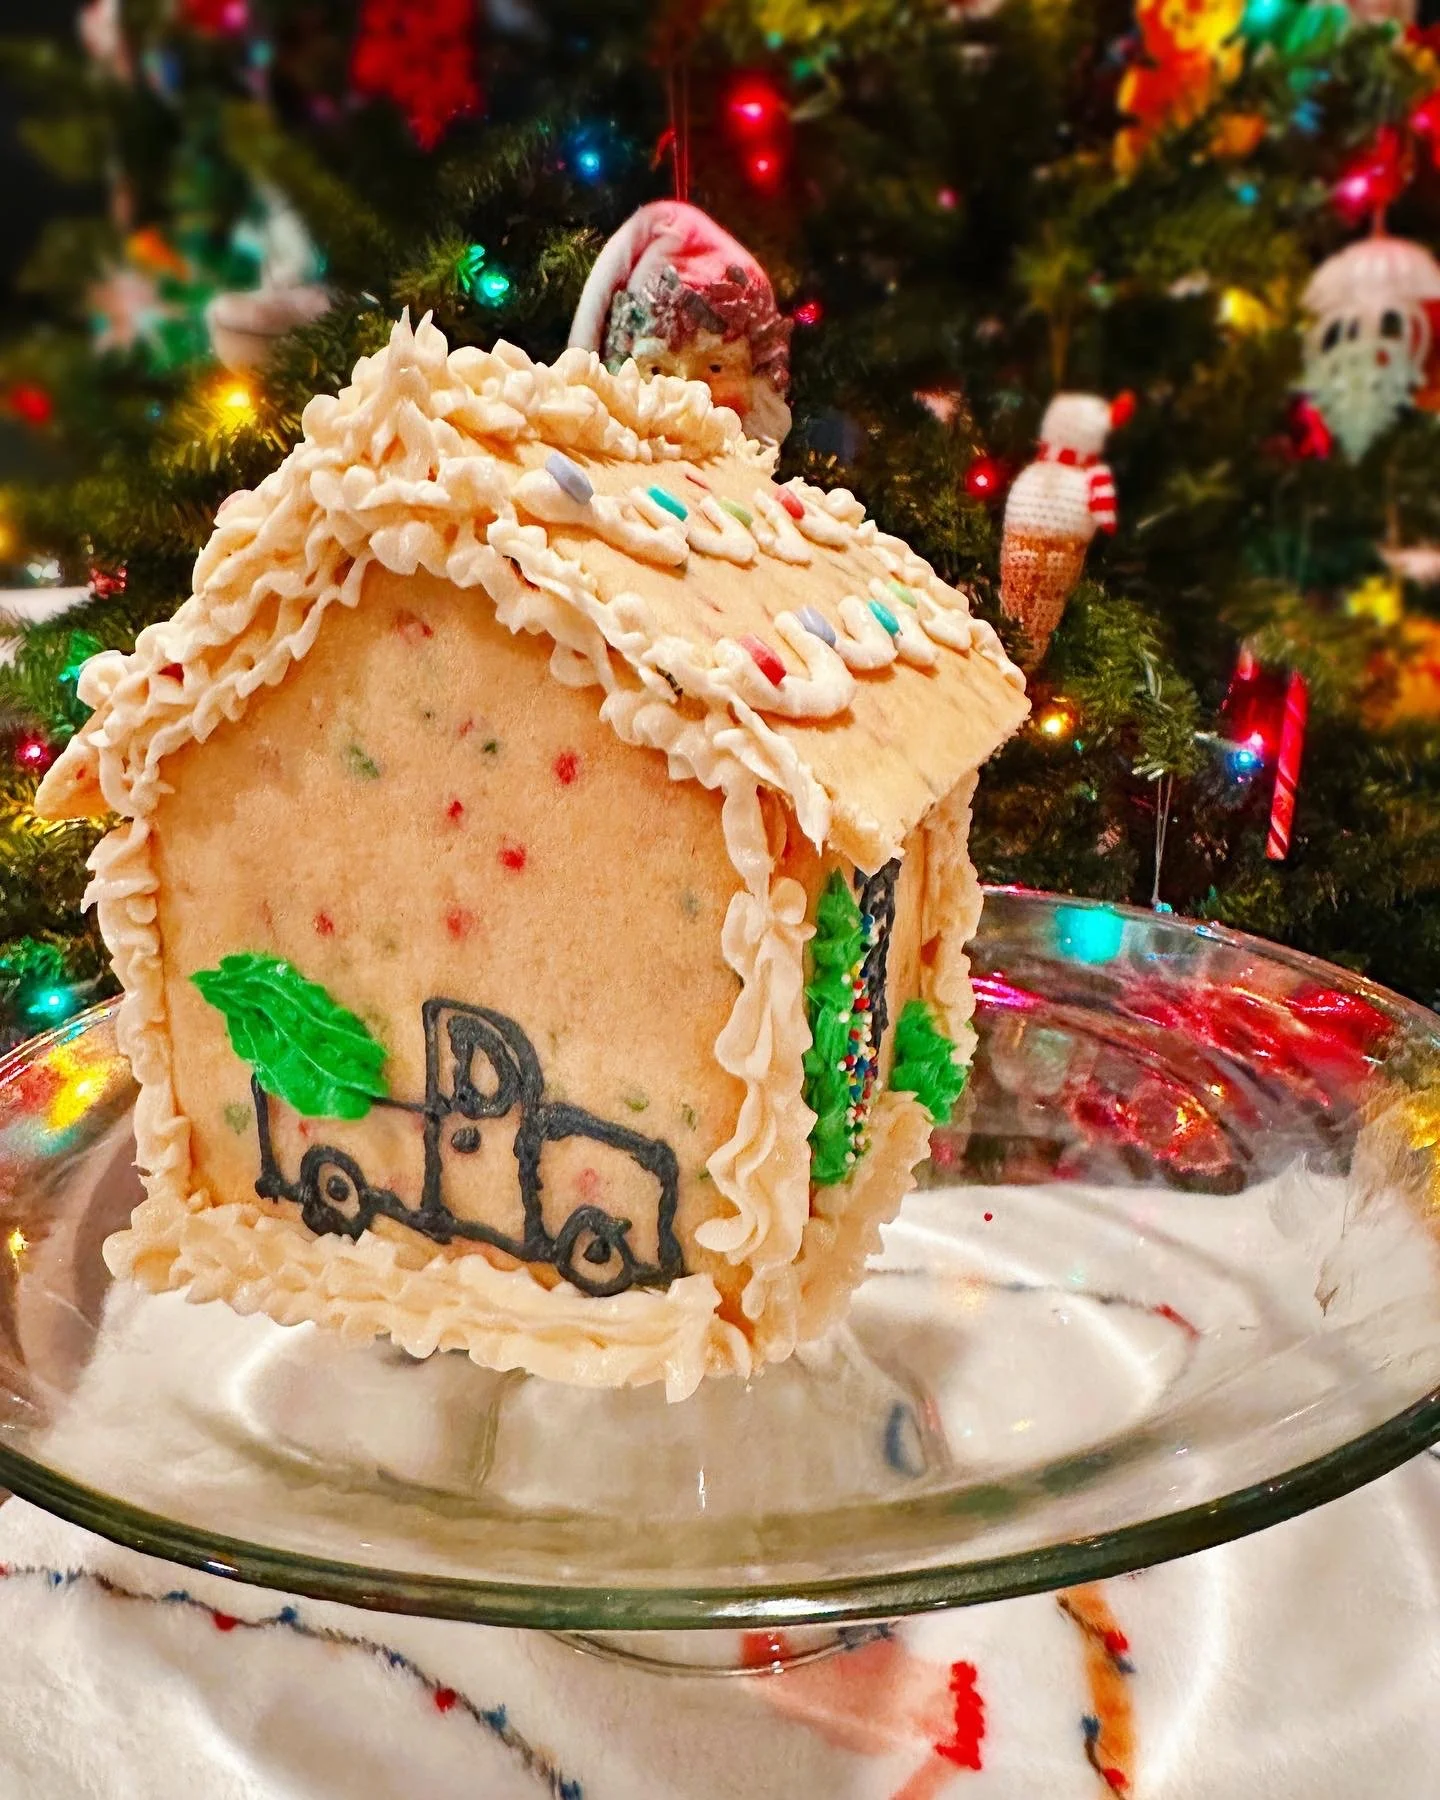
Sugar Cookie House with Trucks Design
Why Make a Sugar Cookie House Instead of Gingerbread?
Sugar cookie houses are easier, tastier, and more kid-friendly than traditional gingerbread houses.
And look — there is absolutely nothing wrong with classic gingerbread. It smells festive and looks beautiful. I’m just not the biggest fan of eating it!
Over the years, I started experimenting with a sugar cookie house as a gingerbread alternative — and I honestly haven’t looked back.
If you’ve ever searched for:
gingerbread house alternative
easy gingerbread house ideas
best gingerbread house glue
no eggs gingerbread house
You might actually be looking for something simpler.
That’s where sugar cookies shine.
Why families love a sugar cookie house:
✔️ Softer cookies that are actually edible (YUM 😋)
✔️ No molasses or heavy spices required — just pantry staples
✔️ Easier dough to roll and bake evenly
✔️ Sturdier structure with buttercream “glue”
✔️ Works for multiple holidays — not just Christmas
If you’ve ever struggled with rock-hard gingerbread, broken walls, or icing that won’t hold, sugar cookies are a total game changer.
I use the same simple template and base dough for Christmas, Valentine’s Day, St. Patrick’s Day, Easter, and beyond. Once you learn the method, you can decorate it any way you want.
It’s less stress.
More creativity.
And way more fun to eat..
Shop my list - These are the tools I use when building my sugar cookie houses.
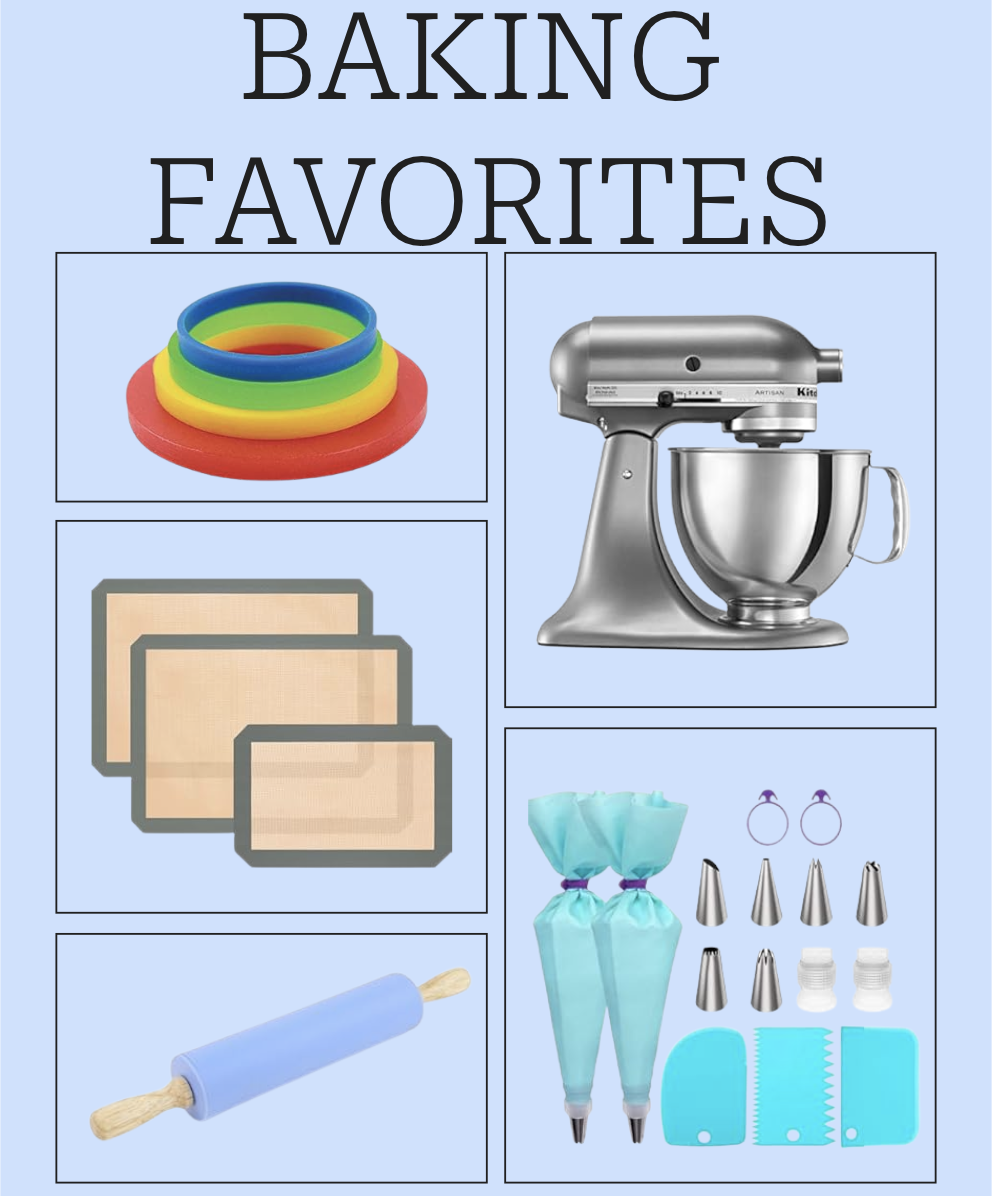
These are the baking tools I use every time I make a sugar cookie house—from mixing the dough to piping the final details.
What Is a Sugar Cookie House?
A sugar cookie house is built using sturdy sugar cookie panels instead of gingerbread. The cookies are baked slightly thicker to hold their shape, then assembled with frosting and decorated based on the season.
You can customize:
Roof style
Door and window shapes
Icing colors
Holiday-specific candy decorations
Check out my favorite Sugar Cookie Houses Pinterest board for design ideas!
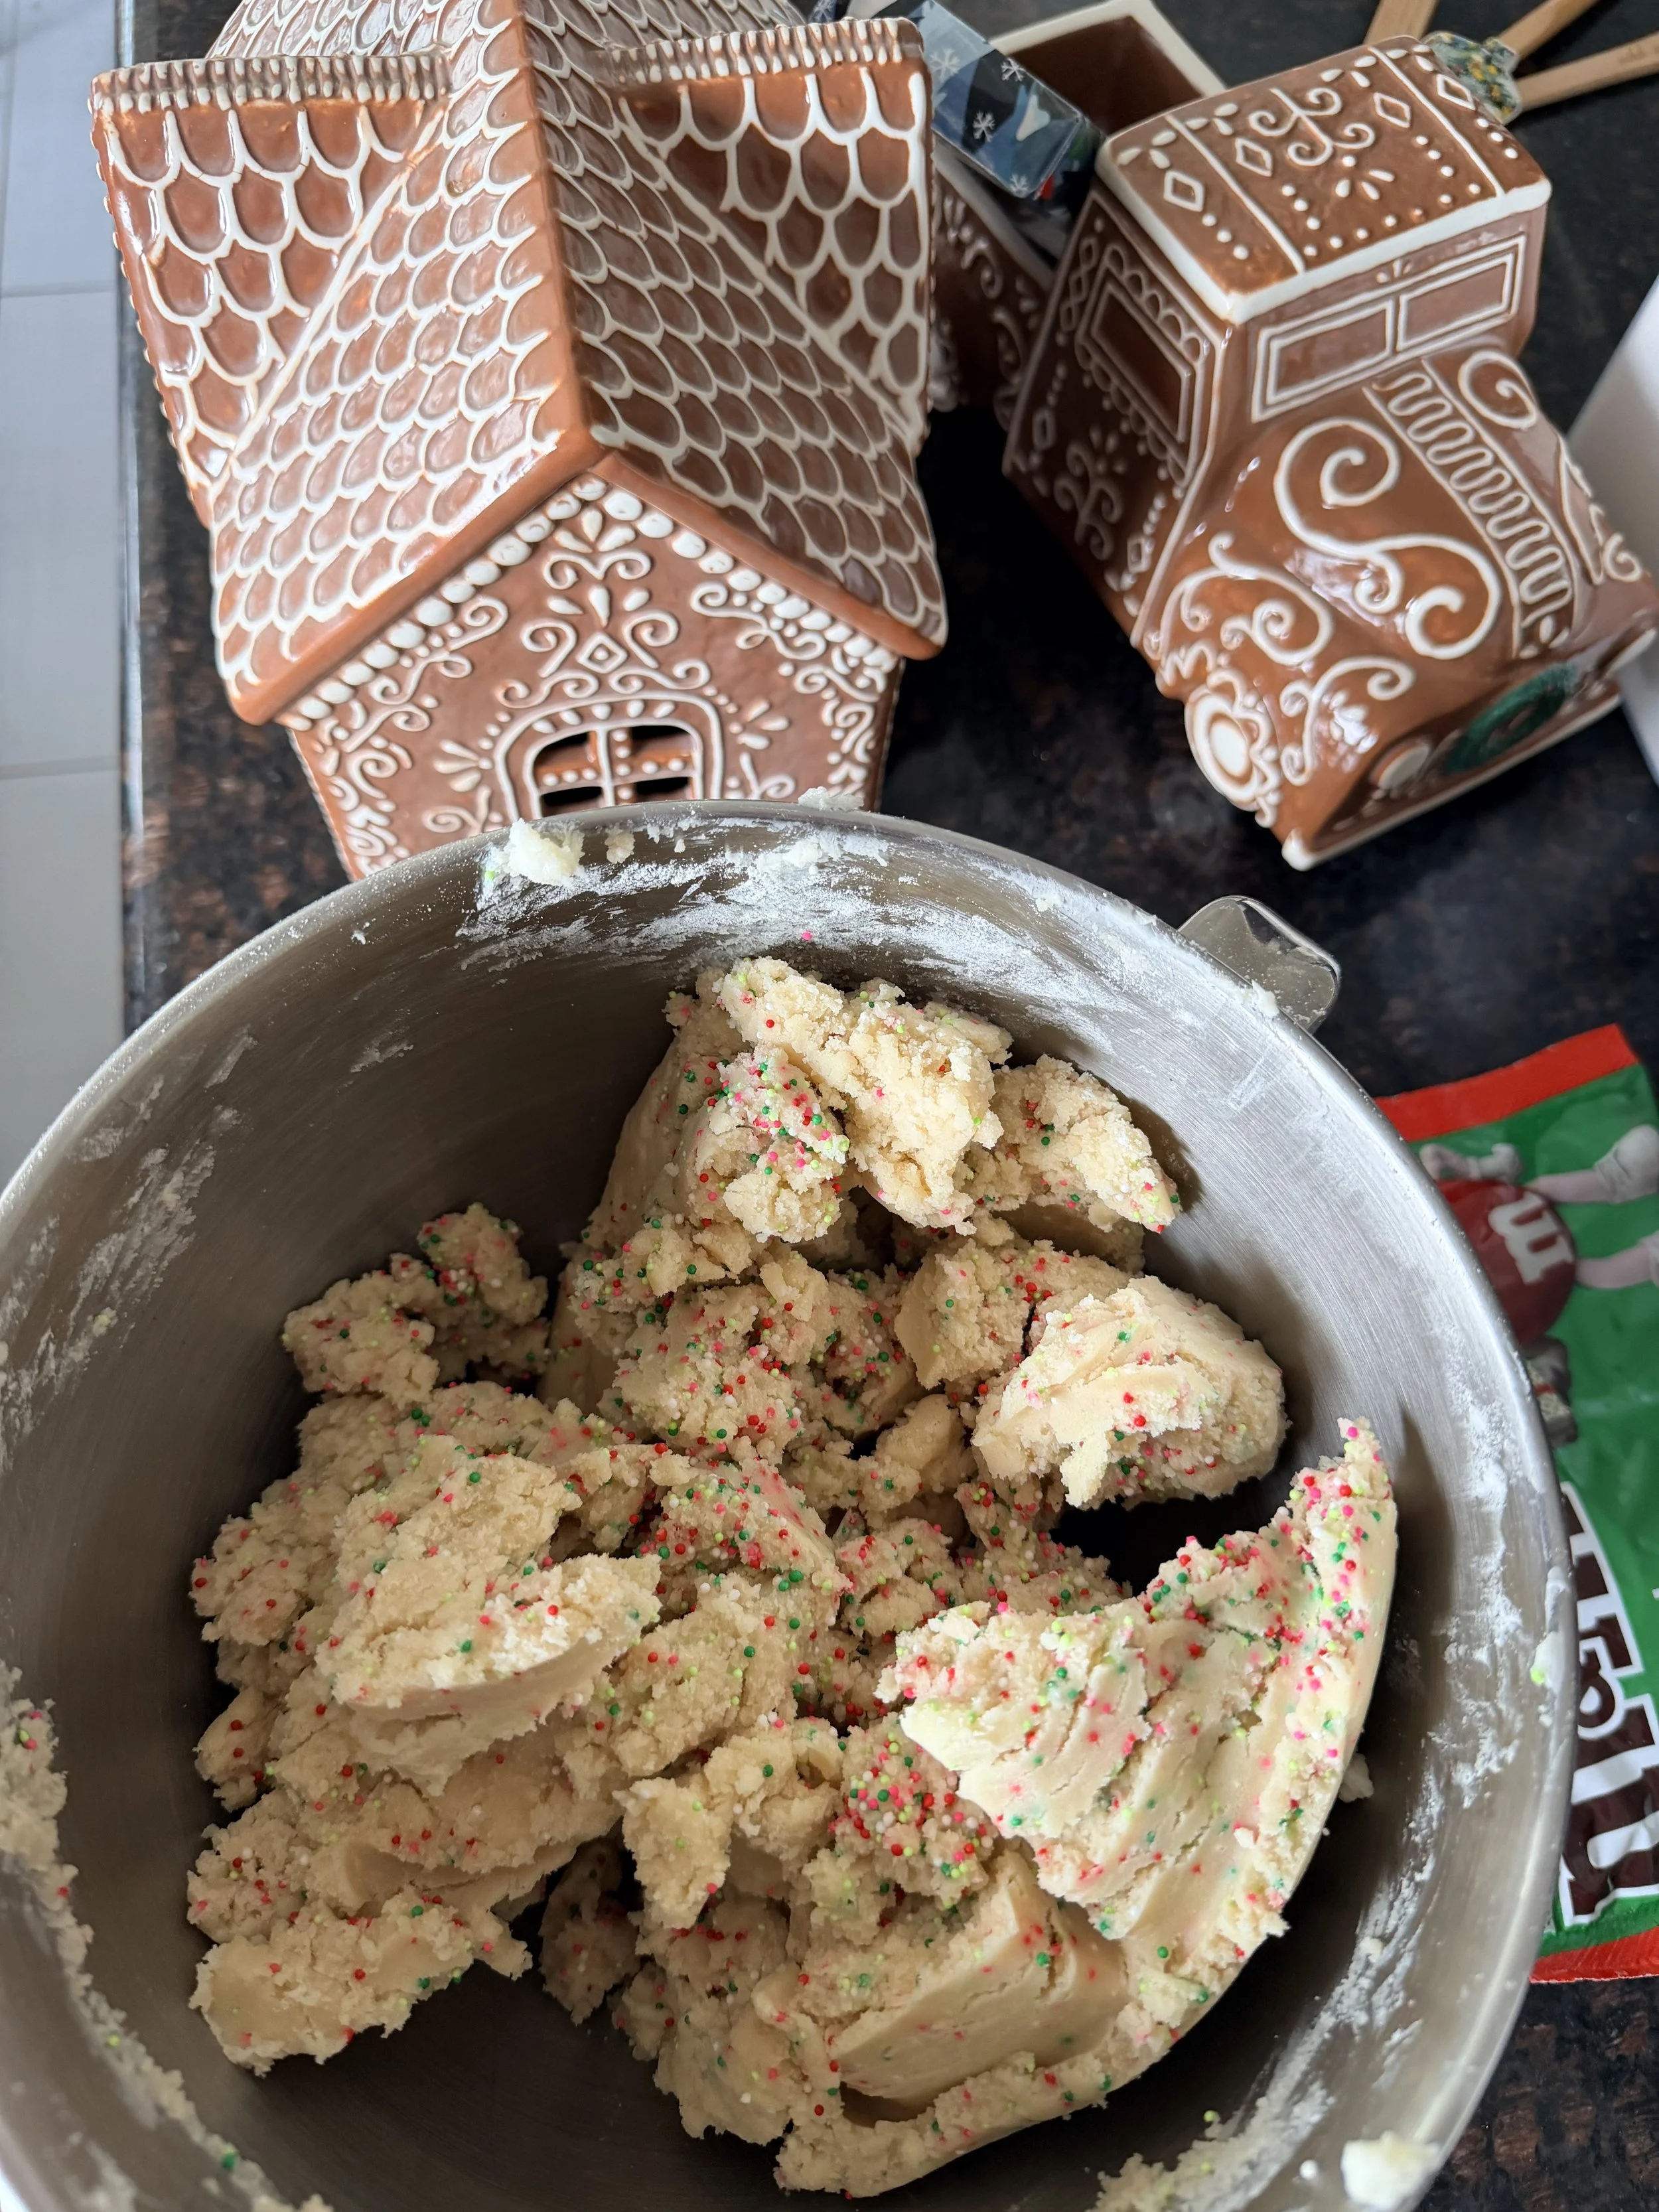
Sugar Cookie Dough with Sprinkles
Sugar Cookie House Dough Basics
A good sugar cookie house dough should be:
Firm but not dry
Rolled evenly
Baked until set (not browned)
💡 Tip: Chill the dough before cutting shapes to prevent spreading.
You’ll find exact measurements and baking times inside each seasonal tutorial below.
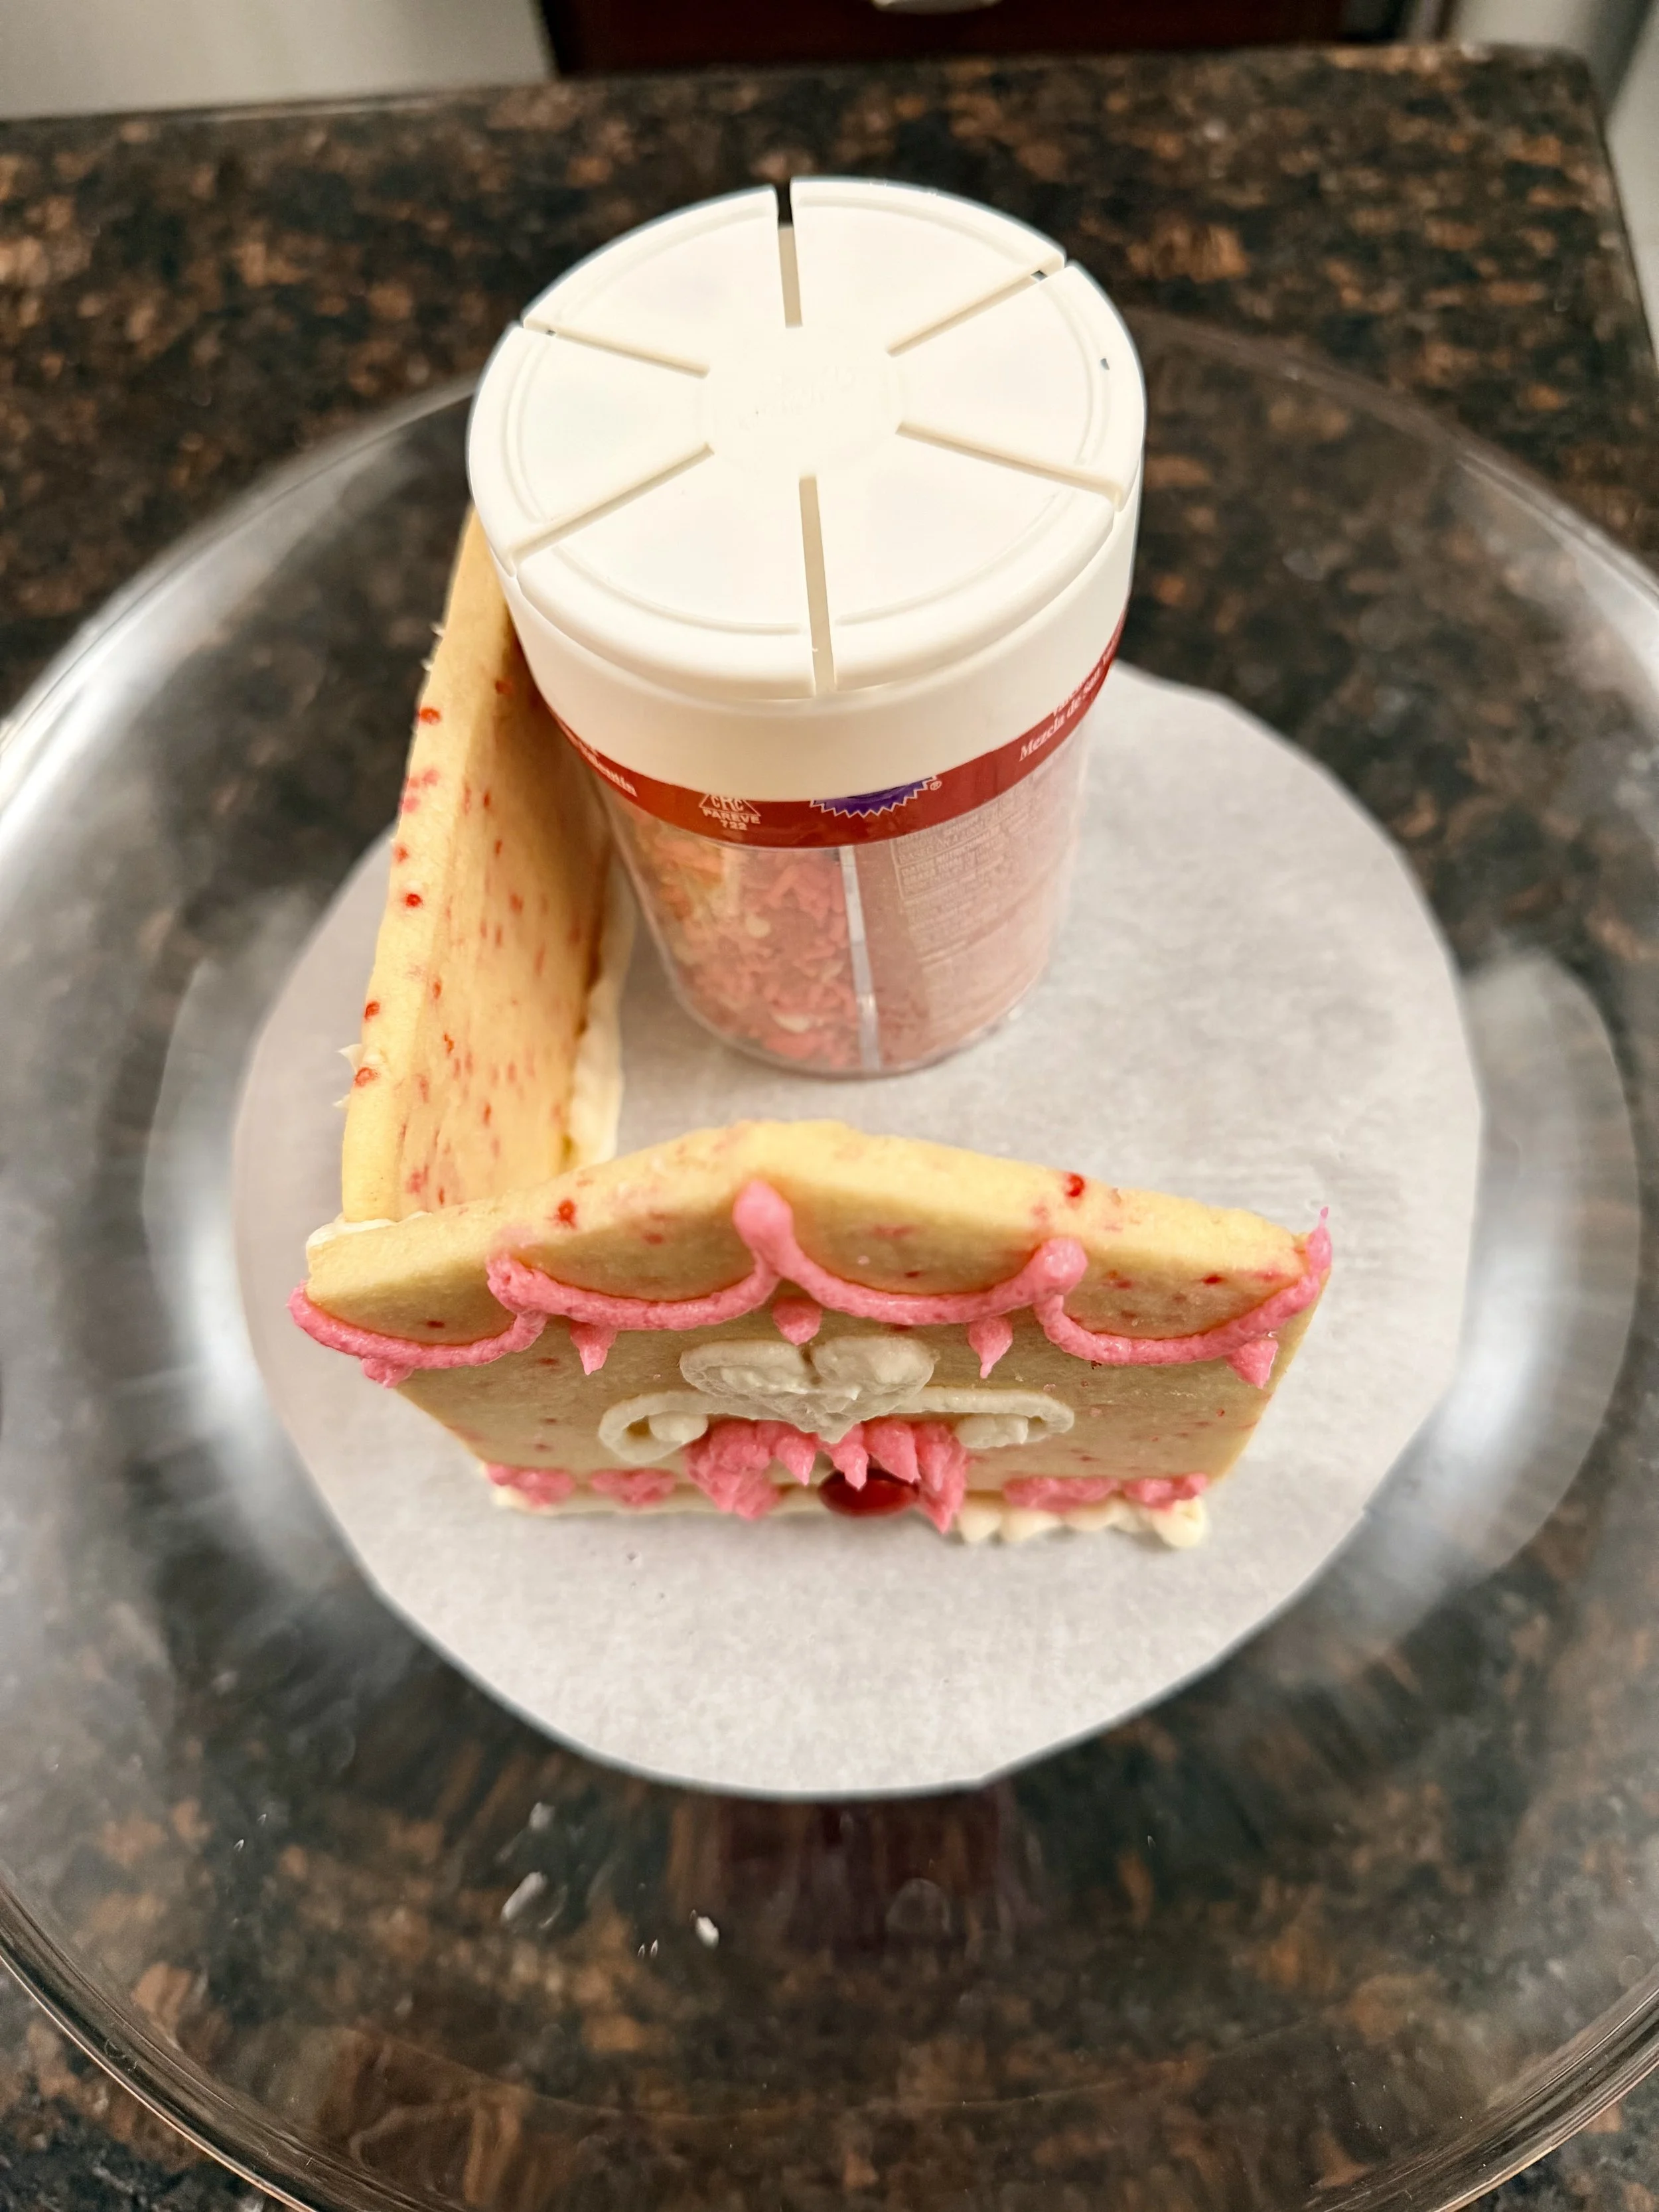
How to Assemble a Sugar Cookie House - Step by Step! Use containers to support the cookie walls while assembling
How to Assemble a Sugar Cookie House
Assembly is the same no matter the holiday.
Basic steps:
Bake and cool cookie panels completely
Decorate all pieces and refrigerate for 15 mins at least to let the frosting set
Pipe thick frosting along edges
Assemble walls first and let set
Add roof panels
You can use buttercream frosting (yes, really!) or royal icing depending on your preference.
See our Valentine’s Day post for more info about Buttercream Frosting do’s and don’t’s.
See the full sugar cookie house come together in this quick timelapse before we turn it into a leprechaun trap.
A quick timelapse of assembling the sugar cookie house before decorating it as a St. Patrick’s Day leprechaun trap.
Free Sugar Cookie House Template (Printable)
To make building a sugar cookie house even easier, we created a free printable sugar cookie house template you can use to cut consistent wall and roof pieces every time. This template works perfectly for sugar cookie dough and can be reused for different holidays and designs.
👉 Download the free sugar cookie house template here:
https://www.thesweetestescapes.com/shop/gingerbread-house
This template works for Christmas sugar cookie houses, Valentine’s Day houses, and any themed sugar cookie build.
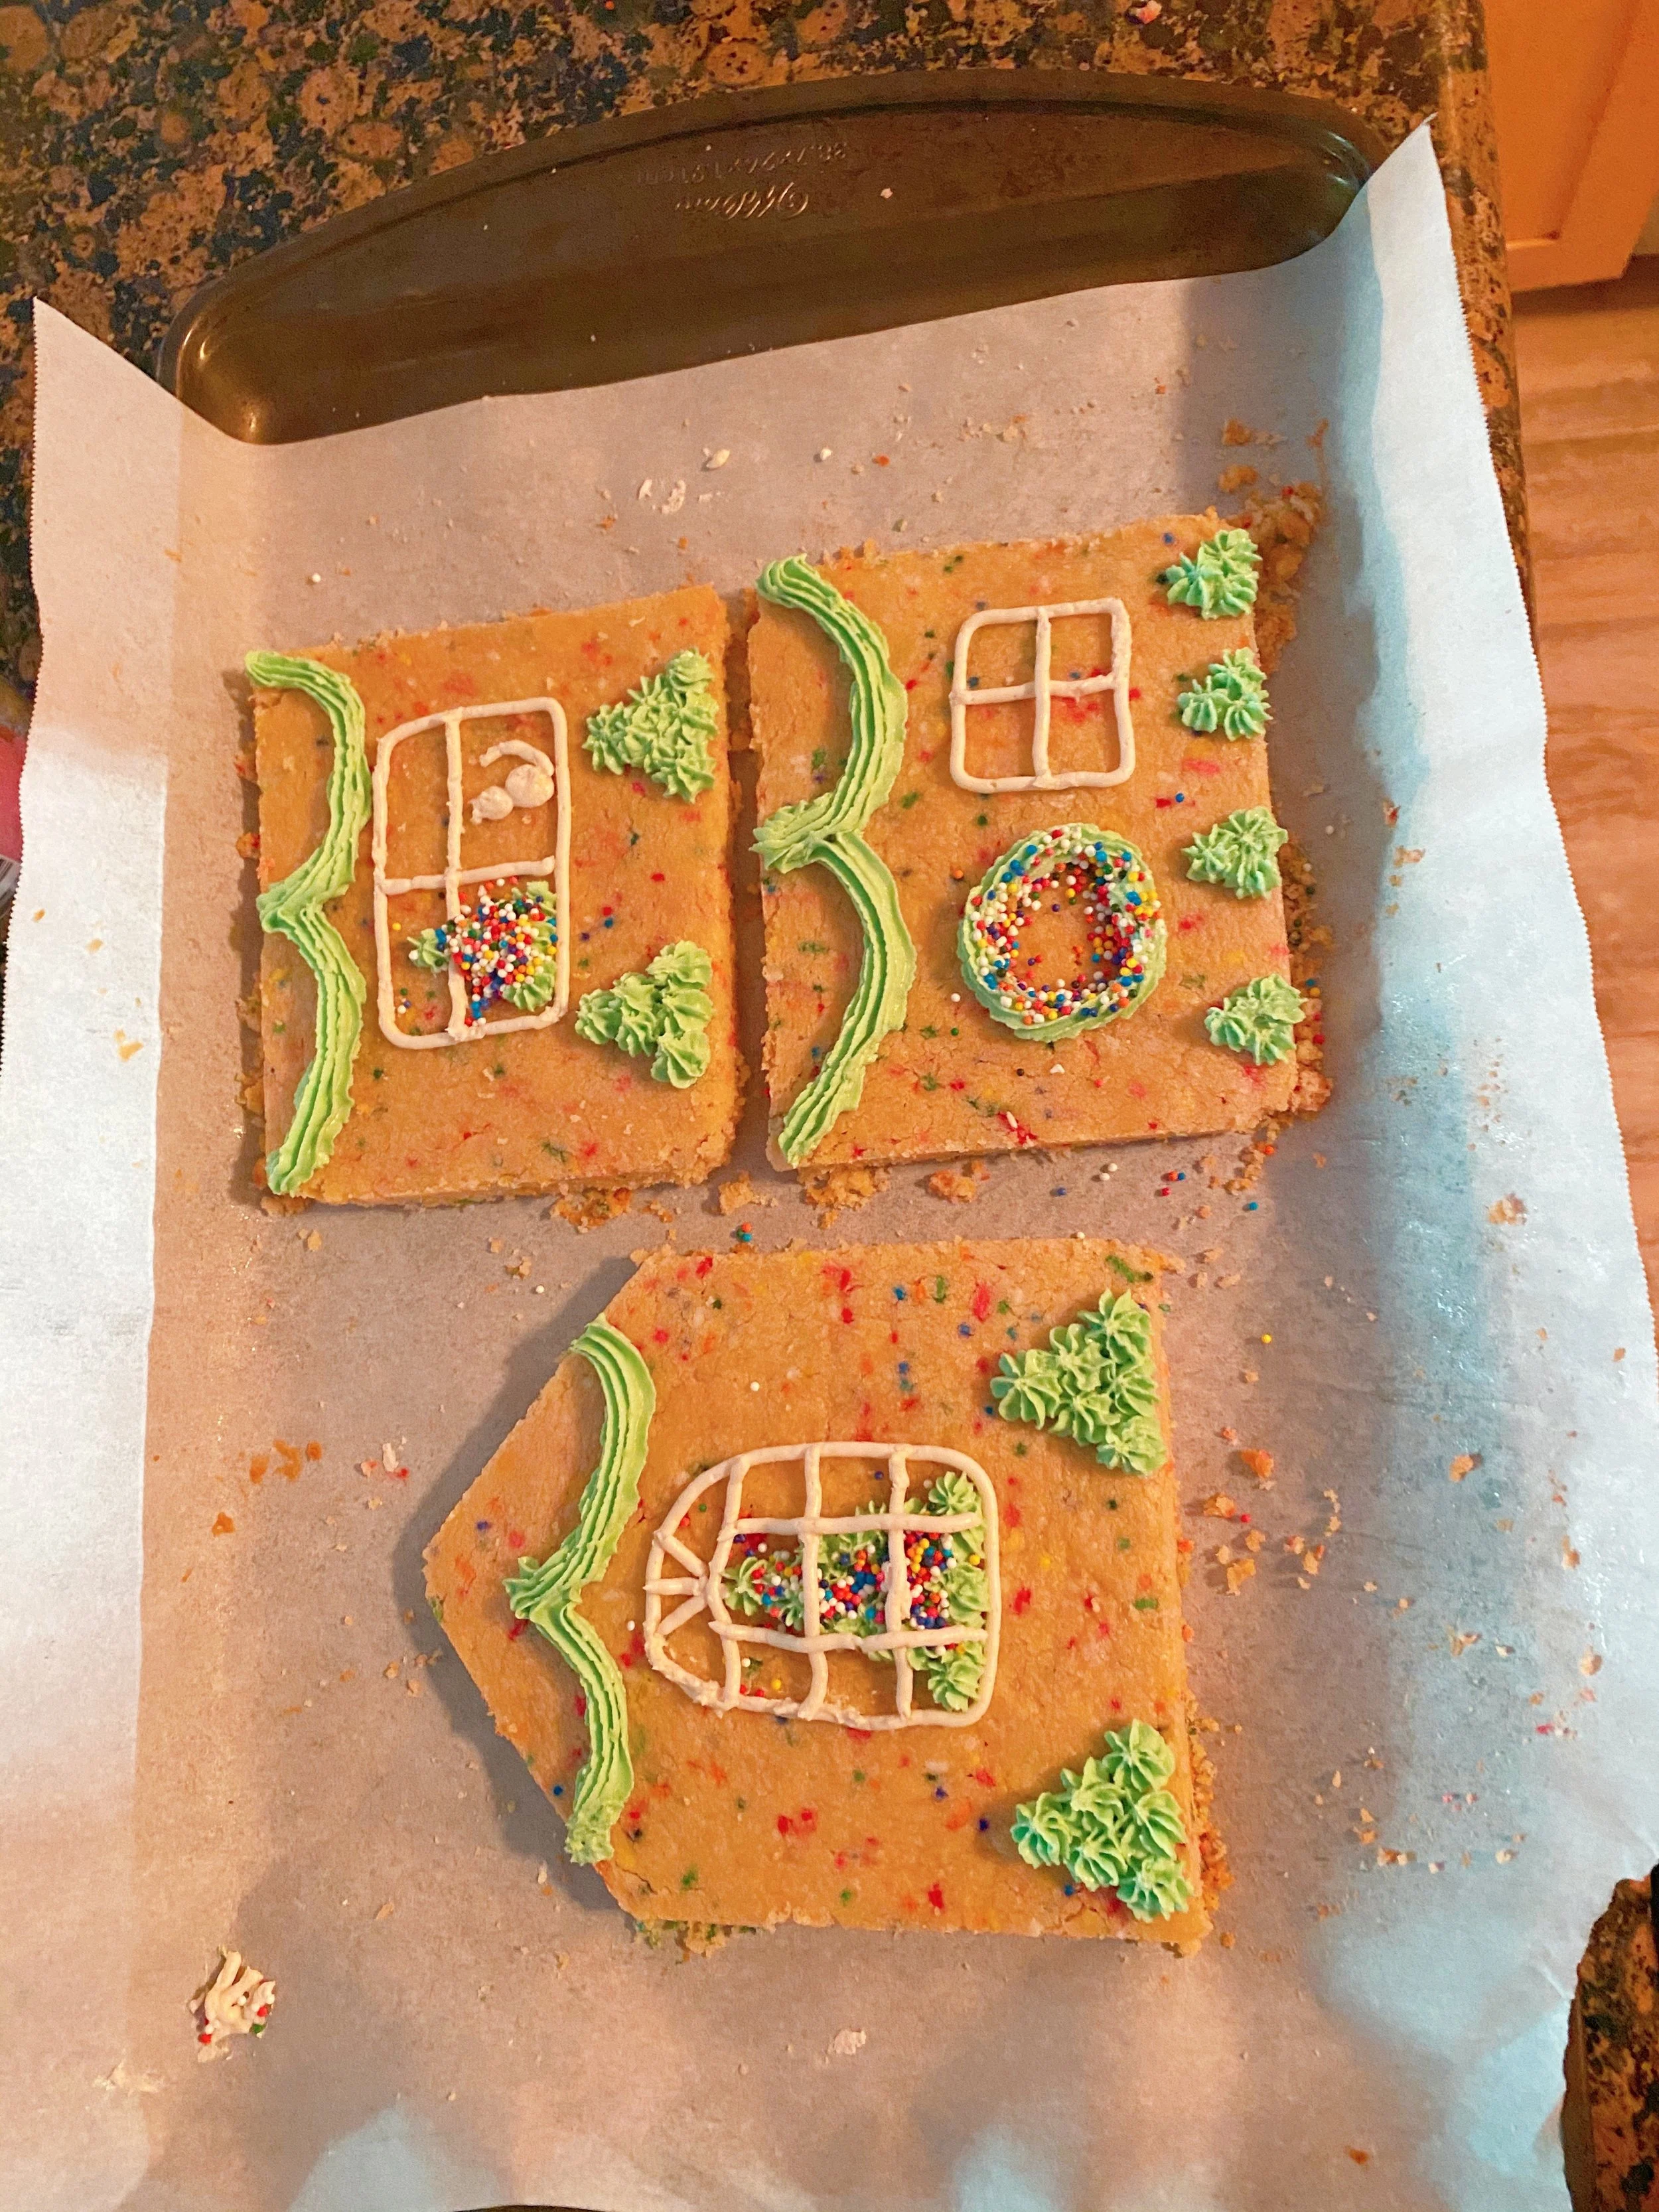
Sugar Cookie House Design Ideas - Side walls and back
Sugar Cookie House Design Ideas and Gingerbread Accessories
One of the best things about a sugar cookie house is how easy it is to customize for different holidays, themes, and skill levels. Whether you’re decorating with toddlers or creating a show-stopping centerpiece, these ideas work beautifully with sugar cookie dough.
Popular sugar cookie house designs and Gingerbread accessories include:
Classic house with piped frosting and sprinkles
Minimalist house with simple lines and powdered sugar
Candy-covered house for kids who love decorating
Pastel or themed houses for holidays like Valentine’s Day or Easter
💖 Lace-Inspired (Perfect for Valentine’s Day)
Uses piped icing to mimic lace patterns
Great for Valentine’s, weddings, baby showers
Elegant look without extra baking steps
👉 For step-by-step decorating and recipes, explore our seasonal sugar cookie house tutorials below.
Save these sugar cookie house design ideas on Pinterest so you can come back when it’s time to bake.
How to Make a Sugar Cookie House for Christmas, Easter, Valentine’s Day, or St. Patrick’s Day
Making a sugar cookie house for Christmas, Easter, Valentine’s Day or St. Patrick’s Day is simple when you use the same base template and decorate it for the season.
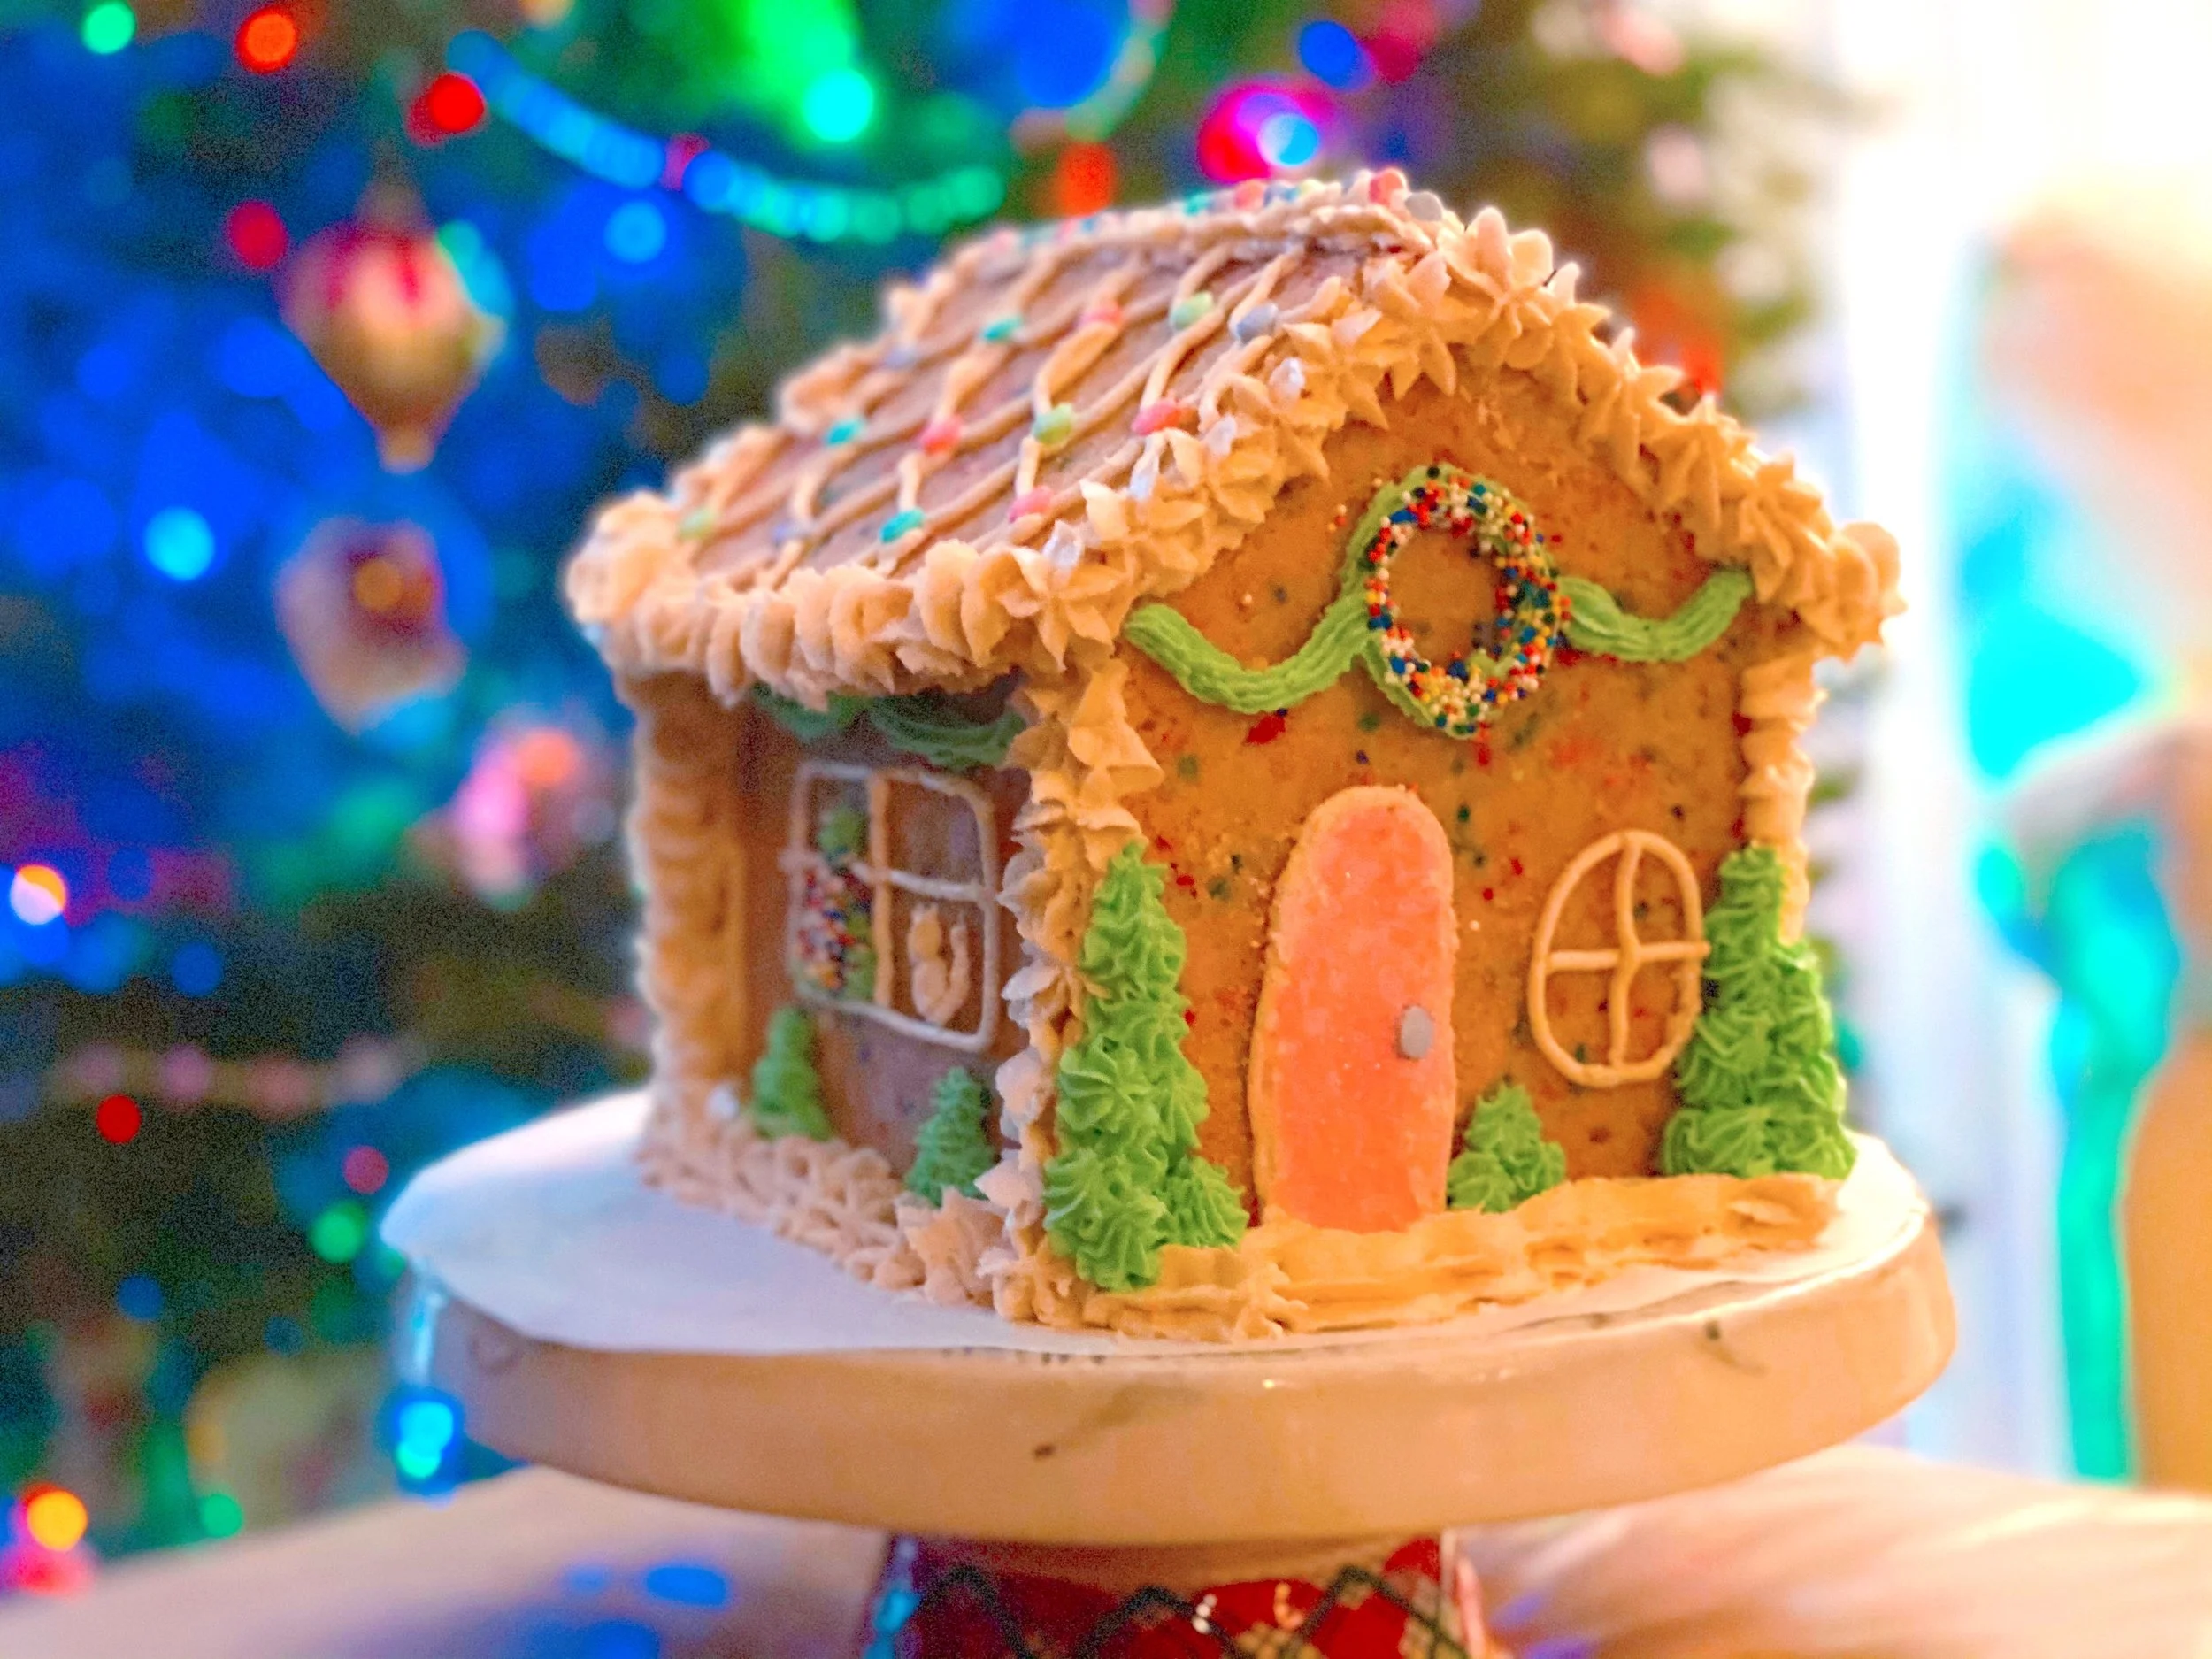
Christmas Sugar Cookie House Design - Cat in window
🎄 Christmas Sugar Cookie House
A Christmas sugar cookie house is perfect for family traditions and holiday parties. Think snowy roofs, festive sprinkles, and classic Christmas candy. And maybe a cat in a window? Why not?!
👉 Read the full tutorial here: Christmas Sugar Cookie House (Easy & Kid-Friendly)
Popular Christmas decorations:
Mini gumdrops
Peppermints
White frosting “snow”
Holiday sprinkles
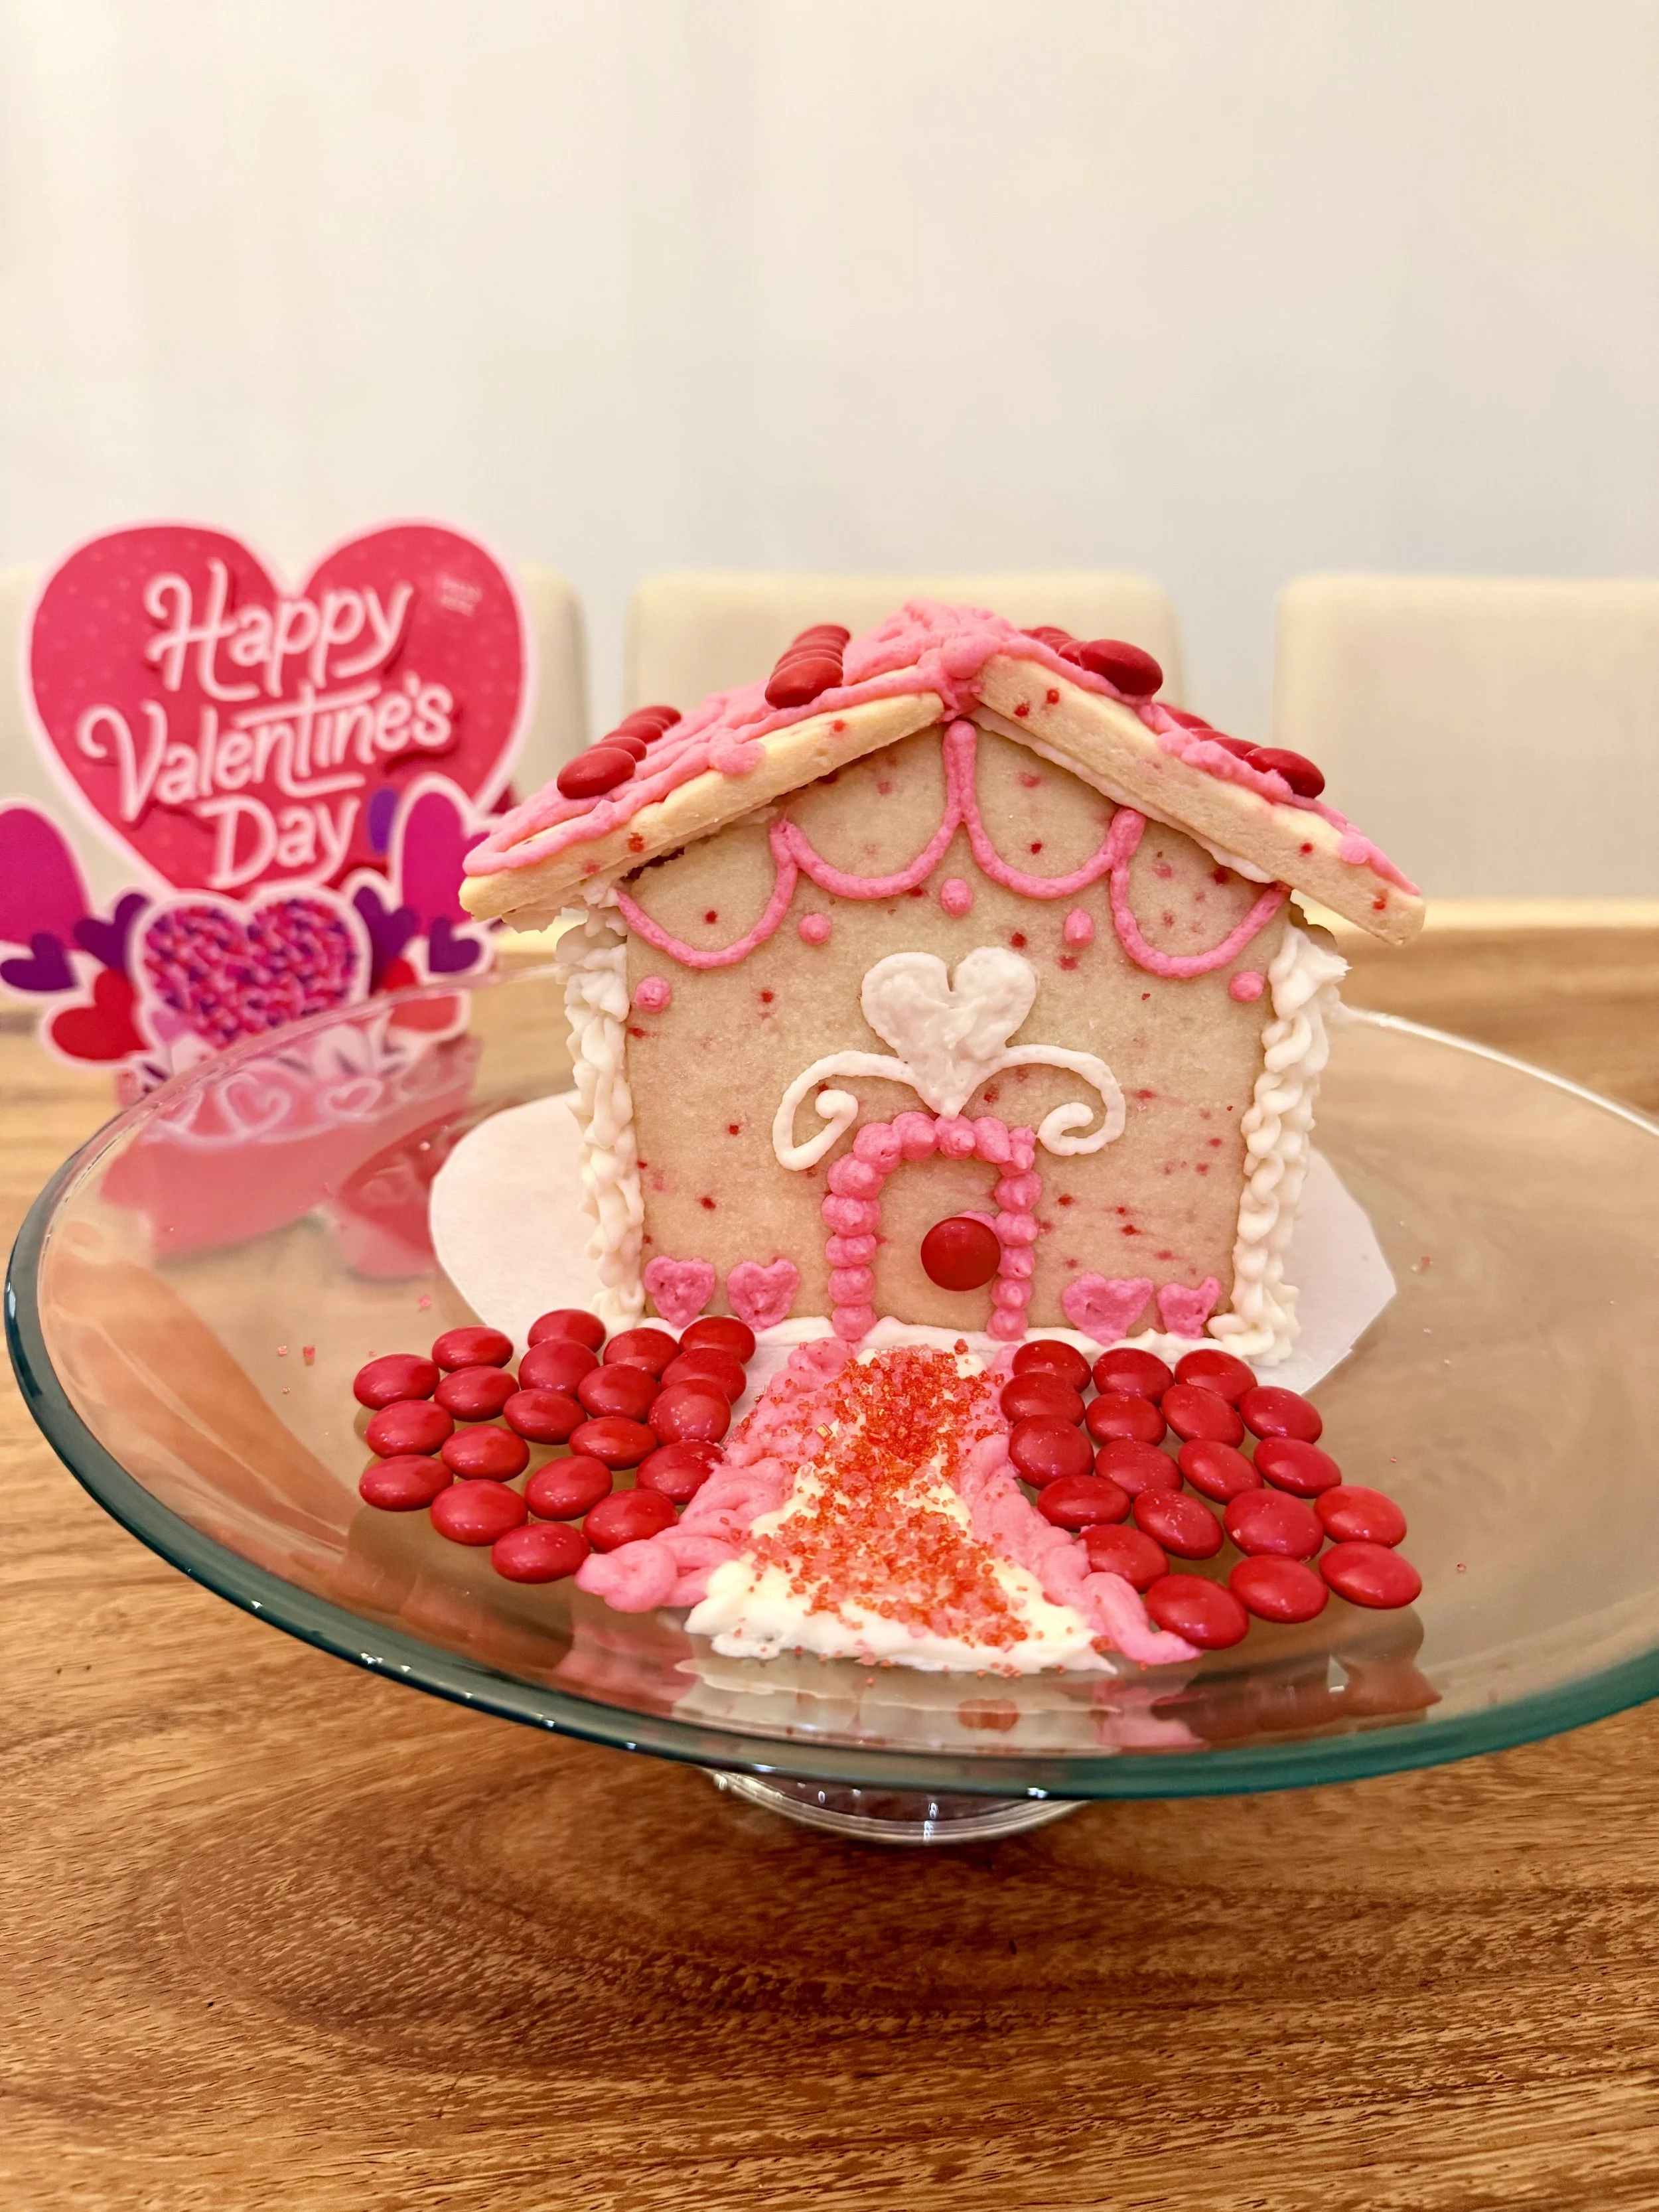
Valentine’s Day Sugar Cookie House with Lace Icing Details for Sugar Cookie Houses
💕 Valentine’s Day Sugar Cookie House
A Valentine’s Day sugar cookie house is a sweet winter activity that doesn’t feel like Christmas leftovers. Pink frosting, heart cookies, and pastel candy make this a fun February tradition. When you think there’s too much pink just add more! Never enough pink in my book.
👉 Read the full tutorial here:
Valentine’s Day Sugar Cookie House (No Gingerbread Required)
Valentine decorating ideas:
Conversation hearts
Pink and red icing
Heart-shaped cookies
Sprinkles and sanding sugar
💖 Lace-Inspired (Perfect for Valentine’s Day)
Uses piped icing to mimic lace patterns
Great for Valentine’s, weddings, baby showers
Elegant look without extra baking steps

St. Patrick’s Day Leprechaun Trap Sugar Cookie House
🍀 St. Patrick’s Day Leprechaun Trap
Turn your cookie house into an edible leprechaun trap!
Decorating ideas:
Rainbow path
“Free Gold” door
Gold coin bait.
See the full St. Patrick’s Day tutorial here.
🐰 Easter Sugar Cookie House Ideas
Spring is the perfect time to build a sugar cookie house. Instead of traditional gingerbread, decorate your cottage with:
Piped buttercream grass
Jelly bean eggs
Pastel icing details
A simple bunny silhouette
Tiny candy “tulips”
The same base template works beautifully for Easter — just swap the decorations for soft spring colors and playful details.
👉 See the full Easter Sugar Cookie House tutorial here.
Best Frosting for Sugar Cookie Houses
You have two great options:
Buttercream Frosting
Tastes better
Easy to make
Great for decorating with kids
No raw eggs
Royal Icing
Dries hard
Best for advanced builders
Less forgiving (and less tasty)
👉 Tip: For family builds, buttercream works surprisingly well when cookies are fully cooled.
My Favorite gingerbread house icing without eggs can be found on our Sugar Cookie Recipe Post
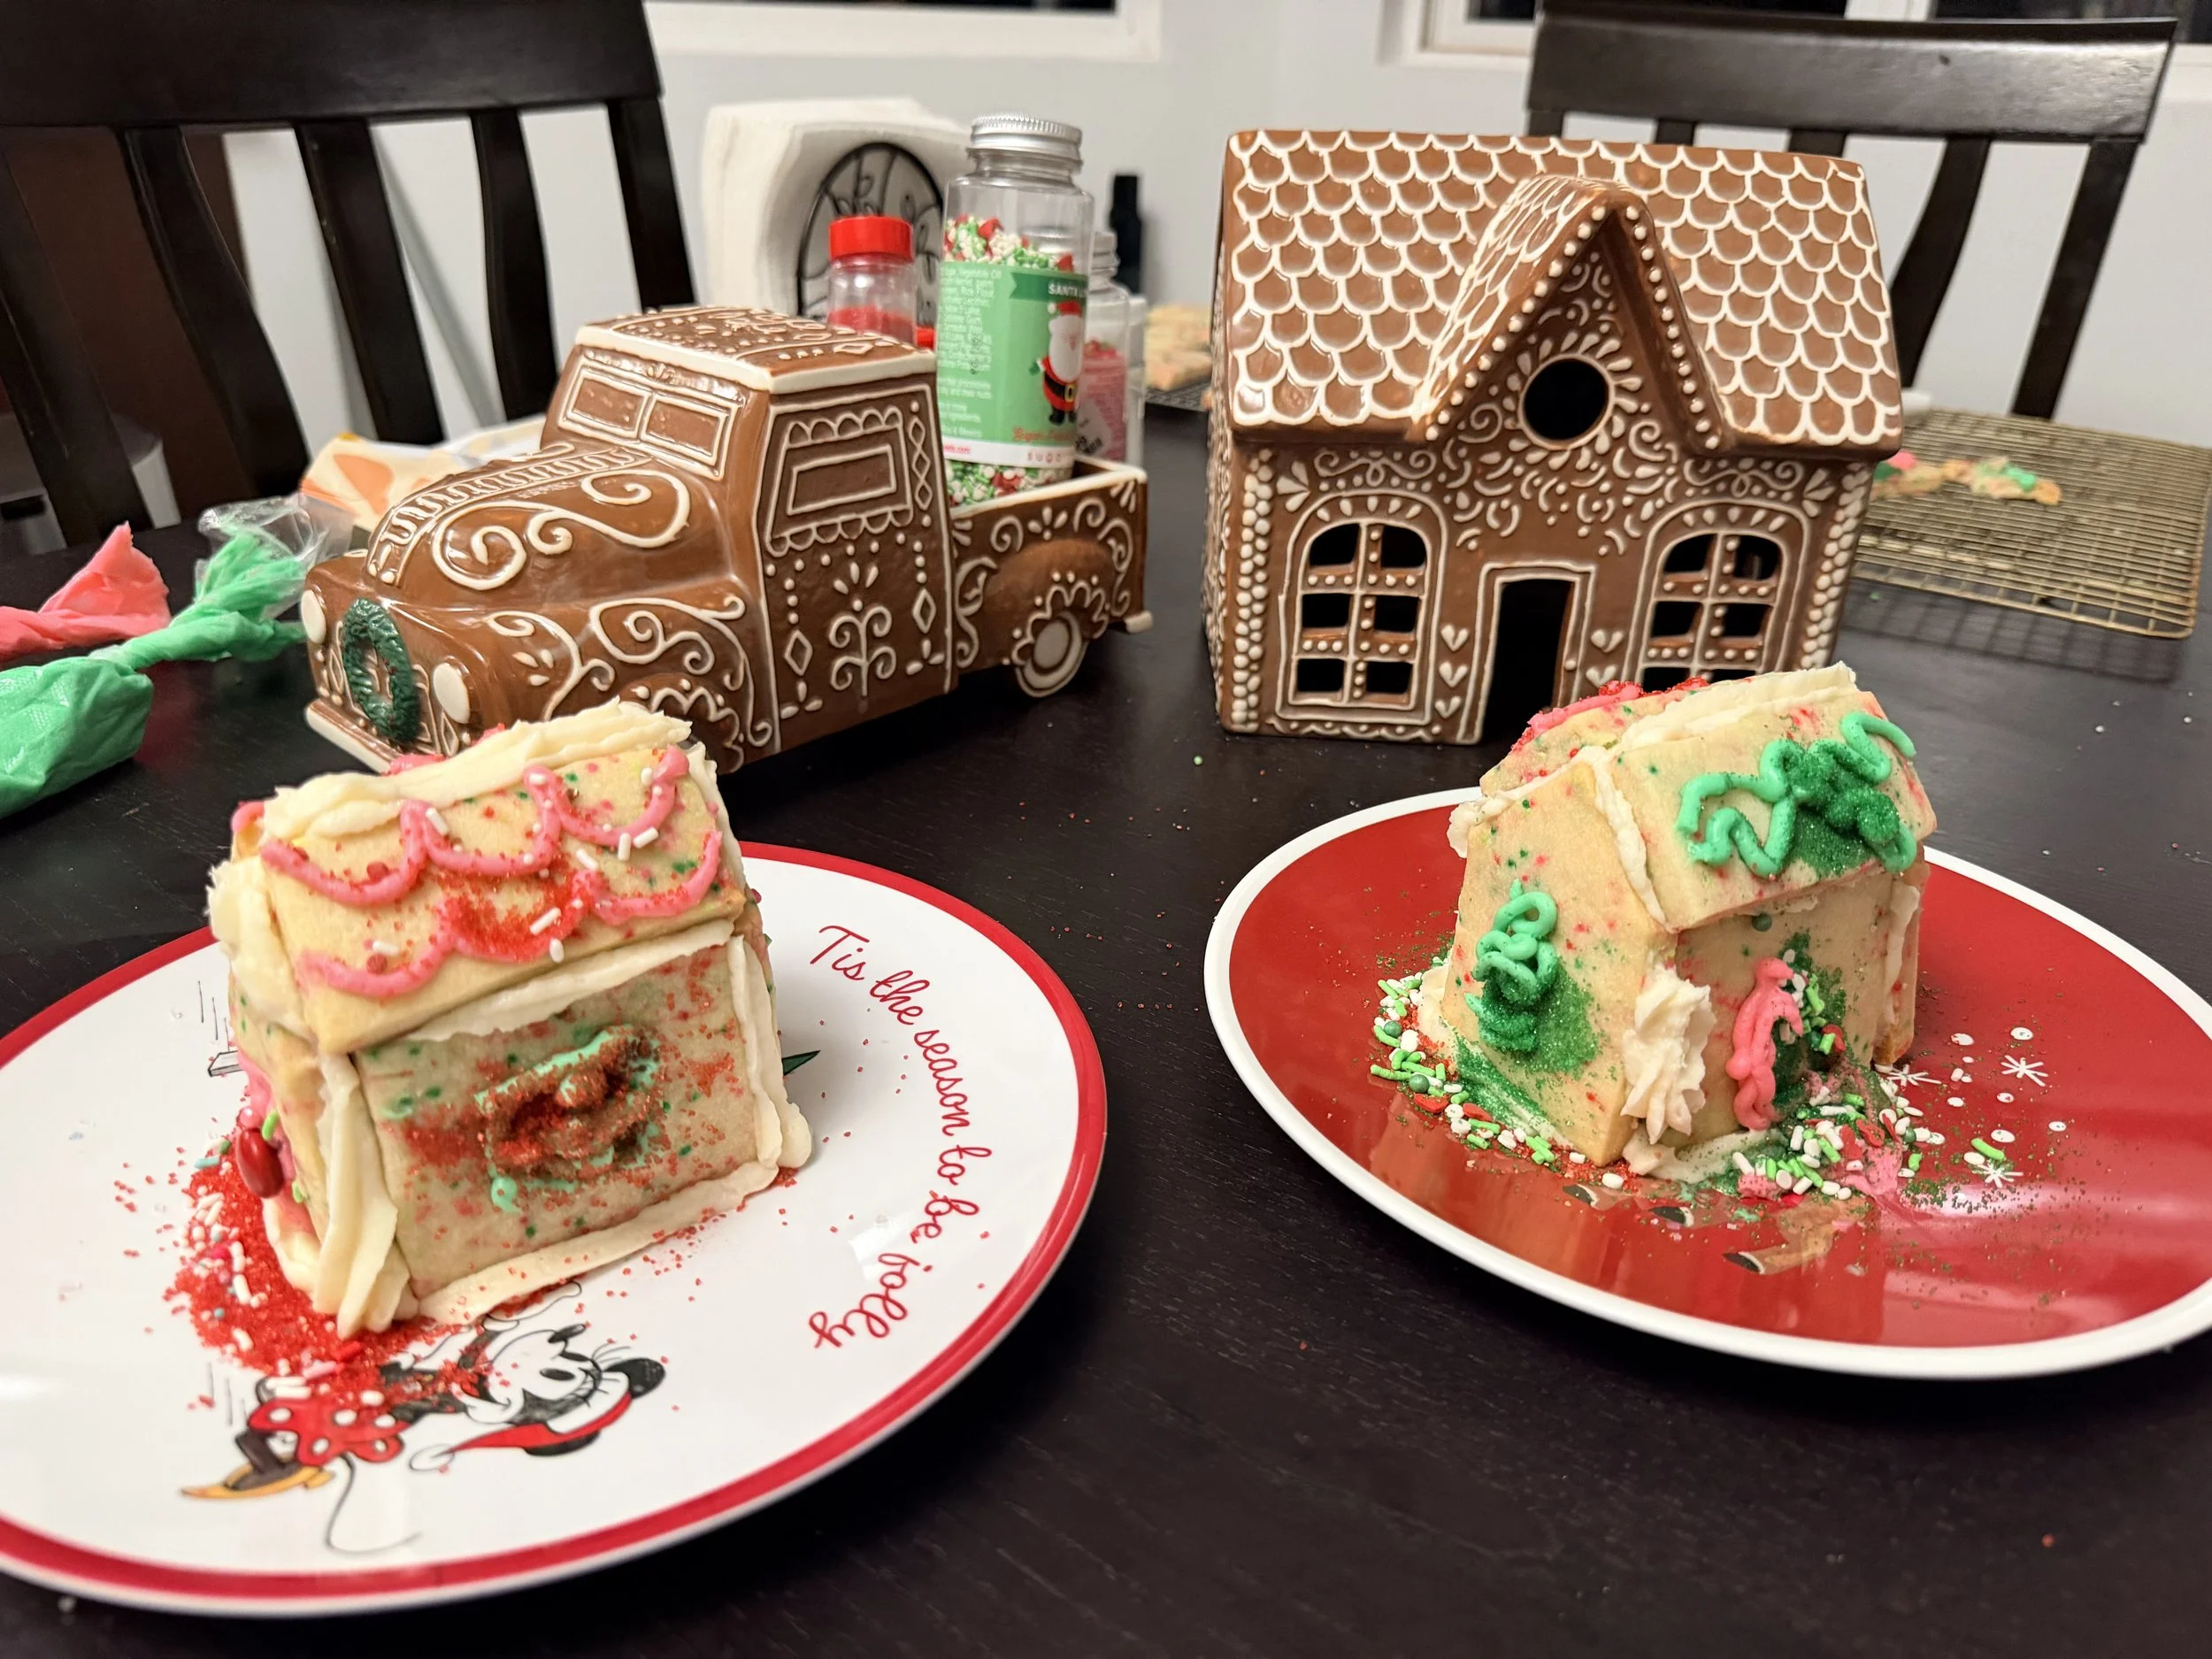
Kids Sugar Cookie Houses
Making Sugar Cookie Houses with Kids
Sugar cookie houses are much more forgiving for toddlers and young kids.
Kid-friendly tips:
Pre-bake all pieces
Let adults assemble the structure
Kids decorate once stable
Use squeeze bottles or zip-top bags for frosting
This makes it a fun, low-stress activity instead of a meltdown waiting to happen.
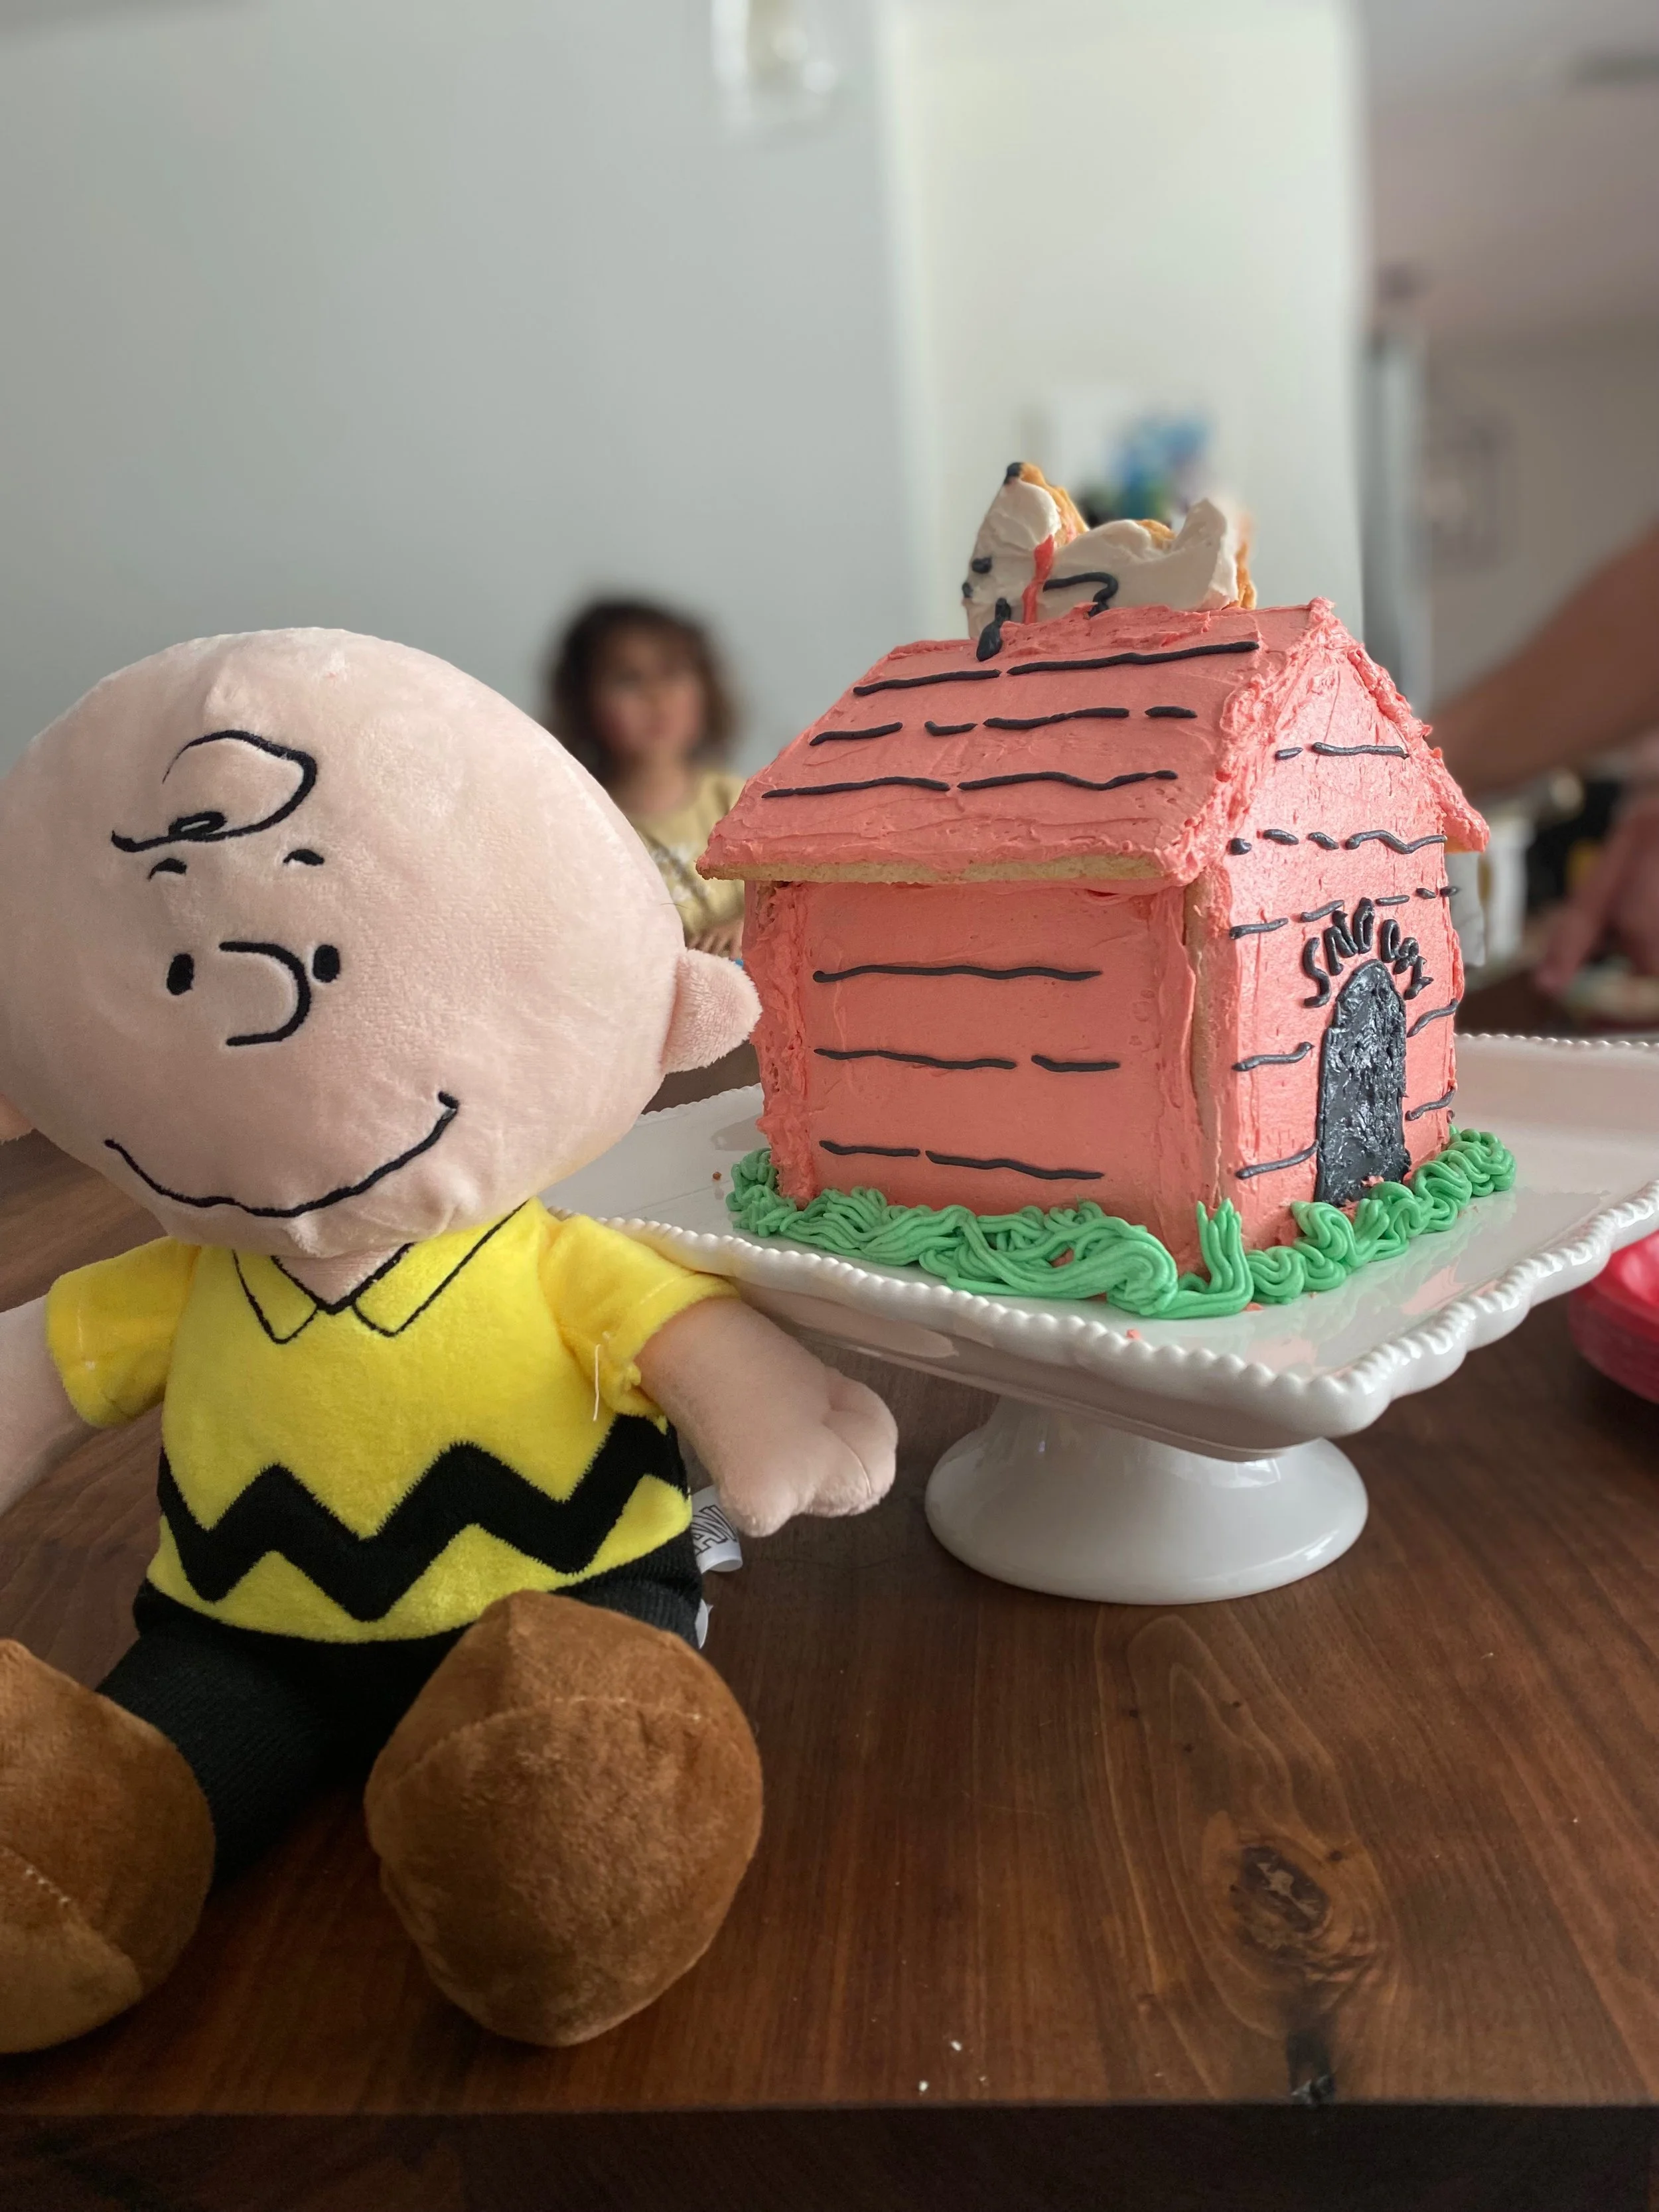
Snoopy Dog House Design - Sugar Cookie House
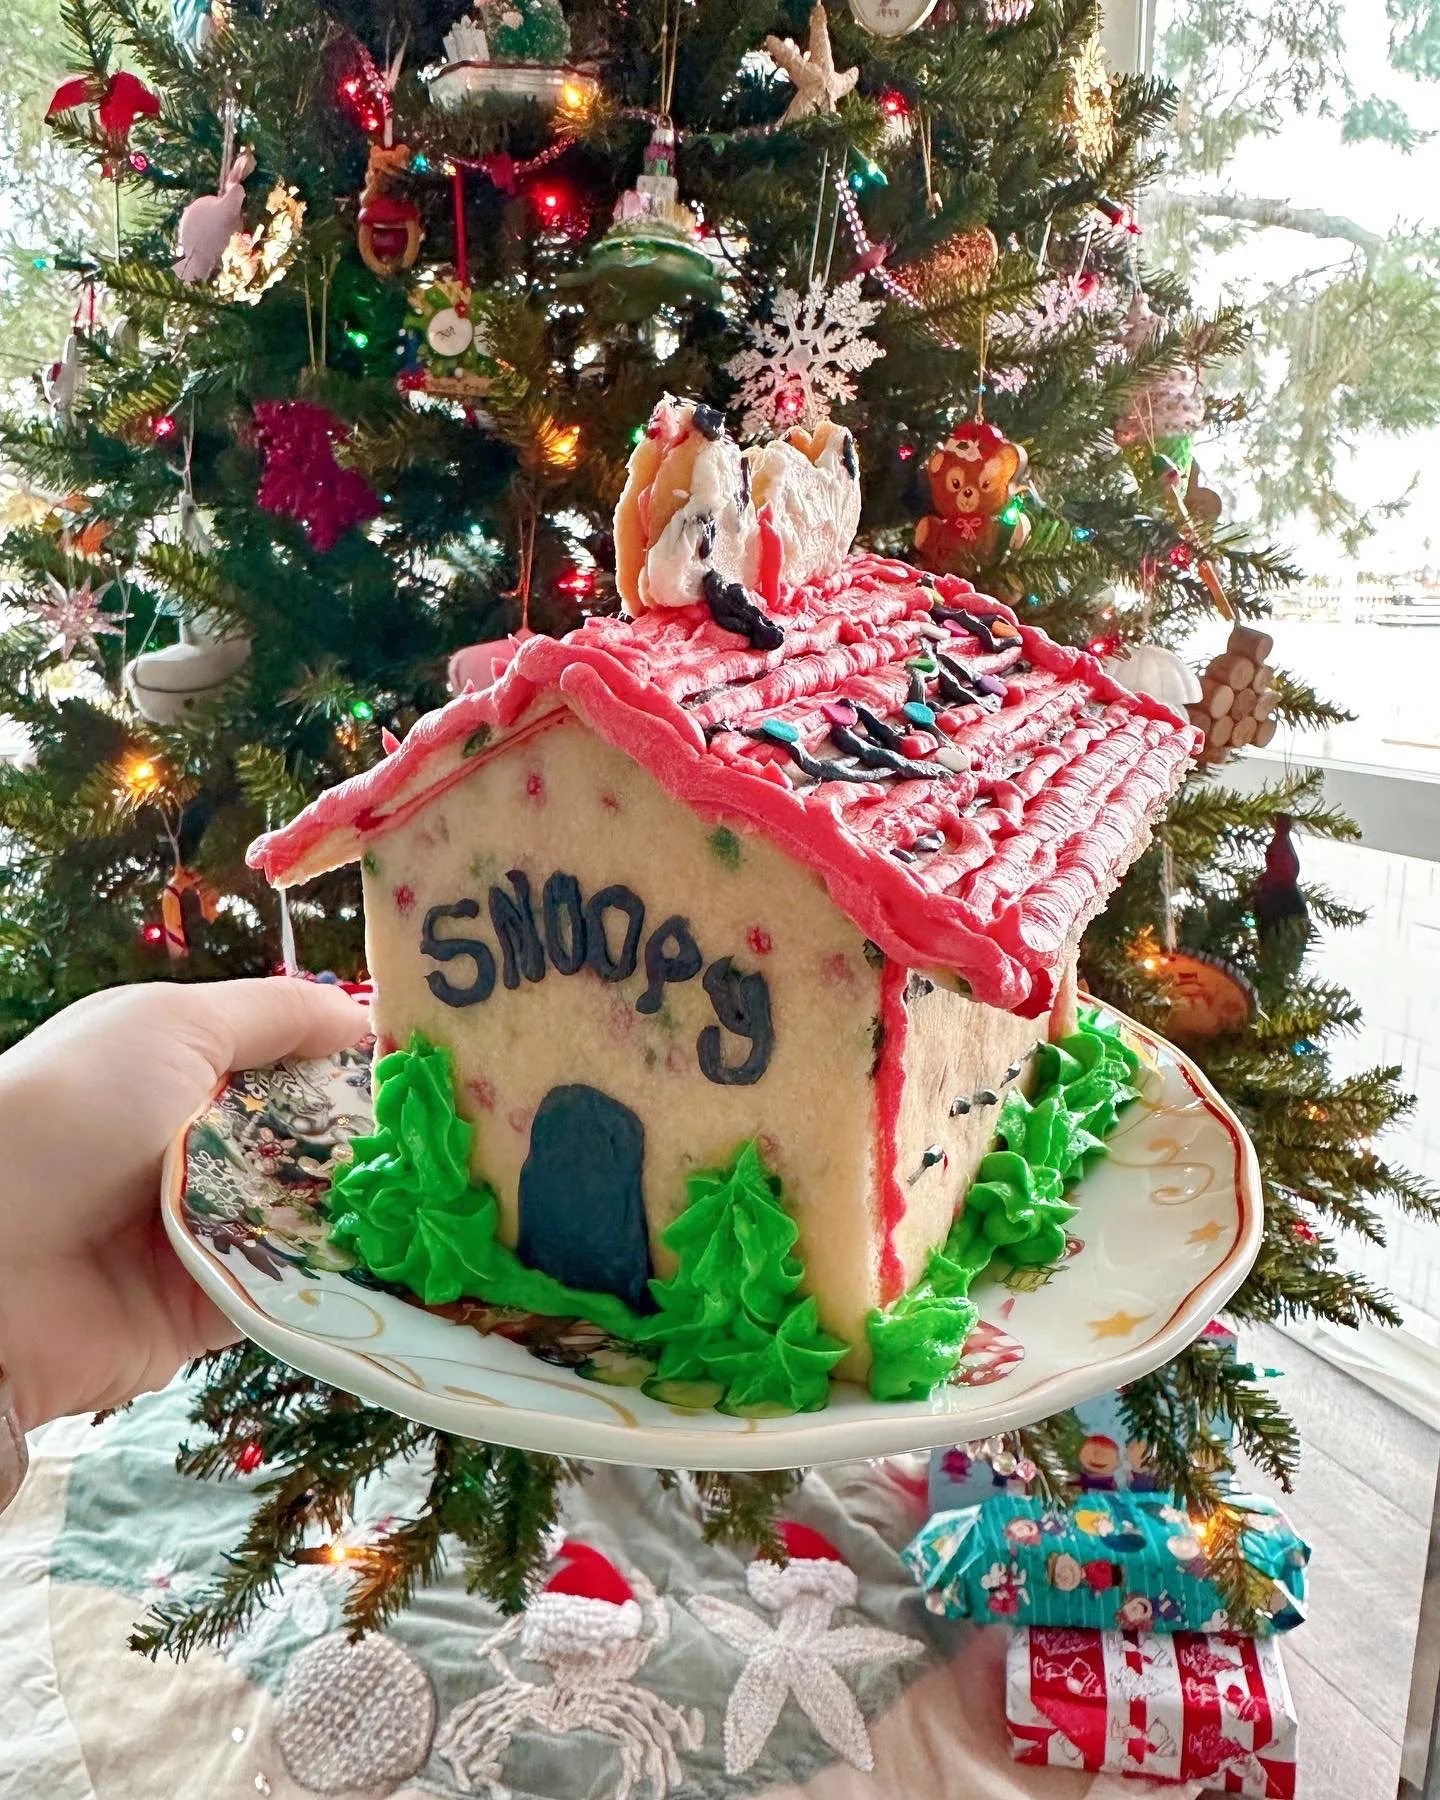
Snoopy Dog house Sugar Cookie House
Fun Themed Sugar Cookie Houses for Kids
If your kids love themed projects, a cartoon-inspired dog house sugar cookie house is a huge hit. We made a black-and-white dog house design that kids immediately recognized and loved decorating. It’s a great alternative to a traditional house and perfect for little hands that just want to frost, sprinkle, and have fun.
👉 This is a fun example of how sugar cookie houses don’t have to look like houses at all.

Sugar Cookie House and Truck - no gingerbread
Creative Sugar Cookie Builds for Kids
Sugar cookie houses don’t have to look like houses at all. One of our favorite kid-friendly builds was a sugar cookie truck, which was just as fun to decorate and even easier for little hands to work on. Flat shapes, bold outlines, and simple details make vehicle-style cookie builds a great option for younger kids who want to jump straight into decorating.
👉 This is a great example of how sugar cookie dough can be used for creative, kid-approved designs beyond traditional houses.
Also, add The Trucks that Saved Christmas to your collection!
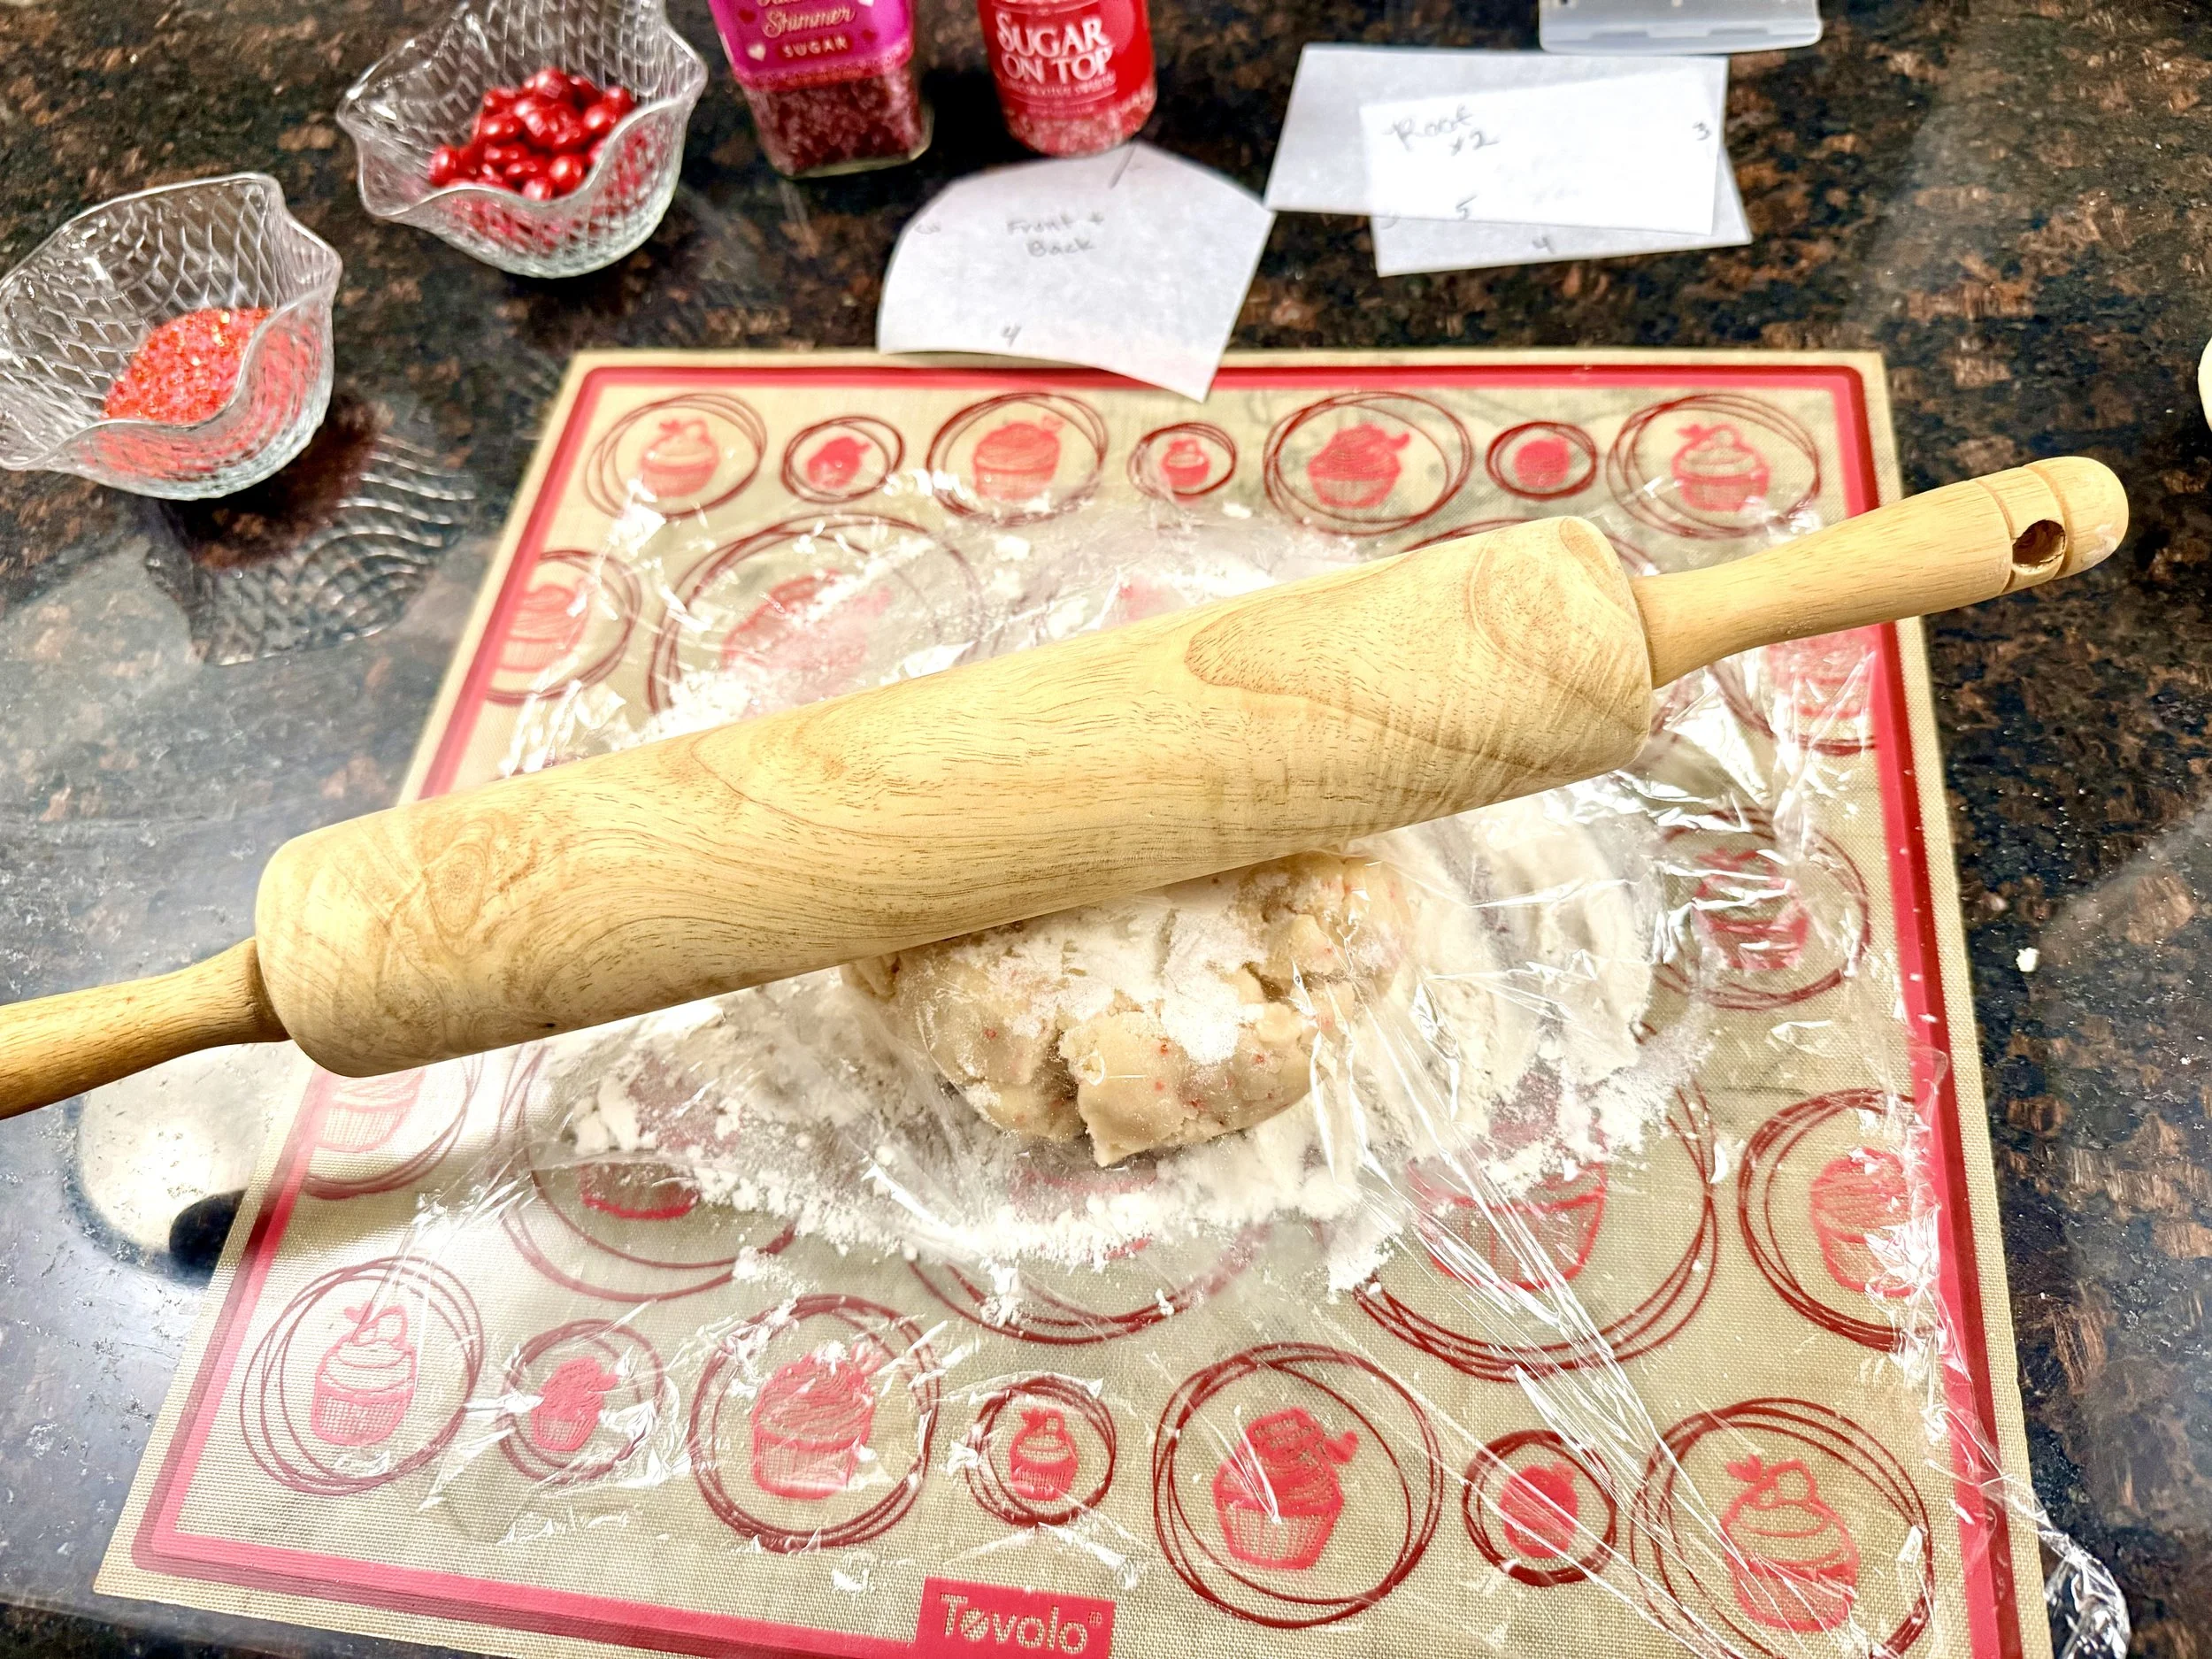
Sugar Cookie Prep Station
Can You Make Sugar Cookie Houses Ahead of Time?
Yes, in fact I HIGHLY recommend making the dough ahead of time.
Cookies: Bake 2–3 days ahead
Frosting: Make 1–2 days ahead and refrigerate
Assembly: Same day is best
Store cookies in an airtight container at room temperature.
More Sugar Cookie House Ideas Coming Soon!
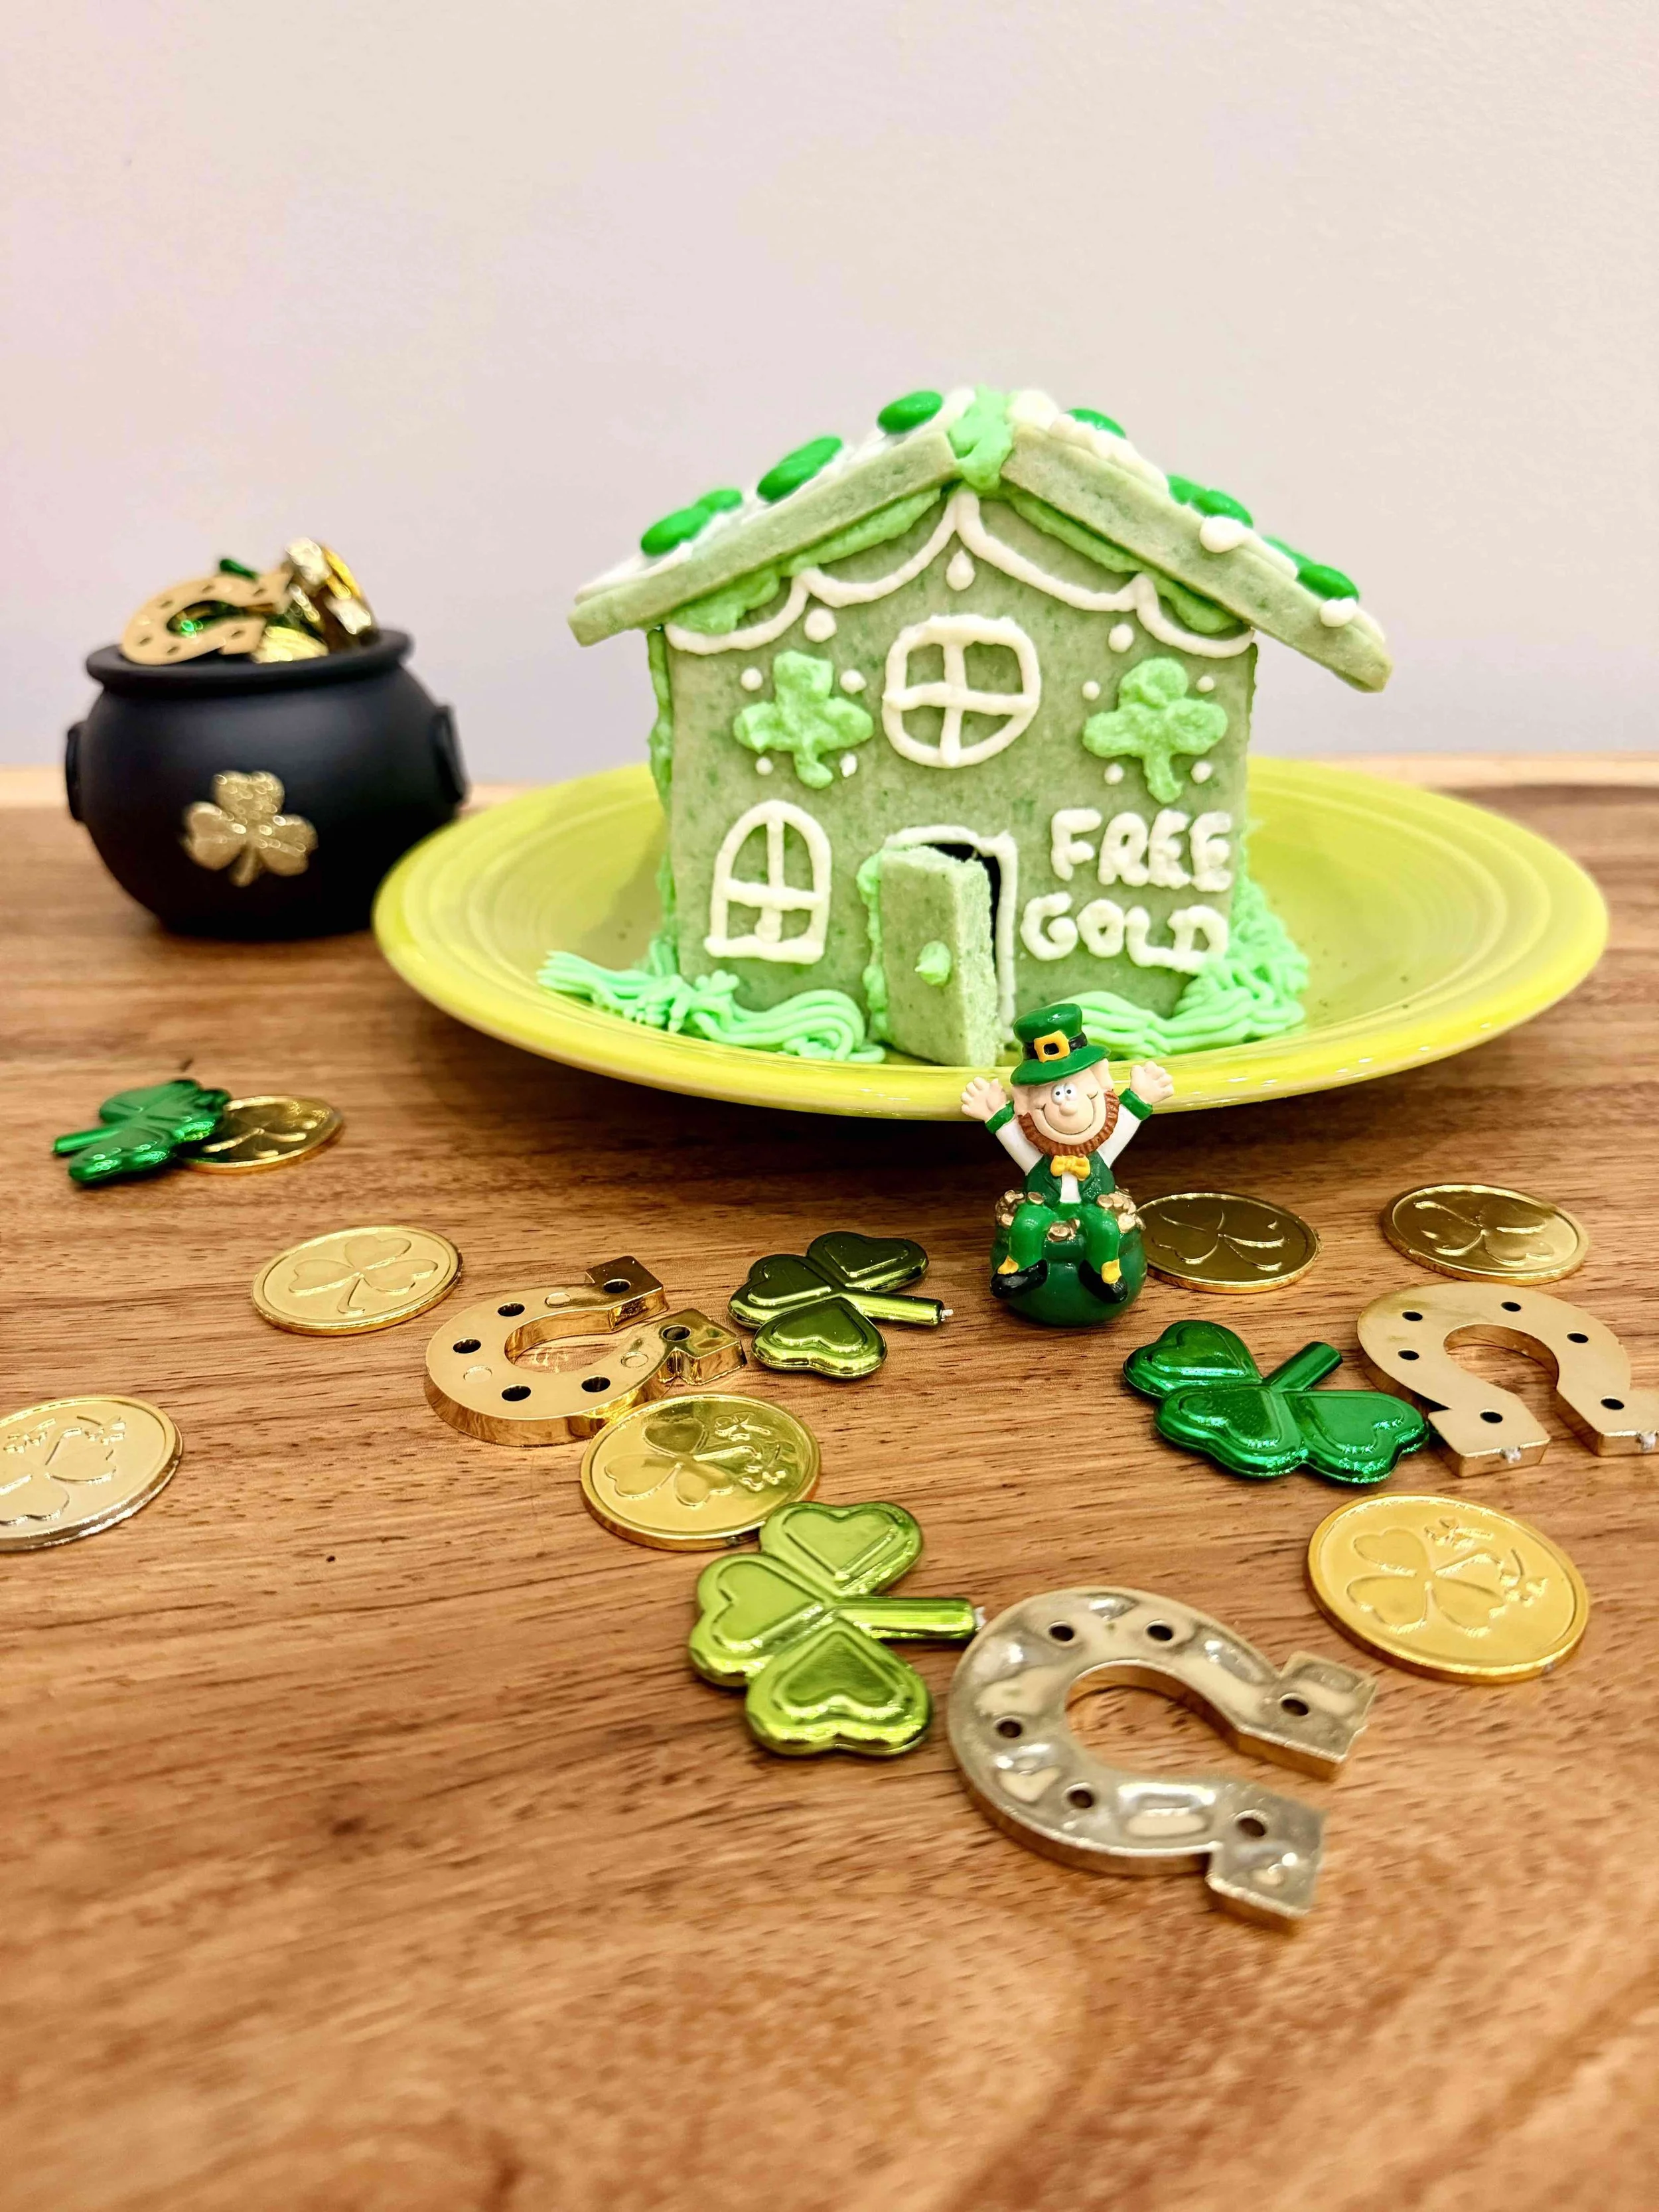
Chocolate gold coins placed outside a sugar cookie house leprechaun trap for St. Patrick’s Day.
Final Thoughts: The Best Sugar Cookie House for Any Season
A sugar cookie house is a fun, flexible tradition that doesn’t have to be limited to Christmas. With simple ingredients and endless decorating options, it’s an activity your family can enjoy all year long.
Start with one season—or build them all.
More baking posts:
How to Make a Sugar Cookie Gingerbread House (Recipe and Template included)
Tips, ideas, looks, and templates for making the perfect Sugar Cookie Confetti Gingerbread House with buttercream icing! Level is relatively easy for those who have some baking experience. Pink doors and kitty cats included!
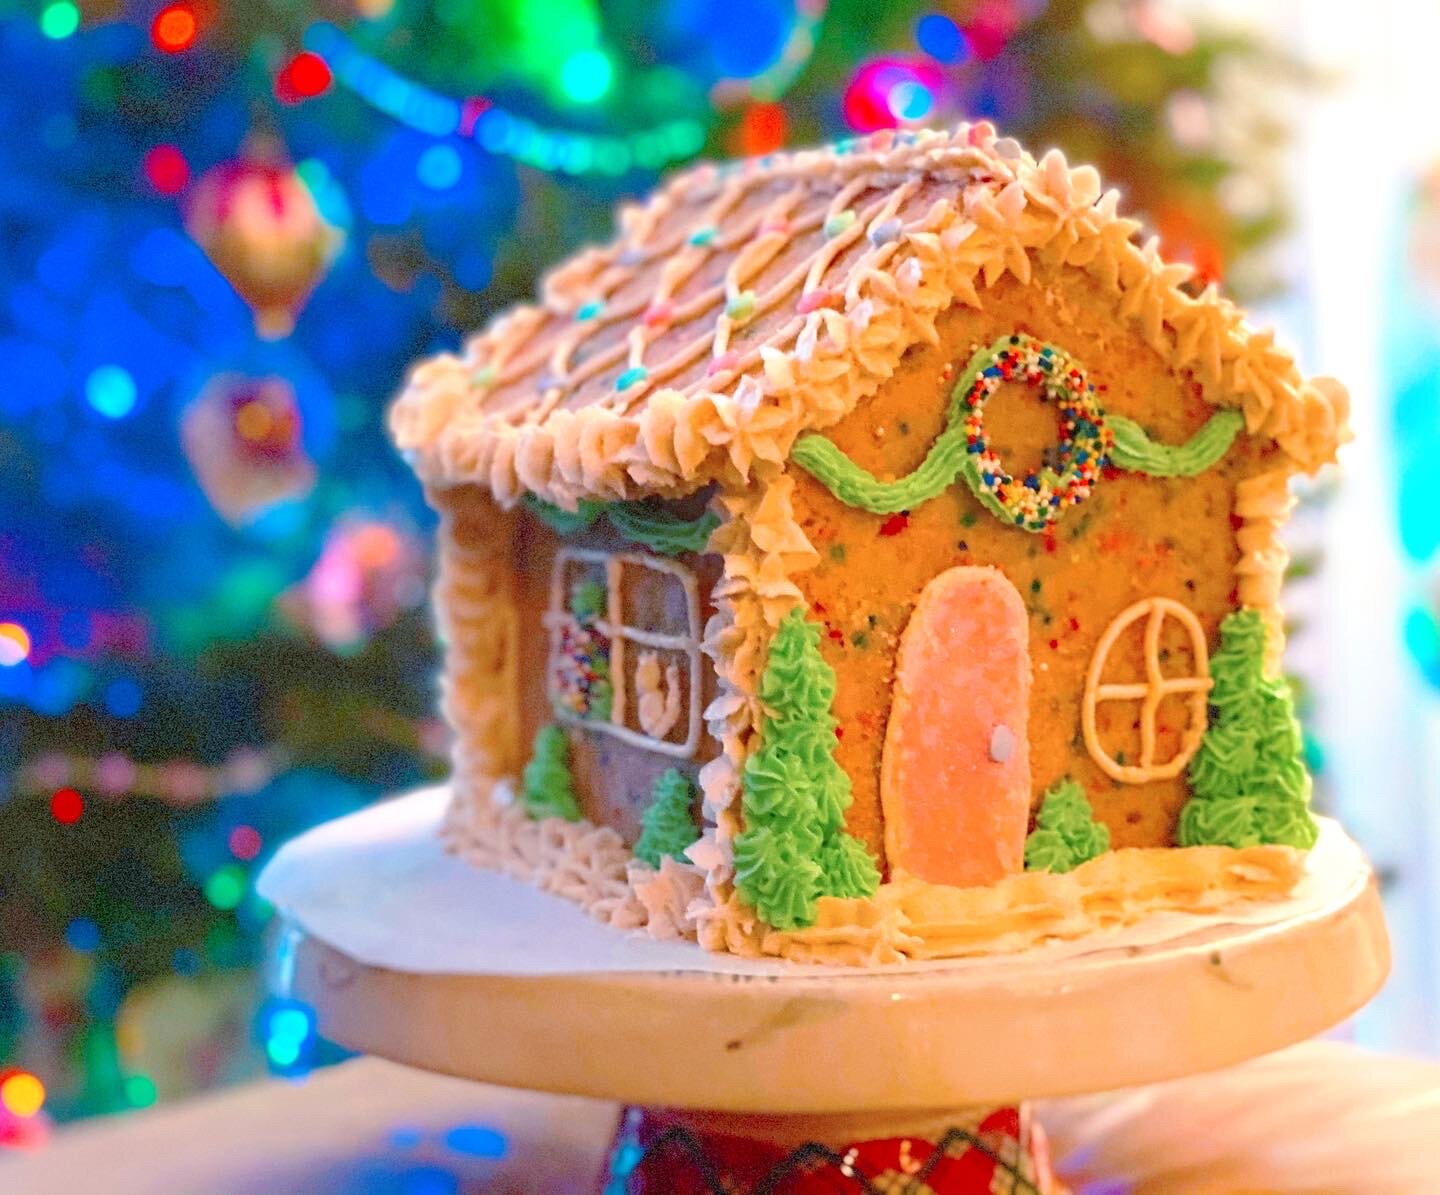
Sugar Cookie Pink Gingerbread House
Tips for making the perfect Sugar Cookie Gingerbread House - Level: Pretty Easy
Want a gingerbread house that’s cute, sweet, and actually easy to build? This sugar-cookie gingerbread house is one of my favorite holiday traditions — simple to make, sturdy enough for decorating, and perfect for kids or beginners. In this guide, I’ll share the full recipe, step-by-step instructions, the exact tools I use, my best decorating tips, and troubleshooting tricks so your house comes out picture-perfect every time.
Whether you're hosting a Christmas cookie party or creating a cozy holiday moment at home, this sugar cookie gingerbread house is a festive project that everyone will love.
I wouldn’t call myself a baker, though I love to make cookies and cupcakes. My best friend, and realtor: Holly Patterson, had her annual Christmas Gingerbread House Contest and when I saw her post, I thought, “I wish I liked Gingerbread.” To go through all the trouble to make something I didn’t like seemed silly. That’s when I started the research. I can’t be the only one, someone must’ve tried this before! I found fancy houses and then I found Studio DIY. First off, I follow Kelly on Instagram and was inspired after reading her post. I went down a long rabbit hole of research and I was pretty pleased with the results! I was looking at recipes and ways to avoid going out to buy cream of tartar or molasses, things I never use. The good news, I didn’t have to go anywhere and had everything I needed in my pantry (my huge sprinkle collection finally came in handy)!
I didn’t even know where to begin, and started asking things like: how do you make the house shapes? Do you put the frosting on before or after you construct the gingerbread house? What design should I do? I then did what I do best, I made a Pinterest Gingerbread House Ideas board to collect my thoughts and inspiration. After I had my gameplan, I was ready to start!
Note: I keep calling it a Gingerbread house because you can use the template for a Sugar Cookie House or a Gingerbread House.
Looking for more sugar cookie house ideas beyond Christmas?
See our complete Sugar Cookie House Guide for easy builds, kid-friendly designs, and creative ideas for more holidays including Valentine’s Day, a Leprechaun Trap, a Bunny Cottage, Snoopy’s Dog House and more.
Get your FREE Printable Gingerbread House Template - CLICK HERE
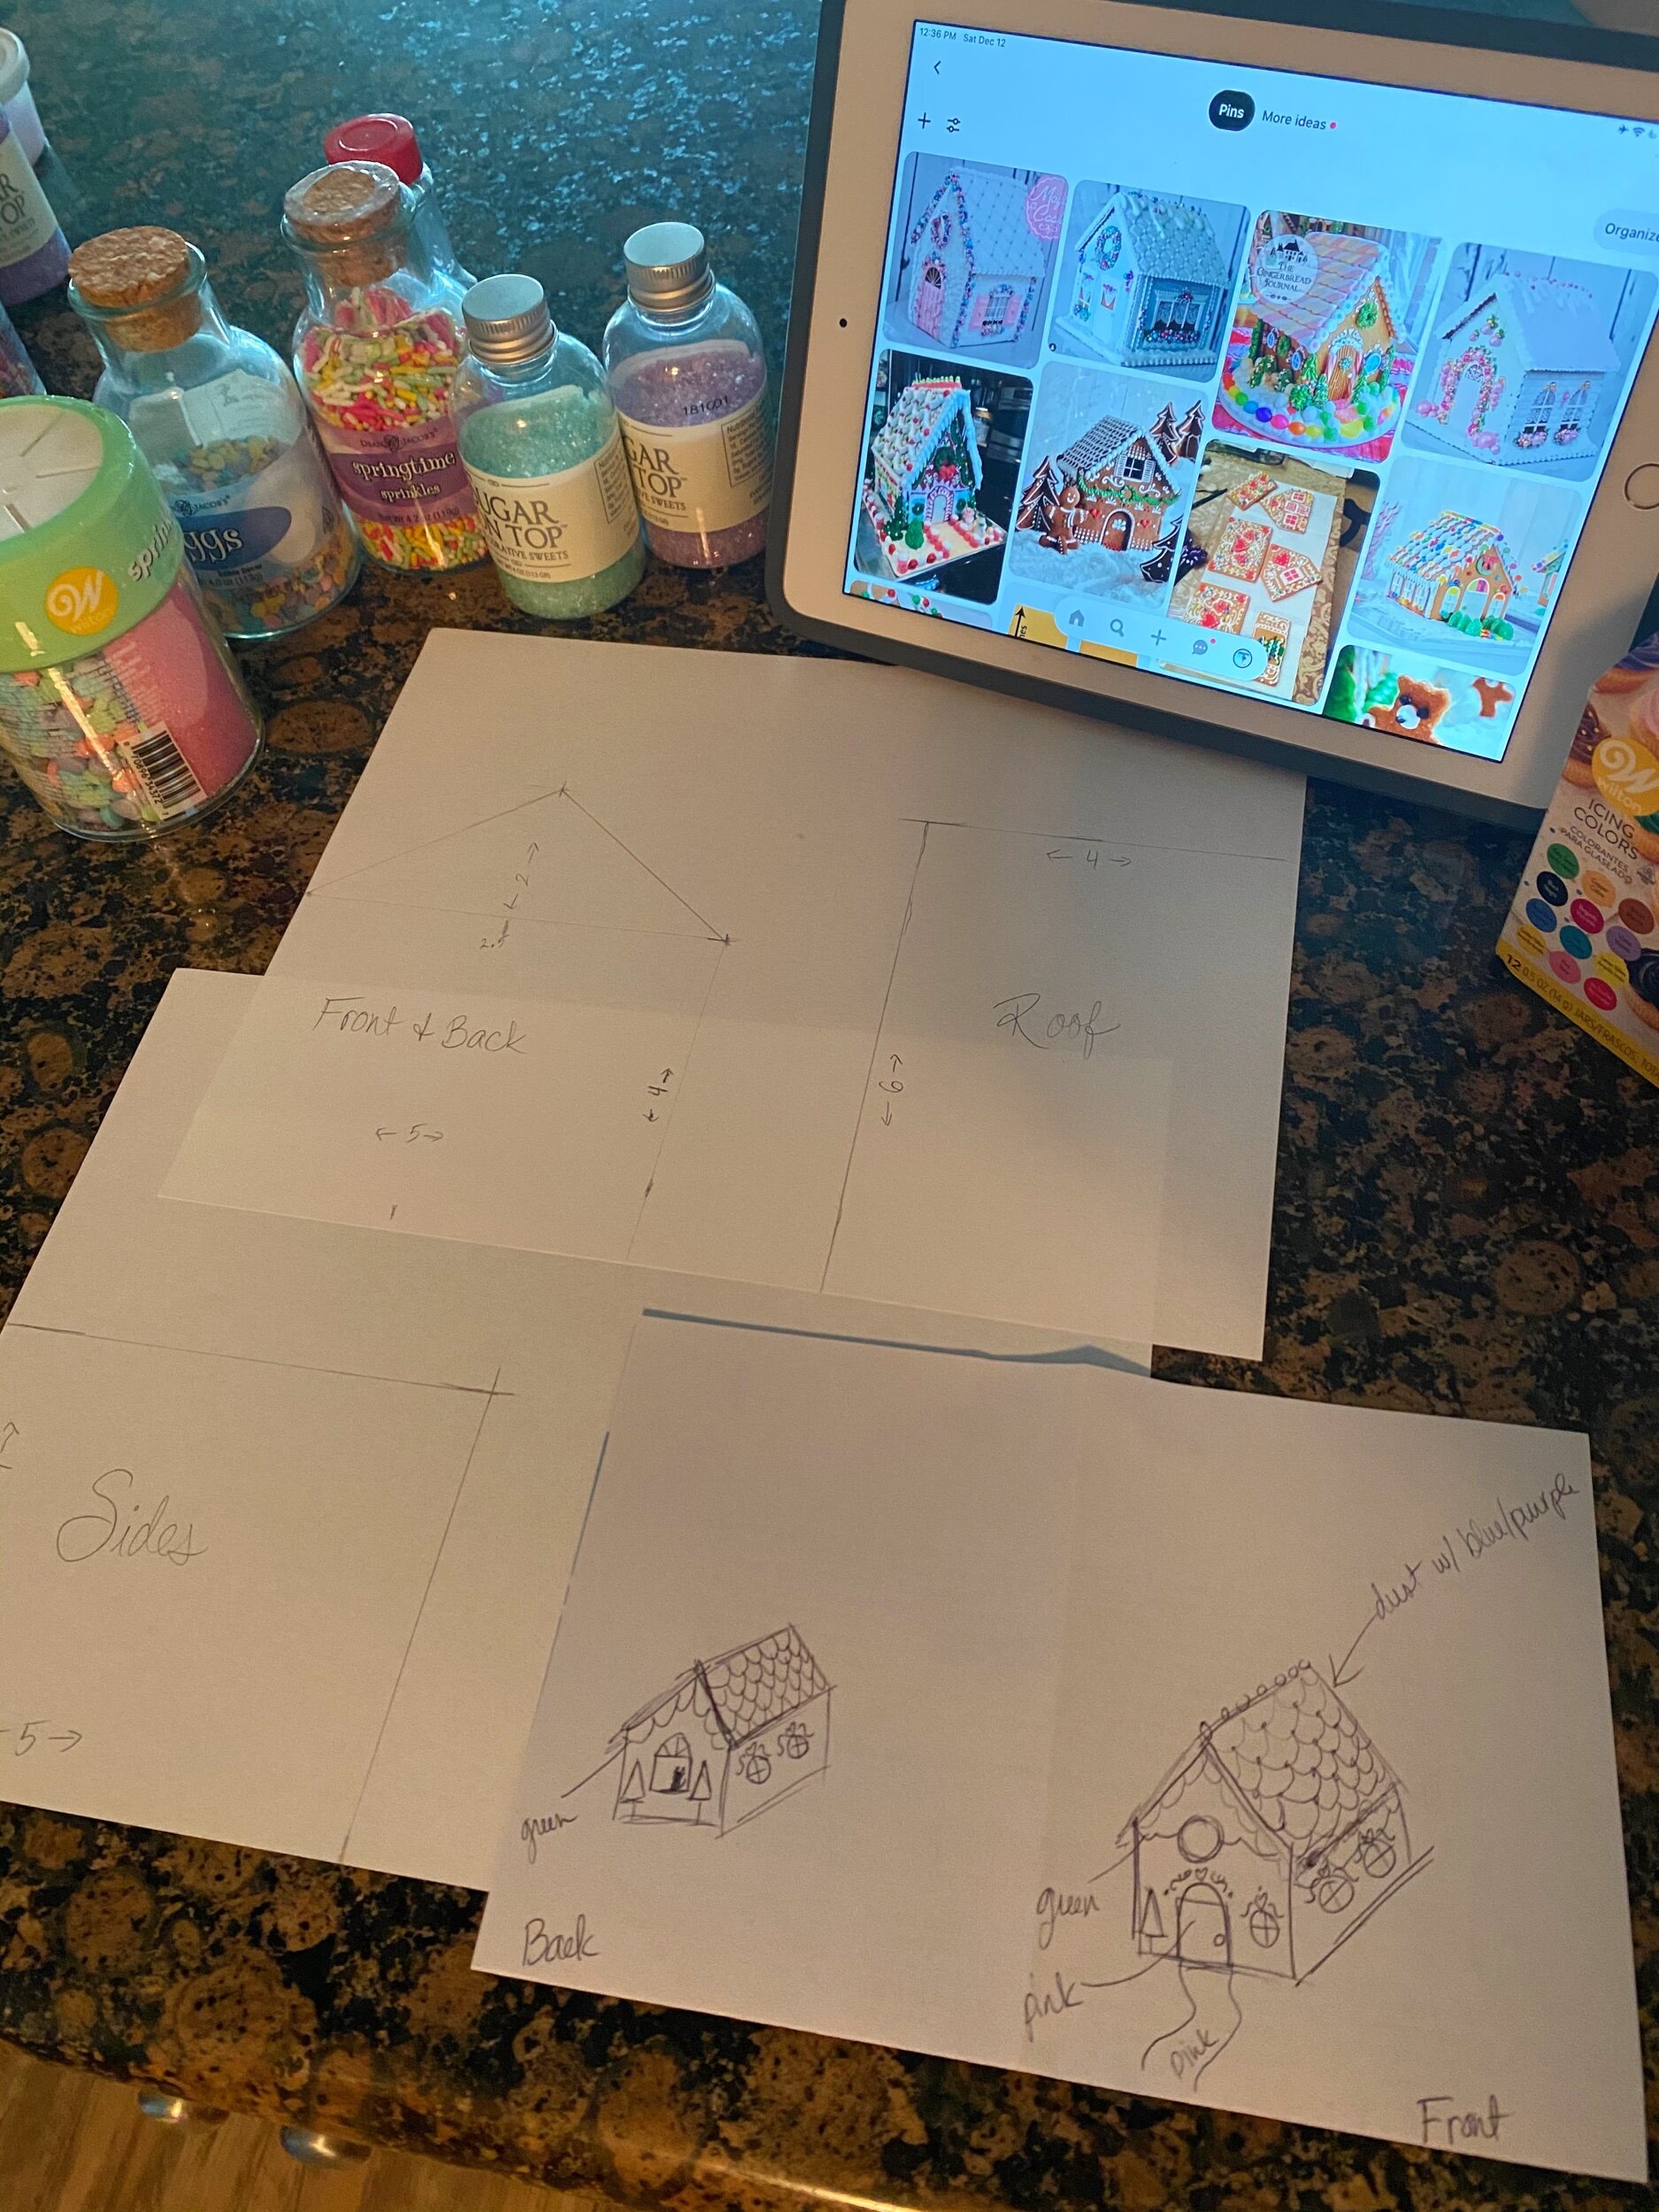
Gingerbread House Template and Plan

Checkout fun children gifts like this cute fire station!

CHeck out our toy wishlist!
Looking for great Toddler gifts? Check out what my kiddos have on their wishlist for Christmas this year! Amazon WISHLIST LINK
Shop this Post:
Shop our favorite sugar cookie decorating tools and supplies on Amazon → My Favorite Baking Supplies List
Stand Mixer
Silicone Baking Mats
Cooling Racks
Rolling Pin
Parchment Paper Sheets
Cookie Cutter Set
Piping Bags + Tips
Edible Glitter Decorations
Holiday Sprinkles
Icing Scraper
Food Coloring Gel Pack
Gingerbread House Display Board
LED Fairylights (fun lights outside or inside!)
Gingerbread Sugar Cookie House Recipe
Plan ahead! I did a sketch and made my own template based on other templates I saw. I was worried the sugar cookie would be a little crumbly, so I made a smaller house by taking an inch off of every measurement in this Gingerbread House blueprint template. I followed the recipe from Better Homes & Gardens but tweaked it a little:
Prep Time: 30 minutes
Chill Time: 1 hour
Bake Time: 12–15 minutes
Total Time: ~2 hours
Yield: 1 Valentine’s Day sugar cookie house
Ingredients
2 cups butter, softened
1 1/4 cup sugar
2 tablespoons milk
2 teaspoons vanilla extract (I love Vanillas of the World)
4 ½ cups all-purpose flour
3/4 cup rainbow sprinkles
1 – 2 cup buttercream icing (see recipe in next section below)

Use a pizza cutter for those edges!
Directions - Sugar Cookie Dough That Holds Its Shape
Step 1 - Preheat oven to 325F.
Step 2 - In a large mixing bowl beat butter with an electric mixer on medium to high speed for 30 seconds. Add sugar; beat until combined, scraping sides of bowl occasionally. Beat in 1 tablespoon milk and 1 teaspoon vanilla at a time (2x each total). Beat in as much of the flour as you can with the mixer. With a wooden spoon (or cute spatula), stir in sprinkles and any remaining flour.
Step 3 - Divide dough in half. Cover and chill about 1 hour or until dough is easy to handle. You can refrigerate the cookie dough for up to 2 days. On large sheets of parchment paper or Silpat mats (less slippery) roll out dough portions to 1/8- to 1/4-inch thick. Lightly flour the top of the dough as necessary to keep it from sticking to the rolling pin. Pro Tip: I lined my cookie sheet with parchment paper so I could cut the excess dough and throw them in the oven!
Step 4 - Using my gingerbread house template, set pattern pieces on the dough; use a sharp knife (or roll a pizza slicer) to cut around each pattern piece. Remove excess dough. Remove pattern pieces; set aside.
Step 5 - Transfer dough cutouts on parchment paper to a large cookie sheet. Bake in the preheated oven for 12 to 15 minutes or until edges are lightly browned. Cool 2 minutes on pan. Remove to wire racks and cool completely. Use a knife (or pizza slicer) to cut edges evenly, if necessary. Use excess to make trees, snowmen, or gingerbread men shapes.
NOTE: Some of my pieces were pretty thick, so when I put them in the oven, I baked more on the 15-20 min side. It might have been too long because the edges were dry and would kinda crumble when I went to cut them evenly.
Step 6 - Decorate as desired with buttercream icing (see recipe below), candies, and decorative sprinkles. Refrigerate for 20 mins. Assemble cookie house, using buttercream icing as glue. Let stand until firm.

Cut the pieces to the size of the template.

The Trucks that Saved Christmas written by yours truly! The Trucks that Saved Christmas
I wrote a children’s book! My favorite thing to do is read with my boys. I love watching their faces light up as they laugh at a funny moment or learn a good life lesson along the way.
We read a lot of truck books around here — and my favorites are always the Christmas ones, of course! 🚒🎄
This year, I felt inspired to create one of our own. I’m beyond excited to share that I’ve written and published The Trucks that Saved Christmas, now available on Amazon! Also available on Barnes and Noble, Walmart, IngramSpark, and other retailers!
It’s a rhyming, heartwarming story about teamwork, friendship, and helping Santa when he needs it most — perfect for little readers who love trucks and holiday magic.
If you have a truck-loving kid (or know someone who does), I’d be so grateful if you checked it out, shared it, or added it to your holiday reading list.
🎁✨ Thank you for being so sweet and supporting this little Christmas dream of mine!
See more about The Trucks that Saved Christmas and other books on our Bookshelf page!
Best Frosting or Icing for Gingerbread House Construction
Royal Icing vs Buttercream Icing… I read you have to use Royal Icing to make pieces stick together. I love the taste of buttercream frosting so I thought I’d give it a try and use toothpicks if it didn’t work. Guess what, I didn’t need those toothpicks! After a week… it’s still standing!
Ingredients
1 cup unsalted butter, softened
3 teaspoons vanilla extract
4 cups confectioners' sugar, sifted if possible
1-2 tablespoons milk
Divide and add food coloring
Directions
Cream room temperature butter with a hand mixer, the paddle attachment of a stand mixer, or a wooden spoon until smooth and fluffy. Gradually beat in confectioners' sugar until fully incorporated. Beat in vanilla extract.
Pour in milk and beat for an additional 3-4 minutes. Add food coloring, if using, and beat for thirty seconds until smooth or until desired color is reached.
How to Make a Sugar Cookie Gingerbread House
Here’s my advice:
I used my frosting tip kit to help make it look more professional, but you can also cut a small hole in the corner of a plastic bag.
Here are a few icing tips and tricks I have found over the years:
Make sure frosting is not too soft and not too hard. It should have a little peak at the end if you dip a spoon in.
If you are making colors, make sure you set enough aside to use as glue for your house. You can always make white a different color but you can’t go back to white without making more!
After inserting the tip into your piping bag, place it in a pint glass or similar, then open the top of the bag and fold over the top of the glass to get the icing in.
I have a huge sprinkle collection which came in handy! The ManvsSprinkles shop on Amazon has some great options! I found some good sprinkles (especially holiday themed ones) from stores like Target, Home Goods, Ross, or TJ Maxx.
I refrigerated the decorated pieces for 20 mins after I had my design so they were a little more solid and the frosting would set a bit. This gave me time to clean up some of my mess and switch my frosting to a new bag so I could use a different tip for the icing to use as glue for the house assembly.
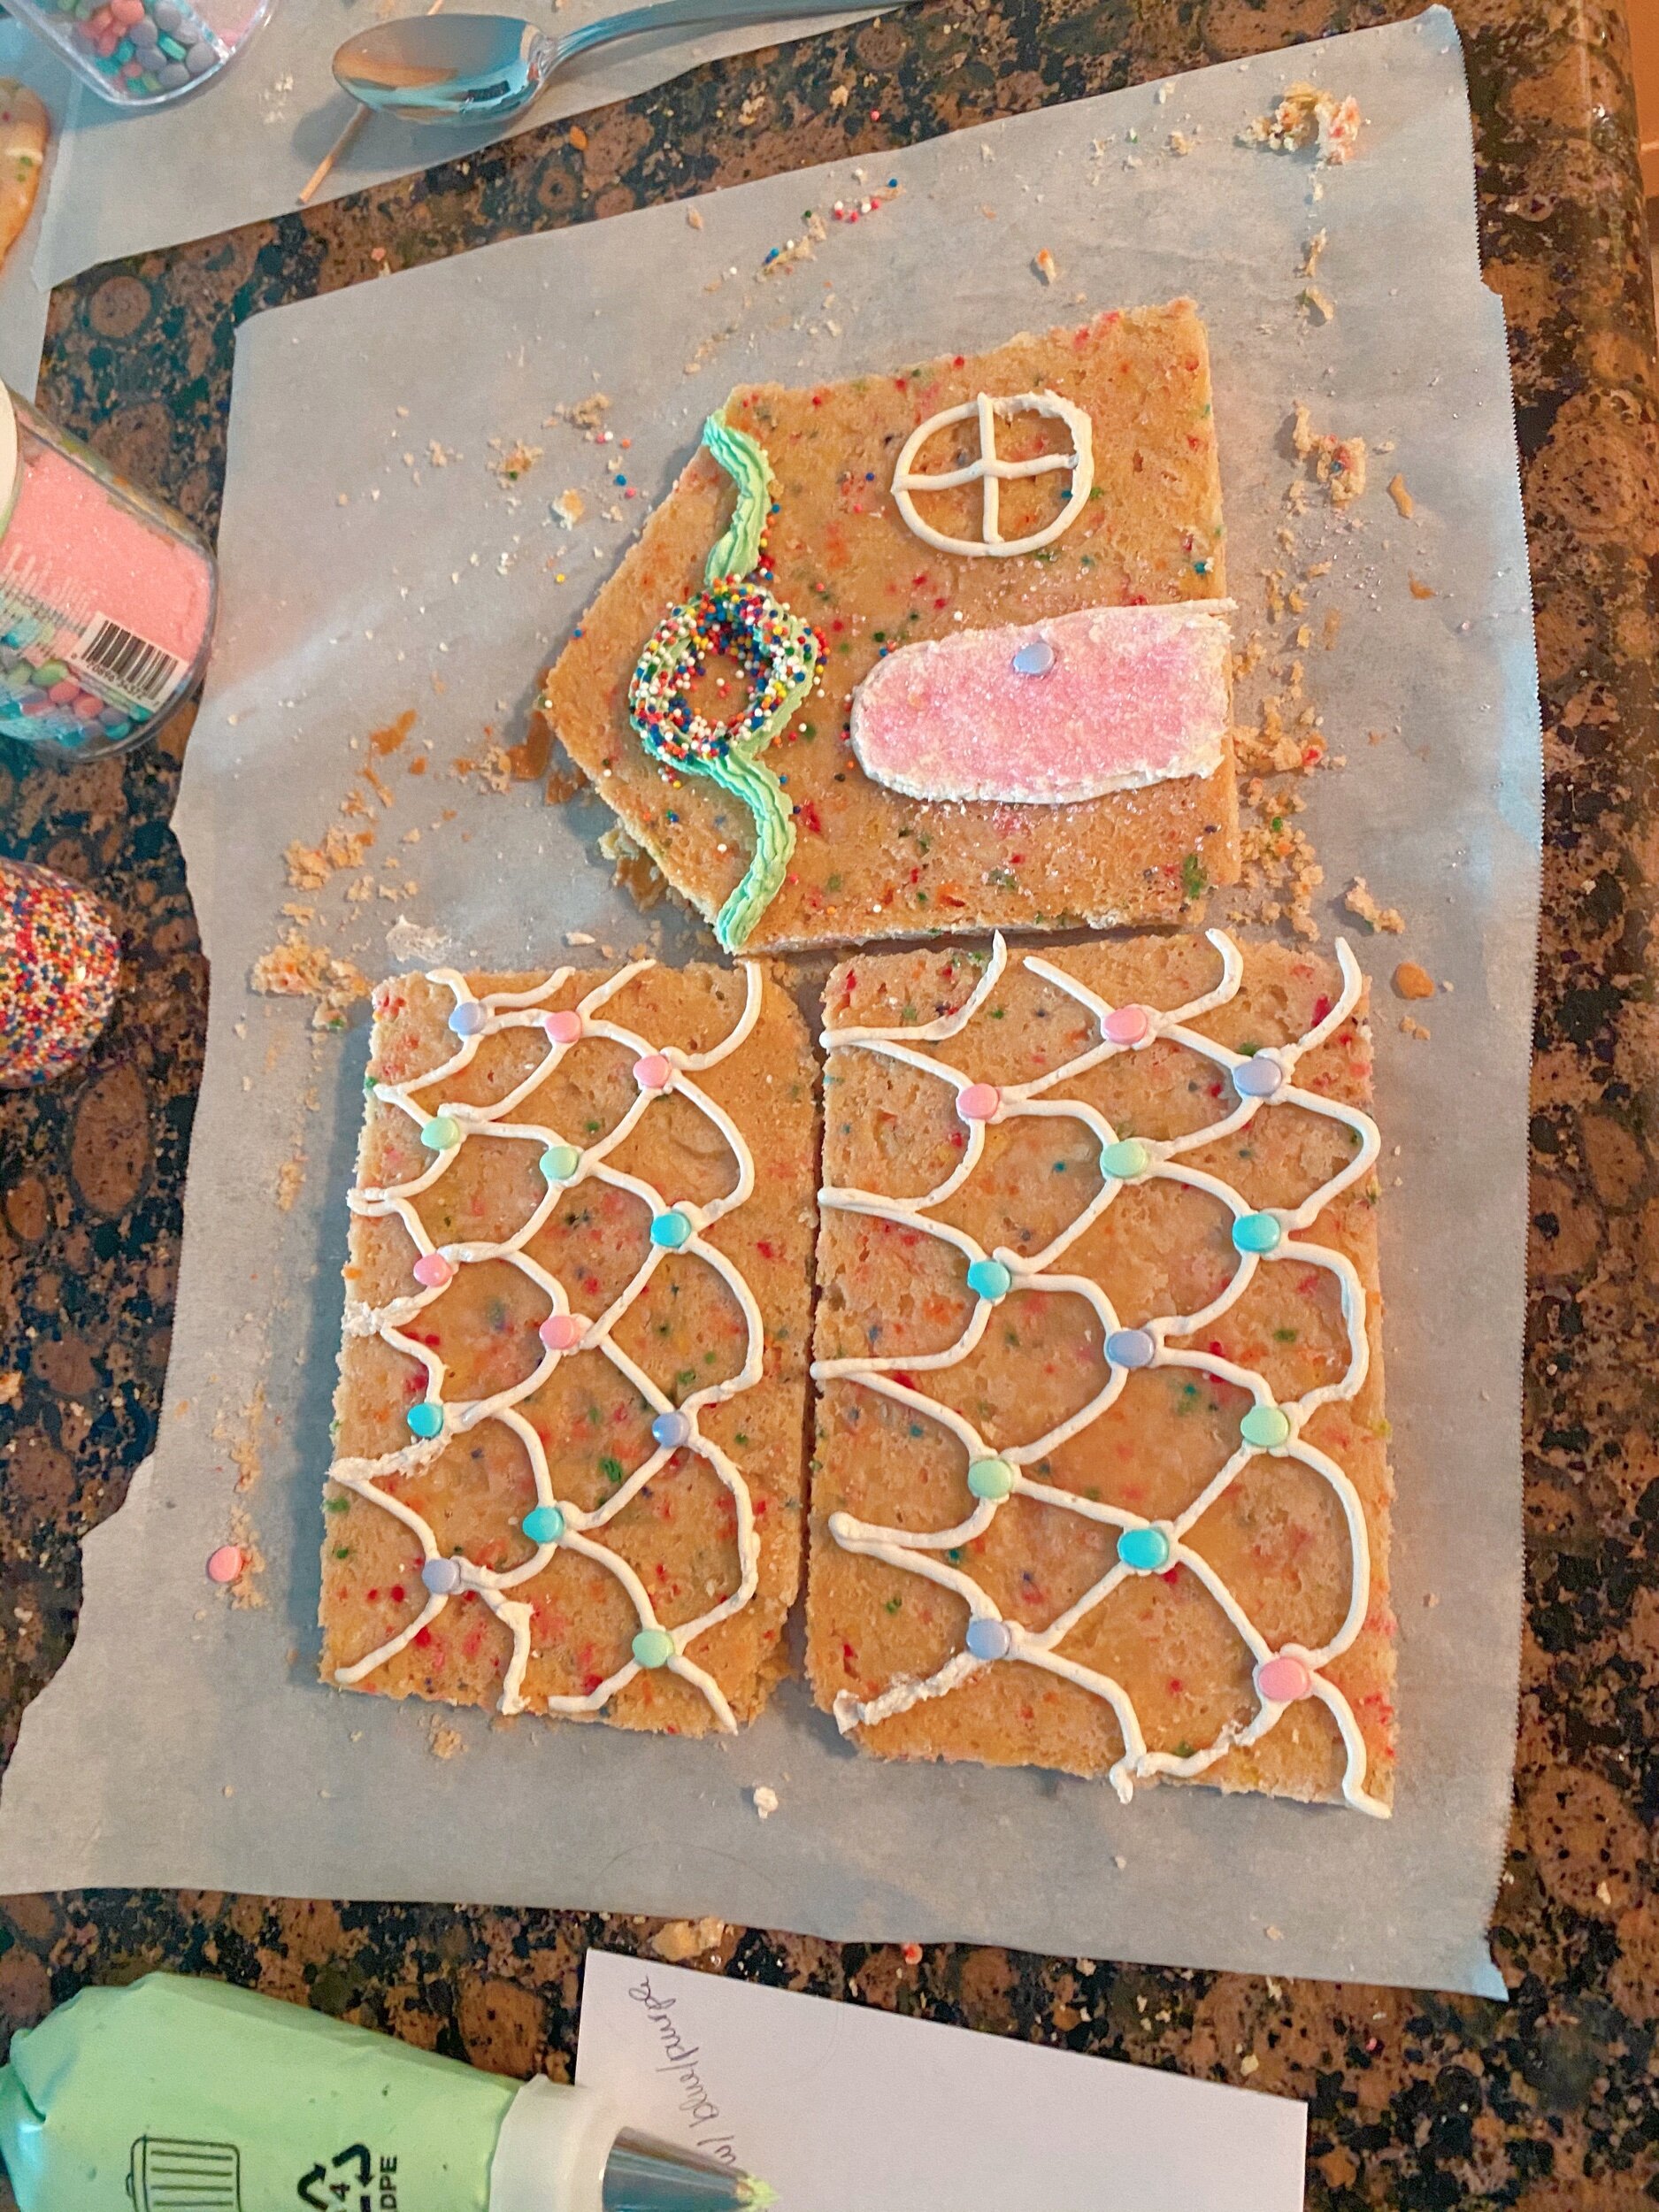
Pro Tip: Put the decorated pieces in the fridge for 20 mins to help the frosting set
Tips for Making a Sturdy Gingerbread House
I used soup cans to lean the pieces against while frosting the edges of my next piece. Once I had two pieces together, it was pretty solid so I was able to put all the pieces together without a side falling over.

Hold the pieces up with soup cans
How to Assemble the House Step by Step
Plan ahead and figure out where your house is going to live (because it is hard to move it)
Put parchment paper down or directly on the plate
Make an Icing base for the front of the house and stick it down. Lean it against the soup can.
Add frosting to the bottom of sides of the house and along the side that will connect to the front.
Carefully and gently push the side into place, do the same with the other side.
Line the bottom and sides of your back with frosting and connect to the house.
Let it set for 10 mins or so before applying the roof.
Smother the top of your house with frosting add one side of the roof and then connect the other. I put frosting in between the peak of the roof too.
I added more frosting to the corners to make it looks more smooth. Pro tip: Don’t use too much frosting on the roof or it will collapse!
And voilà:
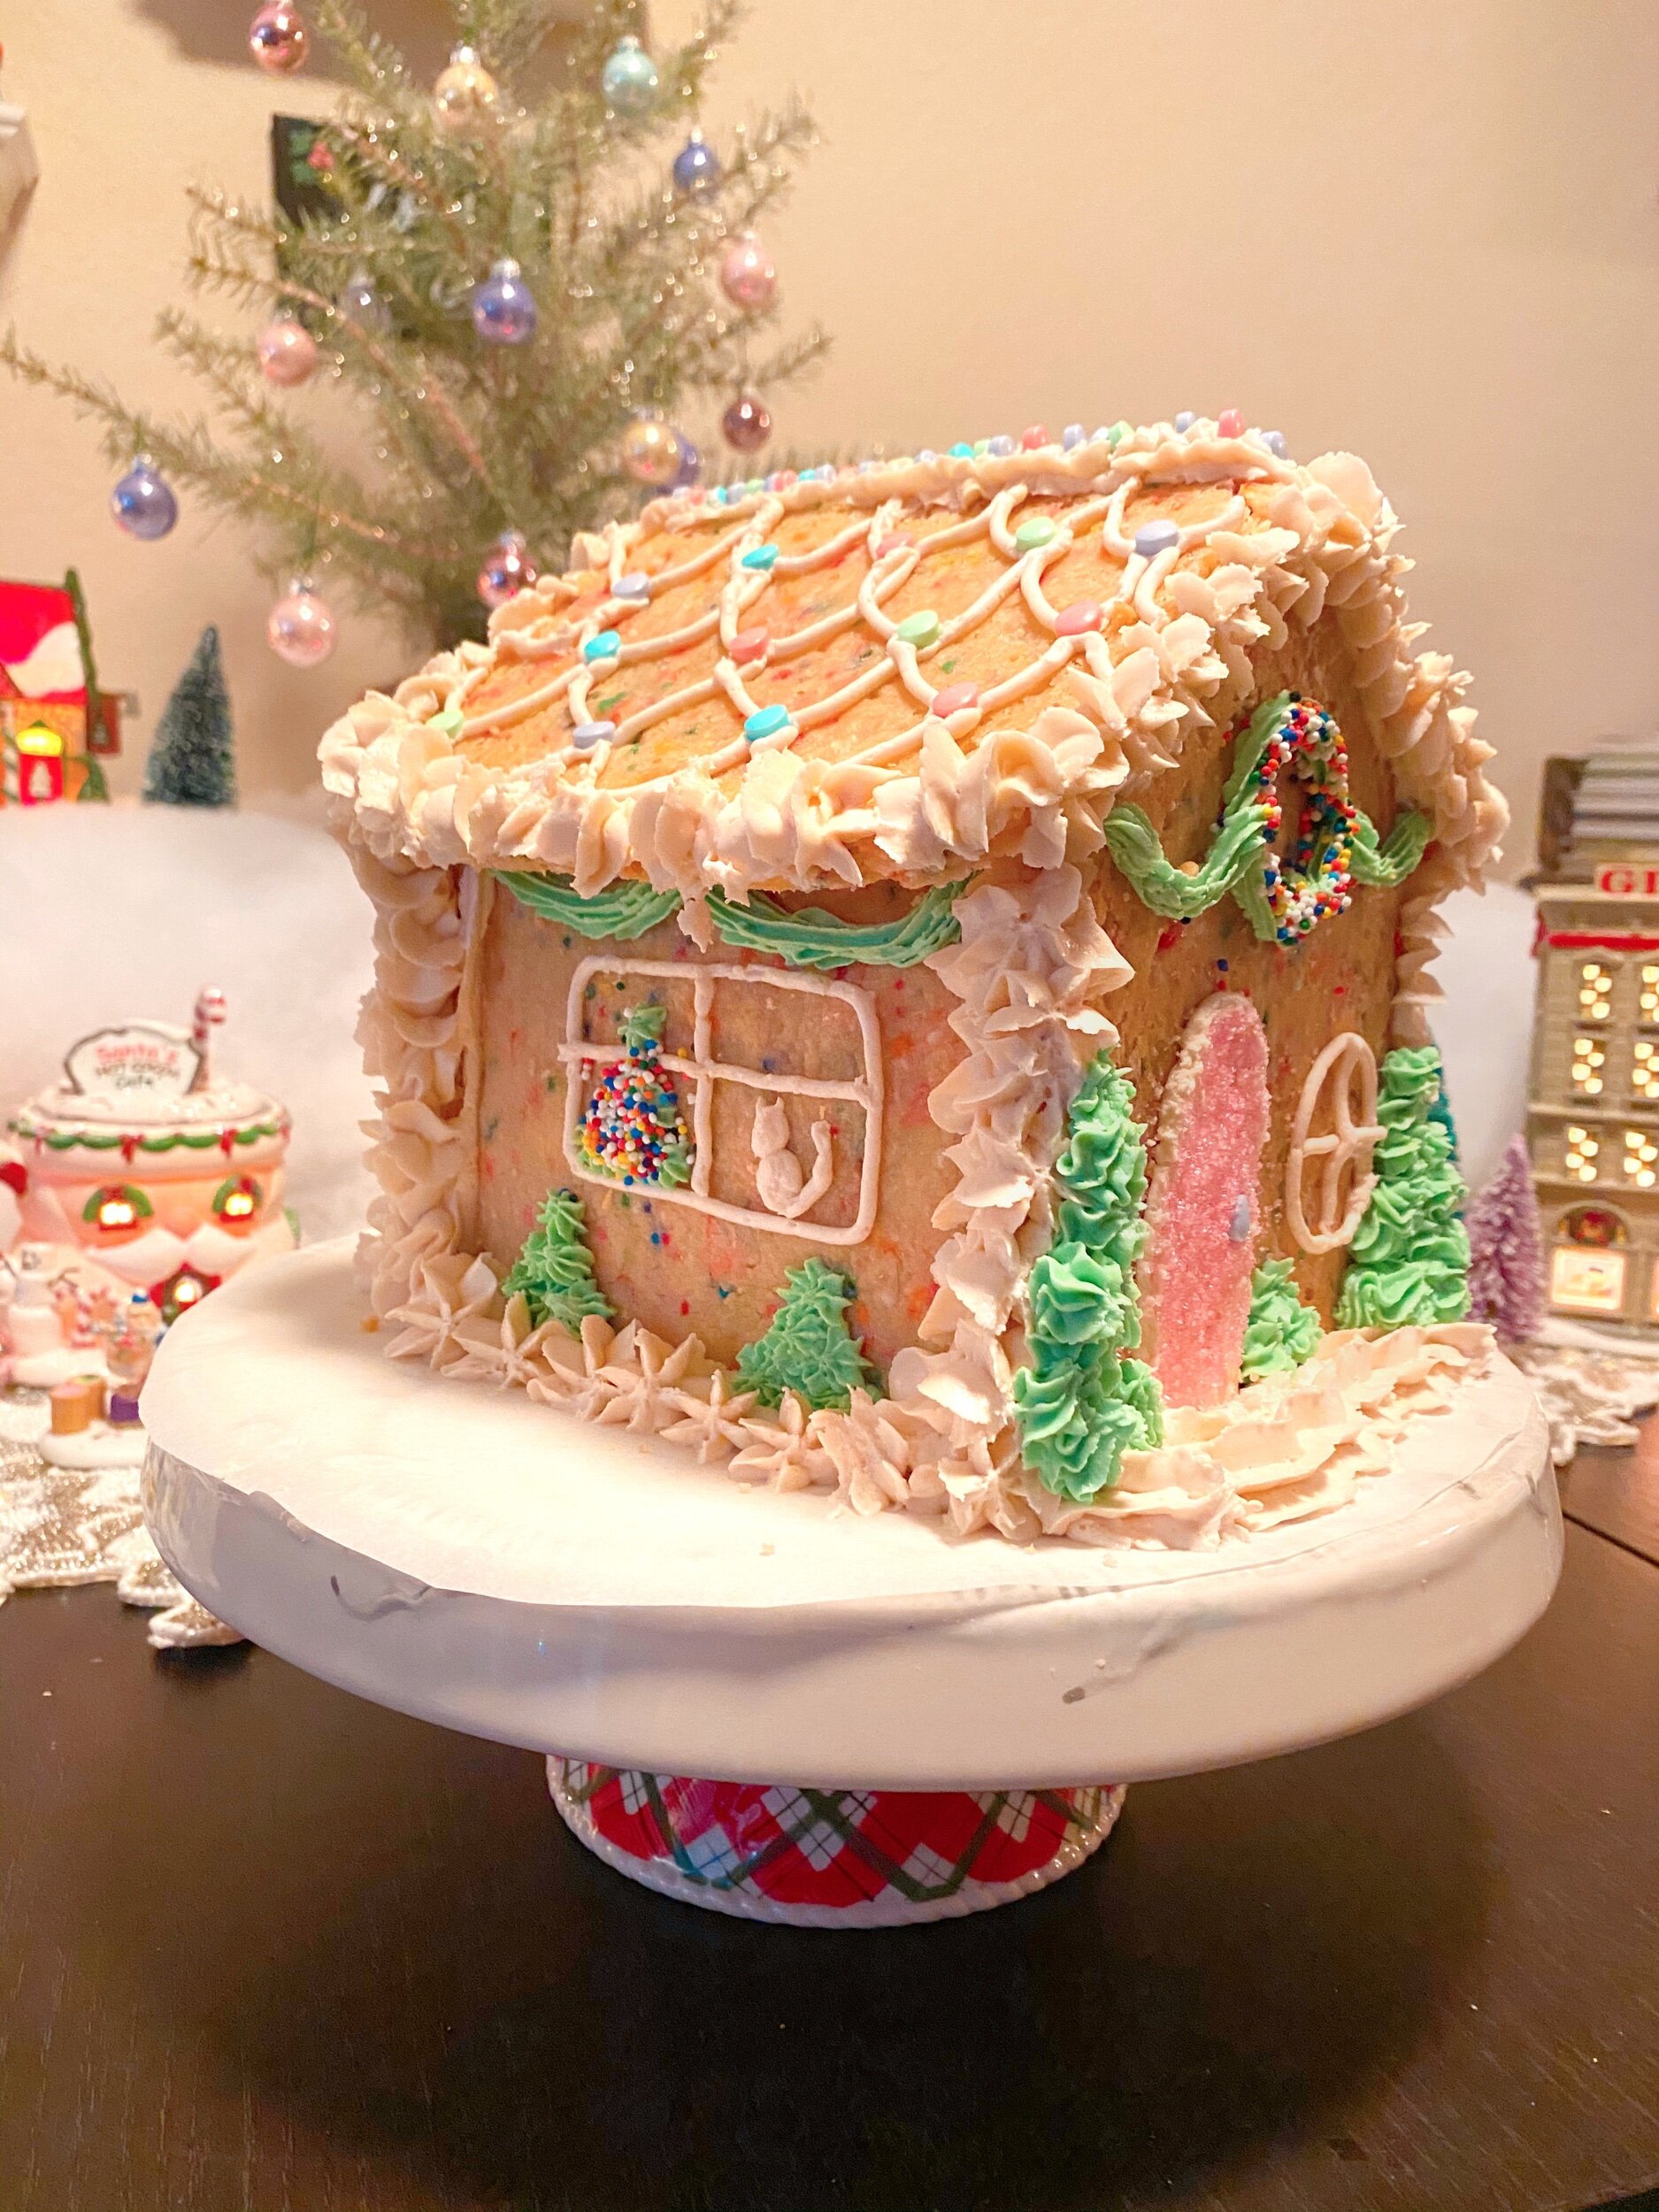
Gingerbread House design idea - cat in the window

Back of Sugar Cookie Gingerbread house
See every angle of the Sugar Cookie Gingerbread house!
FAQ
Why did my gingerbread house collapse?
Usually the icing wasn’t fully dried or the pieces weren’t cut evenly. Make sure edges are straight and let the icing harden for at least 10–15 minutes before adding the roof.
Can I make the dough ahead?
Yes! Refrigerate up to 2 days or freeze up to 1 week.
Does this recipe work with gingerbread instead of sugar cookie dough?
It can, but sugar cookie dough is sturdier and less likely to spread.
How do I make my sugar cookie dough hold its shape?
Chill the dough for 30 minutes before rolling, and freeze the cut pieces for 10 minutes before baking.
What icing works best for building a gingerbread house?
Royal icing or “edible glue” is strongest. Buttercream tends to softens at room temperature but I like it because it tastes better.
How long will a sugar cookie gingerbread house last?
About 5–7 days at room temp, or up to 2 weeks if you’re keeping it for decoration only.
Can I make the pieces ahead?
Yes! Bake the pieces up to 2–3 days in advance and store in an airtight container.
Troubleshooting Your Gingerbread House
My dough cracked while rolling.
It’s too cold—knead slightly until smooth.
The pieces puffed or spread in the oven.
Freeze cut shapes before baking and avoid overmixing.
The roof keeps sliding off.
Add more icing to the top edge and let it dry longer before adding decorations.
My icing is too runny.
Add more powdered sugar 1 tablespoon at a time.
Let me know if you attempt to make this or if you like this post in the comments below!
If you liked this post please share it on your favorite social media site using the Share button below because we’d love to get the word out! Feel free to pin this to your favorite Pinterest board:

More blog posts:





Make a cute, not-too-spooky Halloween cookie house with chocolate cookie walls, colorful buttercream, 3-D frosting pumpkins and a friendly ghost! This kid-friendly haunted cookie house includes the full chocolate cookie recipe, decorating tips and step-by-step assembly instructions.